Safari is a fast, secure, and feature-packed browser that works so well most of the time that many Mac users
never even consider using another web browser. But occasionally, things do go wrong. One of the most common issues with Safari is when it is unable to find the server you are trying to connect to. So, in this article, we’ll show you how to fix a ’Safari can't find the server’ error on Mac.
Why can’t Safari find the server?
There are several possible reasons for this error:
- Your internet connection is unstable or very slow.
- There is an issue with your Wi-Fi network.
- Safari’s DNS cache is corrupt.
- The DNS server your Mac is using has a problem.
- Safari’s security settings are causing a problem.

How to fix it when Safari can’t find the server
The only way to fix the problem is to work your way one step at a time through the possible causes and eliminate them.
1. Try a different website
If the problem is specific to one website, and you can access other sites, the problem could be at that end. Use Down Detector to check if there is a reported problem with the site. If the problem affects all websites, continue to step 2.

2. Check your internet connection
If you have other devices connected to your Wi-Fi network, check that those can get online and that everything works as it should. If not, it indicates an issue with either your Wi-Fi network or broadband connection. Try restarting your router. If that doesn’t work, contact your broadband provider.
3. Try a different browser
If you have verified that your Wi-Fi network and internet connection are working, try Chrome, Firefox, or another web browser.
4. Clear Safari data
If the other browser works, then the problem is specific to Safari. So, the next thing to do is to clear its cache and other data.
- Click the Safari menu and choose Settings.
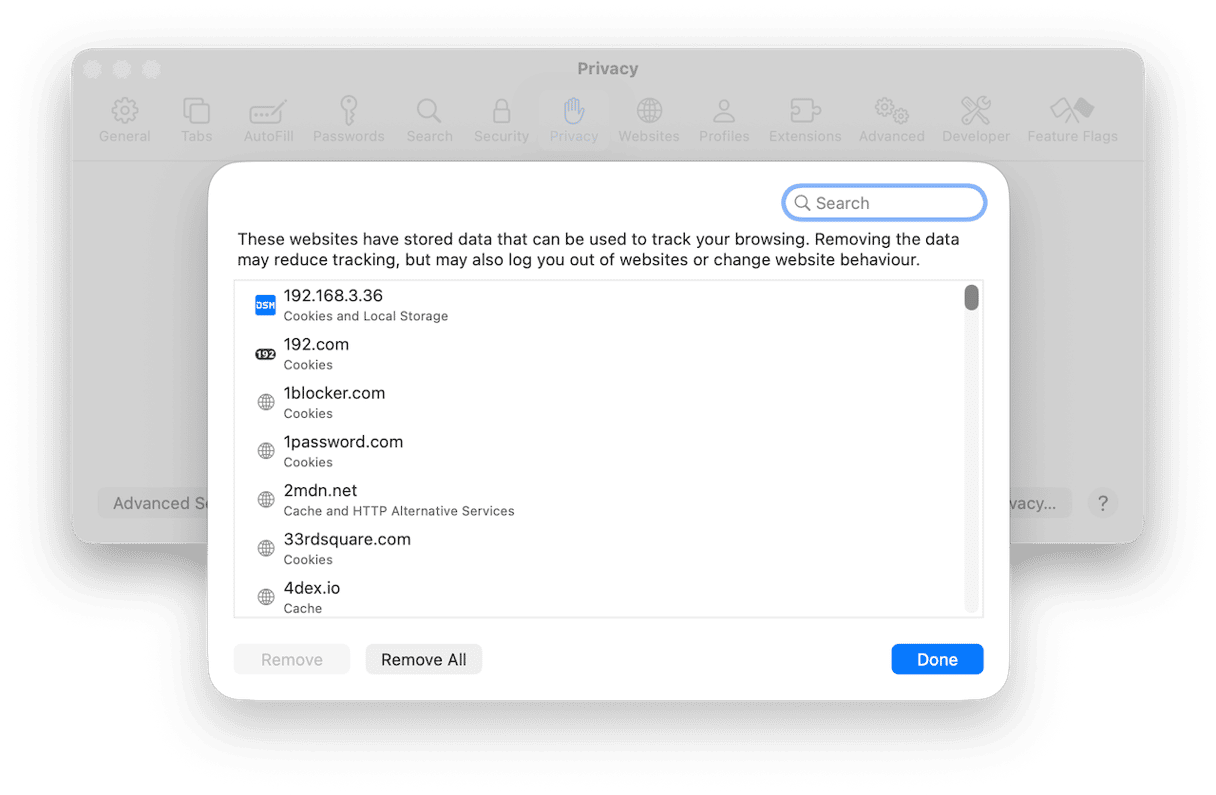
- Select the Privacy tab.
- Click Manage Website Data.
- Wait for the data to load and click Remove All.
- Check whether the error occurs when you try to visit the website.
- If it does, go back to Settings > Privacy and deselect the checkbox next to Prevent cross-site tracking and try again.


5. Update macOS
Normally, when an application misbehaves, the advice is to update it. But you can’t update Safari on its own. Safari is updated when you update macOS, so in this instance, the advice is to update macOS.
- Click the Apple menu and choose Settings.
- Go to General > Software Update.
- Wait for it to check for updates.
- If there is an update available, follow the instructions on screen to install it.

6. Change DNS settings
A domain name server (DNS) is where your Mac goes to look up a URL and find the matching IP address. Most of us use the DNS assigned by our internet service provider. But if that server runs into a problem, for example, it can’t resolve a web address, you can change to a different server. There are several alternative DNS options, including a couple from Google that are free and publicly available. We’ll use one of those in the steps below. Others include OpenDNS, Cloudflare, and Cleanbrowsing.
- Open System Settings and choose Network.
- Select your current connection (e.g., Wi-Fi) and then choose Details.
- Click DNS, then the ‘+’ under DNS Servers. Type in
8.8.8.8and click OK. - Quit System Settings and try the website again.

7. Flush DNS cache
If you still get the error message after changing DNS settings, try flushing the DNS cache. Your Mac caches DNS data to save time looking, and if it is still drawing from the cache instead of the new DNS you pointed it to in step 6, you may keep seeing the error message.
Unfortunately, there is no easy way to flush DNS cache in macOS. You need a specialist tool. We recommend the Performance feature in CleanMyMac. As well as flushing DNS cache, it can run other maintenance tasks like reindexing Spotlight, thinning out Time Machine snapshots, and repairing disk permissions.
- Get your free CleanMyMac trial — you can test it for 7 days for free.
- Open CleanMyMac and choose Performance in the sidebar.
- Click Scan.
- Click Run to run all maintenance tasks, or Review to see the recommended tasks and select Flush DNS cache, then click Run.

8. Reinstall macOS
If nothing else works, the final, and drastic option, is to reinstall macOS from recovery mode. Remember to back up your data first. If your Mac is the only device on your network that gets this error message, it may just work.
The method for booting into recovery mode is different for Apple silicon and Intel-based Macs. You can find the steps for your Mac on Apple’s support pages here. Once you have booted into recovery mode, choose Reinstall macOS from the macOS Utilities screen.

If you get an error message when you try to access a website on your Mac, follow the steps above to fix it. Hopefully, one of them helped. Happy browsing!