It’s easy to panic if your Thunderbolt Display is acting up or simply refuses to turn on, but there are several hacks to try before paying for a repair technician to look it over.
How to fix Apple’s Thunderbolt Display
Here are some fixes to try if your Thunderbolt Display is not working. Follow them one at a time.
1. Turn it off and on again
It’s a tried and tested method for hardware that sometimes needs to reset itself. It’s a simple fix, but sometimes that’s all it needs.
- If your Mac is switched on, shut it down from the main menu.
- Unplug both your Mac and the Thunderbolt Display from the power source.
- Disconnect the MagSafe cable to separate the Mac from the Display.
- Remove any other cables or USB devices that are connected to the Thunderbolt.
- Wait for at least thirty seconds before reconnecting your Mac and Display to a power source and reconnecting the two via the MagSafe cable.
- Power on as usual to check if the Thunderbolt Display comes on.
This is also useful for reconnecting your cables to ensure they are fitted snugly into the ports.
2. Check that the Thunderbolt cable is working
If you can get your hands on another cable, use that to connect your Thunderbolt Display to your Mac. If the Display turns on, it’s likely the original cable will be damaged and needs to be replaced.
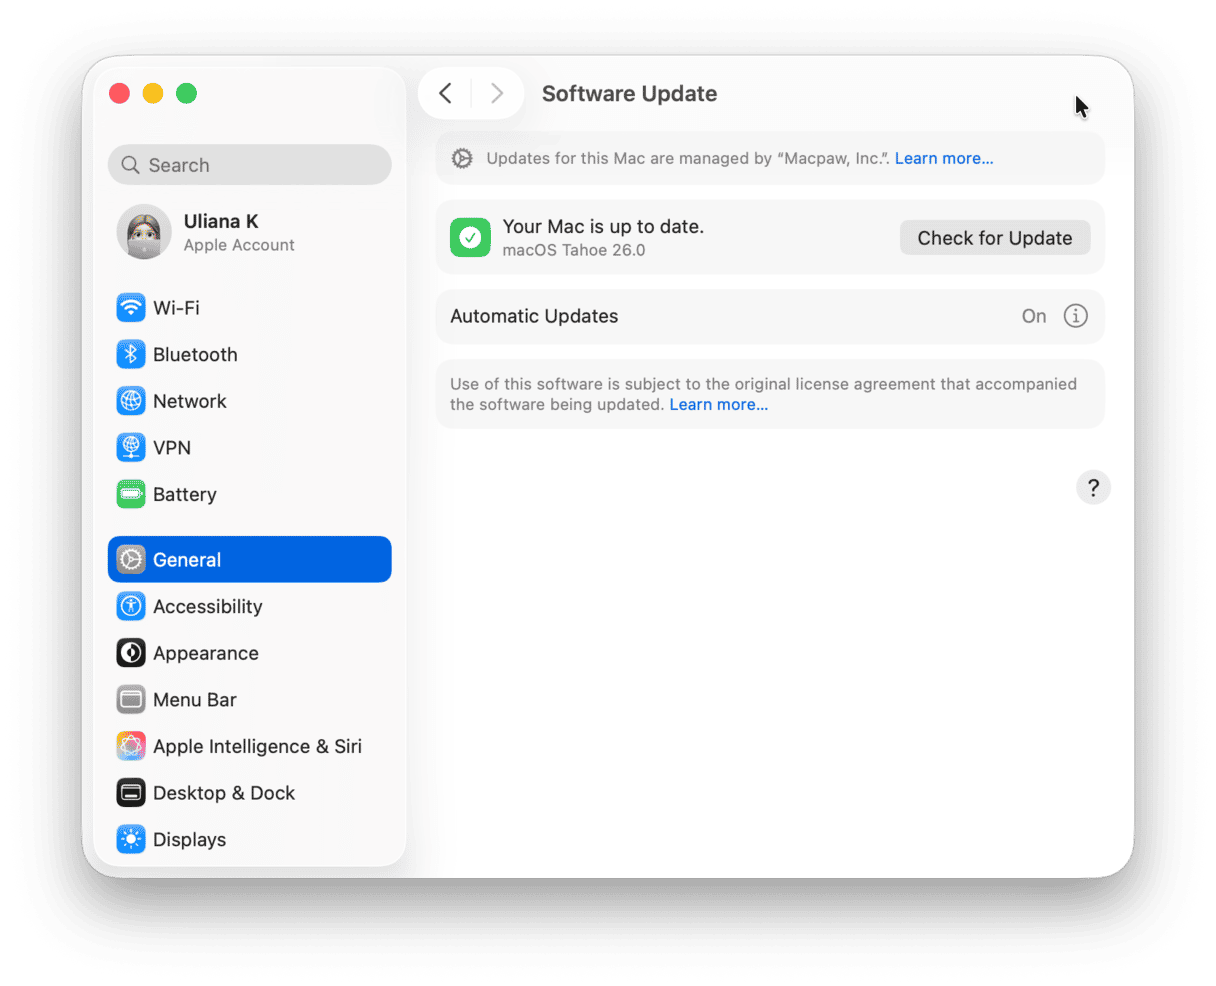
3. Make sure your macOS is updated to the latest version
Occasionally, older macOS versions won’t recognize the hardware, and your system might need an update to sync effectively. To update your Mac:
- Click the Apple logo in the top-left of the menu bar.
- Go to System Settings > General.
- Click Software Update.
- If an update is available, click Update Now.

It is equally important to know that your Mac isn’t cluttered with junk and old files that slow your computer down. Backups, old junk files, malware that may have sneaked onto your Mac, and apps that you don’t need anymore all take up space that could be put to better use.
Use CleanMyMac to create space and improve performance:
- Download it free here.
- Run a Smart Scan.
- Click Run to delete system junk, remove any malware, and speed up your Mac by running maintenance tasks.

Do this every few months, and your Mac will always operate at peak performance.
4. Reset your Mac’s System Management Controller (SMC)
If the connection has been reset and the macOS has been updated, but the Thunderbolt Display won’t turn on, the SMC may need a reset. This is performed differently with different hardware. If you have a Mac with Apple silicon, simply shut down your Mac, wait for 30 seconds, and turn it on again. These steps are not official, but users on forums say that they help reset SMC.
For an Intel-based Mac, follow the steps below.
Resetting a Mac notebook’s SMC with the T2 chip:
- Shut down your Mac.
- Press and hold Control-Option on the left side of the keyboard and Shift on the right side of your keyboard.
- Hold all three keys for 7 seconds, then press and hold the power button as well.
- Hold the four keys for another 7 seconds.
- Release the keys and start up your Mac.
Resetting a Mac notebook’s SMC with a non-removable battery:
- Shut down your Mac.
- Ensure you’re connected to a power source via either a MagSafe or USB-C cable.
- Simultaneously press the left side Shift-Control-Option keys with the power button.
- Release all of the keys and the power button, and then press the power button again to turn on the Mac.
_1718806337.png)
Resetting a Mac notebook’s SMC with a removable battery:
- Shut down your Mac.
- Physically remove the battery from the Mac.
- Press and hold the power button for 5 seconds.
- Replace the battery.
- Press the power button to turn the Mac back on.
_1718806328.png)
Resetting the SMC on a Mac desktop (with and without the T2 chip):
- Shut down the Mac.
- Once it has shut down, remove the power source.
- Wait 15 seconds.
- Replace the power source.
- Wait 5 seconds and then press the power button to turn the Mac on.
5. Try a reset of your NVRAM/PRAM
What if, after all that, your Thunderbolt display still isn’t working? Don’t send it to the technician just yet, try resetting NVRAM. It stands for Non-Volatile Random-Access Memory, known as PRAM on older devices.
Again, if you have a Mac with Apple silicon, restart it.
For an Intel-based Mac, follow these steps:
- Shut down your Mac.
- Turn it back on, then press and hold the Command-Option-P-R keys when you hear the start-up sound.
- Keep all keys depressed until the Mac restarts and you hear the start-up sound again.
- Release the keys and allow your Mac to load up as usual.

Your Mac’s volume, time zones, and screen resolution settings may need reconfiguring after this reset.
If you’ve tried every hack on this list, it might be time to throw in the towel and call Apple Support at (800) MY-APPLE or book a Genius Bar appointment.


