From messaging to taking pictures, you use your iPhone for nearly everything in your daily life. So when you have the misfortune of breaking or losing your phone, it’s not always as easy as getting a new one. The predicament most people find themselves in is they realize they either never backed up their original phone or haven’t done it in an incredibly long time. Keep reading, and we’ll go over everything you need to know about backing up your iPhone to iTunes.
Before you create an iTunes backup
So, before we dive right into backing up to iTunes, it’s important to remember that the more data you have on your phone, the larger your backup file will be and the longer the backup will take.
Your photo gallery could be taking up more space than you think. Consider giving your library a thorough cleanup before backing up all those pictures you no longer need. An easy step is to declutter your photos with an app like CleanMy®Phone. It helps remove similar images, duplicates, blurred shots, and other photo clutter, allowing you to free up much-needed storage.

Understanding iTunes backup
A common misconception about iTunes backup is that it’s the same thing as syncing your iPhone via iTunes. It’s not. The backup file is a snapshot of your iPhone saving your data and settings, but it’s not transferring any useable data to your computer. An iTunes backup saves everything in a self-contained file that you’re not able to do much with, if anything at all.
Does iTunes backup include photos?
The simple answer is some of them.
The iTunes backup is a complete snapshot of your iPhone, or, as Apple says, it captures nearly all of your device’s data and settings. That includes things like:
- Settings
- Photos from your Camera Roll
- App data
- Notes
But there are a handful of things that don’t get backed up:
- Anything that can be re-downloaded from the iTunes or App Store
- Anything already stored in iCloud, i.e. Photos and Messages
- Face ID and Touch ID settings
- Apple Pay information and settings
- Apple Mail data
Where does iTunes store backups?
Where iTunes stores your backup is different depending on which operating system you’re running on your computer.
On macOS: ~/Library/Application Support/MobileSync/Backup/
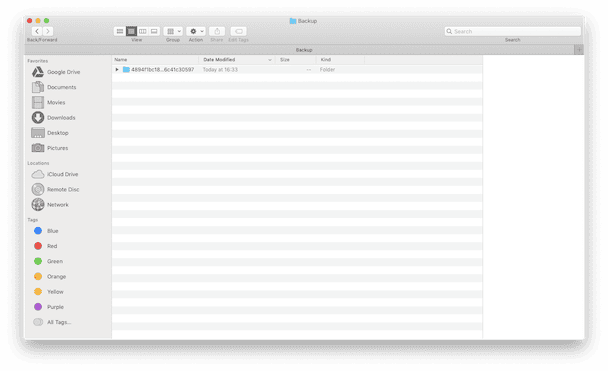
On Windows: \Users\(username)\AppData\Roaming\Apple Computer\MobileSync\Backup\
But once you find the backup files, you’ll see they’re all self-contained and there’s not much you can do with them aside from restoring your iPhone.
How is an iTunes backup different from an iCloud backup?
An iTunes backup is relatively similar to an iCloud backup. The significant difference between the two services is the physical difference, wherein iTunes backups require you to plug your phone into your computer. iCloud, on the other hand, backs up data using wireless connection.
Another difference is where the backups are stored. If you plan on using a free iCloud account, you'll only have 5GB of storage to back up your iPhone. Of course, you can pay to remove that storage limitation, but with iTunes backups, you’re only limited by how much free space you have on your computer.
How to back up your iPhone using iTunes
Now for the fun part, actually backing your iPhone up to iTunes. The first thing you should do, regardless of whether you’re on a Mac or a Windows-based computer, is update your iTunes. Once it’s updated, follow the steps below, depending on your OS.
Back up iPhone to iTunes on Mac
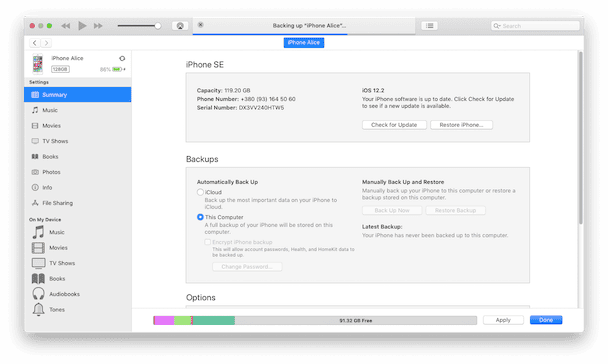
- Plug in your iPhone using the USB cable.
- If a pop-up message asks for your device passcode or whether you Trust This Computer, follow the directions to grant your Mac access to your iPhone.
- Select your iPhone when it appears in iTunes.
- Click Summary in the left sidebar.
- In the Backups section, check mark This Computer.
- Then, click Back Up Now.
Back up iPhone to iTunes on Windows
- Connect your iPhone to your computer.
- If a pop-up message asks for your device passcode or whether you Trust This Computer, follow the directions to grant your computer access to your iPhone.
- Select your iPhone when it appears in iTunes.
- Select Summary in the sidebar.
- In the Backups section, choose This Computer.
- Then, click Back Up Now.
If all you want to back up is your photo library, there are more ways to do that than iTunes. We've covered those in our guide to moving photos from an iPhone to a Windows PC.
Why can’t I back up my iPhone to iTunes?
If you’ve tried the steps mentioned above, but are having trouble backing up, here are a few possible reasons why your iPhone is not backing up to iTunes:
- iTunes is not up to date
- There’s not enough free space on your computer
- The USB cable and/or port on your computer is not working
And of course, no troubleshooting list is complete without suggesting restarting your computer.
Now that you’re comfortable backing up your iPhone to iTunes, I’ll leave you with one more final piece of advice: backup early and backup often! You can never have a backup that’s too recent, so just get in the habit of backing up your iPhone every chance you get. If you do ever find yourself in a position where you need to restore your data, you’ll be glad you did it.


