Just because you have an iPhone doesn’t necessarily mean you must use the entire Apple ecosystem to sync your photos to a computer. In fact, you don't need any special software or tech knowledge to transfer photos from iPhone to a PC or vice versa. All you need is either the same Lightning-to-USB cable you use for charging your iOS device or your iCloud account enabled on both devices. In this article, we will cover 4 easiest and quickest ways how to transfer photos from an iPhone to a PC and from a computer to an iPhone.
How to transfer photos from an iPhone to a PC
Transferring photos from your iPhone to a PC is a simple process that can be done in several ways. This guide will walk you through four effective methods to safely move your photos to your computer.
- Upload via a Lightning-to-USB cable
- Import using Windows Photos
- Sync using iCloud Photos
- Transfer with Google Drive
Before you import photos from an iPhone to a PC
To make the transfer faster and avoid cluttering up your computer, it’s worth taking a closer look at your Camera Roll. Are you sure all of these 15 selfies from slightly different angles should go to your PC? Or these year-old screenshots you forgot to delete and these photos of whiteboards from a meeting three months ago? If you unclutter your photo library before transferring it to your computer, it will reduce the time it takes to complete the transfer.
Of course, a major cleanup like that could take you hours, especially if your iPhone contains all your photos since 2014. But as with anything, there’s an app for it. Download CleanMy®Phone for iPhone and run a scan. The app will find all the similar shots, unneeded screenshots, and blurred photos, so you can delete them in a few taps.

4 ways to transfer photos from an iPhone to a PC
Transferring photos from your iPhone to your computer can be done in various ways. It all depends on your preferences and the tools available. Here, we outline several methods to help you move your photos where you need them.
Method 1. How to transfer photos from iPhone to computer with USB
Before connecting your iPhone or iPad to a PC, make sure you've downloaded iTunes to the computer. Importing photos this way requires iTunes 12.5.1 or later, which you can download from the Apple website.
Once that is ready, connect your Lightning-to-USB cable to the PC. You may need to unlock the phone and verify you Trust This Computer when prompted. Next, follow these steps:
- Now, your iPhone will appear as a new device, either in File Explorer, under This PC (in Windows 10), or under Computer in Windows Explorer ( Windows 7). If it doesn't show up straight away, unplug it and plug it back in.
- Right-click on the iPhone and select Import pictures and videos.
- Follow the instructions in the Import wizard.
If you see photos with the .HIEC file extension means your iPhone running iOS 11 or later stores images using the new HEIF format. Unfortunately, these aren't compatible with Windows devices, so to make them easy to transfer:
- Go to Settings on your iPhone.
- Scroll to Photos > Transfer to Mac or PC.
- Tap the option: “Automatic” — this will turn them into JPEGs.

And there we go. That is one way to transfer images and videos from an iPhone over to a PC.
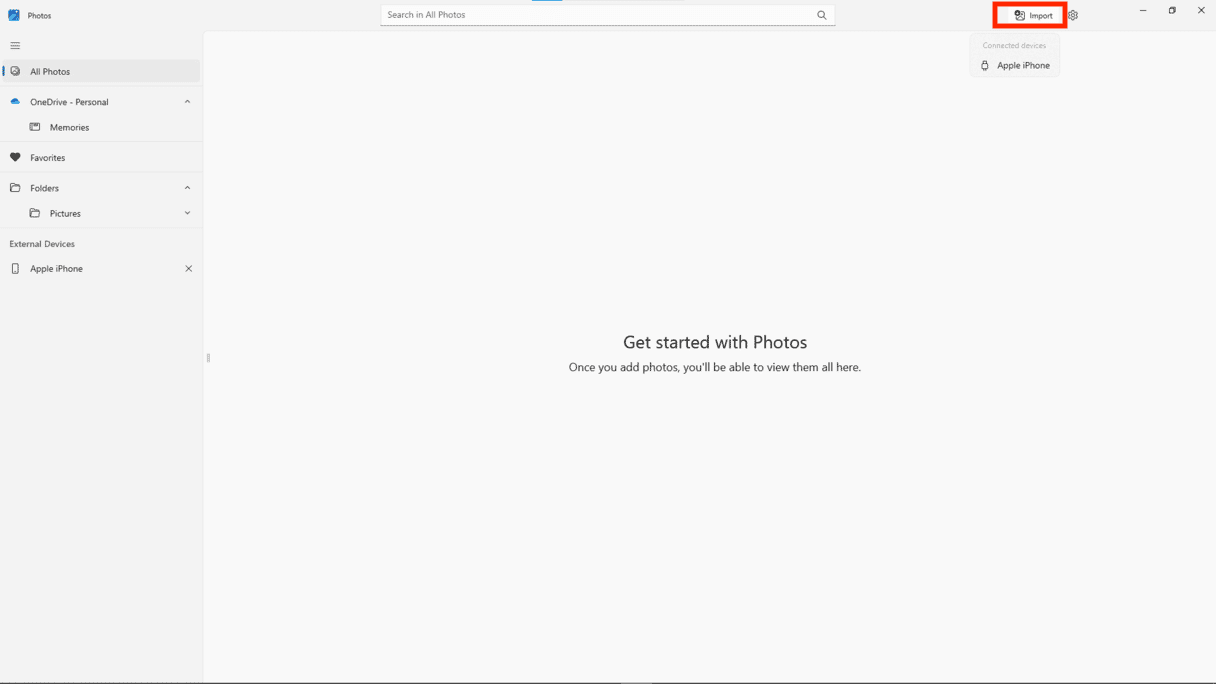
Method 2. Transfer photos from an iPhone to a PC with Windows Photos
Connect your iPhone to the computer, just like described above. Once you’ve unlocked your phone and confirmed you trust the PC device, follow these steps:
- Go to the Windows Photos app that comes with Windows 10.
- Click Import in the top right-hand corner. Your photos should be ready for import.
- Select or deselect pics, depending on what you want to import.
- Click Add items and follow the instructions.


Everything you import should now be saved in the Windows Pictures folder.
Method 3. Import photos from an iPhone to a PC with iCloud for Windows
Another way to sync iPhone photos with a Windows device is using iCloud. Let’s make sure it’s switched on and ready to go. On your iPhone, follow these steps:
- Go to Settings and tap your name at the top.
- Go to iCloud.
- Underneath the iCloud storage indicator, you’ll see a list of Apps Using iCloud.
- Click Photos (it should be the top option).
- Switch on iCloud Photos.

Now, make sure the iCloud is enabled on your PC:
- Download iCloud for Windows and install it.
- Restart your PC.
- Open iCloud for Windows and sign in to iCloud with your Apple Account.
- Check the box next to Photos and any other types of content you want synced.
- Click Done.

From now on, your photos should sync with your iPhone to your computer automatically. iCloud is also an obvious way to sync photos between an iPhone and a Mac, so if you also own a Mac computer, check out our guide to moving photos from iPhone to Mac.
Method 4. Transfer photos from an iPhone to a PC using Google Drive
Using Google Drive is another convenient method to transfer photos from your iPhone to your computer.
First, you need to upload photos from your iPhone to Google Drive. To do that, follow these steps:
- Open the Google Drive app on your iPhone. If you don’t have it, download it from the App Store and sign in with your Google account.
- Tap the "+" button at the bottom right corner of the screen and select "Upload file." Choose "Photos and Videos."
- Select the photos you want to upload and tap "Upload" to start the process.

Next, you need to access Google Drive in the app or browser and download the photos.
Here’s how to do that:
- On your computer, open the Google Drive app or go to the Google Drive website and sign in with the same Google account.
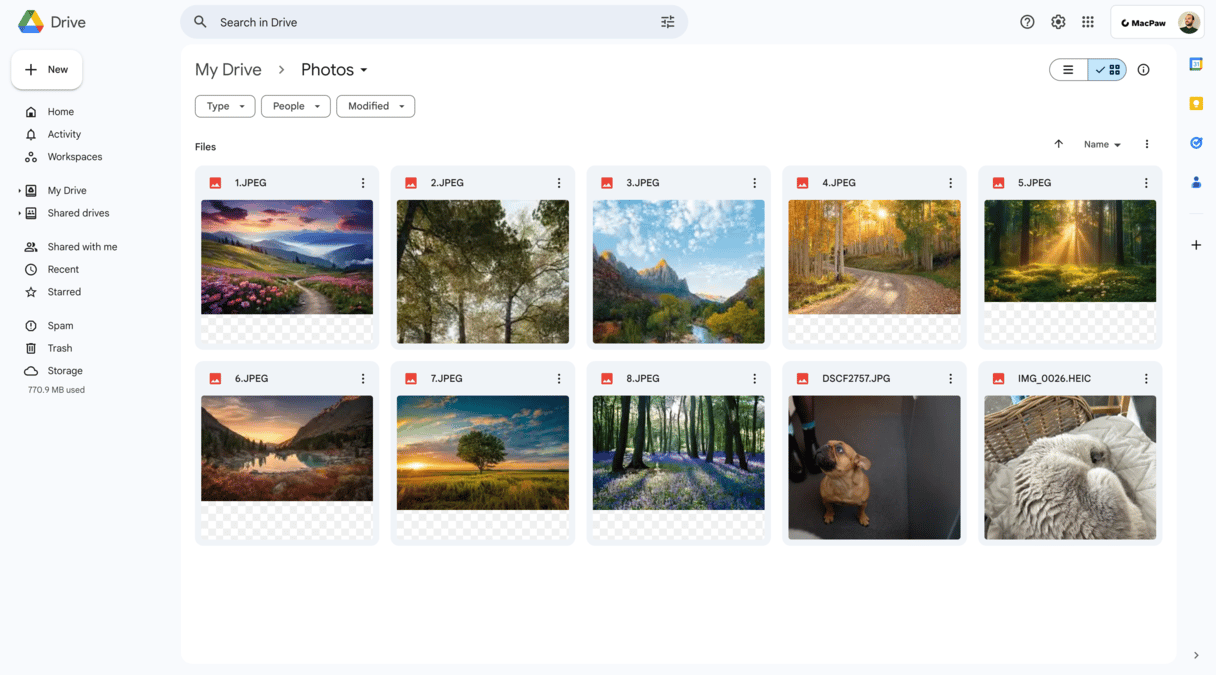
- Go to the folder where you uploaded the photos.
- Select the photos you want to download.
- Click the three-dot menu icon or right-click and select "Download" to save the photos to your computer.

Why can’t I copy photos from my iPhone to a PC?
If you have encountered any difficulties, it is worth looking into the following:
- Does your Windows device have sufficient memory?
- Are the photos in a compatible format?
- Does your iPhone sync images with other devices without any problems? If yes, it could be the cable or the computer.
- Is Wi-Fi enabled for transferring images via iCloud?
- Are you sure your antivirus, security settings, or firewall software aren’t preventing the transfer?
- Have you confirmed you trust the PC before initiating the transfer?
Once you’ve checked everything, further troubleshooting might be necessary if the transfer is still impossible. However, in most cases, transferring pictures from an iPhone to a PC is simple and straightforward.
How to transfer photos from PC to iPhone
There are a couple of different ways you can go about transferring photos from your PC to your iPhone. It just depends on which of the ways you prefer. We’ll go over how to move photos using iTunes, as well as talk about a way that doesn’t require it.
How to transfer photos from computer to iPhone via USB
Setting up your iPhone to transfer photos using iTunes is a great way to keep your pictures in sync on both devices. Once you set it up using the steps below, you can update the photos on either your PC or your iPhone just by plugging in your iPhone.
So here’s how you can transfer pictures from your computer to your iPhone:
- Plug your iPhone into your PC.
- Open iTunes if it doesn’t automatically.
- Click on the iPhone icon in your upper left.

- Click on Photos in the sidebar.
- Check Sync Photos.
- Click Done in the bottom right corner.


There is one drawback to transferring your photos this way. When you sync your pictures, it overwrites your saved photo library on your iPhone. If you plan on syncing all your photos between your computer and phone, this won’t be as big of an issue. However, if you’re only trying to transfer a handful of images, then this is something you should be aware of before you start.
How to transfer photos from PC to iPhone without iTunes
One of the easiest ways to move your photos without iTunes is by using iCloud. Here’s how to do that with iCloud:
- On your PC, download iCloud for Windows.
- Open iCloud for Windows and log in using your Apple Account.
- Select the checkbox next to Photos and click Apply.
- Open a File Explorer window. Under Favorites in the left sidebar, click iCloud Photos.

- Copy the photos you want to transfer to the Uploads folder.


After the photos are uploaded, you can open the Photos app on your iPhone and see your pictures. If you don’t see them at least start to download, you might want to verify your phone has iCloud Photo syncing turned on, by going to Settings > [your name] > iCloud > Photos.
How to transfer files from PC to iPhone without iTunes
Transferring files from your PC to your iPhone without using iTunes can be easily achieved through various methods. While iCloud and third-party apps provide excellent alternatives, using a USB cable remains one of the most convenient and straightforward approaches.
Here’s a step-by-step guide to help you transfer files effortlessly:
- Plug your iPhone into your PC using a USB cable.
- Once connected, set up your iPhone to view the files and folders. This will open a new window displaying the available folders on your iPhone.
- Choose the files or folders from your desired folder on your PC.
- Copy the selected files or folders and paste them into the destined folder on your iPhone's internal storage using the file explorer.

You might also like: How to sync your iPhone and your iPad
So these are the 4 ways to move iPhone photos to your computer. Whether you're transferring photos to edit them on a bigger screen or trying to back up your iPhone to a PC, it's fairly easy to do with the tools above.