When a new macOS comes out, it always comes with a handful of bugs. Sometimes those issues are more extensive, like entire apps not working. And other times, they’re as simple as your computer is running slower. The good news is that these problems typically get worked out in time.
But, if you’ve just installed macOS Monterey and you’re noticing your battery drain faster than usual, then you found the right article. Keep reading! This article will show you how to fix the Monterey update battery drain by doing the following:
- Restart your Mac
- Free up RAM
- Check if Spotlight is indexing
- Reset PRAM and NVRAM
- Check for background apps
- Install the latest Monterey update
- Reduce the CPU load
- Downgrade to Big Sur
Apps that consume a lot of resources can also drain the battery. So, when your battery is draining, it’s because too many apps are competing for memory (see tip #2).
Fixes for Monterey draining battery
After you do a macOS update, there’s not always one specific reason that could be causing your battery to drain faster now. So, you might need to try multiple things on this list. The silver lining is that most of these things only take a few seconds to do. Hopefully, you shouldn’t be spending days and days trying to get your battery performance back up.
1. Restart your Mac
This might seem like a no-brainer, but it’s definitely one of those things that’s so easy, you forget to do it. One of your apps or plugins might not be running the way it should be after installing Monterey. Simply rebooting your Mac gives all of your software another chance to start up fresh and, hopefully, the right way. Ultimately reducing strain on your processor or battery.
2. Free up RAM
If you have an app or multiple apps using up your RAM, it can use more power and drain your battery. You can use Activity Monitor on your Mac to identify apps and processes using the most RAM and force quit them. Although, perhaps an easier method is using the app CleanMyMac.
After you get a free trial of CleanMyMac, all you need to do is:
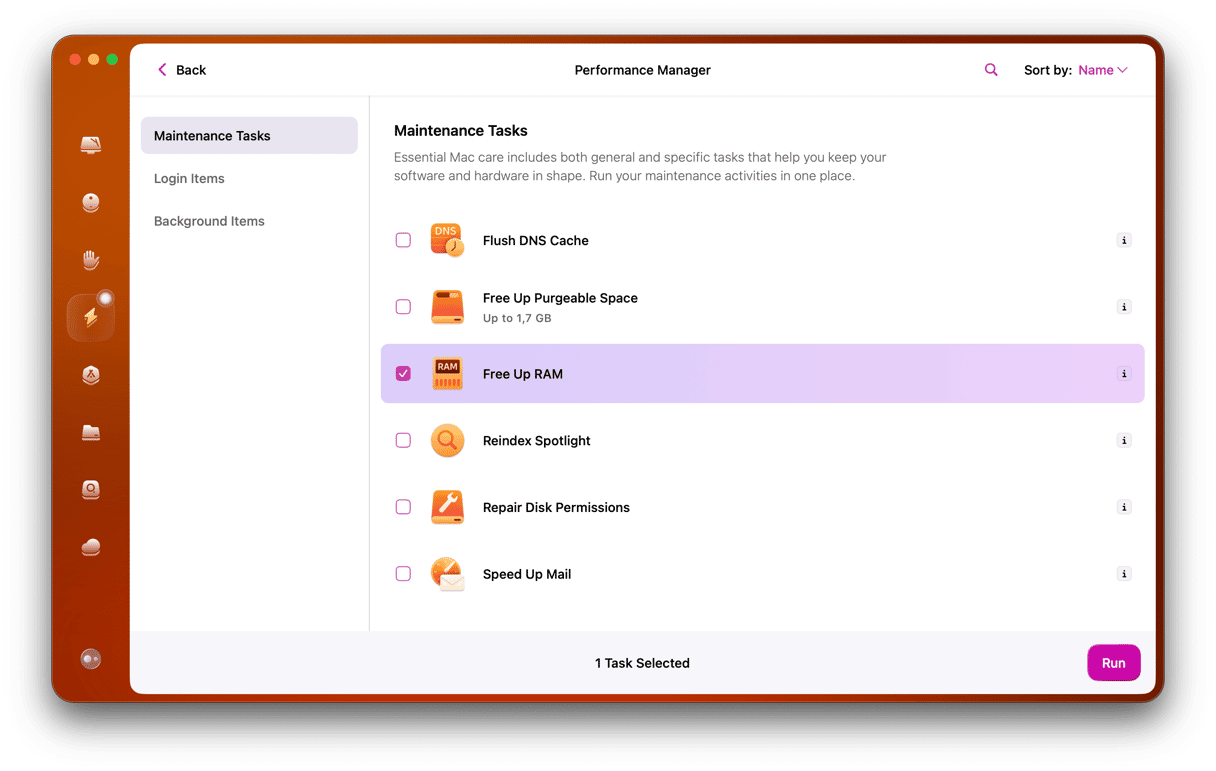
- Open the app and click Maintenance in the sidebar.
- Select Free Up RAM.
- Click Run.
3. Stop Spotlight from indexing
Another common culprit for battery drain is Spotlight continuously indexing. This is more likely to happen after a software update because you’re installing new files and moving others around. But, if Spotlight gets stuck on something, it will keep running and, in turn, drain your battery.
You can tell Spotlight is still running by clicking on the magnifying glass in your toolbar and trying to search for something. It will then show you a progress bar for indexing.
If Spotlight is still running, you can stop it by following these steps:
- Open System Preferences.
- Click Spotlight > Privacy > +.
- Then, select your entire hard drive and click Choose.
- Finally, restart your computer.
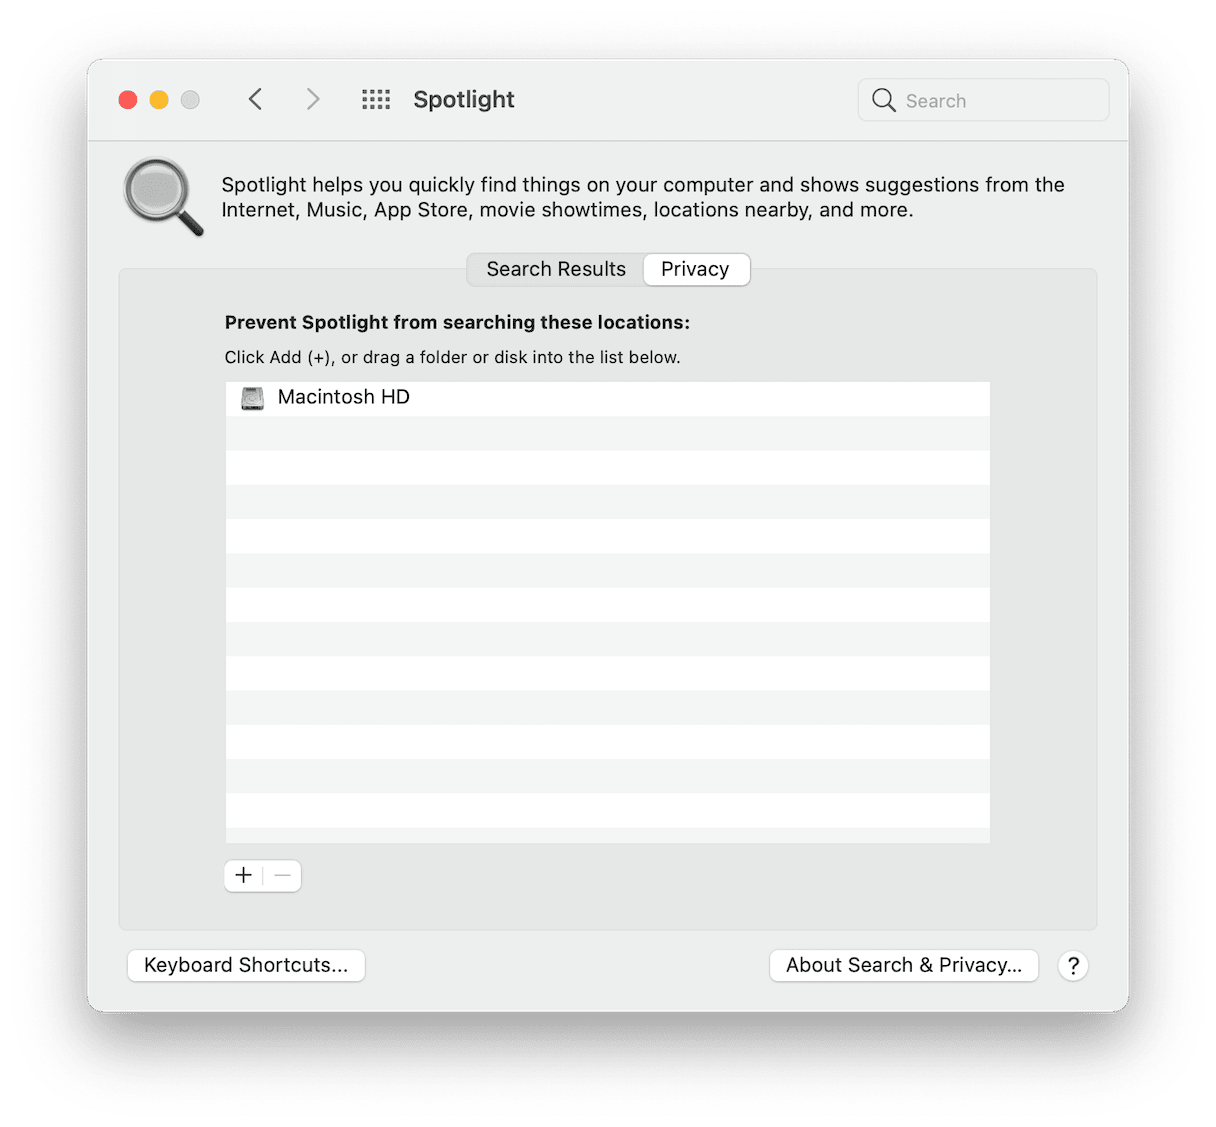
This will exclude your entire hard drive from being indexed by Spotlight, but it will also make searching your Mac pretty much impossible. So, if you don’t find yourself searching for things often, then no problem. But, if you do, then you’ll want to remove your hard drive from the Spotlight exclusion list by:
- Opening System Preferences back up.
- Clicking Spotlight > Privacy.
- Selecting your hard drive and clicking “—.”
Now, the next time you restart your Mac, Spotlight will start indexing again. It might take a while to complete. But it shouldn’t take more than an hour or two, depending on how many files you have.
4. Reset PRAM or NVRAM
PRAM and NRAM mean Parametric Random Access Memory and Non-volatile Random Access Memory. These settings control startup disk selection, screen resolution, and other hardware-related parameters.
And redundant cached files that are in your PRAM or NVRAM could also be causing your battery to drain. Thankfully, it is relatively easy to reset both of them by using these steps:
- Turn your Mac off.
- Hold down the command + option + P + R keys, then power your Mac on.
- Keep holding those keys until your computer restarts twice.
- After you hear your Mac turn off for the second time, let go of the keys.
5. Close or uninstall background apps
Not every app is ready for every macOS update. So, anytime you update, there’s a small risk it might cause an issue for the apps you already have installed. The same is true for apps that run in the background. You can use CleanMyMac to check for Login Items or Launch Agents that aren’t functioning properly and remove them so they don’t drain your battery. Just follow these instructions:
- Open CleanMyMac.
- Click Optimization > View All [x] Items.
- Then, select Login Items and Launch Agents.
- Finally, click Remove.
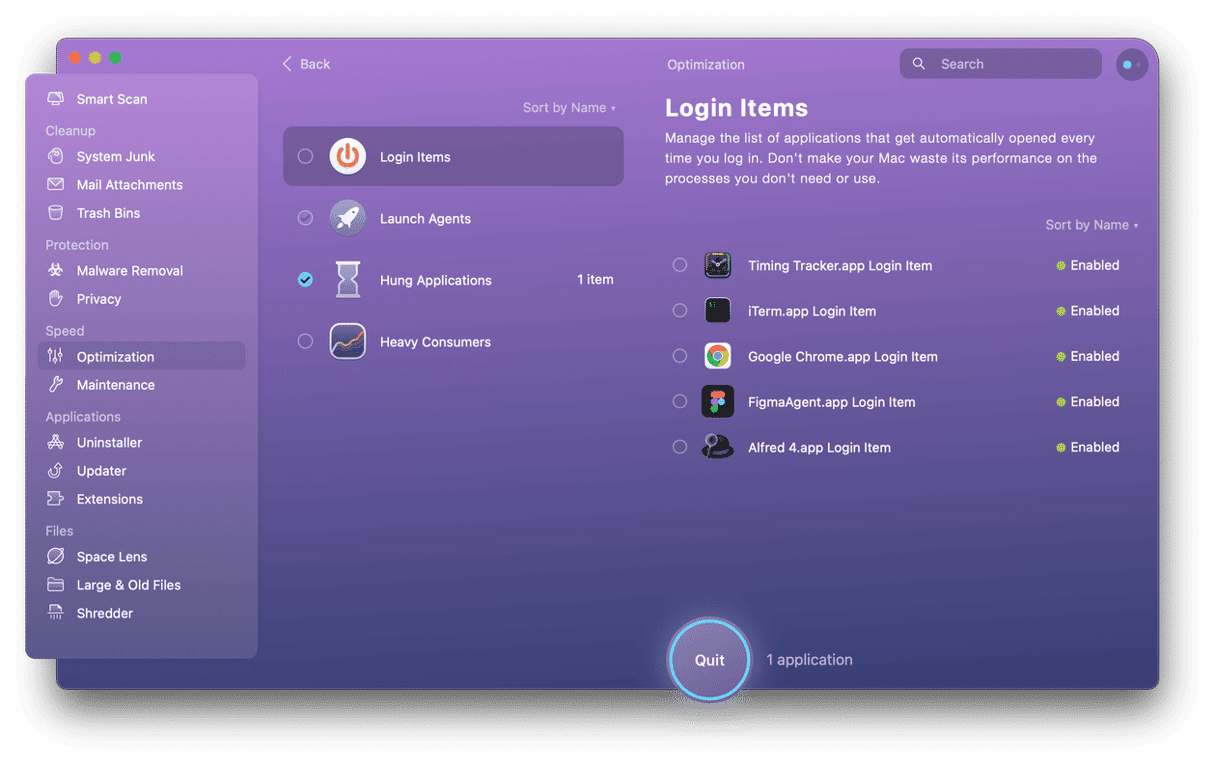
Login items are apps that launch at startup. And Launch Agents are another category of hidden background apps that may drain the memory resources — you may discover some surprises there.
6. Check for Monterey update
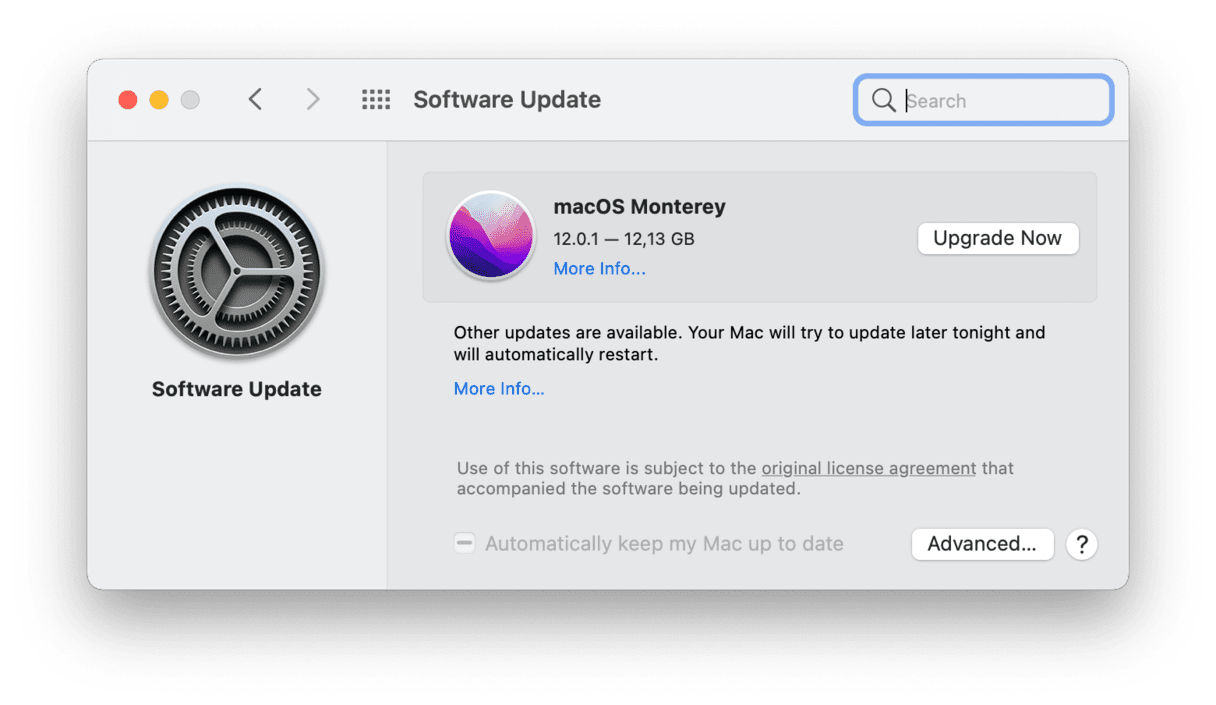
The whole purpose of software updates is to fix any bugs or issues discovered after a piece of software was released. macOS is no exception. That being said, there might actually be an issue with Monterey that can only be fixed by installing a newer update. Here’s how you can check for updates:
- Open System Preferences.
- Click Software Updates.
- If a new update is available, click Upgrade Now.
Note: If your computer has already downloaded the update but not installed it, the button will read Restart Now instead.
7. Reduce your CPU usage
The more resources your computer uses, the more power it’s going to use. By taking some of the stress off your CPU, you can also slow down your battery usage. You can check lower your CPU usage with these steps:
- Open Activity Monitor.
- Click the % CPU tab to sort your running apps by how much CPU they’re using.
- Select a process, then click the hexagon icon at the top.
- Choose either Quit or Force Quit.
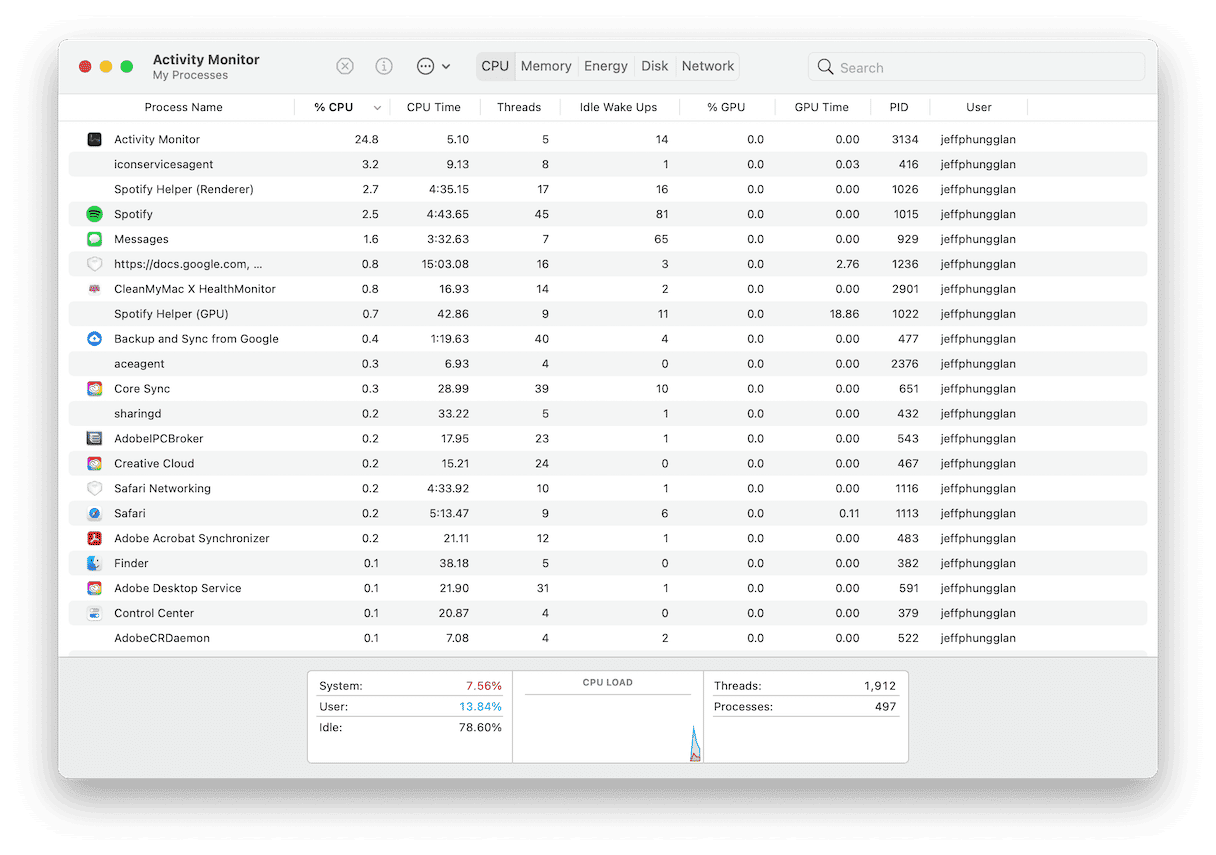
You’ll want to keep doing these until your CPU is running at a manageable pace again.
8. Downgrade back to Big Sur
Finally, if none of these steps have helped with your battery performance, you might have a bigger issue with macOS Monterey running on your computer. Until a more stable version of the operating system is released. You might consider downgrading back to Big Sur.
This step is the outlier of all the other fixes and should be considered a worst-case scenario because it is so invasive.
Before you downgrade, make sure you have a backup of your most important files. Then, the next step is to download the Big Sur installer, which you can get from this link on the Mac App Store. This may take a while to finish, but when it does, you’ll need to make a bootable disk.
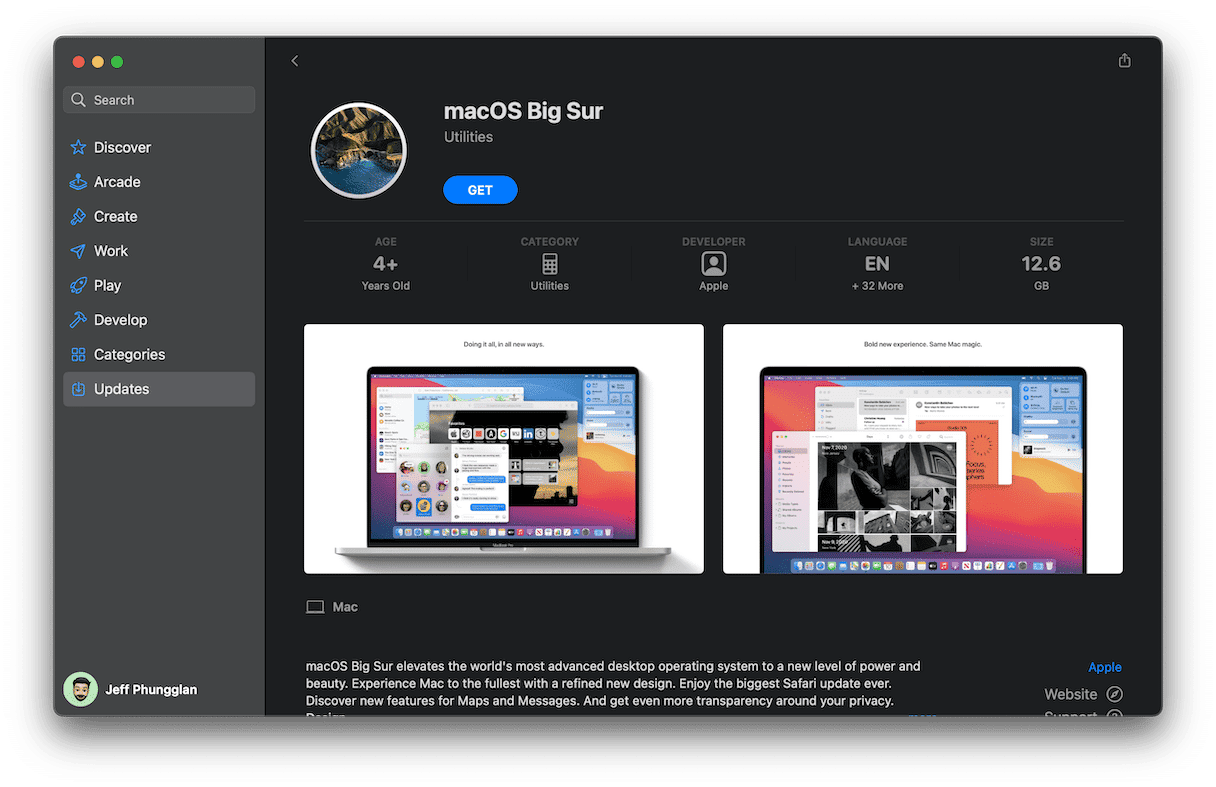
How to create a bootable disk
You’ll need an empty hard drive or flash drive that is at least 15 GB. Then, once you have the macOS installer downloaded, follow these instructions:
- Plug in your drive and open Disk Utility.
Note: You may need to click View > Show All Devices to see your drive.
- Select your external drive in the sidebar.
- Click Erase.
- From the Format drop-down menu, choose Mac OS Extended (Journaled).
- Then, select GUID Partition Map as the Scheme.
- Rename your drive and click Erase.
- It may take a few minutes to finish. Then, click Done.
- Now open Terminal.
- Then, copy this text into the window:
sudo /Applications/Install\ macOS\ Big\ Sur.app/Contents/Resources/createinstallmedia --volume /Volumes/MyVolume -- /Applications/Install\ macOS\ Big\ Sur.app
Note: You’ll replace “MyVolume” with the name you gave your external drive.
- Hit Return on your keyboard.
- Type in your computer password. You won’t see anything as you type, but this is okay.
- Again, hit return on your keyboard.
- Terminal will warn that it is about to erase the drive, type Y, and press Return.
- When Terminal finishes, you’ll see the words “Copy complete and Done.”
Reinstall Big Sur
Now that you have a bootable disk with Big Sur, it’s time to downgrade. Make sure that drive you just made is plugged into your Mac, and then go through these steps.
- Open System Preferences
- Click Startup Disk.
- Choose the external drive with your installer and click Restart.
- Connect to your WiFi network by clicking on the WiFI icon.
- Then, select Reinstall macOS from Utilities.
- Click Continue.
It could take anywhere from 20 minutes to an hour to reinstall macOS Big Sur. But, you’ll know it’s finished because it will reboot and take you to the setup window.
Bugs are to be expected anytime you install a new operating system. Hopefully, one of these macOS Monterey battery drain fixes will work for you.


