Not sure which photo to post on Instagram, Facebook, or Snapchat? Instead of choosing a single photo, why not make a photo collage for added impact? Photo collages are a fun way to tell a story on social media, and they are incredibly easy to create by using photo collage apps on your iPhone.
How to make a photo collage on an iPhone
Creating a photo collage on your iPhone is easy and intuitive with free apps like Google Photos. Google Photos offers a simple collage maker perfect for quickly combining your favorite photos. Both this app and other free collage makers are available for download, making it convenient to create and share your collages on social media.
How to create a photo collage using Collage Maker - Live Collage
Collage Maker is a powerful and user-friendly app that lets you easily create stunning photo collages. With over 20,000 layouts, effects, stickers, and tools, it's perfect for capturing your best moments and memories. Here's how to create a photo collage using Collage Maker - LiveCollage on your iPhone.
- Install and open the Collage Maker - LiveCollage app from the App Store. Upon opening, you'll be greeted with various collage options and features.
- Tap on the "Collage" option to start creating a new collage. This will allow you to combine multiple photos into one layout.
- Select the photos you want to include in your collage by tapping on them from your Photo Library. You can choose anywhere from 2 to 64 photos. A check mark or highlight will indicate the photos you've selected.
- Tap "Next" or the check mark icon once you select your photos. You'll be taken to the layout selection screen.
- Choose a collage layout from the extensive collection available. Scroll through the different styles and shapes at the bottom of the screen to find one that best fits your photos.
- Adjust your collage layout:
- Resize and reposition photos by pinching and dragging them within their frames.
- Swap photos by dragging one photo over another.
- Adjust the frame, colors, and patterns by tapping the layout adjustment options.
- Customize your collage:
- Add backgrounds by selecting from various colors, gradients, and patterns.
- Apply filters and effects to enhance your photos. Tap on a photo and choose from the app's range of filters.
- Add stickers and decorations by tapping the sticker icon and browsing through the categories.
- Insert text by tapping the text icon. Choose from over 100 fonts and customize the color, size, and style.
- Doodle or draw on your collage using the drawing tools if you want to add a personal touch.
- Use advanced features (optional):
- Apply AI artistic filters to transform your photos into artwork in the styles of famous artists.
- Remove backgrounds from photos with the AI Background Eraser.
- Create special collages like carousel collages for Instagram by layering photos across multiple frames.
- Review your collage to ensure everything looks perfect. Make any final adjustments as needed.
- Save your collage:
- Tap the "Save" button, usually at the screen's top-right corner.
- Choose the resolution and format if prompted.
- Share your collage:
- After saving, you can share your creation directly to social media platforms like Instagram, Facebook, or Twitter by tapping the respective icons.
- Alternatively, your collage will be saved to your Camera Roll, and you can share it later from your Photos app.
How to combine photos in a collage using Google Photos
Google Photos has a similar collage maker that is perfect for quickly combining photos into a collage to share on social media. Here's how to use Google Photos on iPhone to create a collage.
- Install and open Google Photos. If you already use Google Photos, you can see all of your photos in your Library. If you're new to Google Photos, you must allow access to your photos and add them to the Google Photos platform.
- At the bottom of your screen, tap Assistant.
- Tap Collage.
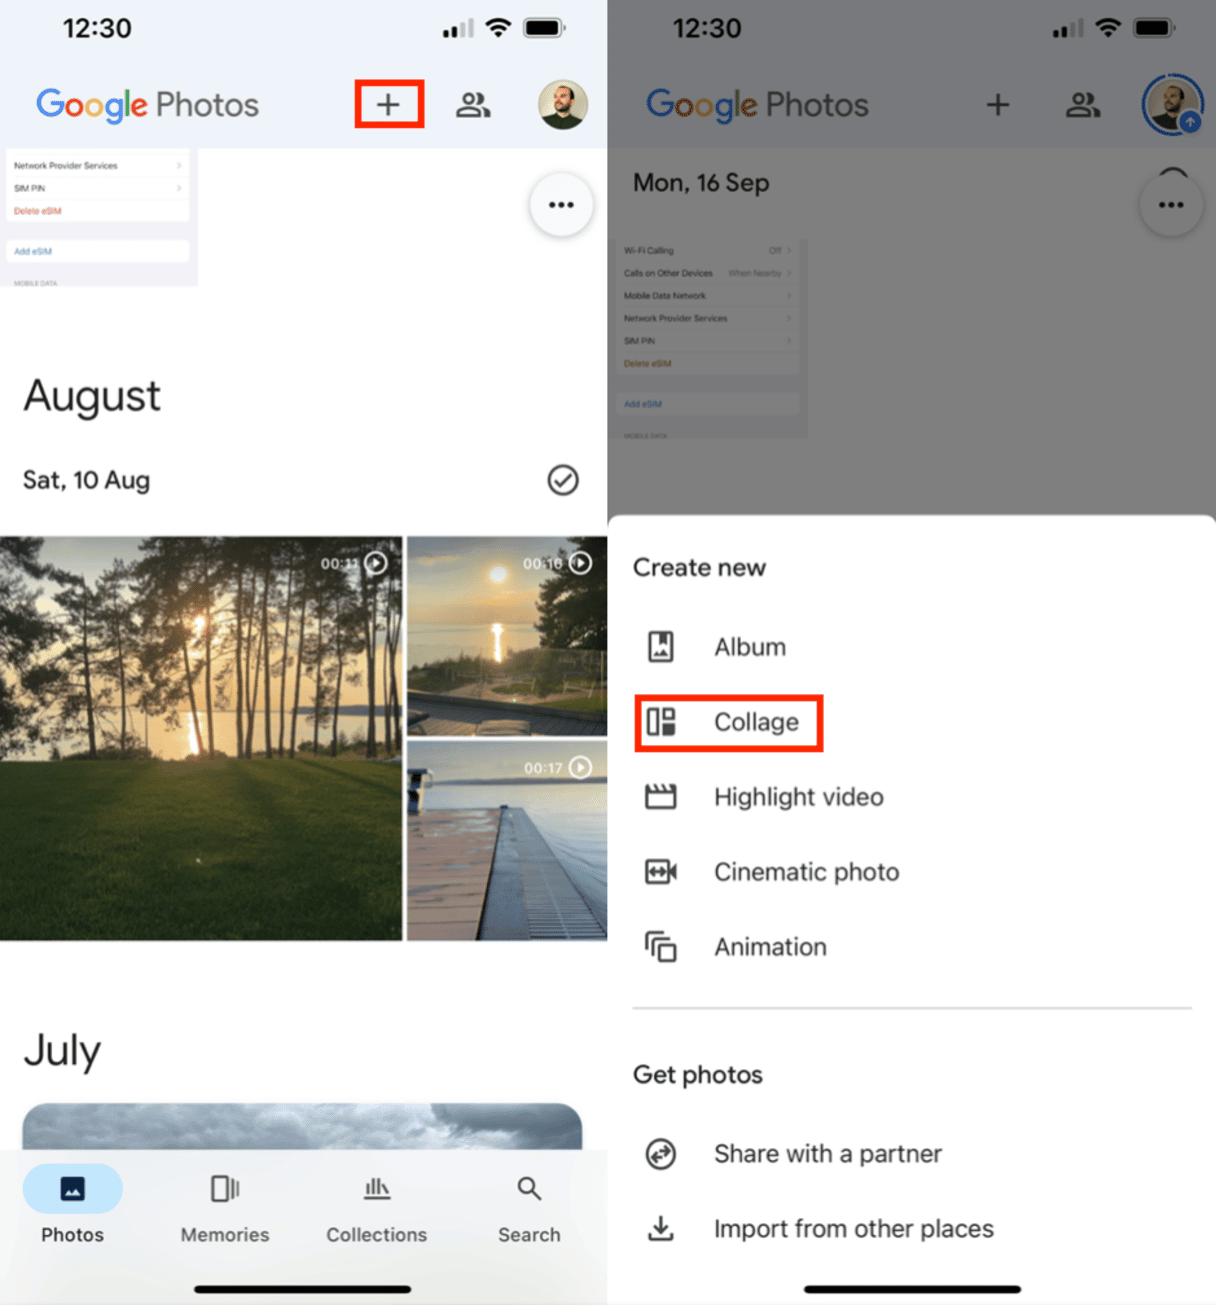
- Select 2-9 photos you want to add to your collage.
- Tap Create.
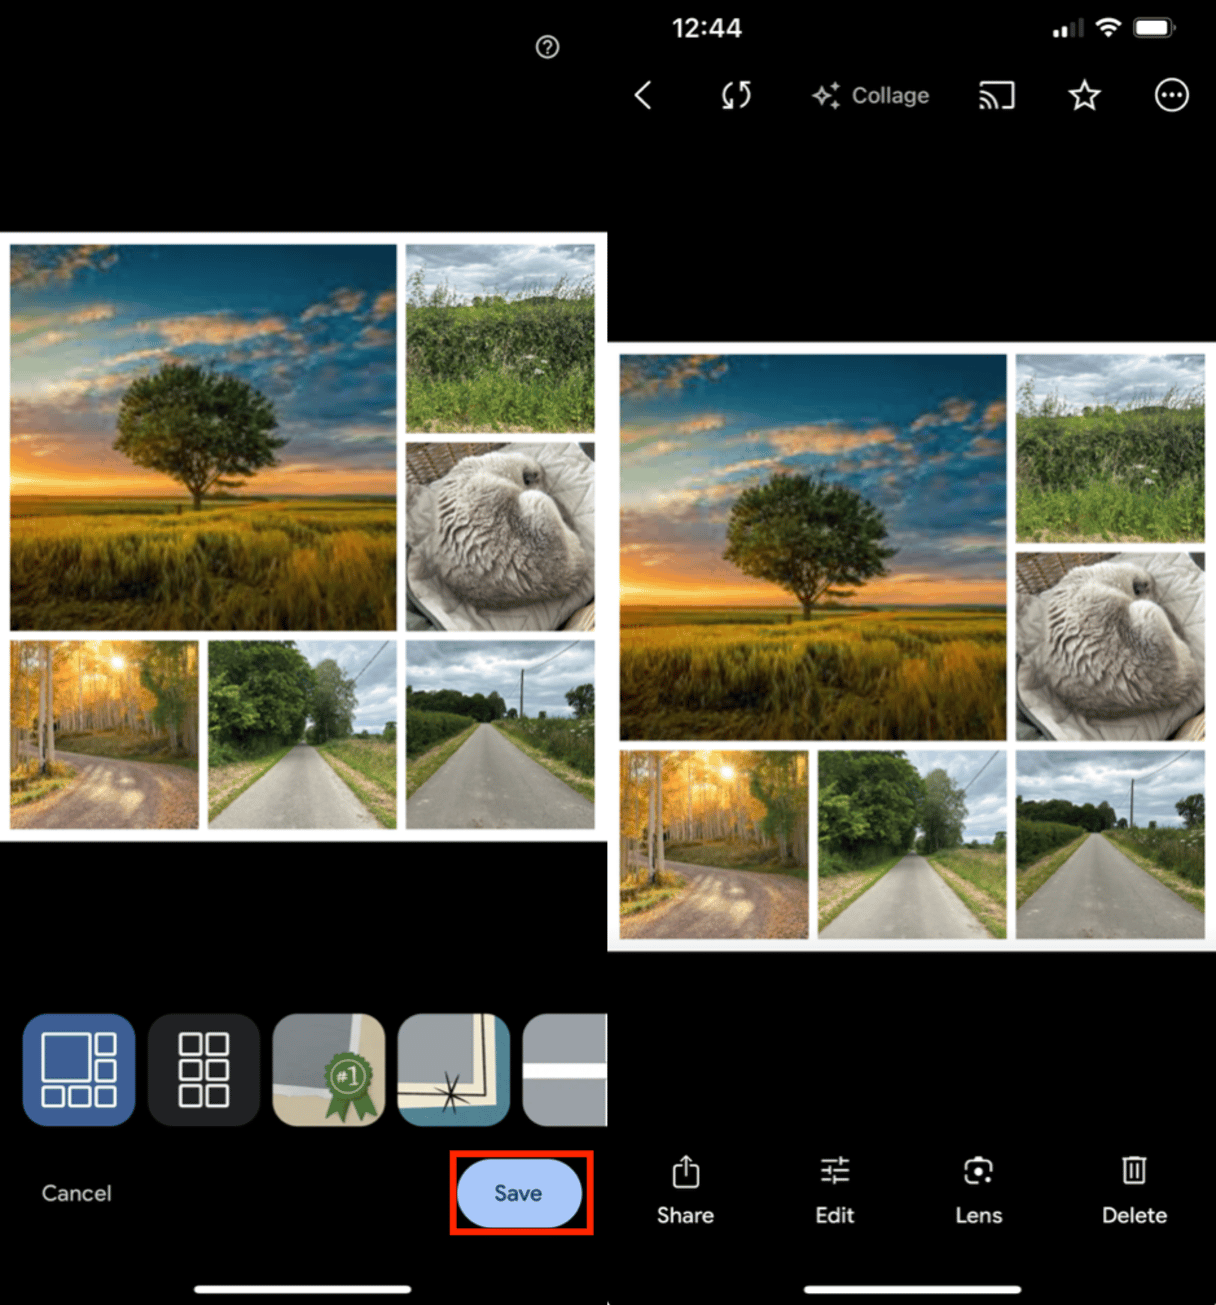
- Google Photos will create a custom collage with a white border.
- Once your collage has been created, you can’t edit the layout of your photos without starting over. You can, however, apply filters to your collage or crop it using the edit or crop icons at the bottom of the screen.
- When you’re finished, tap Save.
Make a collage with a collage app for iPhone
Layout and Google Photos provide easy-to-use interfaces that allow you to create collages quickly but don’t allow for much customization. You may need to use a dedicated photo collage app if you want more control over how your collage looks — or some advanced features. Here are some instructions for using our favorite collage apps for iPhone, including:
- Pic Collage
- Adobe Spark
- Canva
How to make a picture collage on an iPhone using Pic Collage
Pic Collage is a fun photo editor that lets you choose from hundreds of grid styles. Here’s a step-by-step guide.
- Install and open Pic Collage on your iPhone.
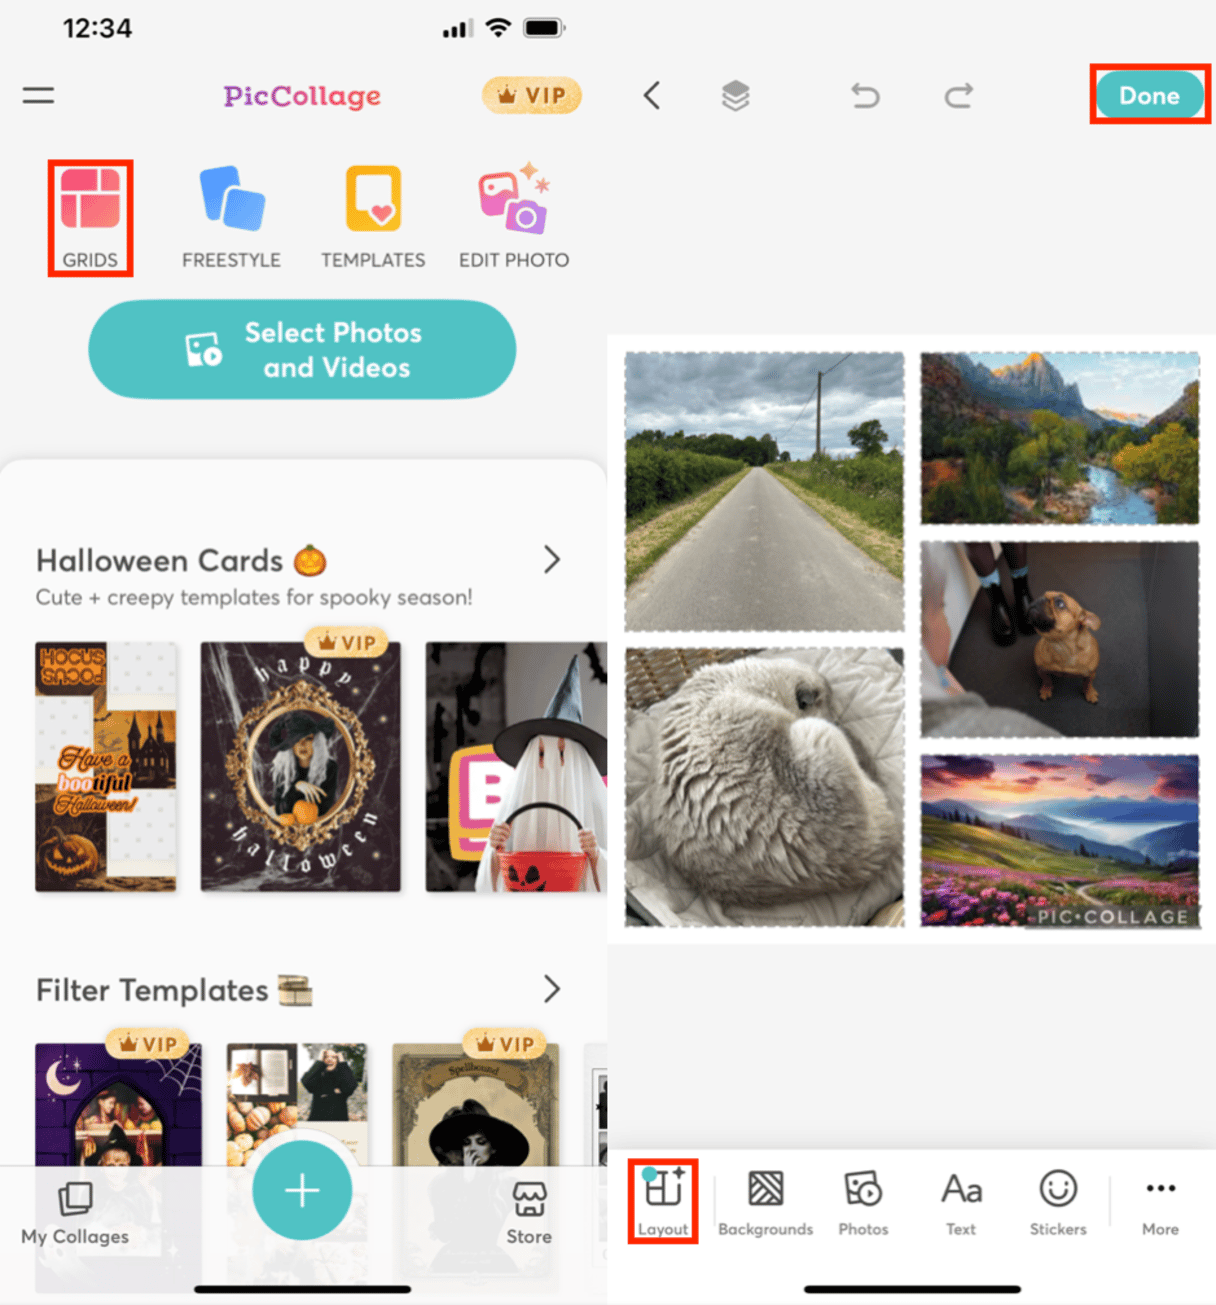
- Tap Grids and allow Pic Collage to access your photos.
- Choose the photos that you want to add to your collage, then tap the checkmark in the upper right.
- Your photos will appear in a grid layout on the screen, but you can scroll through the options at the bottom to choose an option that works for you. You can also slide the border lines in any direction to change your layout.
- To move a photo within your grid, tap on it and then drag it to the new position.
- Use the slider below your collage to change the width of the border.
- Tap Background to change the color of your border or add a design to your border.
- When you’re finished, tap Done.
- Your collage photo will be created with a small Pic Collage watermark. You can easily save your photo from this screen to your Camera Roll.
How to put photos side by side using Adobe Spark
Adobe Spark is a robust graphic design app, but it is also perfect for creating custom collages, especially if you want to add additional graphics or text overlays. Here's how to put photos together using Adobe Spark.
- Install and open Adobe Spark on your iPhone.
- Scroll through the menu bar at the top and tap Collages.
- You will see a list of templates to choose from. Most of these include text and graphics, but you can remove them later if you don’t need them.
- Once you choose a template, tap Replace to replace the stock photos with your own.
- Tap on the design element to delete or change anything that you don’t like. You can remove the text or edit it to meet your needs. You can also change the fonts and colors.
- When you're happy with your collage design, tap Done.
- Tap Share to save your image or share it on Facebook or Instagram.
How to collage photos on an iPhone using Canva
In addition to great collage templates, Canva allows you to choose from various free stock images for your project. Here's how to use Canva to create a unique photo collage.
- Install and open Canva on your iPhone.
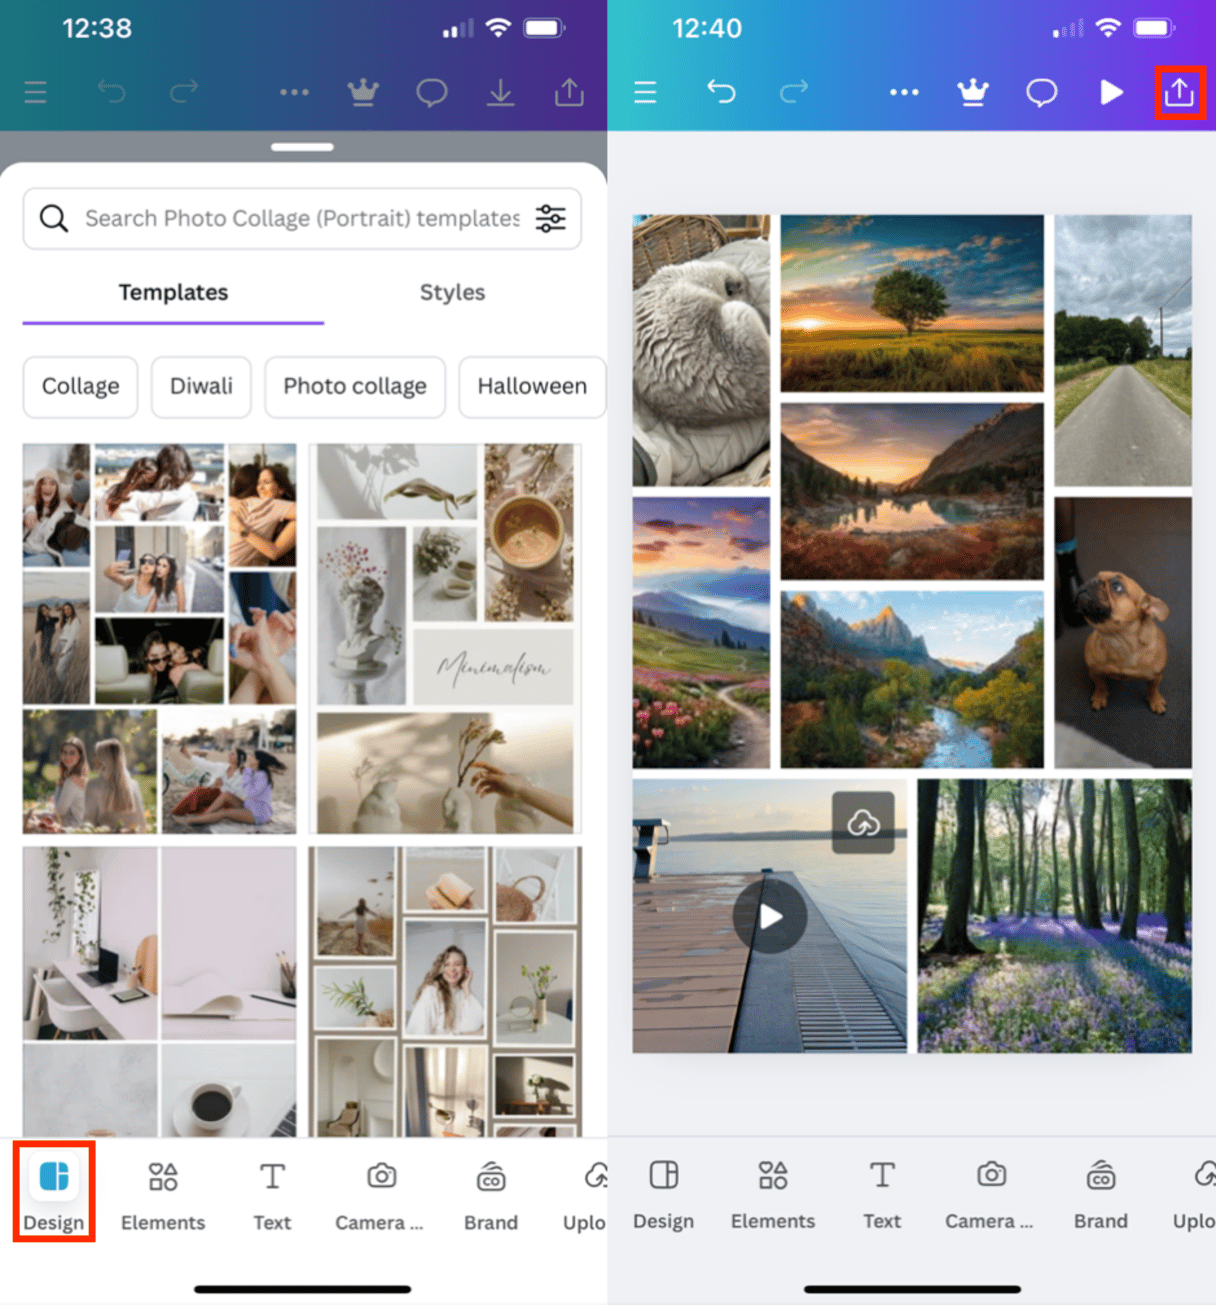
- Scroll through the templates under “Create a new design” and choose Photo Collage.
- Choose a design from the dozens of collage templates available.
- Once you have chosen a collage template, you can edit every design aspect by tapping on the photo. Change the font, colors, text, and photos until you're happy with your design.
- Tap Done when you're finished editing.
- Tap the up arrow in the upper right to save your photo to your Camera Roll or to share it on social media.
How to make a collage on an iPhone without an app
If you want to create a collage on your iPhone without downloading any additional apps, you can try this straightforward method:
- Launch the Photos app and choose the album you want to work with.
- Tap the three dots in the upper right corner, select Add Photos, and include the photos you want in your collage. You can also press a plus sign to add photos.
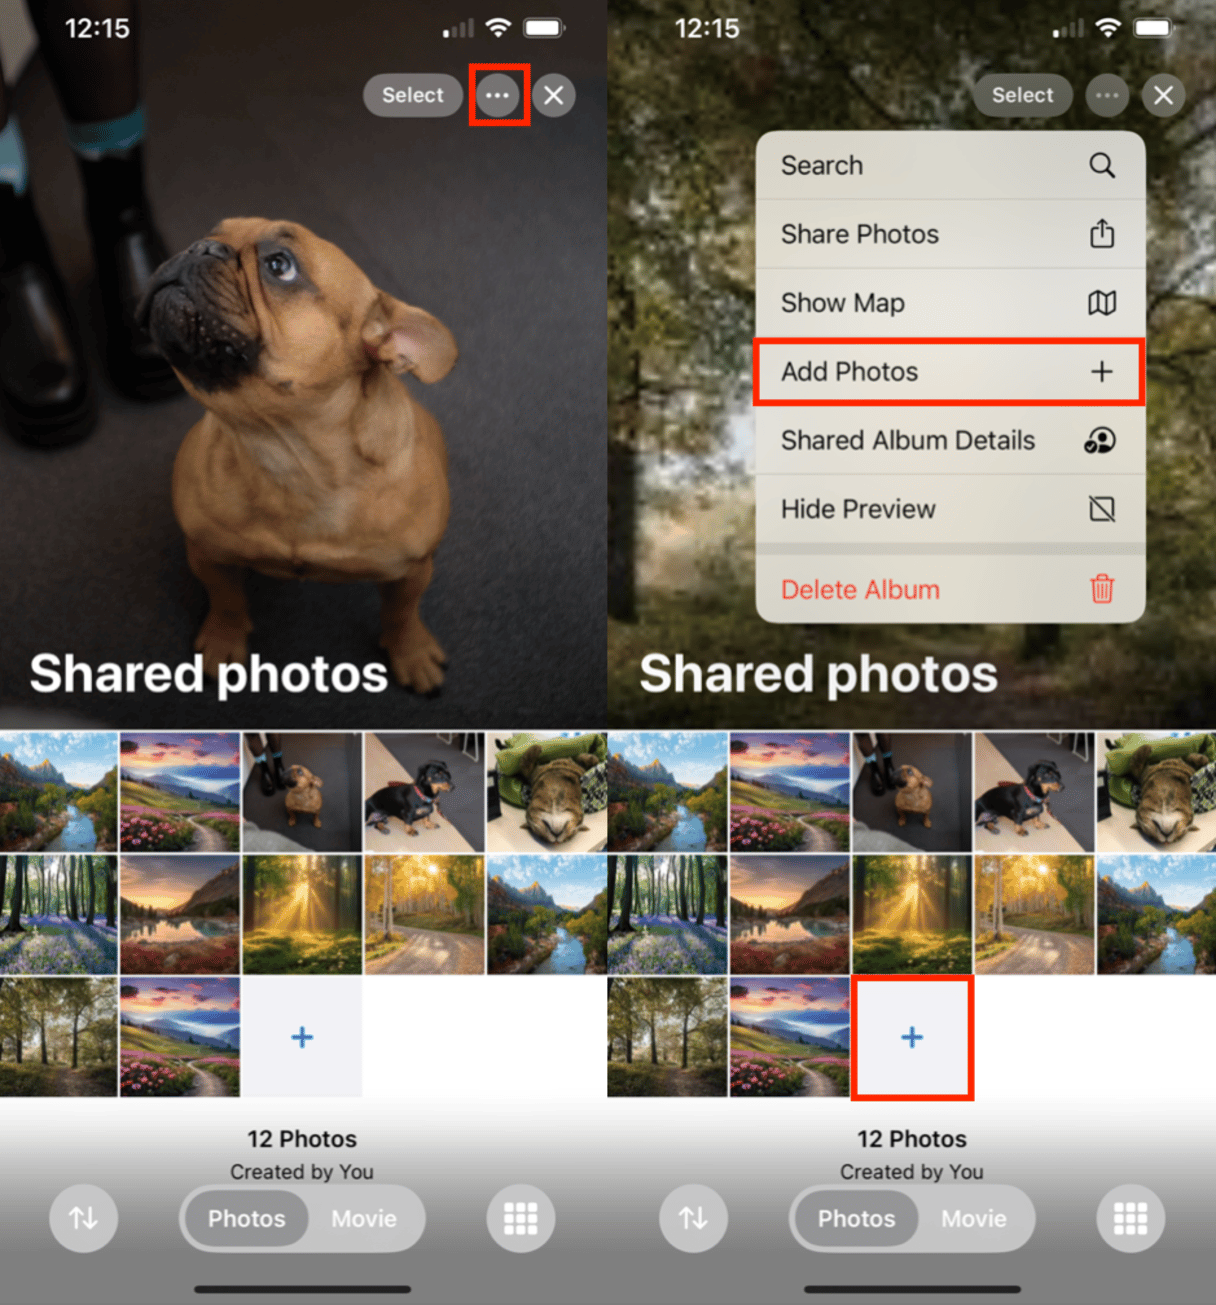
- Next, you can reorder photos as you please. Hold and drag each photo to arrange them in your preferred order.
- Once you’re satisfied with the layout, take a screenshot of the album by pressing the volume and power buttons simultaneously.
- Go to the screenshot in your Photos, tap Edit, and crop the image to show only the selected photos you want to include. Tap Done to save it to your camera roll.
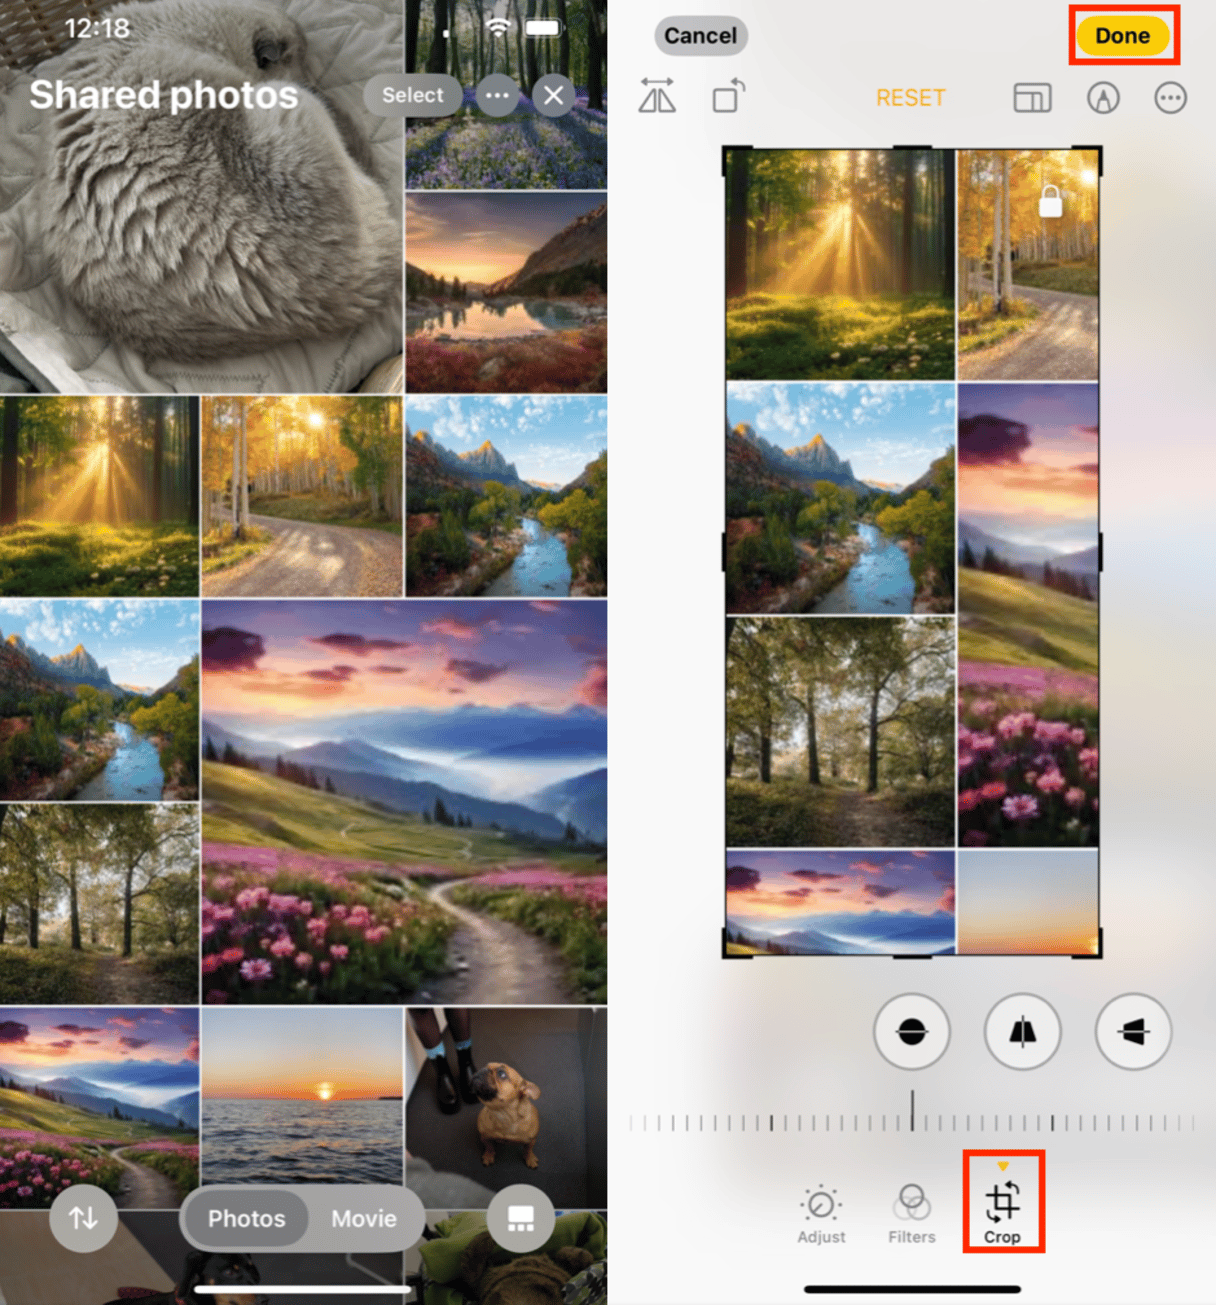
This method is useful for quickly combining multiple photos without external tools.
You can easily combine photos into one-of-a-kind collages that are perfect for sharing with friends and family, posting on social media, or printing. And if you'd like to give your collage a final touch, one of these photo filter apps will do the trick.


