Slideshows are a fun and creative way to showcase your photos and memories so you can watch them or share them with your friends and family. Whether you're putting together a slideshow for a special event, a social media post, or just to relive some great moments, your iPhone makes creating slideshows incredibly easy.
How to make a slideshow on an iPhone
You can create slideshows directly in the Photos app or use third-party apps for more customization options. Let's explore both methods, with step-by-step instructions for each.
How to create a slideshow on an iPhone?
Creating a slideshow on an iPhone is simple, and the native Photos app offers basic tools to get the job done quickly.
Third-party apps are also available if you're looking for more advanced features. Let’s create a slideshow using the Photos app and other apps worth exploring.
How to make a slideshow in the Photos App
Here’s how you can easily make a slideshow using your iPhone's Photos app:
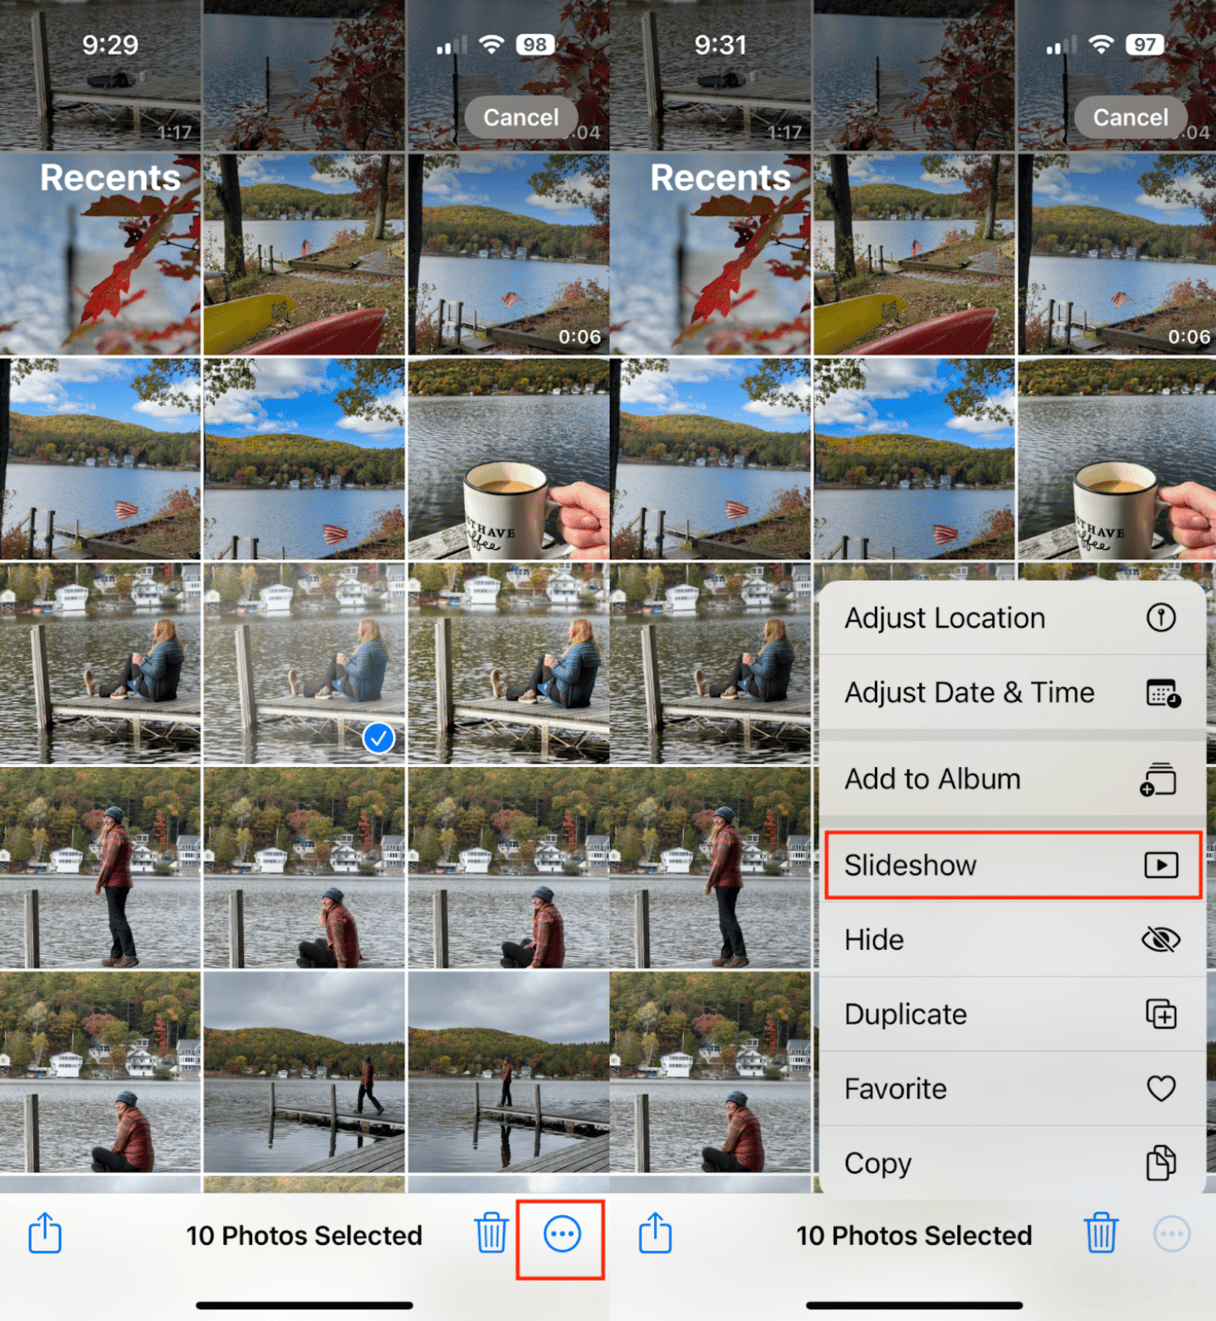
- Open the Photos app from your iPhone’s Home screen.
- Choose an album and then ‘Select.’
- Tap on all the photos that you want to include in your slideshow.
- Tap the three dots in the lower right corner of your screen.
- Tap ‘Slideshow.’
- Your photos will automatically begin playing as a slideshow. Tap ‘Options’ to change the theme, music, or how fast the slideshow plays.
- You don’t have to manually save your slideshow. It will automatically be saved in your iPhone's Memories.
Use CleanMy®Phone to organize your digital clutter
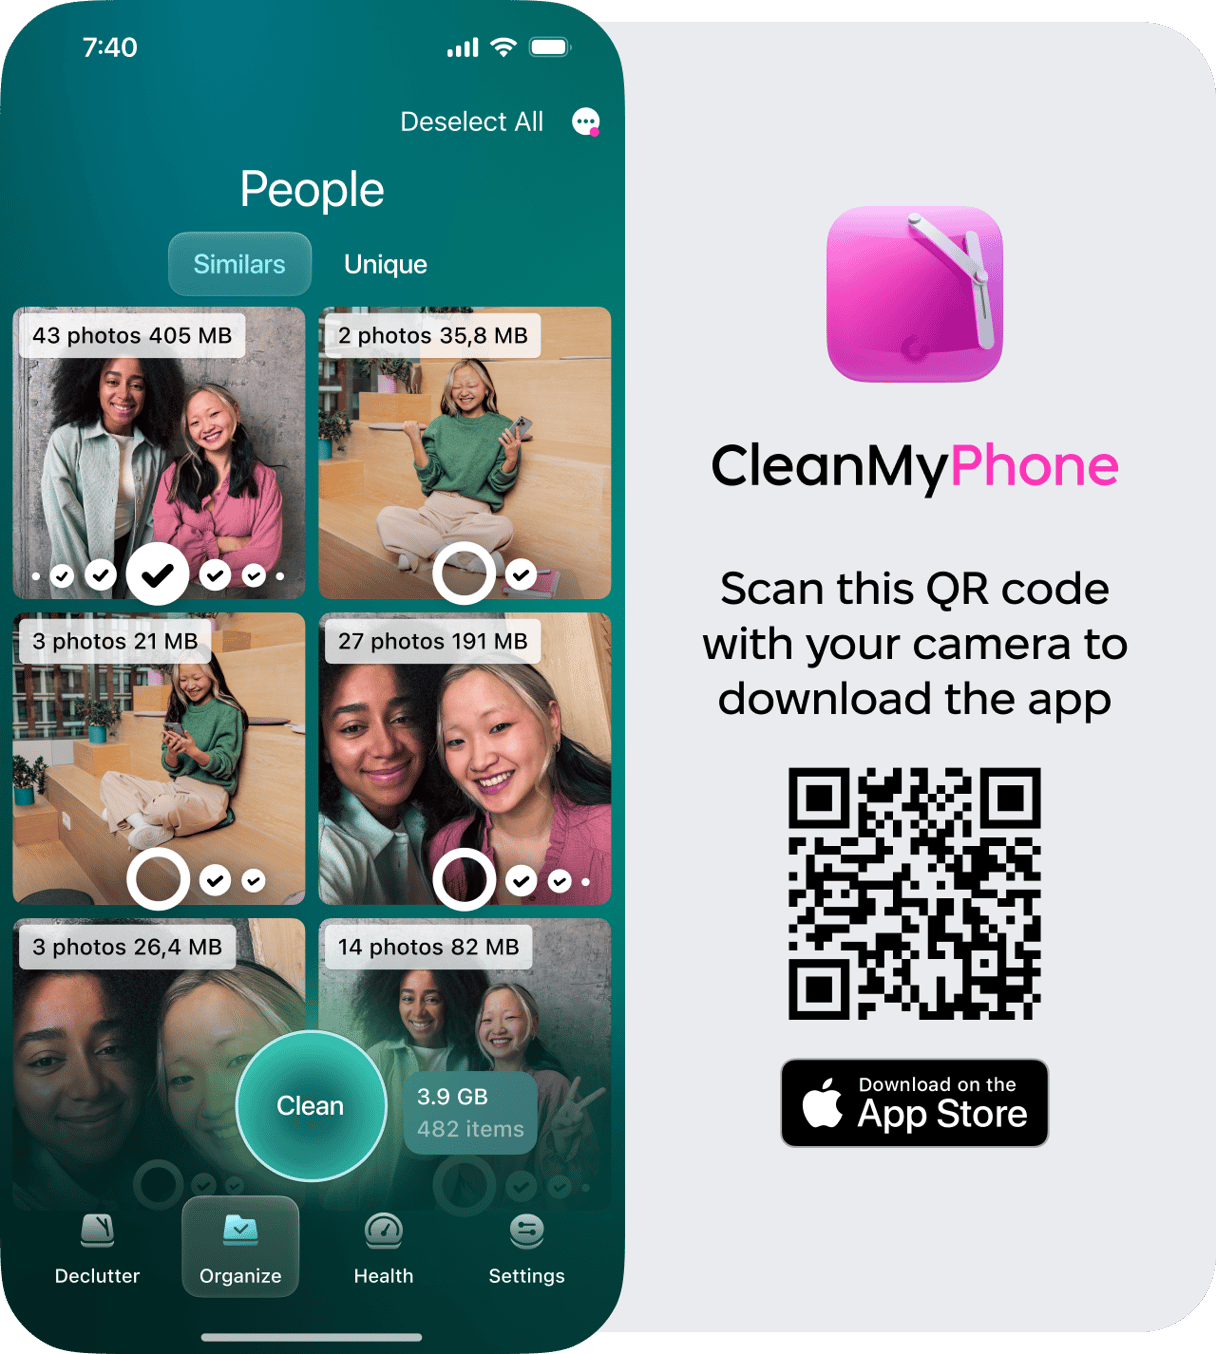
As you create slideshows, it’s easy to accumulate tons of photos and videos that may clutter your iPhone storage. That's where CleanMy®Phone’s Organize Module comes in handy. The Organize Module helps you sort, clean, and organize your photo library, removing duplicates and grouping similar photos. By decluttering your photo library, you free up valuable space on your iPhone, making it easier to find the perfect photos for your slideshows while optimizing your iPhone’s performance.
How to save slideshow on iPhone
As mentioned above, your slideshow is automatically saved in the ‘Memories’ section of the Photos app. This is great for personal use, but if you want to share it, it makes things more difficult. One workaround is to use the screen recording feature to capture the slideshow. This way, you can save it as a separate video to share across platforms or through Messenger. Here’s how to do it.
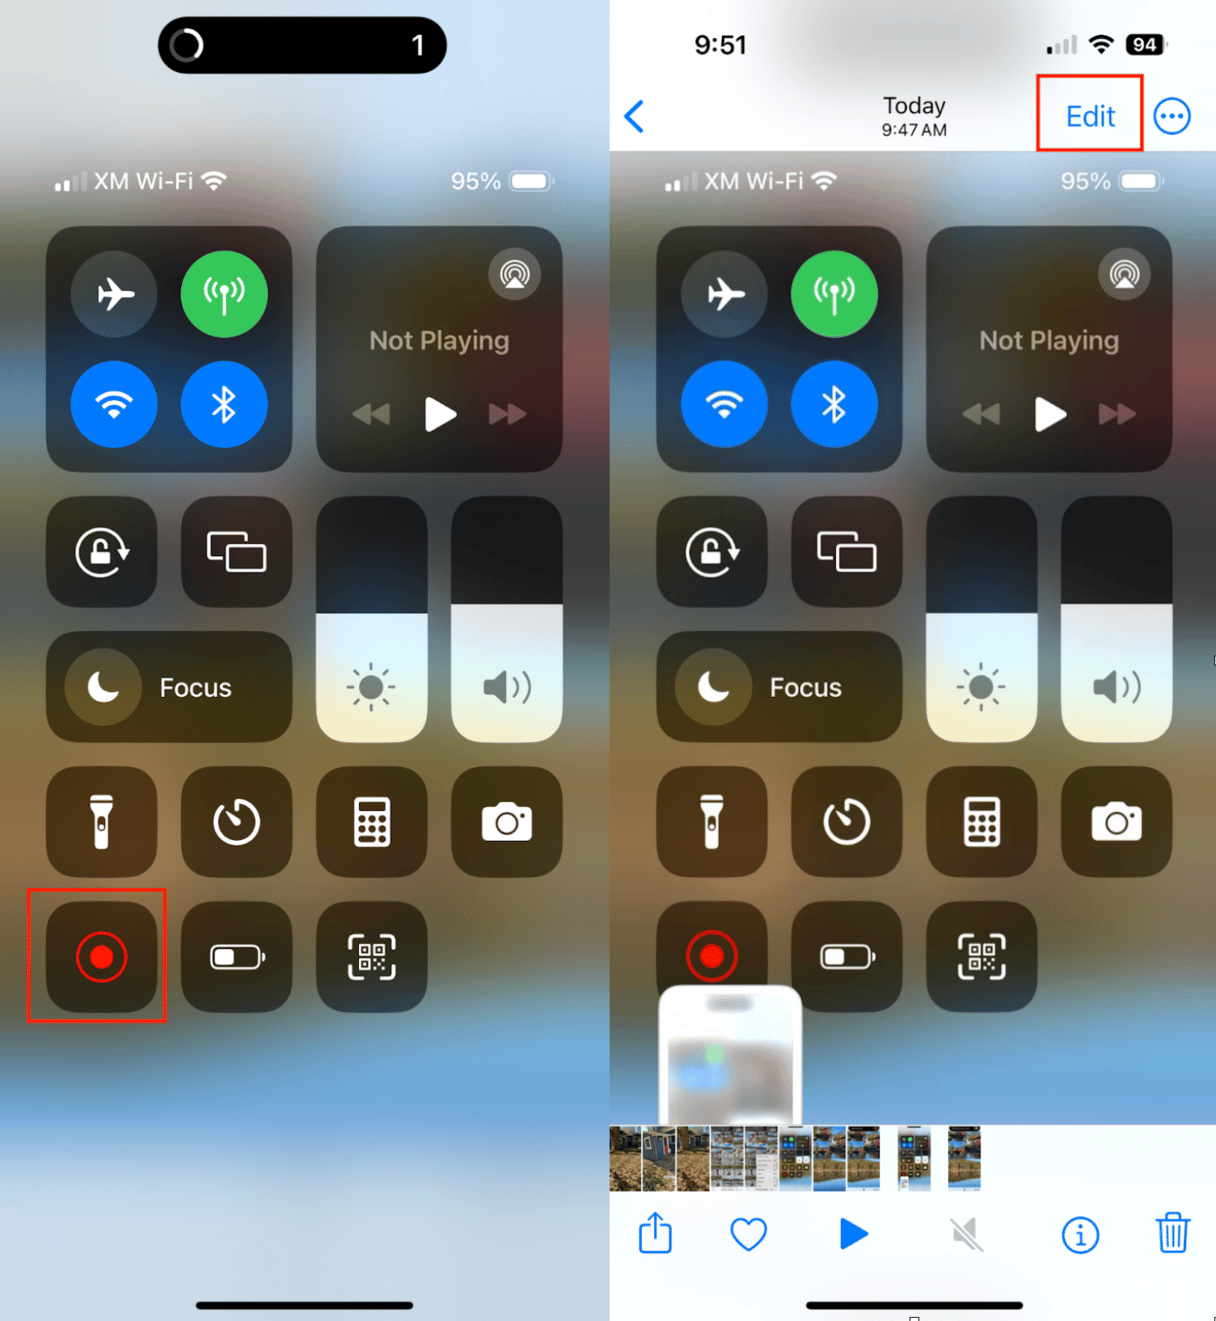
- After creating your slideshow, swipe diagonally down from the top right corner of your iPhone to open the iPhone’s Control Center.
- Tap the screen recording icon, which looks like a circle inside a circle. The app will count down from three and then start recording your screen.
- Play your slideshow within the Photos app.
- When it is finished playing, tap the stop recording button at the top of the screen. Your video will be saved inside the Photos app.
- You can trim your video by tapping ‘Edit’ before sharing it however you wish.
How to make a slideshow on iPhone with CapCut
If you’re looking for more creative control over your slideshow, including transitions, effects, and music, using a third-party app can take your slideshow to the next level. There are plenty of apps available. If you look for advanced features, CapCut is the place to go.
Here's how to make a beautiful slideshow using CapCut:
- Go to the App Store, search for CapCut, and download the app.
- Open CapCut, tap ‘New Project,’ and select the photos or videos you want to include in your slideshow.
- CapCut provides advanced editing options like transitions, text overlays, music, and filters to give your slideshow a professional touch. You can even adjust the aspect ratio for different social media platforms.
- Once you’re happy with the result, save the high-resolution slideshow or share it directly from the app.
How to make a video from photos on iPhone for free with Quik by GoPro
Quik is a free app that lets you create stunning slideshows and videos with just a few taps. Here’s how to create a slideshow with Quik:
- Download Quik from the App Store and open it on your iPhone.
- Open the app, tap ‘Create New,’ and choose the photos you want to include in your slideshow.
- Quik offers various templates and customization options, allowing you to add music, transitions, and effects using an intuitive interface.
- Once you’ve created your slideshow, save it to your iPhone’s photo library, or share it directly on social media platforms.
That's it. You can choose between the paid and free apps depending on the number of features you need and your budget.
How to delete a slideshow from an iPhone?
Deleting a slideshow is as easy as creating one. Here’s how to do it.
- Go to the Photos app, where your slideshow is saved.
- If you’ve saved your slideshow as a video or screen recording, locate it in the Photos or Videos section of the Photos app.
- Tap the video you want to delete.
- Tap the trash icon in the bottom-right corner and confirm by selecting ‘Delete Video.’
Creating a slideshow on iPhone is a breeze, whether using the built-in Photos app or opting for more advanced third-party tools.
From personal moments to professional presentations, slideshows help bring your photos to life in a way that's both visually appealing and memorable. Remember, using an app like CleanMy®Phone can help you keep your photo library organized, ensuring that your iPhone stays clutter-free and ready for your next project. So go ahead and start creating!


