How many photos do you have on your iPhone? A thousand? Twenty-thousand? More? Like most people living in the digital era, you likely snap lots of pics with your iPhone.
Tapping the shutter is the easy part. The not-so-easy part is figuring out how to organize and declutter the images that live on your phone.
The iOS 18 update brought a major overhaul to the iPhone Photos app, adding more sophisticated features to enhance photo management. However, some users find these changes overwhelming—citing a more complex interface and an overabundance of features that make simple tasks feel complicated.
While Apple’s native tools are powerful, there are even better ways to keep your photo library organized and clutter-free, such as using CleanMy®Phone.
Organize photos on iPhone with CleanMy®Phone
CleanMy®Phone is a dedicated tool designed to streamline your photo and video library, helping you remove unnecessary clutter and organize your memories more efficiently.
Here’s how to use CleanMy®Phone to remove clutter, organize your photos, and save space:
Check your photo storage on iPhone
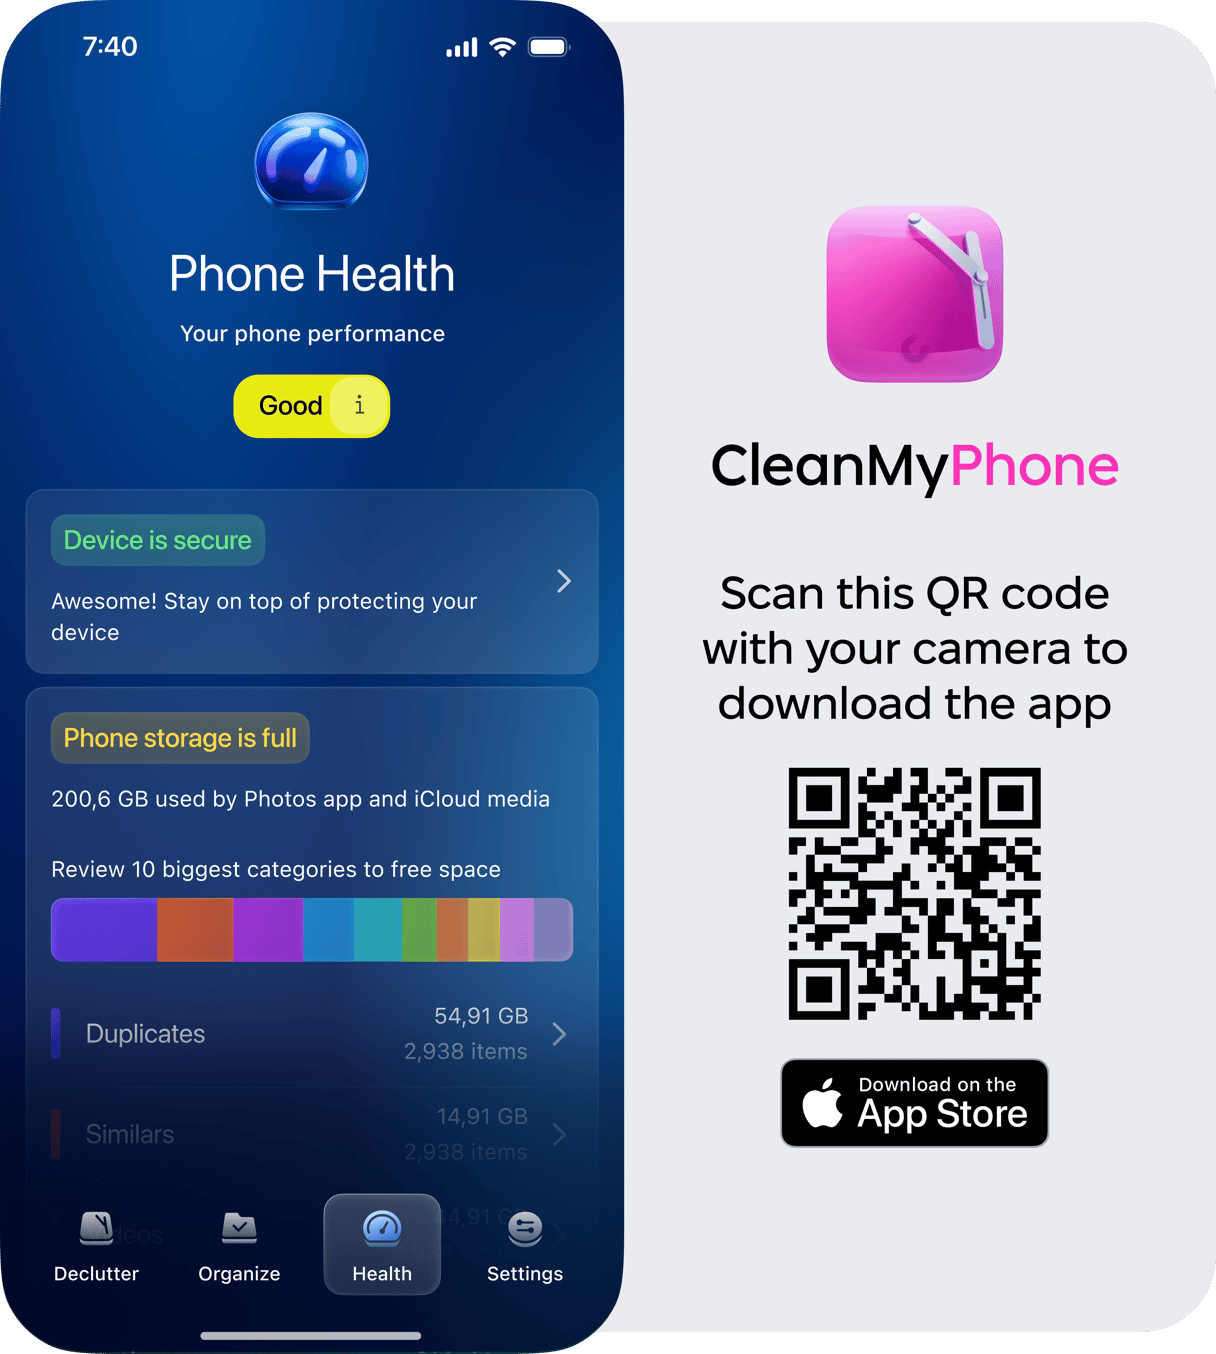
First, go to the Phone Health module and check what types of photos take up most of your storage space. From there, you can also check your phone’s overall security. Then, you can click on each photo type, and the app will take you to those photos.
How to remove clutter in Photos on Your iPhone
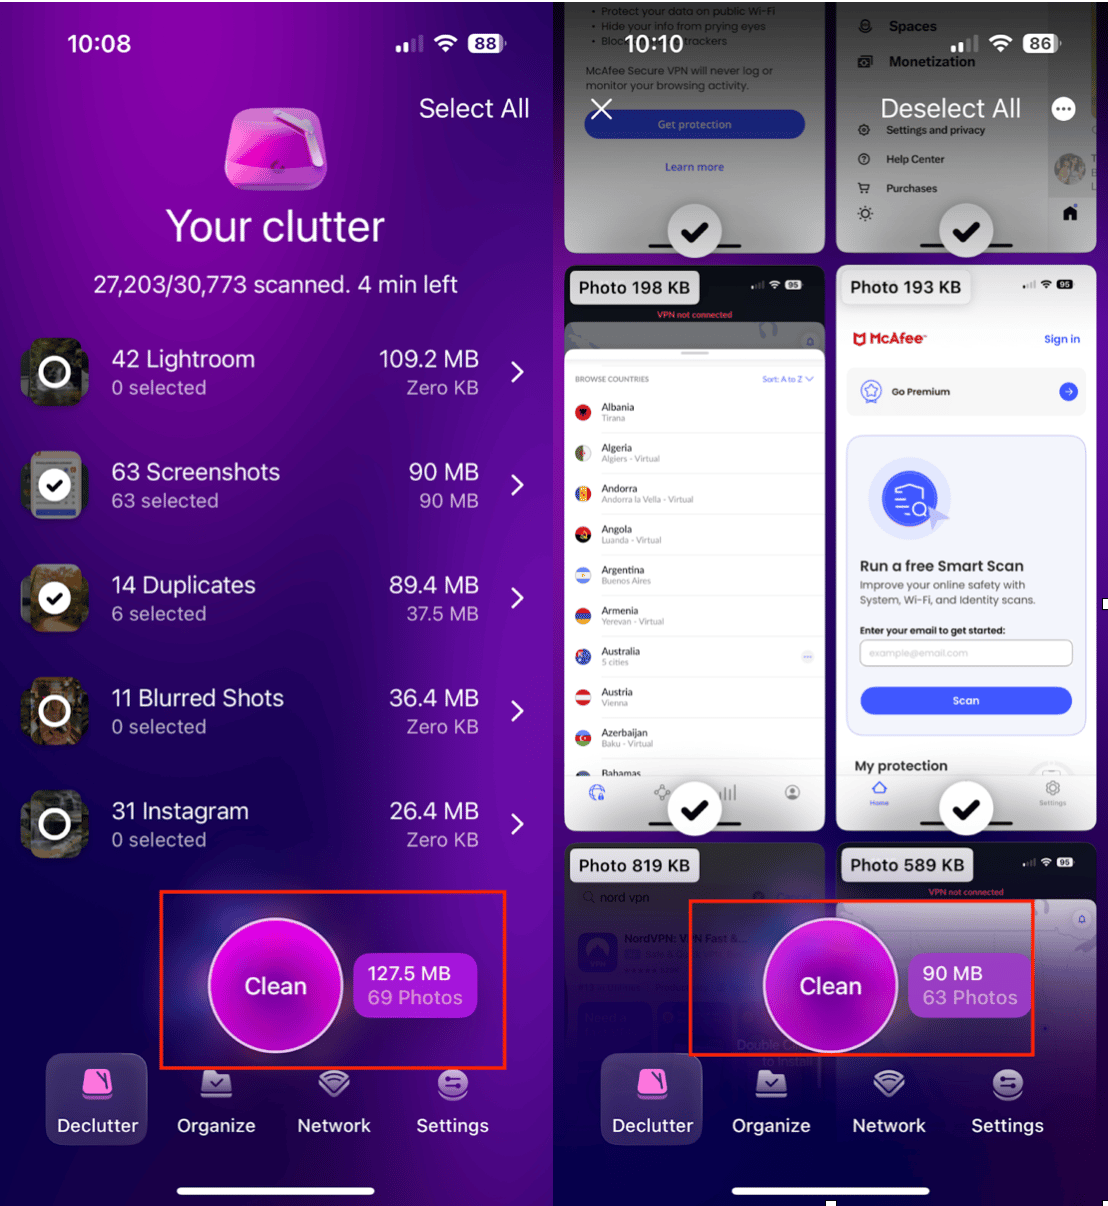
- First, download and install CleanMy®Phone from the App Store.
- Open the app and navigate to the Declutter Module.
- Tap ‘Scan’ to detect duplicate, blurry, and similar photos.
- Tap a category to look through your photos.
- Review the detected images and choose the ones you want to delete.
- Tap ‘Clean’ to get rid of the unwanted images.
- Tap ‘Delete’ to confirm your decision to free up space and keep only the best shots.
- Tap ‘Continue’ and choose another category from which to delete your unwanted photos.
How to organize photos on iPhone
- Open CleanMy®Phone and go to the Organize Module.
- Tap Scan.
- CleanMy®Phone will begin scanning your photo library. The scanning may take some time, depending on the size of your photo library.
- After the scanning is complete, tap a category to open it.
- Choose from ‘Similars’ or ’Unique.’
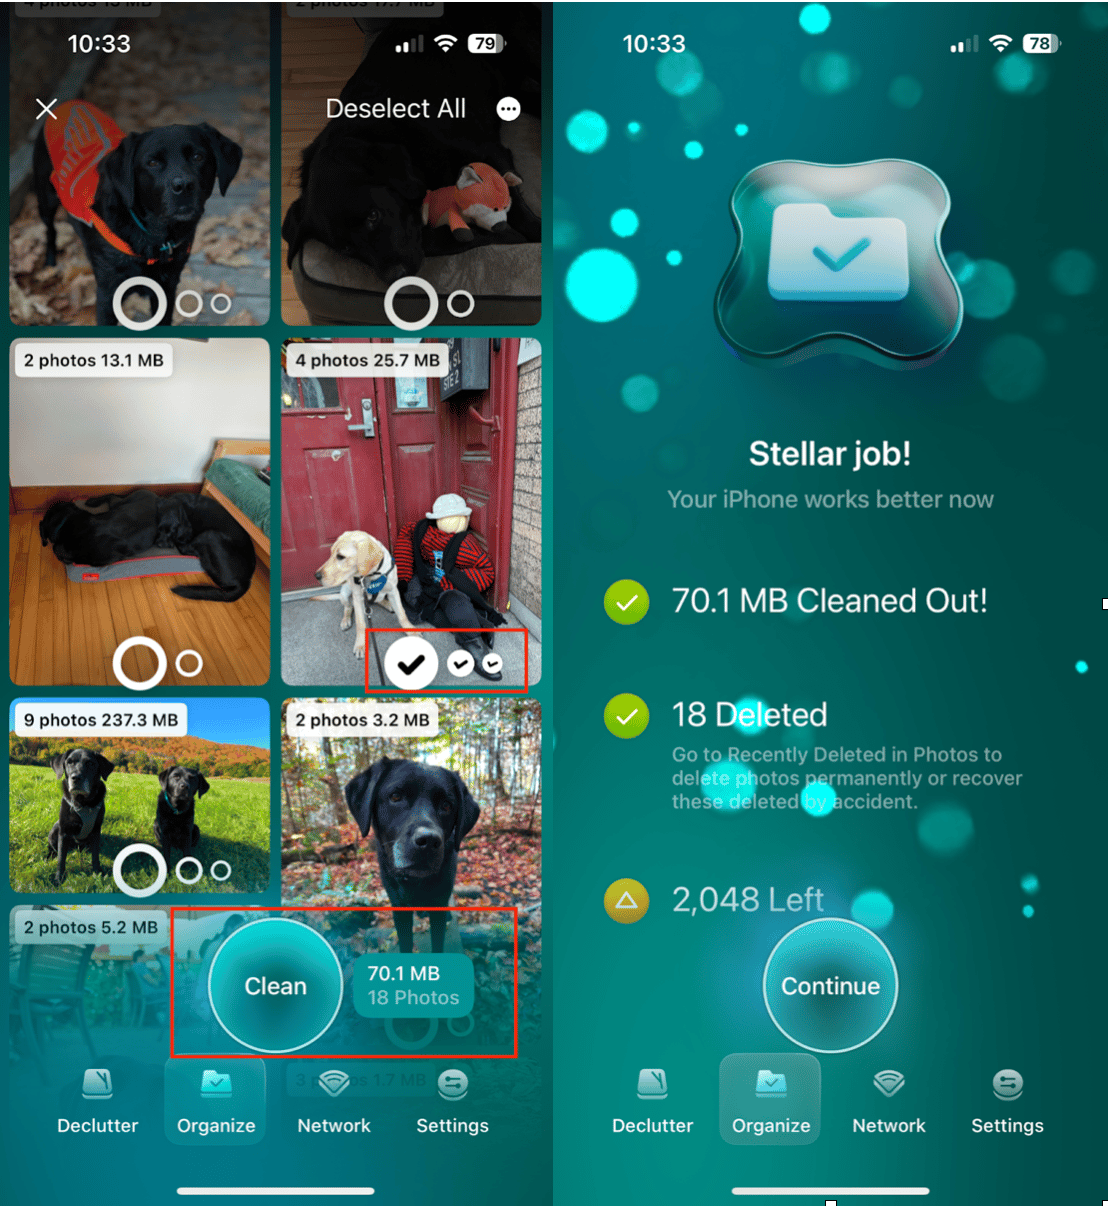
- In the Similars group, the AI has already worked its magic and selected the least successful photos for removal. Swipe over each set of similars carefully and, if needed, deselect the photos you want to keep.
- If you need to take a closer look at a specific photo, tap the photo to open it full-screen. In the full-screen view, you can also enhance a photo, add it to an album or favorites, see its metadata info, or save it to the Sensitive folder so that the app ignores this photo in future scans.
- Use the same process in the Unique group — review the photos and select the ones you want to remove.
- Once finished with your review, tap ‘Clean’ to remove selected images, then tap ‘Delete’ to confirm your choice.
- Repeat these steps for other categories.
How to organize videos on Your iPhone
- Launch CleanMy®Phone and select the Organize tool.
- Choose ‘Videos.’
- You will be able to see thumbnails of your videos, plus how much room they’re taking up on your iPhone. Videos will be grouped into categories like Travel, Family, or Work.
- Store important videos in a dedicated folder for quick access.
- Tap on a video to watch it and tap it to select it for deletion.
How to organize photos on iPhone manually
If you prefer a hands-on approach, you can still organize your photos using the built-in Photos app. Here are some practical tools for organizing your photos.
Use folders & albums in the Photos App
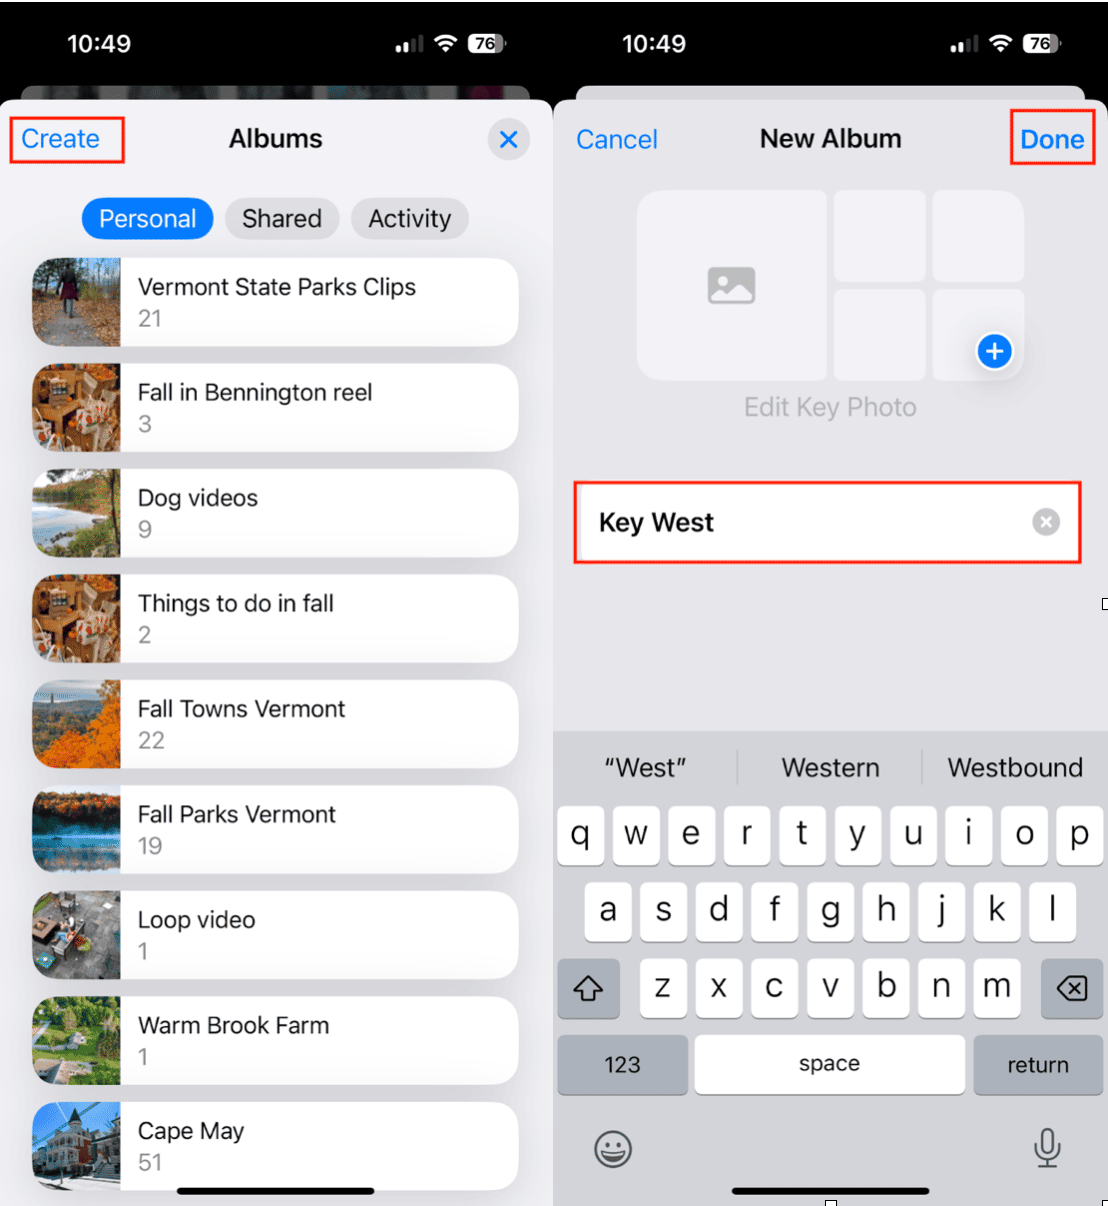
- Open the Photos app and tap on the Albums tab.
- Tap ‘Create’ in the upper left to create a new album or folder.
- Name your album and manually add photos by selecting them and tapping Add to Album.
- Use folders to group similar albums together for better organization.
Use the search feature to find old photos faster
- Tap the ‘Search’ tab in the Photos app.
- Type keywords like dates, locations, or objects to quickly find specific photos.
- Use facial recognition to locate pictures of specific people.
- Browse by categories like "Screenshots," "Selfies," or "Favorites."
Organize photos on iPhone without duplicates manually
- Open the Photos app and scroll down to Utilities > Duplicates.
- Review duplicate images and merge them to keep the highest-quality version.
- Regularly delete screenshots, downloads, and similar images.
- Mark essential photos as Favorites for quick access.
The iOS 18 Photos app update may have added new features, but managing photos manually can still be time-consuming. With CleanMy®Phone, you can easily remove clutter, organize albums, and optimize storage without hassle. Whether you prefer an automated or manual approach, keeping your photos in order ensures you’ll always find the memories that matter most.


