Losing a document you were working on and realizing you haven't saved it may seem like the worst thing that could happen on a Mac. What if I tell you there are still chances to get back all that you've lost? Let's try to recover an unsaved Word document on your Mac.

How to recover an unsaved Word document on your Mac
First, the good news. Word has an auto-save feature that backs up your progress every few minutes. So, if Word crashes or you have to restart your Mac, or you close the lid without saving, there’s no need to worry. The next time you open Word, the most recent version of your document will be there. However, that only works if you’ve given your document a name and saved it. So, what do you do if you lose the document before saving it?
What if autosave doesn’t pull up your document?
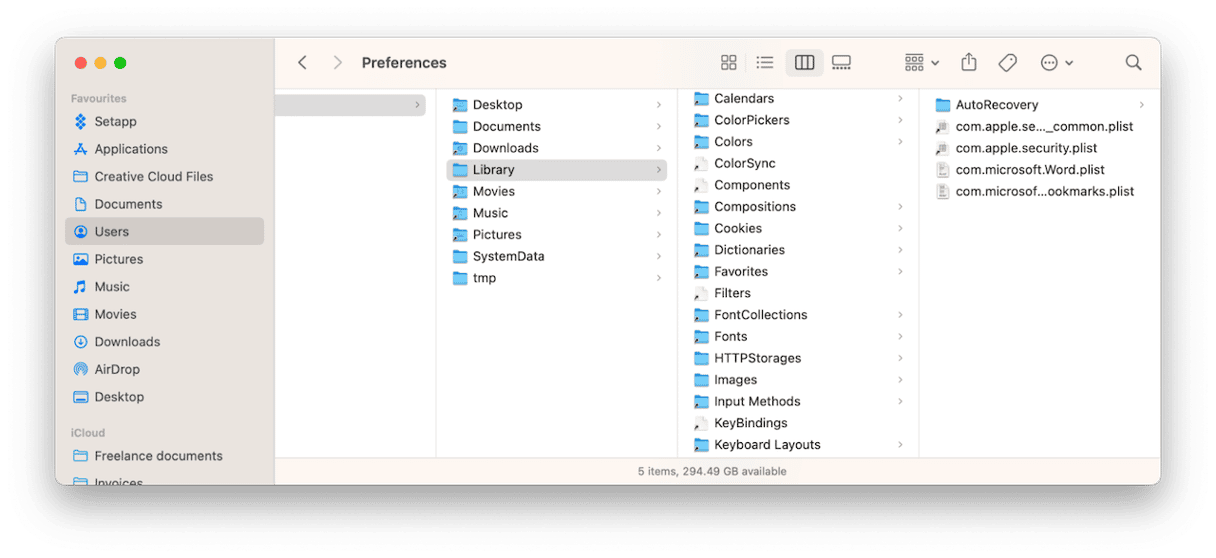
If your document doesn’t appear the next time you open Word, the next thing to try is to look for it in the AutoRecovery folder, where Word stores auto-saved documents.
- Click on the Finder and then choose the Go menu.
- Choose Go to Folder.
- Paste the file path below into the text box and press Return: ~/Library/Containers/com.Microsoft/Data/Library/Preferences/AutoRecovery
- Open all the documents in that folder until you find the one you’re looking for.
- Double-click the file, or drag it onto the Word icon in the Dock.
If AutoSave doesn't work on your Mac, some corrupt items or malware could prevent the auto-save. You can use CleanMyMac to identify and fix these issues.
The app's Smart Care feature scans your Mac for malware, detects junk files and duplicates, updates apps, and looks for ways to improve your Mac's performance. All you have to do is press the Scan button and let CleanMyMac do the rest. Want to remove junk files, optimize performance and eliminate malware? Download CleanMyMac here and try it for yourself. Once you've downloaded it, follow the steps below to scan your Mac.

- Launch CleanMyMac and press Scan
- When it’s finished scanning your Mac, click Run or Review
What to do if the recovered file doesn’t open in Word
If you find the file in the AutoRecovery folder, but Word won’t open it, you can try a couple of things.
- Drag the file onto your Desktop.
- Go to Word, and click File > Open.
- Click On My Mac, then navigate to your Desktop and select the file.
- Click Show Options if that is displayed at the bottom of the window.
- From the Open menu at the bottom right corner of the window, choose Recover Text.
- Click Open.
If that doesn’t work, the other thing you can try is this:
- Go to your Applications folder and launch Text Edit.
- Drag the file onto the Text Edit icon in the Dock.
How to restore a previous version of a Word document
If the problem is that you have made lots of changes to a Word document or overwritten parts of it and now want to go back to an older version, you can do that.
- Open the file you want an older version of in Word.
- Click on the File menu.
- Choose Browse Version History.
- A sidebar will appear on the right of the document window displaying previous versions of the document, along with a timestamp.
- Locate the version you want to open.
- Click Open Version.
- Either click Restore to return to that version of the document and eliminate the changes you have made since, or Compare to show the current version and the earlier version of the document side by side.
- If you chose Compare, copy and paste what you need from the earlier version to the current version.
How to recover a document if AutoRecover doesn’t work
If Word’s auto recovery doesn’t work, there may still be a chance to recover an earlier version of a document.
1. Check the Trash
If you put a document in the Trash and haven’t emptied it, the document may still be there.
2. Check your OneDrive
If you save Word files to your OneDrive, rather than locally on your Mac, there may be an autosave version of the file there.
3. Use a Time Machine
If you back up your Mac with Time Machine, you may be able to use Time Machine’s Restore feature to recover the document. Here’s how to do it:
- Click the Time Machine icon in the menu bar.
- Choose Browse Time Machine Backups.
- Use the arrows to roll back to the time when you were working on the document in Word.
- Click the Finder window and navigate to ~/Library/Containers/com.Microsoft/Data/Library/Preferences/AutoRecovery. Look for your document in that folder.
You will probably need to preview the contents of files in that folder, as their names won’t be helpful in identifying them. You can use Quick Look by selecting the file and pressing the spacebar. If you find the file you want to recover, click Restore and open it in Word.
4. Try Terminal
Mac has a temporary folder where it keeps some temporary files. Your Word document might be in there.
- Go to Applications > Utilities and launch Terminal.
- Type: open $TMPDIR
- Press Return
Inside the TMP folder is another folder called Temporary Items. Your Word document may be in there.
5. Use data recovery software
If nothing else works, the next option is to use specialist software to recover data. This software works best when you have it already installed before you lose the document you want to recover. However, it's sometimes possible to recover data even if the recovery software wasn't there before. There are several data recovery apps available for Mac, including Disk Drill, which is part of the Setapp suite of apps.
6. Contact a data recovery specialist
If nothing else works, and your document is very important, you could take your Mac to a data recovery specialist. However, this is likely to be very expensive.
How to avoid having to recover files in Word
Prevention is always better than cure, and you can do several things to avoid having to recover an unsaved Word document on your Mac.
1. Save early and often
This is the easiest and most foolproof method of avoiding having to recover unsaved files. As soon as you save a file, AutoRecover kicks in. From then on, you should press Command + S regularly to save the file.
2. Set AutoRecover to save more frequently
You can change how often Word autosaves your documents from its Preferences:
- Launch Word, click the Word menu and choose Preferences.
- In the Output and Sharing section, click Save.
- Make sure that Turn on AutoSave by default, Allow background saves, and Save auto-recovery information are checked. You could also check Always create a backup copy.
In the Save Every menu, change the value from the default 10 minutes to five minutes.
3. Save files to OneDrive
OneDrive is Microsoft’s cloud storage service. And, just as iCloud is deeply integrated with Apple software, OneDrive is deeply integrated with Microsoft tools like Word. If the worst happens and your Mac crashes, or even if it is stolen, you will still be able to access your files from any device connected to your Microsoft 365 account or from any web browser in which you log into your Microsoft account.
As we mentioned earlier, one thing that can cause you to lose unsaved Word documents is malware. It’s rare for Macs to be hit by malware, but it can and does happen, so it’s a good idea to check your Mac for malware regularly. To do that, you’ll need an anti-malware tool. We recommend CleanMyMac. Its Protection feature scans for adware, spyware, and other threats and neutralizes them immediately.

How to easily find and open files in Word
Word has a neat feature that makes it easy to find and open files, even if you’ve opened many files since you last worked on the one you’re looking for. You can pin files to the top of the Open Recent List. Here’s how to do that.
- Click the File menu in Word.
- Hover over the Open Recent selection and choose More in the box that opens.
- Locate the file you want to pin in the list of files.
- Control-click or right-click the file and choose the pin.
- The file will now appear in the Pinned section of the Open Recent box.
Losing work because you haven’t saved a file you were updating is very frustrating. Thankfully, many applications autosave files and store different versions of them these days, so it’s rare to lose all your work. Word is one of those. It has an AutoRecover feature you can customize. Follow the steps above to recover unsaved Word documents on your Mac, and don’t forget the advice on how to avoid retrieving documents in the first place.


