Stuck wondering how to remove write protection on a micro SD card? You're not the only one. When you're trying to transfer files or start editing, and you get caught in the read-only loop, it's the kind of problem that makes you second-guess everything: your card, your reader, even your Mac.
I ran into this while backing up footage. One minute, the files were right there, ready to go. The next? Locked down. I couldn't drag them or delete them.
The worst part is how little your Mac tells you about what's actually wrong. So I started digging, hopped on the forums, and started testing on my Mac running Sequoia from trying different cards, readers, Terminal commands, and even maintenance tools. Some fixes helped. Some didn't. What I learned was that write protection can come from more than one place, and if you don't know where to look, you'll waste a ton of time.
So here's everything I've uncovered along the way.
What is SD card protection?
If you've ever stuck your SD card into your Mac and couldn't delete a file, or worse, couldn't format it, you're dealing with write protection.
It's like a tiny digital padlock on your card, and it's incredibly frustrating when you're in the middle of a transfer or trying to clear space for a project. In simple terms, write protection stops any data from being altered or deleted on the card.
There are two kinds: hardware and software. A physical switch on the card (which is more common on standard SDs, not microSDs) can trigger this. But more often, especially with microSD cards used in drones or cameras, the issue is software-based. And that's when macOS starts throwing errors like 'The operation couldn't be completed.'
So, let's get into the steps on how to remove write protection on SD cards.
How to disable write protection on an SD card
I've put these tips in logical order. Work your way through them, and hopefully, one of them will be the trick you've been searching for.
1. Check the physical card
If you're using a full-size SD card, chances are it has a lock switch; here's how to check:
- Remove the card from your reader.
- Look on both sides for a tiny switch.
- Slide it up toward the connectors to disable write protection.
Tip: That switch can get loose with age and sometimes gets damaged; if you think the switch is sliding by itself, make sure you backup your content quickly and consider replacing the SD card.
Also worth mentioning here is if you're using a USB-C Hub or adapter, it might be causing the issue. My SD card showed up, but wouldn't allow changes. No errors, no permissions flags, just stuck. Turns out, it was a power delivery issue through a cheap USB-C hub.
I swapped to a direct SD reader plugged into the MacBook's port, and suddenly, everything worked. No write protection errors, no Finder lockups. Write protection isn't always a software lock; it can also be your Mac struggling to maintain a clean data connection with the card. A weak link in your hardware chain can trigger intermittent write failures that look like protection issues.
2. Inspect your Disk permissions
OK, so if it wasn't a lock switch issue, the next logical step is to check your Mac's Disk permissions.
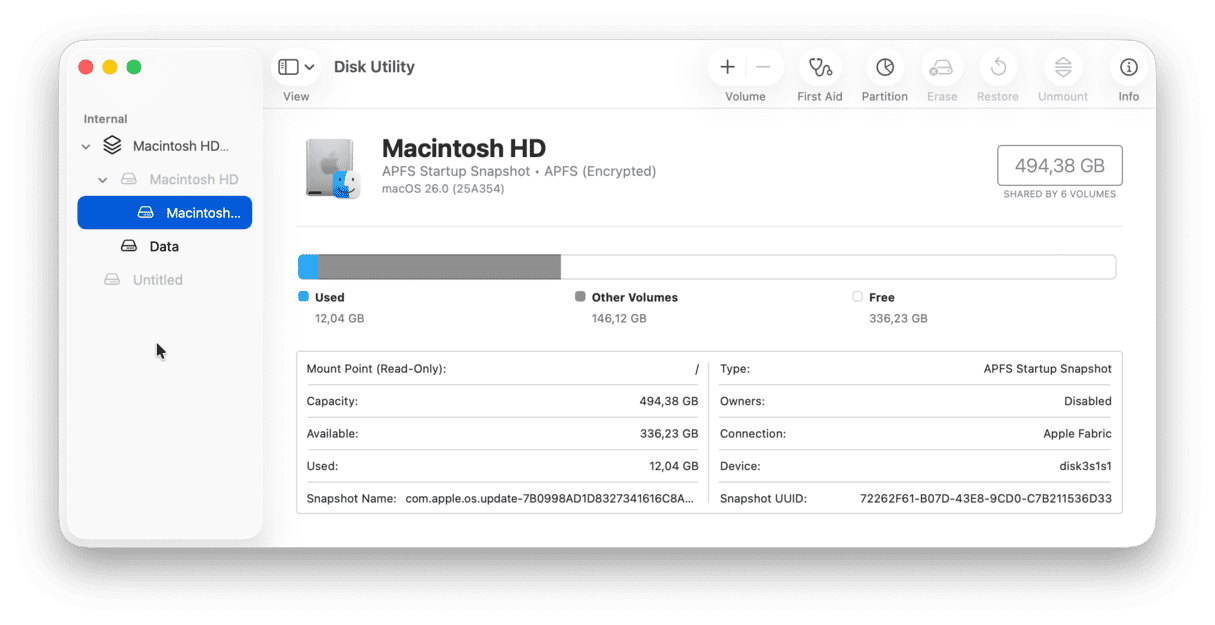
- Open Disk Utility (Applications > Utilities).
- Select your SD card from the left panel.
- Click First Aid from the top; it can help with minor permission bugs.
Still, locked? You're in the same boat I was in. Time for Terminal.
3. Use Terminal to disable write protection
Terminal gives more us a little extra control. Here's how I managed it:
- Make sure your SD card is inserted into your Mac, and open Terminal (Applications > Utilities).
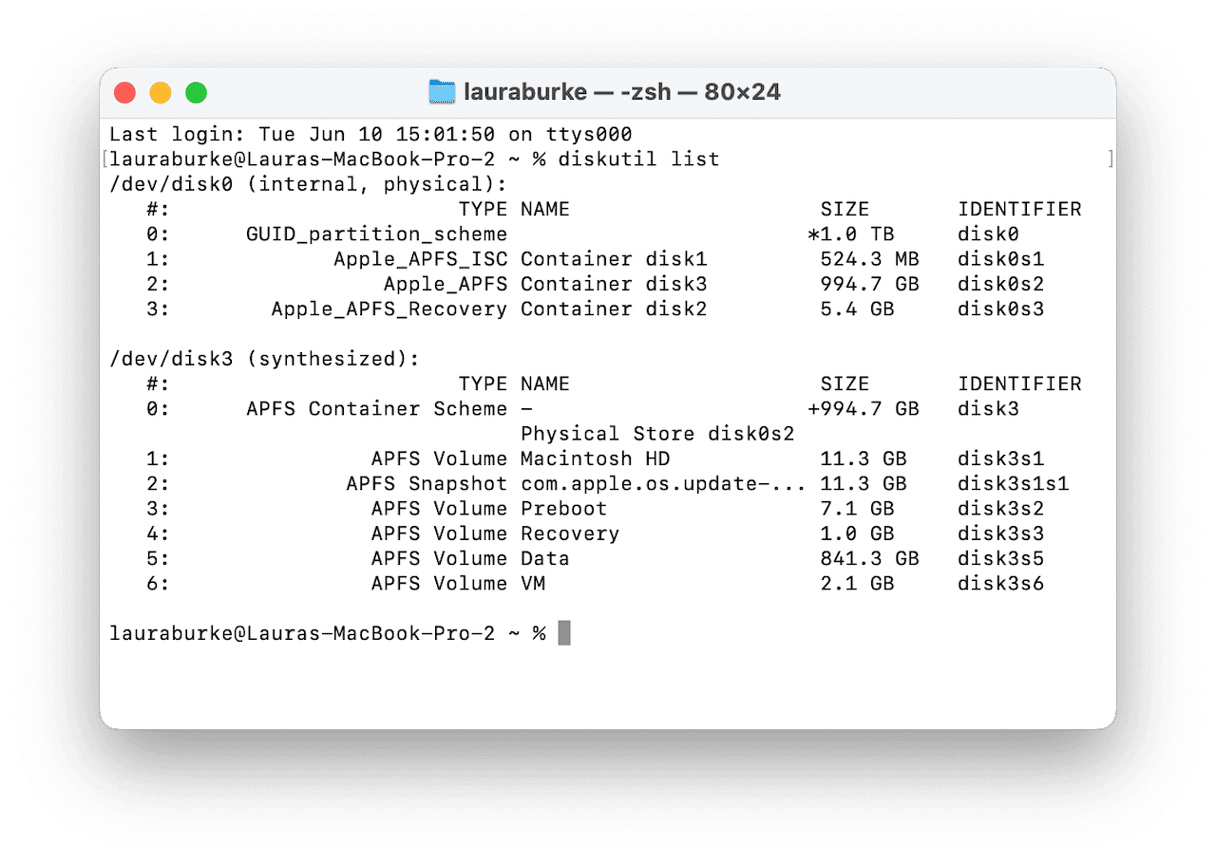
- Type in this command followed by Return to see a full list of connected drives:
diskutil list - This shows every drive connected to your Mac. You're looking for your SD card's identifier; it'll look like disk2, disk3, or something like that. You'll usually see your card's name or size next to it, which helps you spot it.
- Next, use this command to try turning off write protection:
sudo diskutil enableOwnership /dev/diskX(replace diskX with your actual disk number). It'll ask for your admin password. Type it (you won't see it appear, just press Return when you're done).
Now, you can try and use your SD card again. If it works, you're good. If not, keep on reading.
4. Check for Spotlight Indexing conflicts
OK, this might sound random, and it's one I certainly hadn't expected, but there are loads of threads about this on user forums. Spotlight indexing can cause weird write behavior on SD cards, especially ones formatted in exFAT or used on both macOS and Android devices.
Spotlight might be trying to index the card, but then it gets stuck and silently triggers a write failure.
You won't see any error message about this; it just stops you from modifying files. So, here is what you can do to try and solve it:
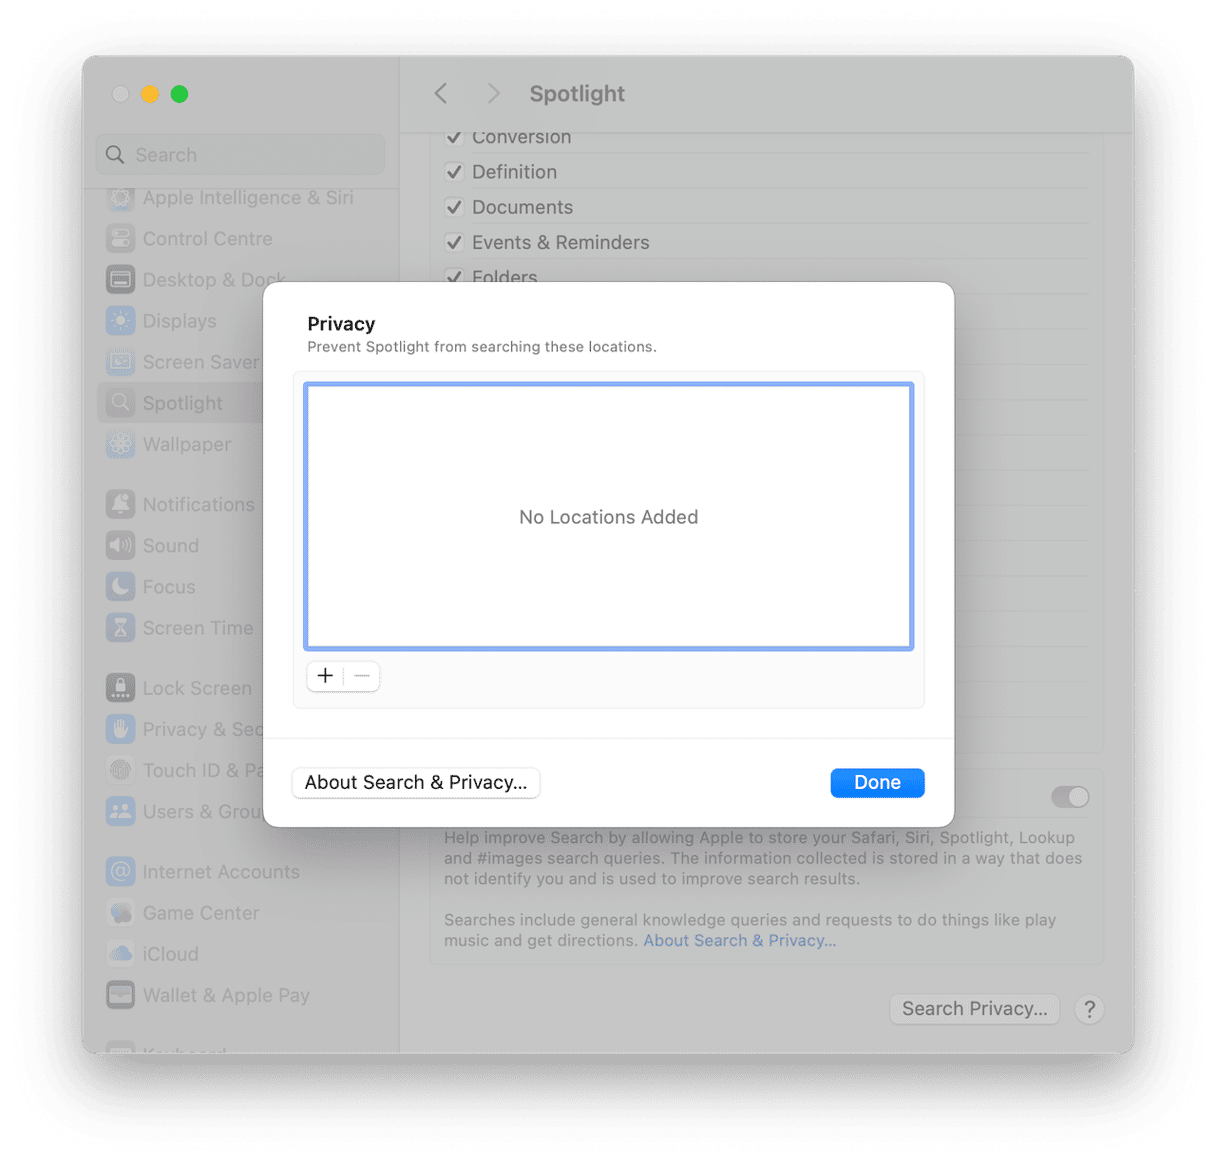
- Open System Settings > Spotlight.
- Scroll down and click Search Privacy.
- Click the + button and add your SD card to this window.
- Reject your card safely and reinsert it.
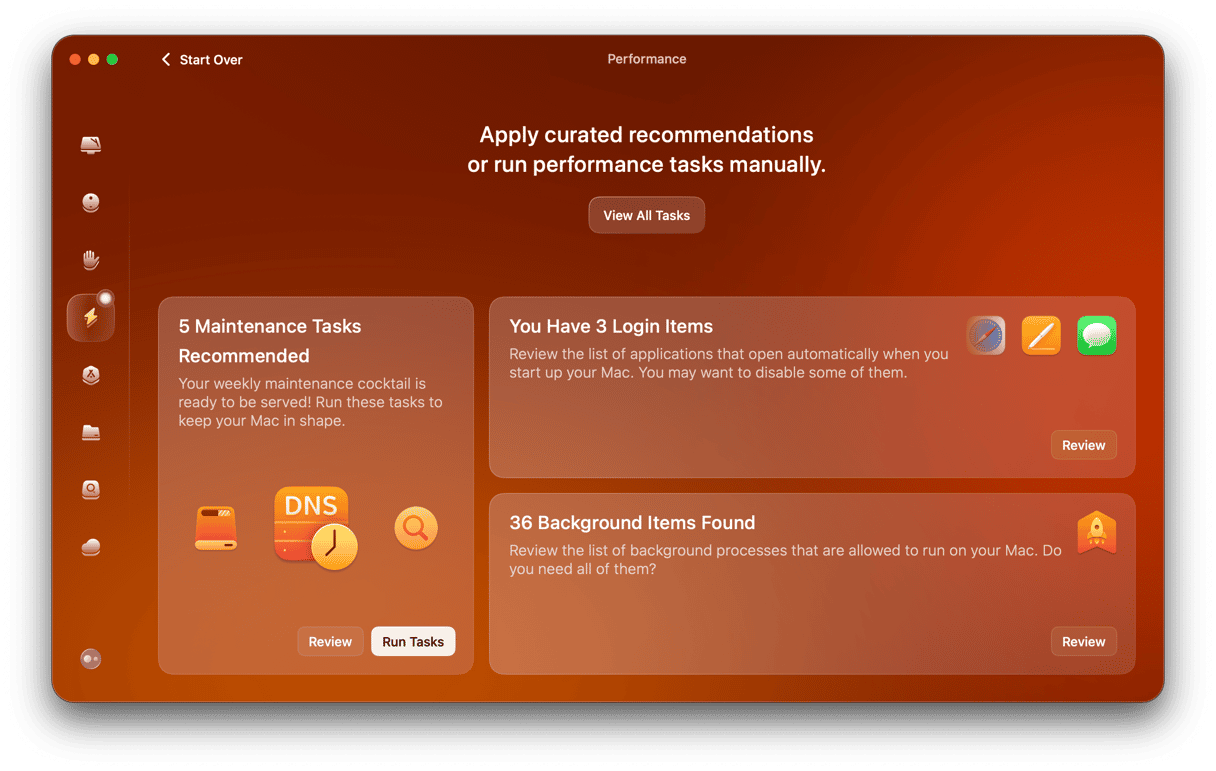
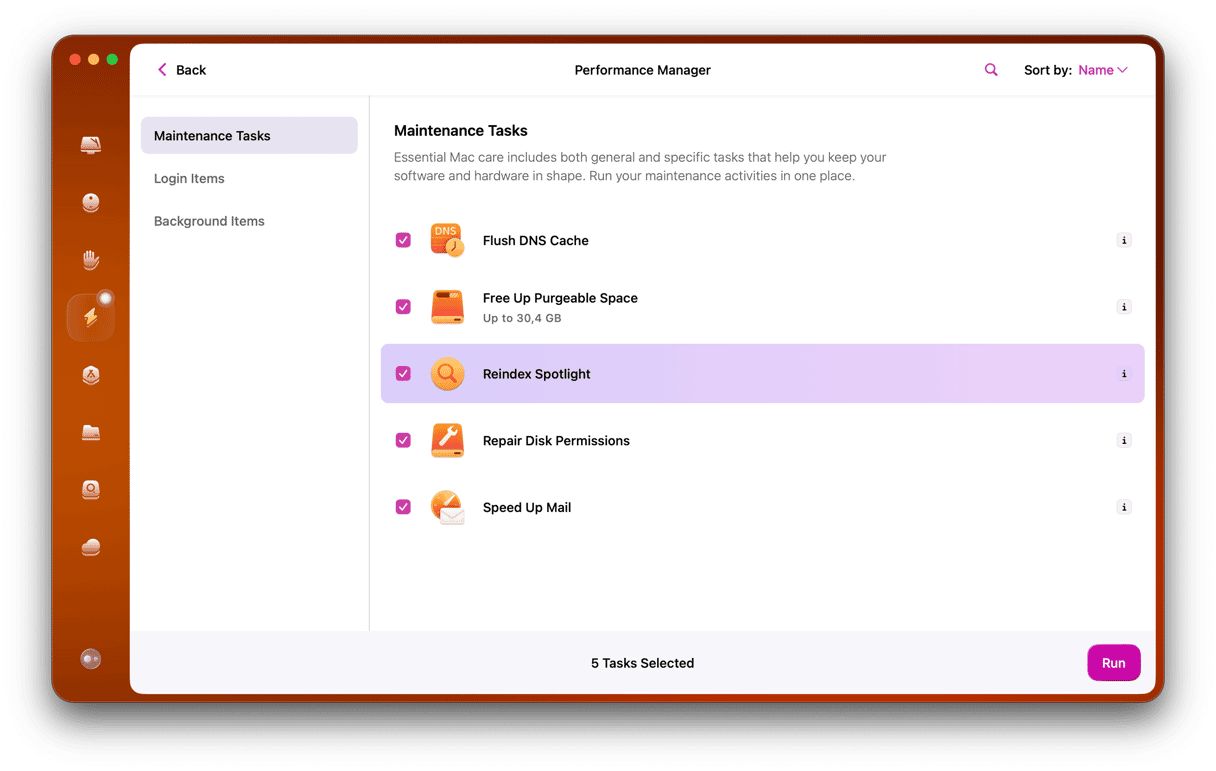
You can do this much faster with CleanMyMac. Its Performance feature comes with the Reindex Spotlight tool that does all the hard work in a few easy clicks. Here's how it works:
- Start your free CleanMyMac trial — test the app for 7 days at zero cost.
- Open CleanMyMac and click Performance > Scan.
- Click View All Tasks > Maintenance Tasks from the sidebar.
- Select Reindex Spotlight > Run.
Other things that can cause SD Card write protection issues
Let's not forget that Apple keeps tightening disk access with each macOS update. In macOS Sequoia, System Integrity Protection (SIP) is even more aggressive.
But here's the twist: sometimes your Mac isn't the problem at all. A surprising number of SD cards in 2025 come with built-in firmware-level write protection. These aren't mechanical locks; they're hidden controller flags inside the card itself. And they can be tripped by something as simple as pulling the card out too soon, especially while files are still being written or indexed. That's what happened to me: ejected too fast from Finder, and poof, locked.
How to avoid tripping Firmware write locks
1. Always eject safely
It's tempting to just pull your SD card out, especially if you're in a rush, but don't. Make sure to right-click the card in Finder and select Eject.
2. Wait for the light
If your reader or Mac has a card access light, wait until it stops blinking. That usually means the file system is done writing.
3. Avoid low-end readers
I've had budget USB-C card readers corrupt multiple cards. Stick with known brands that support UHS speeds and macOS.
If you've already tripped the lock
Here's the not-so-great news: you can't fix firmware-level locks with Disk Utility or Terminal. You'll usually need manufacturer repair tools like:
- SanDisk SD Formatter
- Kingston Format Utility
- Lexar Recovery Tool
These tools often require Windows. No macOS versions yet, unfortunately. If you're Mac-only like I am, I've found Terminal is the only tool that's reliably worked for me, at least for non-firmware locks.
If you're dealing with a stubborn card that won't budge even after all this, it might be worth testing it on a PC. I've had luck formatting a few stuck cards on an old Windows laptop, then bringing them back to Mac and using Disk Utility to format them cleanly into APFS or ExFAT.
So, if you're wondering how to remove write protection on a micro SD card with just your Mac, I've been there, and now you've got real, tested steps to try. Removing write protection on SD cards in 2025 isn't just about toggling a switch; it's often about understanding macOS security layers and firmware behavior. But once you know where to look, it's surprisingly fixable.


