If you’ve ever needed to resize or compress an image on your Mac but thought you didn’t have the right software to do so, think again!
In a few simple steps, you can easily resize an image, crop a specific focus area of an image, or compress your image. Better yet, you can do all of these tasks without having to download expensive editing software.
We’ll walk you through some simple step-by-step guides on how to edit and compress image files quickly and easily using the Preview application on your Mac.
How to resize an image in the Preview app
First, open the Finder on your Mac. In the Finder, navigate to the place where your desired image is located (such as Desktop, Downloads, or Recents) and open the image.
The image should open by default in Preview. If it opens in another application instead, you can right-click the image using the mouse (or two-finger click the image on your Mac trackpad) and choose to open it with the Preview application.

Once you’ve opened the image file in Preview, go to the Preview menu on the top left of your screen, select Tools, and then click Adjust Size. From here, you can resize your image by adjusting its height and width. You can choose pixels, cm, mm, points, percent, or inches as size options. Select the “Scale Proportionally” box to make sure your image won’t be distorted or skewed after it’s resized.

Right under the image dimensions adjuster, you can find the Resulting Size of your image.
Another useful image editing tool in the Preview application is the Crop feature. This feature allows you to easily select the focus area of an image and crop accordingly.
First, click and drag to select the desired area of your image. A dotted outline will appear to highlight your selection.
From here, you can adjust the dimensions of your final image by clicking and dragging the blue circles until you’re satisfied. Then, go back to Tools and select Crop from the dropdown menu to crop the desired part of the image. (You can also crop an image with the keyboard shortcut Command + K).

This feature is especially useful when you want to change the size of an image without reducing its quality (or just remove a particular area of an image).
How to compress an image in the Preview App
Whether you are looking to easily share an image through email or save disk space on your Mac, compressing an image file is a simple way to reduce file size without sacrificing quality. Compressing an image is also useful when uploading an image somewhere that has a maximum file size limit.
To compress your image, open Preview. Click Open from the Preview menu and choose Open to choose an image you want to compress. Then navigate to the Tools option and select Adjust Size.

At the top of the Adjust Image window, you’ll see the “Fit into” option. The default selection is Custom, but you can select different pixel dimensions from the dropdown list and compress your image. Then take a look at the Resulting Size field to see how your file size has changed.
There’s also another way to compress an image using Preview. But this method affects the quality of your image.
- Open the image in Preview.
- Go to the Preview menu and select File.
- Choose Export.
- Change the format of the image to JPEG.
Here you can adjust the quality, which in turn will compress the size of the image.
Locate and remove large and old files
If you’re looking to save additional disk space, check out CleanMyMac and its My Clutter feature. It finds the heaviest files on your Mac or external drives and groups them by kind, size, and access date. This saves you the burden of navigating through endless files and folders — instead, you can decide which files you’d like to remove based on a comprehensively arranged list of files.
It also locates duplicate files and similar images.

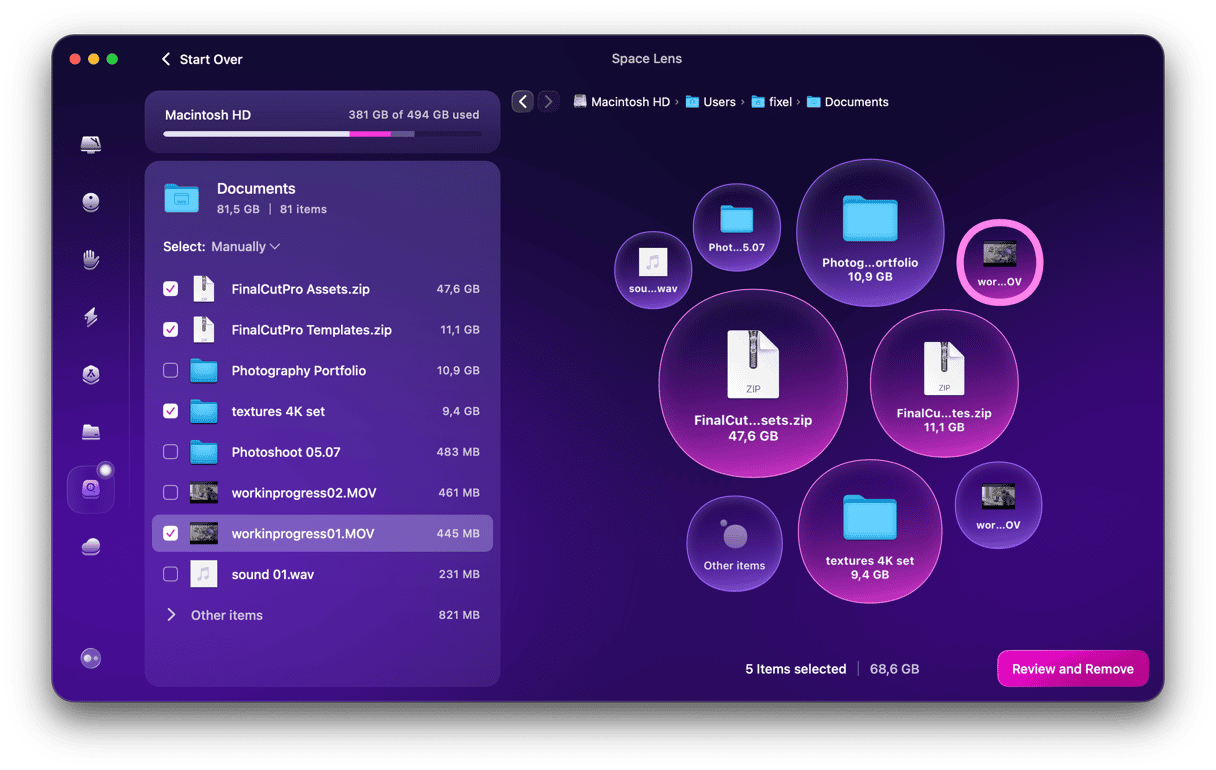
If you want a broader perspective, you can go to another tab — Space Lens. It builds a virtual map of your storage, showing the size and location of each file.
To get to use Space Lens and other features of CleanMyMac:
- Get your free CleanMyMac trial — you can test it for 7 days.
- Install and open the app.
- Go to Space Lens and click Scan.

Once CleanMyMac shows you all the files you have, you can simply select the ones you don’t need and click Remove.
Hopefully, now you can crop and compress your images. And if you have been hoarding lots of files, decluttering your Mac once in a while is a must, and CleanMyMac will help you with that. That’s all for today!


