Apple’s APFS file system is a modern and robust format for internal and external disks and is now the default for macOS. Most of the time, it works flawlessly, and you don’t have to think about it. But now and again, things go wrong and a disk becomes corrupted. Sometimes, this happens while Time Machine is trying to initiate a backup and can’t find the disk. In that situation, you might see a message in the log file that says “Space manager is invalid.” In this article, we’ll explain what that means and what you can do about it.
What does “Space manager is invalid” mean?
“Space manager is invalid” is one of those esoteric error messages that can mean a number of things. This one means that macOS can’t read the disk’s file directory and so can’t access any of the files on it or write files to it. That usually points to a corrupt disk. Unfortunately, fixing a corrupt disk without losing the data already on it is very difficult, if it’s possible at all.
How to fix the “Space manager is invalid” error
The first thing to do, if you have data on the disk that you need, is to try to recover it. To do that, you will need third-party data recovery software, such as Disk Drill. Data recovery tools are able to access files on a disk even when the file system is corrupt or can’t be accessed by macOS. It’s important to note that if you don’t recover the data now, before you try to fix the problem, the chances of recovering it later are very slim.
Once you’ve recovered data or decided you don’t need the data, you can take steps to fix the disk.
1. Mount the disk
Sometimes, your macOS does not see the disk because it thinks that the disk is unmounted. So, the first is to try to mount it in the Finder.
- Connect the disk to your Mac if it’s not already plugged in.
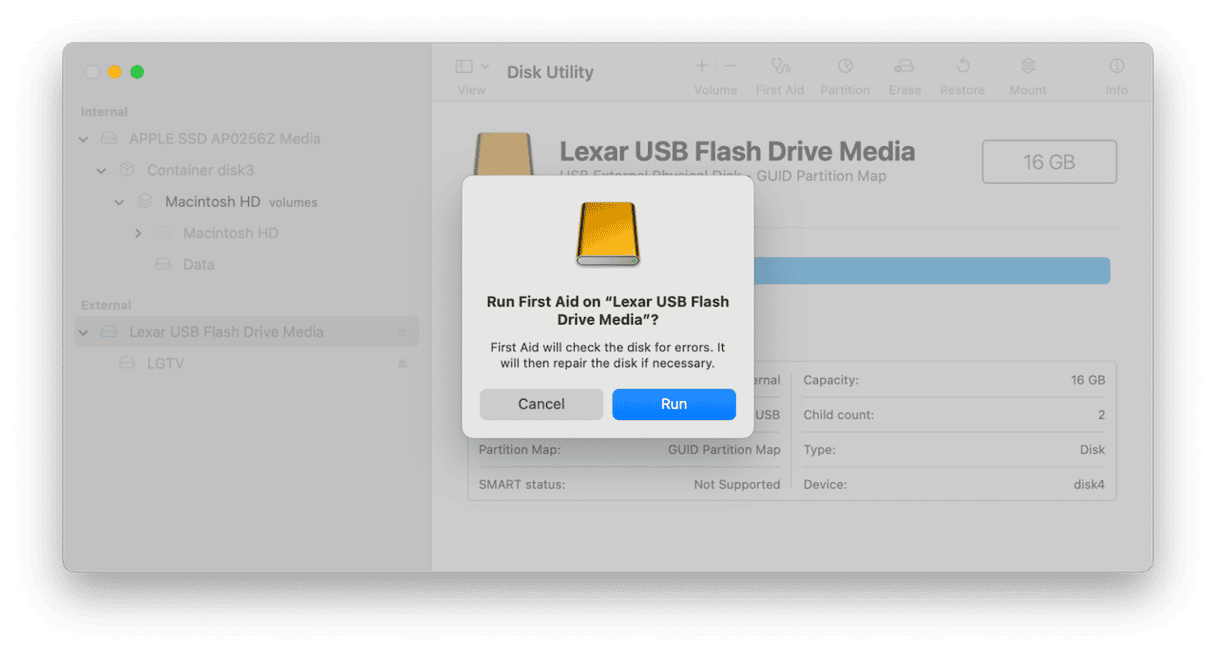
- Go to Applications > Utilities and open Disk Utility.
- Select the disk in the sidebar.
- Click Mount in the toolbar.
- If the disk mounts successfully, you can try to repair it by clicking First Aid.
- Click Run.
- If that’s successful, you will see a message telling you the disk has been repaired.
2. Run Disk Utility in recovery mode
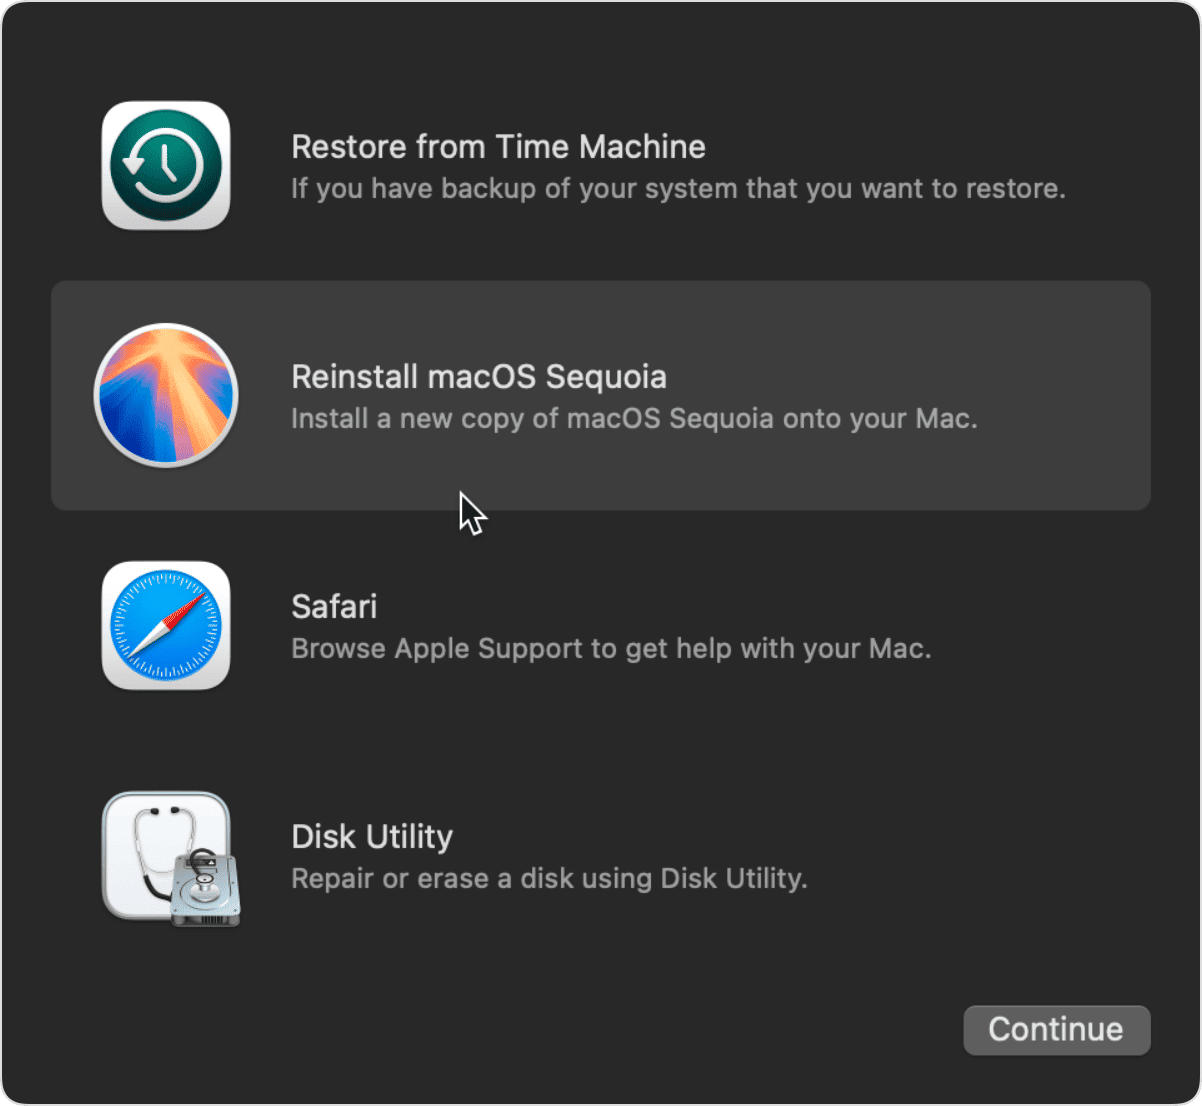
If that didn’t work, or you couldn’t mount the disk, the next step is to boot your Mac into recovery mode and try to use Disk Utility to repair it there.
- To boot your Mac in recovery mode on an Intel-based Mac, hold down Command-R and press the power or Touch ID button. Wait for the Apple logo to appear and then release the keys. Wait a little longer for macOS Utilities to appear.
On a Mac with Apple silicon, press and hold the power button until you see the startup options screen. Click Options, then Continue. Type in your username and password. - When you see macOS Utilities on screen, select Disk Utility.
- Choose the drive that has the problem, and click First Aid.
- Choose Run and wait for Disk Utility to attempt to fix the problem.
- When it’s finished, if it’s successful, restart your Mac normally.
3. Use Terminal
If Disk Utility can’t repair the disk either when you boot normally or in recovery mode, the next step is to try to repair the disk using Terminal.
- Boot your Mac normally.
- Go to Applications > Utilities and open Terminal.
- Type
diskutil listand press Return. - You will see a list of volumes together with identifier codes. Locate the disk you’re trying to fix and note its identifier.
- Type:
fsck_apfs -y /dev/your disk identifierwhereyour disk identifieris the number you noted at step 4. - Press Return and wait for it to check the disk and repair it.
4. Reformat your disk
If nothing so far has worked, it’s likely that the disk cannot be repaired and the only option left is to reformat it, which will erase all the data on it and reconfigure it.
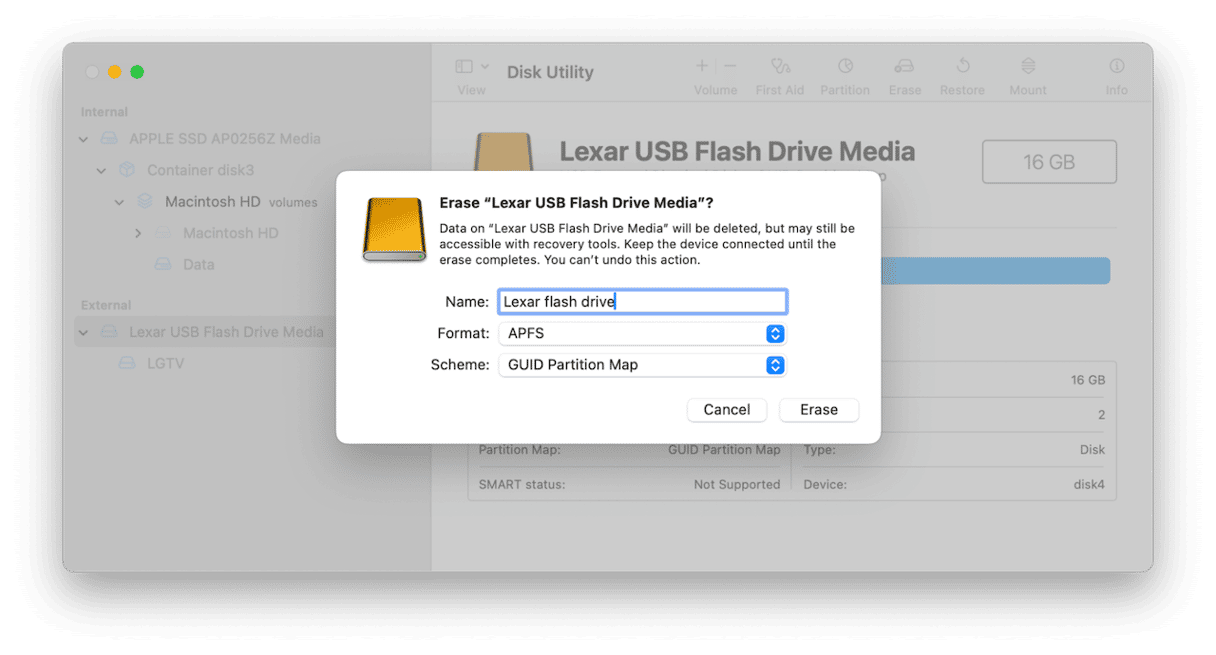
- Open Disk Utility and select the disk in the sidebar.
- Click Erase.
- Give the disk a name and choose a format – you should choose APFS unless you have a good reason not to.
- Follow the instructions on the screen to complete the process.
Problems with disks are less common than they used to be thanks to SSD technology and the APFS format. But they do still occur. When that happens you may see a message in your Mac’s log files that says ‘Space manager is invalid.’ Follow the steps above to fix the problem and get the drive working again.


