One of the areas in the Mac user experience Apple has grappled with over recent versions of macOS is how to arrange windows on the screen when you’re working with several of them at a time. Until recently, third-party apps offered a better way of doing that than macOS itself. And the launch of Stage Manager a couple of years ago didn’t change that. However, the new tiled window support in macOS Sequoia looks like it might finally fix that. However, you can split screen on your Mac in earlier versions of macOS and have been able to do that for several years. In this article, we’ll show you how to do it.
Why split screen on Mac?
There are lots of reasons why you might want a split screen when you’re using your Mac. If you’re writing a report, for example, you might need to refer to figures in an Excel table. Or you might need to compare one PDF with another file or a web page. You could open each in a separate window and then click between them, or put each in a separate Space and swipe between them. But the easiest way to do it while making the most of your screen space is to have two windows side by side on a split screen, or Split View as Apple calls it.

How to do split screen on Mac
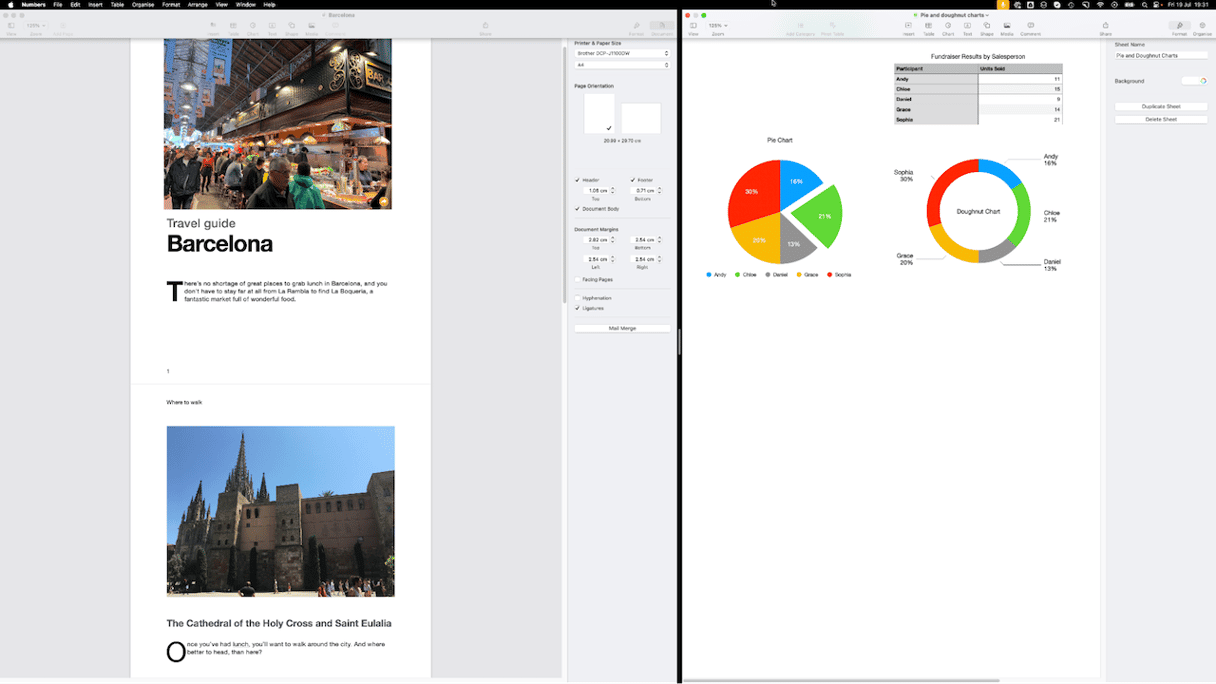
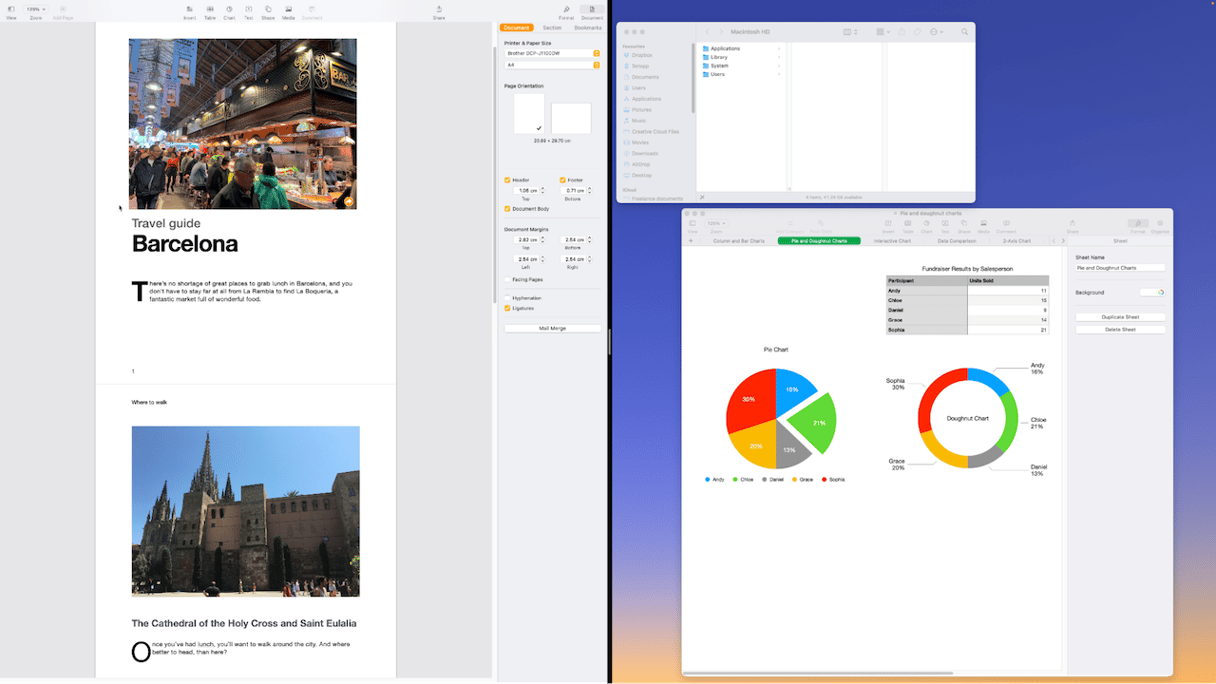
Split screen mode allows you to put two application windows side by side on one desktop space and control how much of the space each window occupies. The windows can be from the same app or from different apps.
Here’s how to split screen on Mac:
- Open the applications you want to share on the split screen and open the documents you want to place side by side.
- Click and hold the green button at the top left of one of the documents.
- Choose whether to tile it on the left or the right of the screen.
- On the empty side of the screen, you will see thumbnails of windows that are available for occupying that side of the screen. Click the one you want.
- You can drag the handle in the middle of the line between the app screens left or right to change how much space is allocated to each window.

What is the shortcut for split screen on Mac?
You can also use a shortcut to split screen on your Mac. Here’s how:
- Open one of the apps or documents that you need to view in Split View and press Control + Command + F — it is the shortcut used to enter full-screen mode.
- Once you’re in the full-screen mode, press F3 — this will invoke Mission Control.
- You will now see all other apps that are currently open. Drag the second app or document onto the one that’s in full-screen mode.
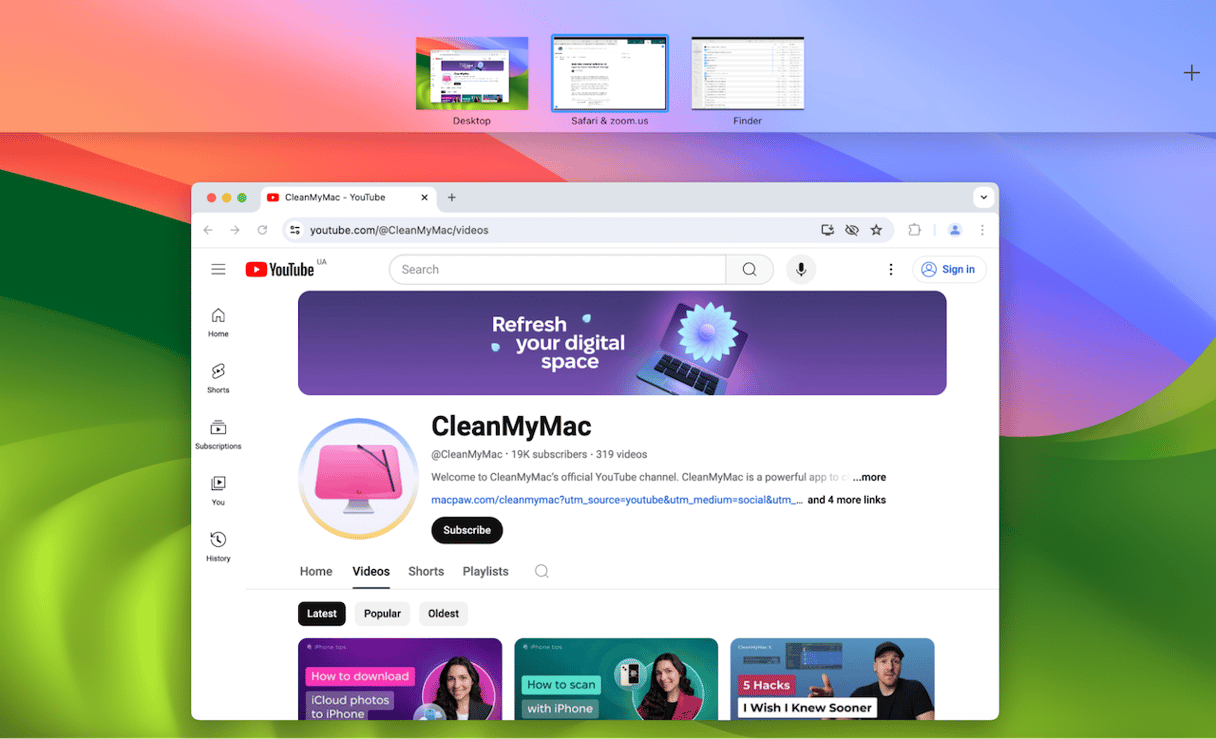
- If you press F3 again, at the top of the screen, you’ll see your split screen apps (like Safari & Zoom in the screenshot below).

How to exit split screen on Mac
If you no longer want to split your Mac’s screen between two windows, do one of the following:
- Close one of the documents sharing the split screen.
- Quit one of the apps sharing the split screen.
- Click the green dot at the top left of one of the windows.
- Click and hold on the green dot and choose Replace to swap the window with another one.
- Click and hold on the green dot on one of the app windows and choose Move to Desktop or Make Full Screen.

How to use window tiling in macOS Sequoia
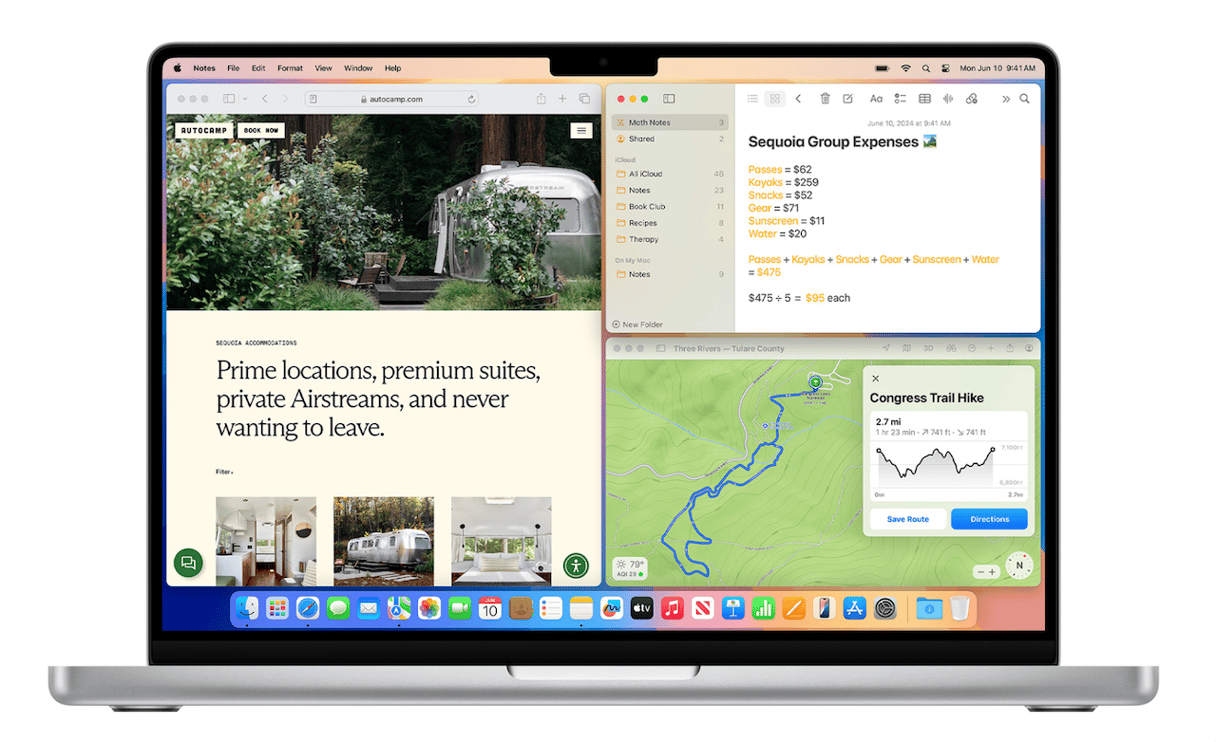
macOS Sequoia added a new option for laying out windows on your desktop. Instead of having just two windows side by side, you can arrange four windows in corners of the screen.
By default, window tiling in Sequoia allows you to drag a window to the side of the screen, for a two-window side-by-side layout, or to the corner of the screen for a four-window (2 x 2) layout. However, there are other options. If you go to System Settings > Desktop & Dock, you can turn off tiling by dragging and turn on an option where you hold down the Option key to tile windows. In this method, when you click and hold a window, hold down the option key, and then move the window, you will see the layout frame appear and you can drop the window into one of the zones.
The third method for using window tiling in Sequoia is the same green button you used to split screen on Sonoma and earlier. In Sequoia, when you click that button, you will see more options. Instead of just full screen, left and right options, you will see two rows, Move & Resize and Fill & Arrange. These allow you to move a window to a section of the screen on its own or arrange it with other windows in a configuration of two, three, or four windows.

When it comes to using split screen on macOS Sequoia, there are a few things to bear in mind:
- The maximum number of tiles is four.
- If you add more than one window to a zone, macOS will stack them.
- You can adjust the size of a window when it’s been placed, but you can’t adjust the size of the zones in layout templates.
- Some apps are designed to have a minimum window size. If a layout you choose involves making a window smaller than that, it won’t work.
There you go, you now know how to split screen on your Mac. Remember, in versions of macOS up to and including Sonoma, you can only have two windows side by side. They can be from the same app or different apps, and you can decide how much space each occupies. In macOS Sequoia, you can tile up to four windows in different arrangements, either by using the same green button as you do for split screen mode or by dragging windows to the edge or corner of the screen.


