Syncing iPhone to Mac was a regular activity just a few years ago. With faster mobile speeds, more space, great streaming apps like Spotify and Listen, and more people syncing their data with iCloud, the need to physically sync isn’t as great as it used to be. Particularly once Apple made it so that iOS updates didn’t have to run through iTunes on your Mac.
But, let's face it, we still want to add movies, music, and TV shows to our iPhones. We also want to save our photos and videos directly to our Macs from time to time. That’s when we need to sync our iPhones with iTunes.
In this guide, we’ll reveal some best practices for syncing. We also have some secret tips for maintaining a clean and optimized Mac that is free of junk cache files generated during syncing.
How to sync iOS devices with Mac
Syncing iPhone with Mac via cable
The most common way to sync iPhone to Mac is with the cable that came with your phone. Use this cable to connect your iPhone to your Mac and then launch iTunes (if it doesn’t launch automatically) to start syncing your media.
iTunes doesn’t just help you sync your media. Here are some other popular syncing options to get the most of your iPhone and Mac:
- Sync notes from iPhone to Mac
- Sync iPhone contacts to your Mac
- Sync messages from iPhone to Mac
- Sync Mac calendar with iPhone
These are easy to sync in iTunes or by turning on iCloud sync in each app. A little more challenging is how to sync Outlook calendar with iPhone.

Sync Outlook calendar with iPhone
Recently, Outlook 2016 had problems syncing with iTunes but the problem seems to have been resolved. Just make sure everything is up to date.
To sync Outlook calendar with your iPhone follow these steps:
- Make sure the iTunes plugin is added to Outlook plugins (File > Options > Add-ins > COM Add-ins). Note - Outlook 2016 doesn’t use the plugin to sync anymore so it won’t be there for this version.
- Connect your iPhone to your Mac and launch iTunes.
- In iTunes click on your iPhones name and then click on the Info tab.
- Scroll down to calendars and choose the calendars you want synced.
- Click Apply.
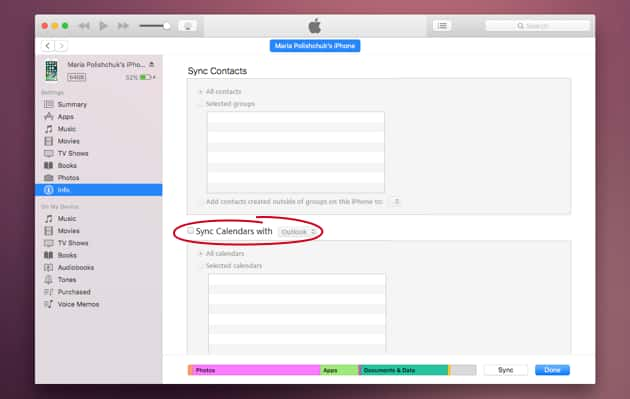
The same method can be used to sync Outlook contacts with your iPhone - just look for the Contacts section on the Info tab.

iPhone Sync to iTunes over Wi-Fi
If connecting your iPhone to your Mac via a cable feels like a strait jacket, you can now break free by setting up a sync through your Wi-Fi connection. That’s right, no more looking for cables. If only we could charge this way as well…hey Apple, what are you waiting for?
There is a downside to this freedom; the speeds won’t be as fast as when connected with a cable. But if you value convenience over speed, let’s get to the steps you’ll need to setup wireless iPhone sync with Mac.
- Unfortunately you’ll need your USB cable to set up Wi-Fi syncing for the first time.
- Connect your iPhone to your Mac via your cable.
- Launch iTunes and click on the iPhone icon.
- Click on the Summary tab.
- Under Options check the Sync with this iPhone over Wi-Fi box and click Apply.
- Now you can remove the cable. Freedom is at hand!
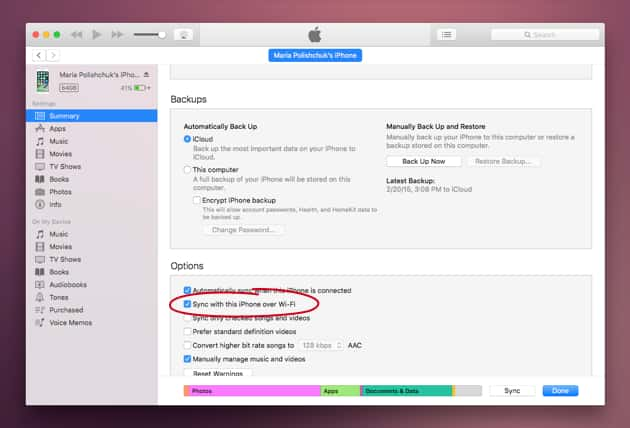
That’s it. Now, in future, when your iPhone connects to the same Wi-Fi connection it will be available for syncing in iTunes.
Now go ahead and throw that iPhone cable in the trash!*
*Don’t do that. That’s a terrible idea.
Clean up iTunes Syncing Cached Files
How to sync iPhones to iTunes? Solved!
Now let’s look at some iTunes tips and tricks to solve other iTunes problem – its love of wasting space.
For every good thing iTunes does it seems to generate unnecessary junk (it can be photos caches like images copies from iCloud, music caches like duplicates from iTunes, movies files caches from media players, or download histories of iOS devices); junk which it won’t clean up itself. With a few easy steps you can clean up after iTunes to free up space on your hard disk and make your system faster.

Remove iTunes Backups
iPhone backups can take up a lot of space. You may find that you have old backups that aren’t needed anymore or a current backup that you’d like to move to an external drive or the cloud to save space on your system.
Luckily this is not hard to do.
- Open iTunes Click Menu > Preferences > Devices
- Control-click the backup you want and show in finder to then move it somewhere else.
- To delete instead, highlight the backup and click Delete Backup.
- Confirm
You can also use CleanMyMac, which is a specialist Mac cleaning app that is brilliant for removing iTunes junk. It even has a section called iTunes Junk!

Remove Old iOS Updates
If you update your phone by syncing your iPhone with iTunes, instead of running the update from the phone itself, then you’ll probably find that iTunes has kept the old iOS setup files. After the update, these files serve no purpose other than to annoy you when you discover how much space they are wasting.
To manually find these old iOS update files navigate to ~/Library/iTunes/iPhone Software Updates and move them to the trash.
Alternatively, to automatically remove old iOS updates and other iTunes junk, CleanMyMac is the one-click solution. It only removes files you don’t need, which gives peace of mind for those who worry about doing something wrong.

Remove Broken iTunes Downloads
It’s frustrating enough when an iTunes download fails. But it’s even worse when you realize this download, which you can’t even use, is taking up your precious hard drive space. Thankfully, removing broken downloads is as easy as it gets with CleanMyMac.
Within CleanMyMac you will find a Smart Clean scan as well as a specialized iTunes Junk scan. Either option will quickly hunt down your broken downloads and present you with the option to remove them from your system with a single satisfying click.

Remove Photos Cache
Cache files serve a purpose, increasing the speed of certain actions, but the real world impact is minimal. With all the syncing that occurs today, you may not realize just how many cache files are being created without your knowledge.
One of the worst offenders is Photos, so if your Mac is low on space one of the first things to look at is your Photos cache folder. You’d be surprised how big it can get. One solution is to delete the cache folder. Your actual library photos will remain untouched.
To remove your Photos cache files:
- Open Finder and control click on Pictures > Photos Library and click Show Package Contents.
- Drag the Photos Cache folder to the trash.
Important Note - Manually deleting the cache folder could potentially cause a corruption of the Photos app. A safer and easier solution would be to download and install CleanMyMac.
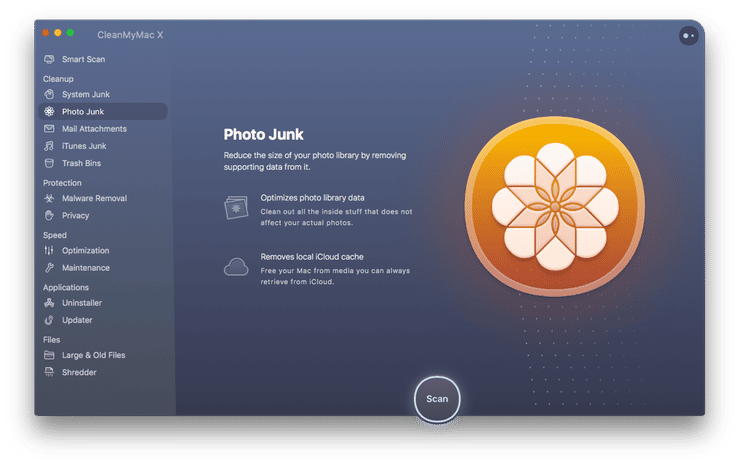
To use CleanMyMac to safely remove your Photos cache files:
- Download, launch CleanMyMac
- Select Photos Junk in the left menu
- Locate your library and click Scan
- Click Clean
Remove Duplicates
Speaking of photos, once you start using multiple devices it’s very easy for your iPhone photos to get backed up and duplicated all over the place. Things can get messy very quickly, and an iPhone sync with Photos just complicates the process even more.
Manually looking through your system for duplicate photos is a nightmare. Instead, try a Gemini 2 The Duplicate Finder. It will quickly scan your system and present all your duplicate photos, making it incredibly easy to choose what stays and what goes.
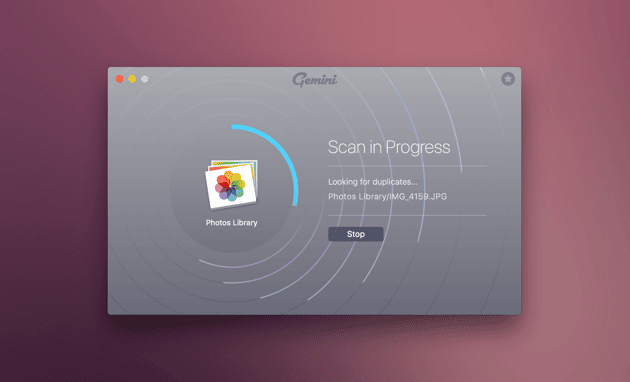
It’s not just duplicate photos that you can get rid of. You can also use the app to scan your iTunes library for duplicates of songs that you’ve accumulated over the years.
You’ll be amazed at how many of them are hidden all over your Mac, and how much space you can free up. As with CleanMyMac, Gemini is incredibly safe. In fact, if you remove a photo by mistake, it can easily bring that photo back from the dead.

One-stop sync solution for your iPhone
We’ve described several ways of syncing different data between Mac and iPhone or any iOS running device. But if you are looking for one-stop solution that will sync all data between Mac and your iPhone directly, within one app and without the need to use cloud storages — take a look at SyncMate.
This app will sync contacts, calendar events, folders with files, Safari bookmarks, photos and music directly between native apps on Mac and iPhone. You can mount iPhone as Mac disk and work with it’s content in Finder, view text messages and calls history on Mac, backup iPhone data on Mac; sync can be performed in background and automatically. Note, due to iOS limitations folders on Mac can be synced with User/media folder on iOS only, as well as Mount option allows mounting this exact folder only. More about syncing iOS with Mac using SyncMate along with the full list of sync options and sync directions for them can be found here.
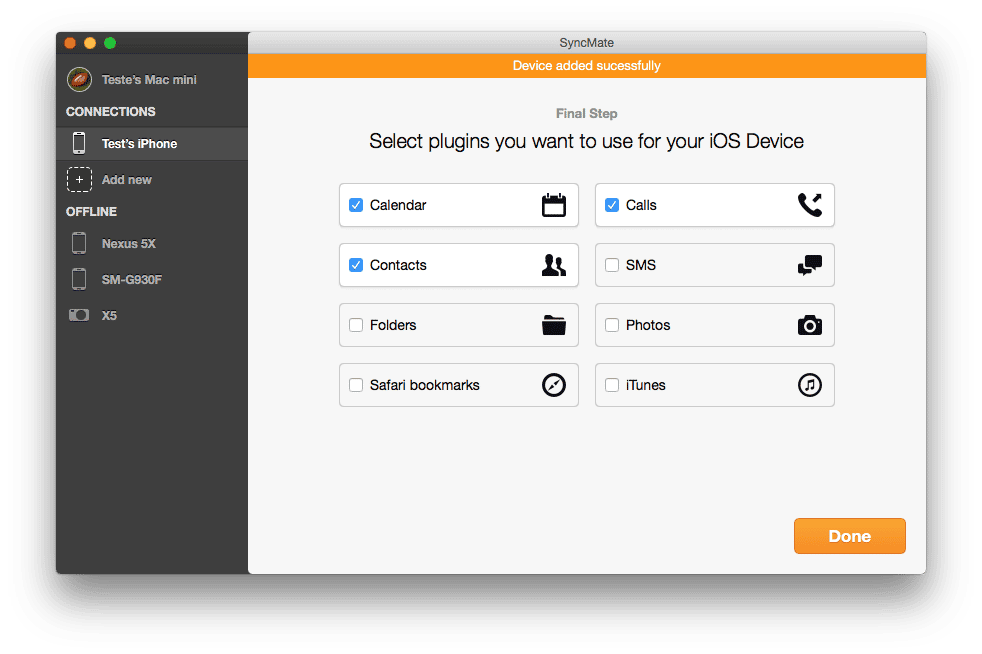
BTW, iOS devices are not the only ones SyncMate supports. With SyncMate you can sync data on Mac with Android, mounted or MTP devices, other Macs, Google, iCloud and Dropbox accounts, Microsoft service — one app fits all.
Sync and Swim
When we know we have to sync our Mac with iPhone, it can feel like a chore. We hope that this guide has given you the tools to make syncing iPhone to iTunes much easier and more productive. Not just for you but also for your Mac, which will surely benefit from a good iTunes cleaning from CleanMyMac, Gemini, and the manual tips we revealed in this guide.
Here’s to the beginning of a new and harmonious relationship between your Mac and your iPhone.


