Nvidia’s Cuda is a driver for Nvidia graphics cards. If you’ve previously installed one on a Mac Pro or used an external graphics card with your Mac, you may have installed the driver. In this article, we’ll explain more about what it is and how to uninstall Cuda. We’ll also show you a very quick and easy way to remove other applications and drivers on your Mac.
What is Cuda?
Cuda is what’s known as a parallel computing platform – which means it can run lots of calculations simultaneously – that allows computers with Nvidia GPUs (graphics processing units) to use the GPU for tasks other than graphics. So, instead of having a load of processing power sitting on a chip for photo, video editing, or playing games, Cuda allowed Nvidia GPUs be used for all kinds of work. It also acted as an API (application programming interface) that allowed application developers to take advantage of the processing power of Nvidia GPUs in their applications.
Despite of that, Apple hasn’t shipped Nvidia GPUs in Macs for several years and dropped support for Cuda in macOS Mojave. So last year, Nvidia announced that the current version of Cuda would be the last to support the Mac. Most Mac users don’t have Cuda on their Macs, but if you have an older Mac with an Nvidia GPU or you fitted an Nvidia card to a Mac Pro, then you may well have. And now that neither Apple nor Nvidia supports it, the time has come to uninstall it.
GPUs and the Mac
Graphical processing units (GPUs) are specialist chips designed to meet the demands of real-time 3D graphics, such as those used in video games. In GPUs’ early days, they would handle graphics work while the CPU cores took care of general computing tasks. However, over the last decade or so, GPUs have developed into multiple-core, highly capable processing units in their own right. And so manufacturers, recognizing the potential of the unused power, have developed ways to use GPUs alongside CPUs for general computing.
Over the years, Apple has used both Nvidia and AMD GPUs but recently favored AMD. Now, as it transitions to its own silicon, it uses its own GPUs. That should mean even more power available for Mac users, as Apple designs both the hardware and the software to take advantage of it.
How to check if Cuda is installed on your Mac
Go to System Settings. Look at the bottom row. If you see additional pane there called Cuda, you’ll know it’s installed. If it’s not there, Cuda is not present on your Mac. It's that simple.
_1674156323.png)
How to uninstall Nvidia Cuda manually
Like most applications and drivers, Cuda places files in lots of different locations on your Mac. So you’ll need to do some detective work to hunt them down and remove them. First, though, you’ll need to take a trip to System Settings.
- Click on the Apple menu and choose System Settings.
- Look in the bottom row for the Cuda pane.
- Right-click Cuda.
- Choose Remove Preferences Pane.
- Quit System Preferences.
Next, you’ll need to track down those files.

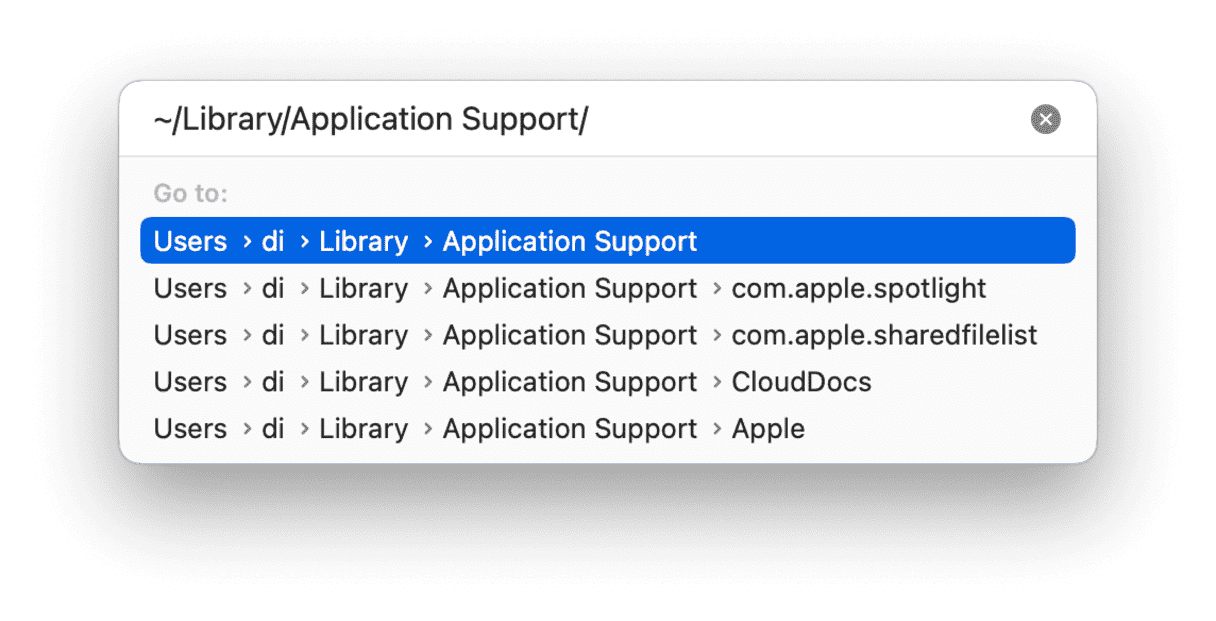
- In the Finder, click the Go menu and choose Go to Folder.
- In the box, paste each of the locations below in turn.
~/Library/Application Support/
~/Library/Caches/
~/Library/LaunchAgents/
~/Library/LaunchDaemons/
- In each of the folders above, look for files or folders with the name ‘Nvidia’ or ‘Cuda’ in them.
- If you find any, drag them to the Trash.
- When you’ve finished, empty the Trash.
- Click the Spotlight icon in the menu bar.
- Type ‘Cuda’
- If you find any more files, drag those to the Trash too.
How to uninstall other Nvidia drivers
Follow the steps above. In System Settings, remove the pane for the Nvidia driver you want to uninstall. When you’re looking for files, instead of Cuda, look for anything with ‘Nvidia’ in its name or the name of the driver you want to remove.
How to uninstall apps and drivers the easy way
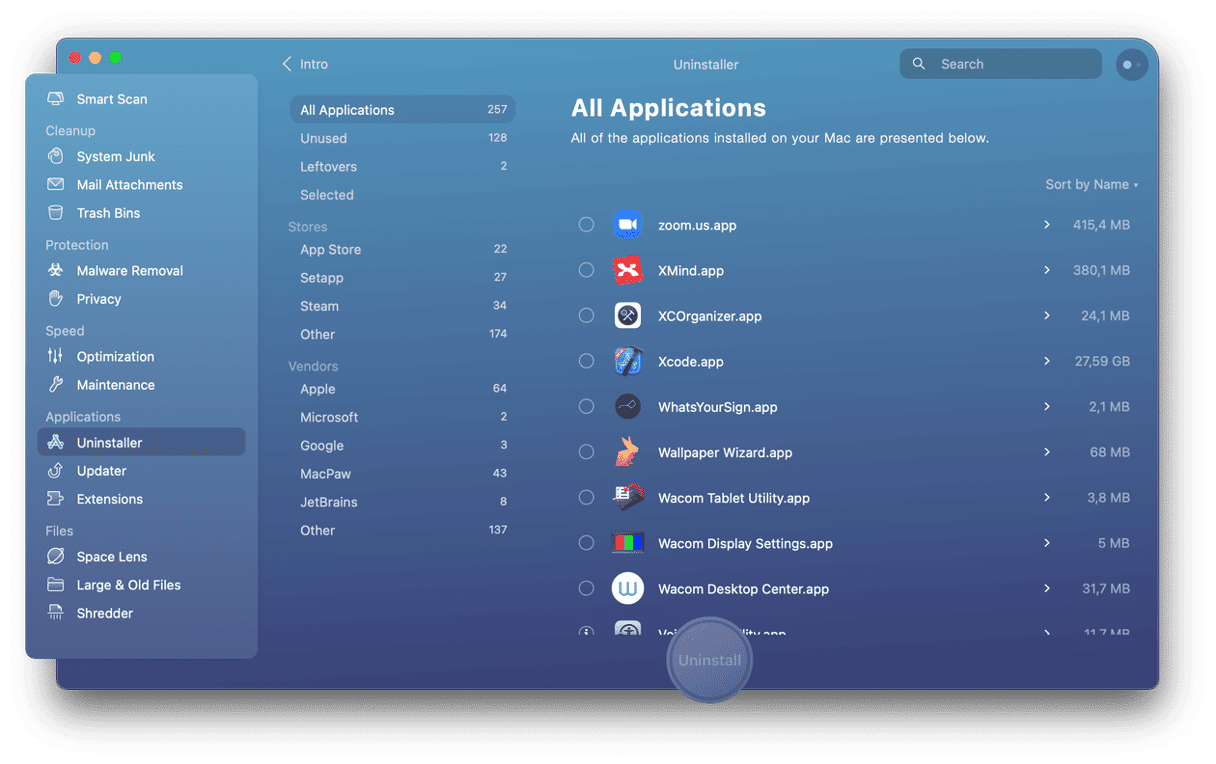
As you can tell from the above, uninstalling applications and drivers manually is a lengthy and complicated process. Thankfully, there is an easier way. CleanMyMac can uninstall most apps and drivers on your Mac with a couple of clicks. Here’s how to use it.

- Download and install CleanMyMac, then launch it.
- Choose Uninstaller in the sidebar.
- Look for the application in the right-hand window and select it.
- Press Uninstall.
CleanMyMac can also reset misbehaving apps, meaning you don’t have to uninstall and reinstall them to fix issues. Follow the steps above. Then, in step 3, click the drop-down menu next to the app name and choose Reset. Then press Reset. The application will now be returned to its default settings as if it was freshly installed.
Nvidia’s Cuda is a piece of software that works in conjunction with Nvidia GPUs and allows computers with Nvidia graphics to use the GPU for general computing tasks. It also enables software developers to use the processing power of the GPU for their applications. However, Apple hasn’t shipped Macs with Nvidia GPUs for several years and no longer supports Cuda in macOS. Besides, Nvidia also no longer supports it. So, if you have Cuda installed, it’s time to say goodbye. If you follow the steps above, you can do that in no time.


