Photoshop is one of the oldest and one of the most well-known applications on the Mac. Even if you’ve never used it, you’ve almost certainly heard of it. It’s so well-known that it’s name is now used as a verb whenever an image is heavily altered on social media. Photographs are no longer altered or ‘doctored’, they are ‘Photoshopped.’
Photoshop is no longer just a standalone app, it exists as part of Adobe’s Creative cloud suite. To install and use it on your Mac, you need a subscription to Creative Cloud, whether that’s a photography subscription that provides access to Photoshop and Lightroom, or one that gives you access to the whole suite.

Fortunately for us Mac users, there are lots of apps available for the Mac that offer many of the same features as Photoshop and for which you pay a relatively small one-off price, instead of an annual subscription. These include the likes of Pixelmator Pro, Luminar and Affinity Photo.
So, what happens if you install Photoshop and then realize you don’t use it or need it any more and want to uninstall it? We’ll show you how to do that in this article.
How to uninstall Photoshop on your Mac using Creative Cloud
This method will so far delete Photoshop from the suite, not the suite itself.
When you first subscribed to Creative Cloud and downloaded Photoshop, you will also have downloaded the Creative Cloud desktop app and from there you uninstall Photoshop.
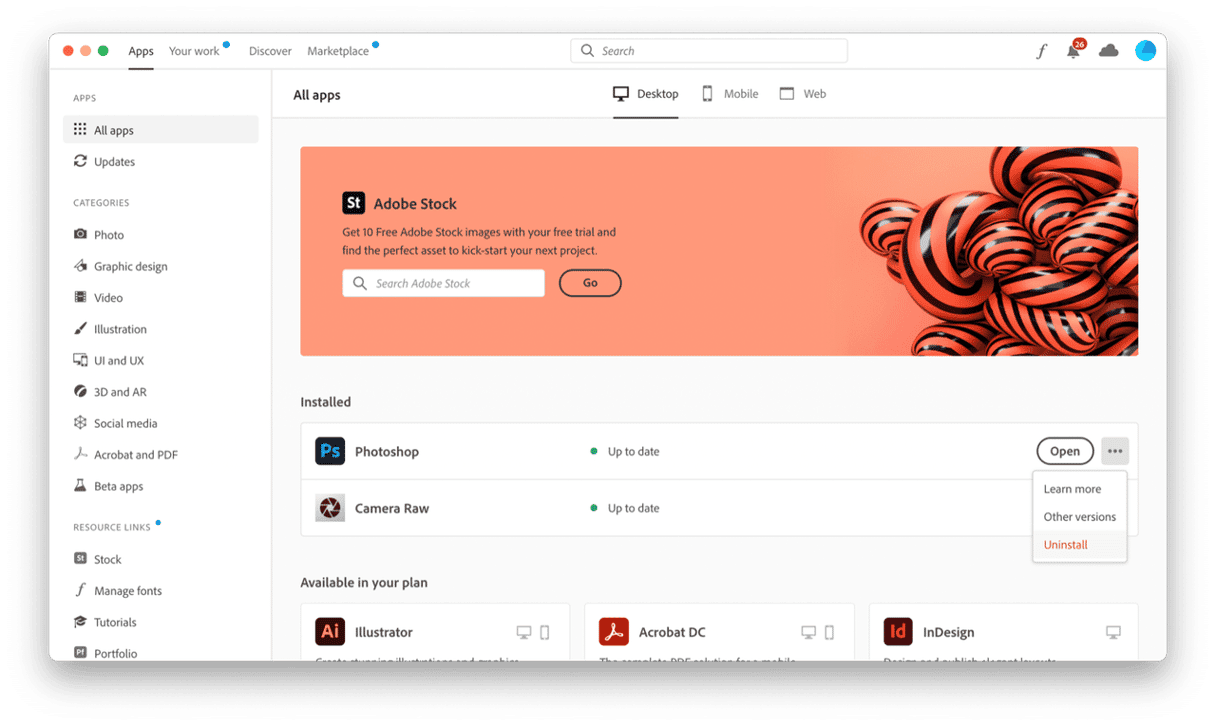
- Save your work and quit Photoshop, if it’s running
- Go to your Applications folder and double-click Creative Cloud to launch it, or click its icon in the menu bar if it’s there.
- Choose the Apps tab.
- You should see Photoshop listed in the main window. Click the More button (three dots) next to Open.
- Choose Uninstall.
A window will open asking if you want to remove Photoshop's preferences and other associated files. Press Remove.
Check for Photoshop leftovers on your Mac
Photoshop will now be uninstalled from your Mac and all of its files removed. If you want to check that there are no files remaining, click on the Go menu in Finder, and choose Go to Folder. Paste each of the locations below into the window, one at a time and look for files or folders with Photoshop in their name.
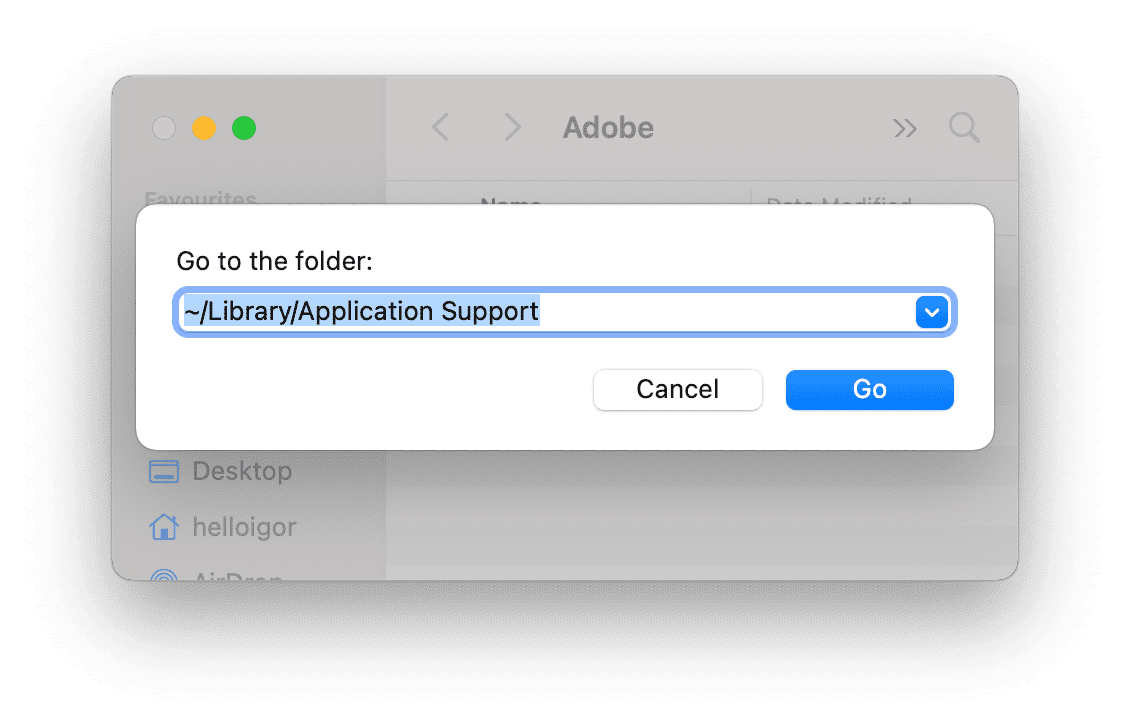
~/Library/Application Support
~/Library/Preferences
/Library/LaunchAgents
/Library/LaunchDaemons
/Library/PrivilegedHelperTools
If you find any, drag them to the Trash.
How to delete Photoshop’s document versions
Another way to clean Photoshop parts is to remove any old versions of documents you’ve been working on in Photoshop and that are still on your Mac. The easiest way to check for those is to use the Document Versions tool in the System Junk module in CleanMyMac.
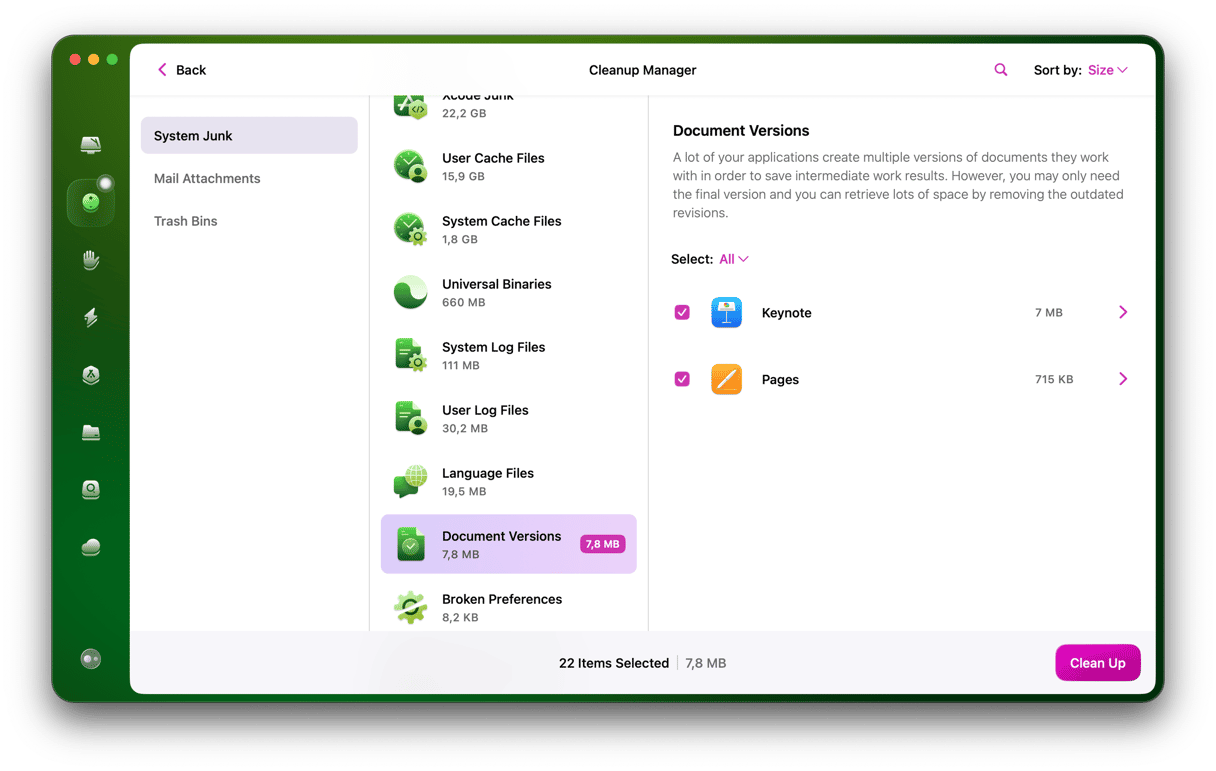
- Download the free version of CleanMyMac and follow the instructions on screen to install it, if it’s not already on your Mac.
- Choose System Junk and press Scan.
- When it’s finished, press Review Details.
- Scroll down to Document Versions and select it.
If there are any old versions of Photoshop documents on your Mac, they will be displayed there. CleanMyMac will delete the intermediary edits that can waste space.
How to uninstall Photoshop and Creative Cloud
Now, let’s delete the entire Creative Cloud package.
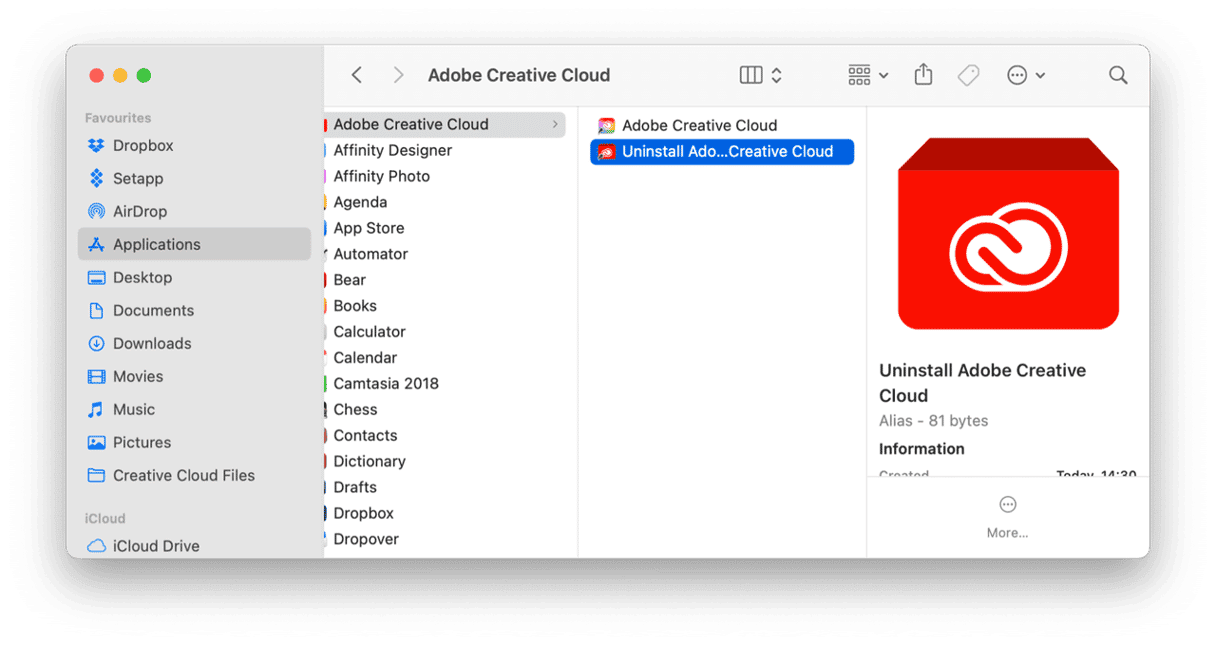
If Photoshop is the only Creative Cloud app you use, you may also want to uninstall the Creative Cloud app. Here’s how to do it.
- First of all, follow the instructions above to uninstall Photoshop.
- Go to your Applications folder.
- Click on the Adobe Creative Cloud folder to open it.
- Double-click Uninstall Adobe Creative Cloud.
- Type in your admin password when asked.
- Press Uninstall.
When it’s finished, click Close — and that’s it.
Once you’ve done that, both Photoshop and Creative Cloud will have been uninstalled. If you don’t have the Creative Cloud Uninstaller on your Mac, or you get an error message when you try to run it, download the latest version from helpx.adobe.com Once the .zip file has downloaded, double-click it to extract it and follow the instructions to install it. Once the uninstaller is installed, run it and follow the instructions to uninstall Creative Cloud.
Once you’ve done that, locate any leftover files by navigating to the folders in the Photoshop section, above, locate Creative Cloud files and folders and drag them to theTrash.
How to reset Photoshop without uninstalling it
If your reason for uninstalling Photoshop is that it is misbehaving, running slowly, or crashing, you could try resetting it first. You can do that using the reset tool in the Uninstaller module in CleanMyMac. This resets applications to the state they were in when they were first installed and can solve lots of problems. Here’s how to do it.
- Grab a free download version of CleanMyMac.
- Choose the Uninstaller module in the sidebar.
- Locate Photoshop in the list of apps and click the arrow next to Uninstall.
- Choose Reset.
- Press Reset.
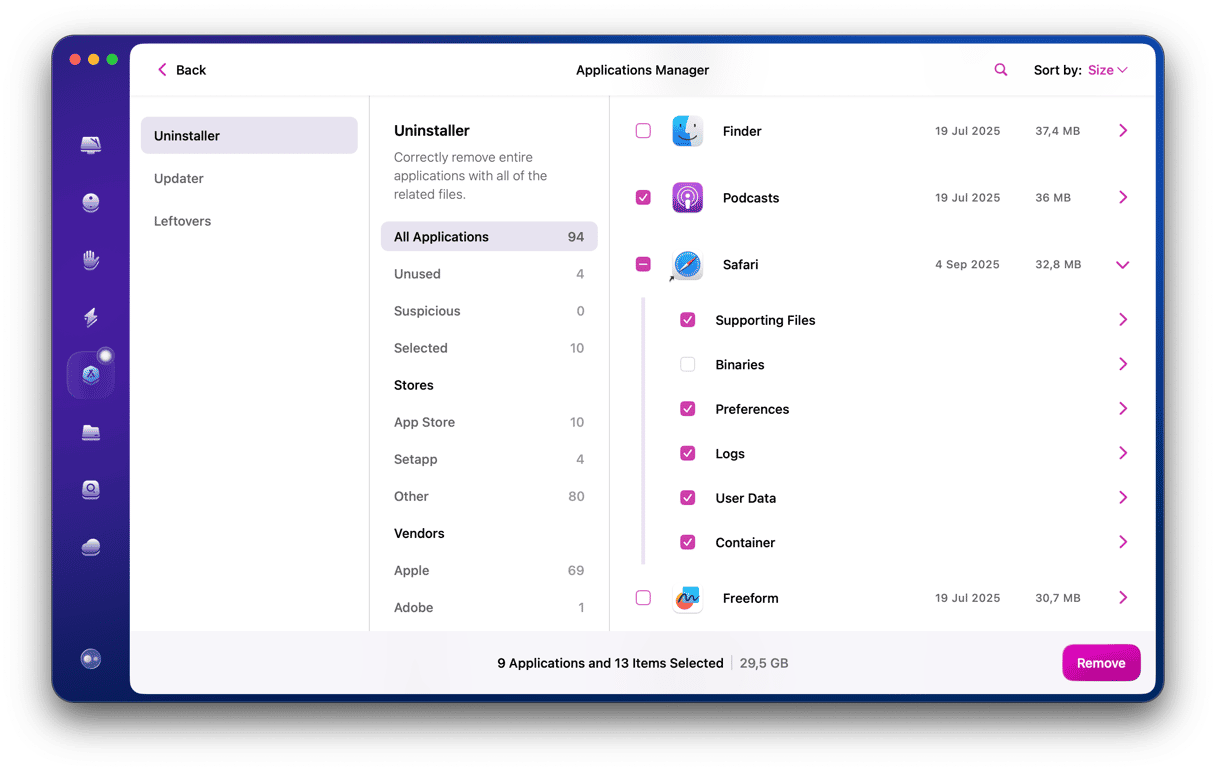
Photoshop will now be returned to its default state and may well now run without any problems.
This way you can use CleanMyMac to uninstall any app on your Mac, which is especially useful for apps that don’t have their own uninstaller. If you simply removed the application from your Applications folder, you’d leave a lot of files behind. CleanMyMac removes them all.
Photoshop is perhaps the most well-known application available for the Mac, and one of the oldest and most powerful. It’s also expensive and requires a subscription to Adobe's Creative Cloud to use it. If you’ve installed it on your Mac and no longer want it, you should follow the instructions to either remove it on its own, or remove both it and the Creative Cloud app. If you want to keep it but it’s not working properly, try resetting it with CleanMyMac’s app reset tool. It might just be all you need to do to get it running smoothly again.


