Some notifications that pop up on your Mac are genuinely useful, like a reminder you set for yourself or a calendar notification for an appointment. Others are just annoying. One notification that began appearing in macOS Ventura and definitely falls into the latter category is the “background items added” message. Some users have reported it appearing several times a day and for no apparent reason. In this article, we’ll show you how to get rid of the “background items added” notification.
Why does “background items added” notification appear?
Background items are processes that run on your Mac in the background and which you may not realize are even running. Third-party applications, if you allow them, can run background processes for a number of reasons. For example, applications that sync data, like Dropbox or Google Drive, have background processes to manage syncing. The “background items added” notification is there to tell you that an application has run a background process for the first time. The notification should only appear when the process is created, but some users have reported seeing the notification for the same app several times.
How to manage notifications
Most notifications can be turned on or off in the Notifications section of System Settings. However, “background items added” is generated by macOS, and so you can’t turn it off in Notification Center settings.
How to stop the “background items added” notification
The simplest way to stop the notification is to prevent the application that generated the background item from being able to run processes in the background. However, before you do that, think carefully about what the background items are doing and whether it will affect the way you use your Mac. For example, stopping an application from running a background process may stop it from checking for updates, syncing data, or scanning for malware. If you want to go ahead and stop a background item from running, follow these steps.
1. Check System Settings
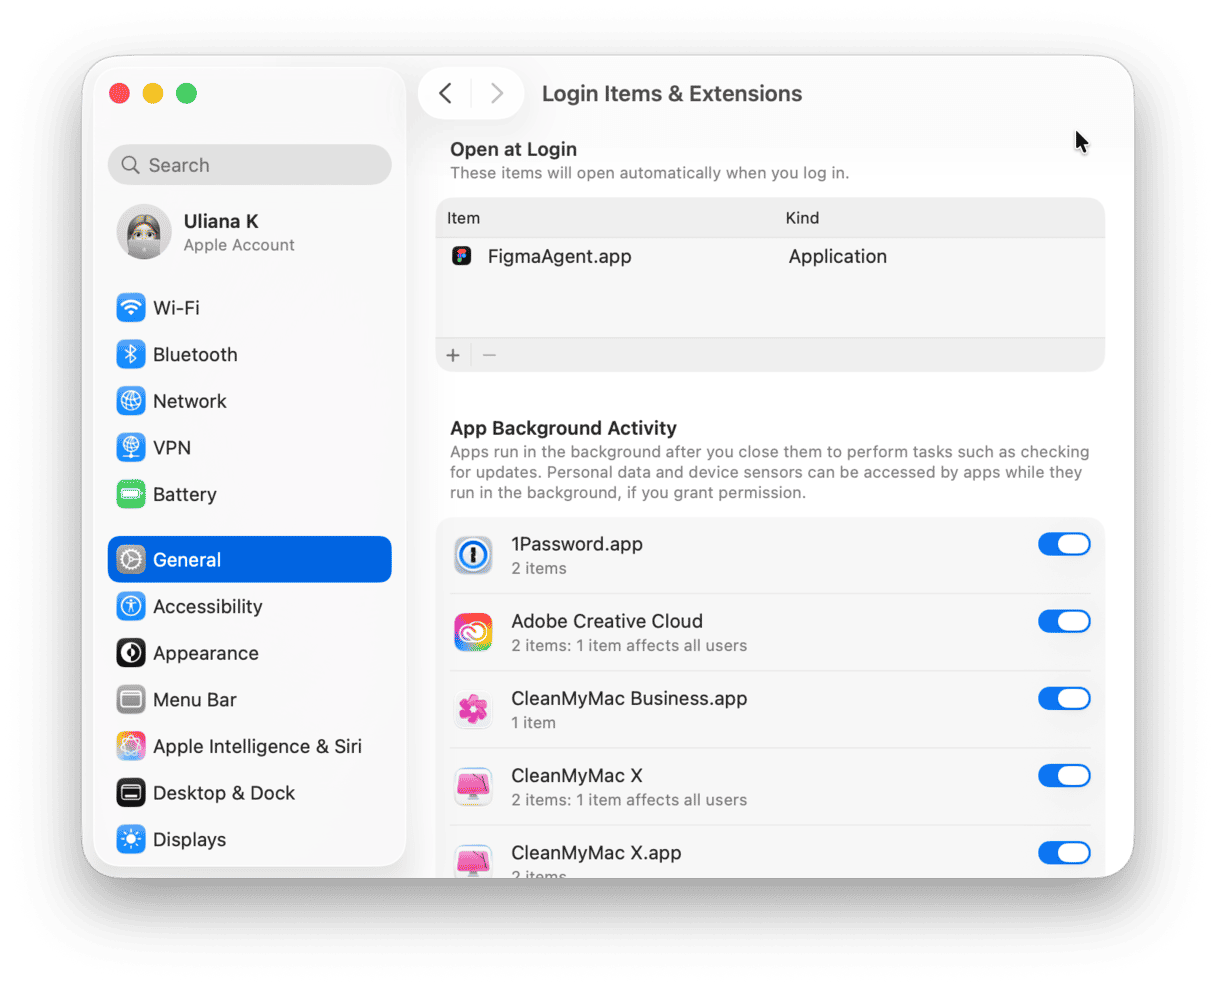
The easiest way to manage background items and any notifications related to them is to check System Settings:
- Click the Apple menu and choose System Settings.
- Select General > Login Items & Extensions.
- Under the ‘Allow in the Background’ section, turn off any apps you don’t want to allow to run processes in the background.
2. Remove the item’s preference file
If switching off an app’s permissions in ‘Allow in Background’ doesn’t work, the next step is to manually remove the preferences file from the Launch Agents folder:
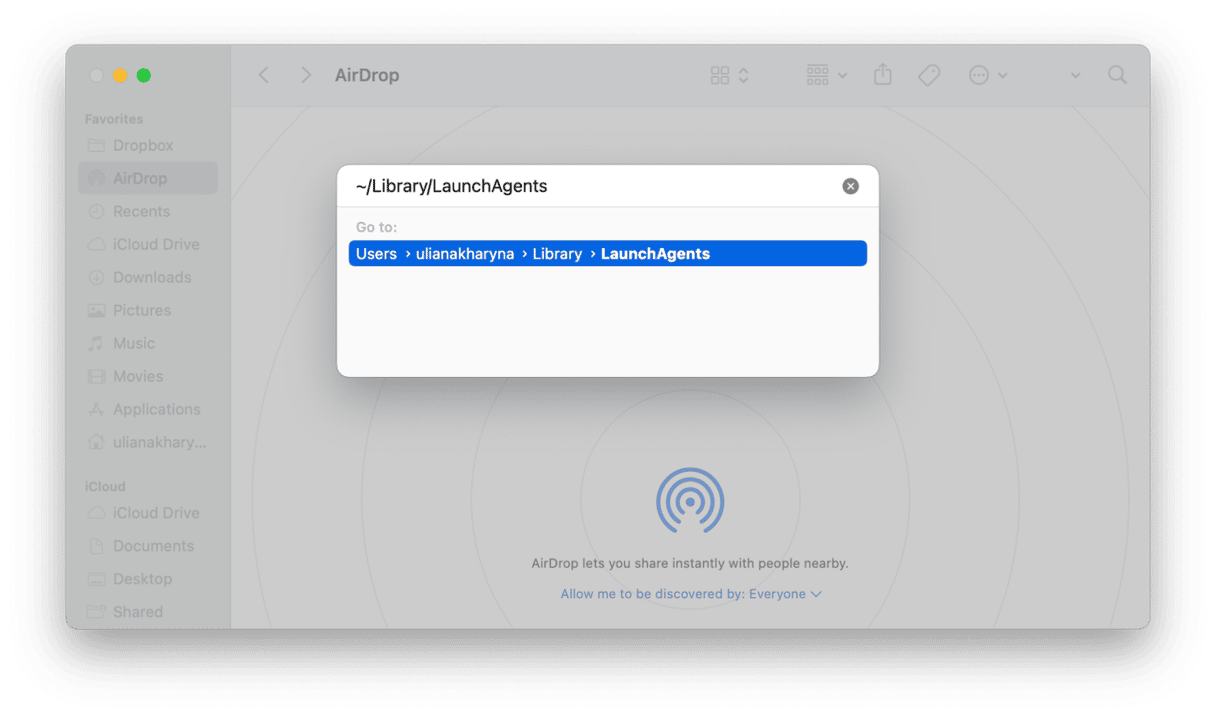
- Click the Finder icon in the Dock and choose the Go menu > Go to Folder.
- Paste this path in the text box:
~/Library/LaunchAgentsand press Return. - In that folder, look for a file with the name of the app whose background items you want to stop. When you find it, drag the file to the Trash.
- Repeat steps 1-3 for the three paths below:
/Library/LaunchAgents
~/Library/LaunchDaemons
/Library/LaunchDaemons - Empty the Trash.
3. Remove launch agents the easy way
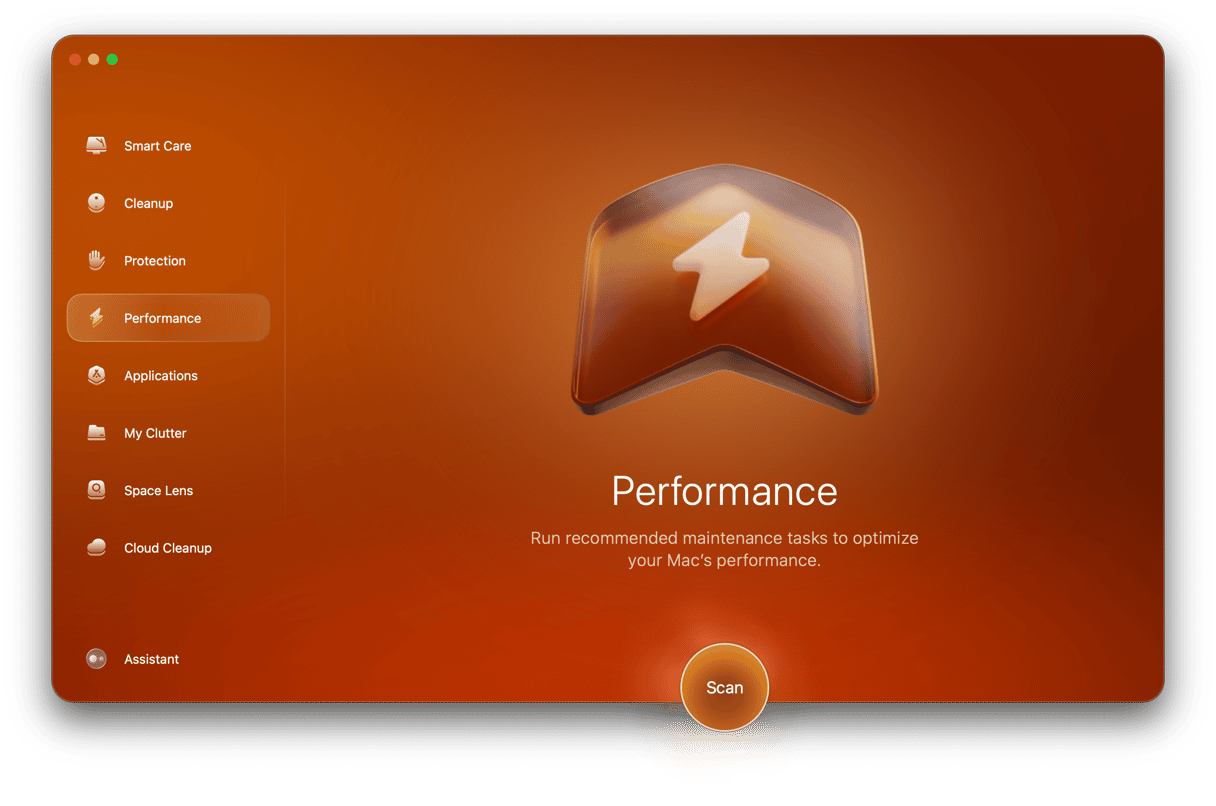
If tracking down those files manually seems like a lot of work, you’ll be glad to know there is a much easier way — CleanMyMac’s Performance tool allows you to remove launch agents and login items with just a couple of clicks. It can run different maintenance tasks that will help speed up your Mac. You can get your free CleanMyMac trial. Once you’ve done that, follow the steps below to remove launch agents:
- Open CleanMyMac and choose Performance in the sidebar.
- Run a quick scan.
- Click Review under Login Items.
- Select those you want to delete and click Remove.
- Click Done and repeat steps 3-4 for Background Items.
4. Check for an app update
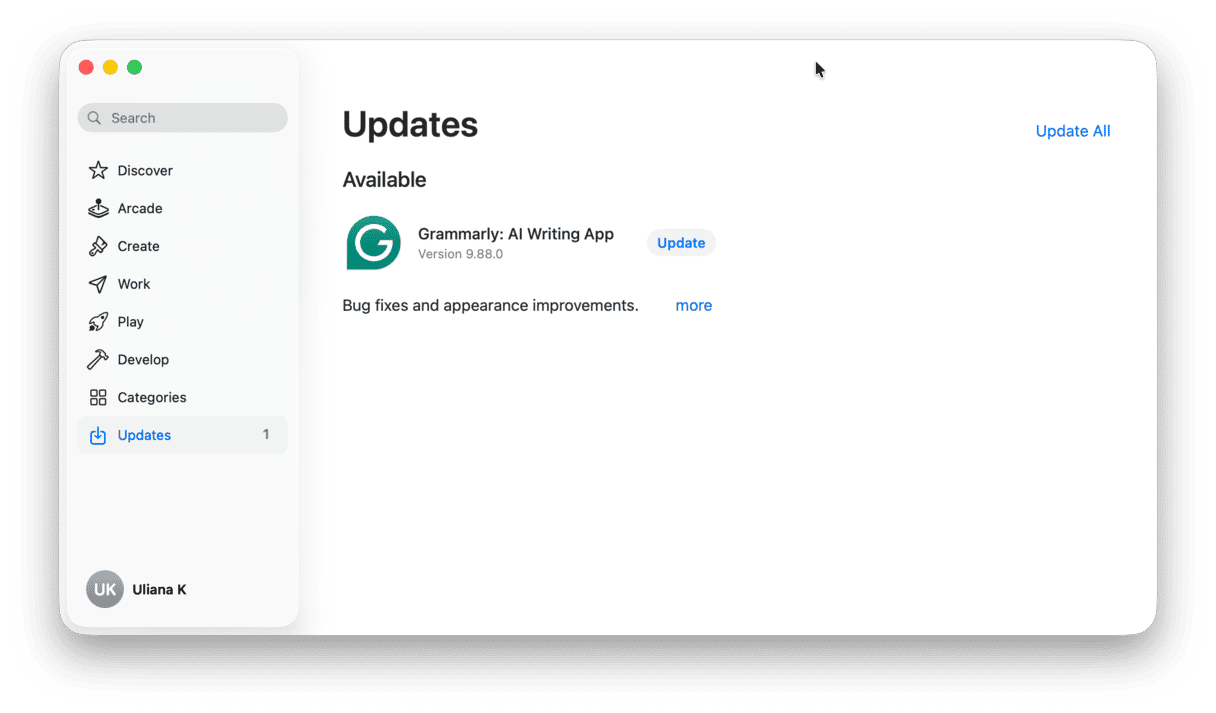
It may be the case that the background task is caused by a bug in the app that has been fixed in a recent update:
- If the app was downloaded from the App Store, open the App Store app and look in the Updates section for an update.
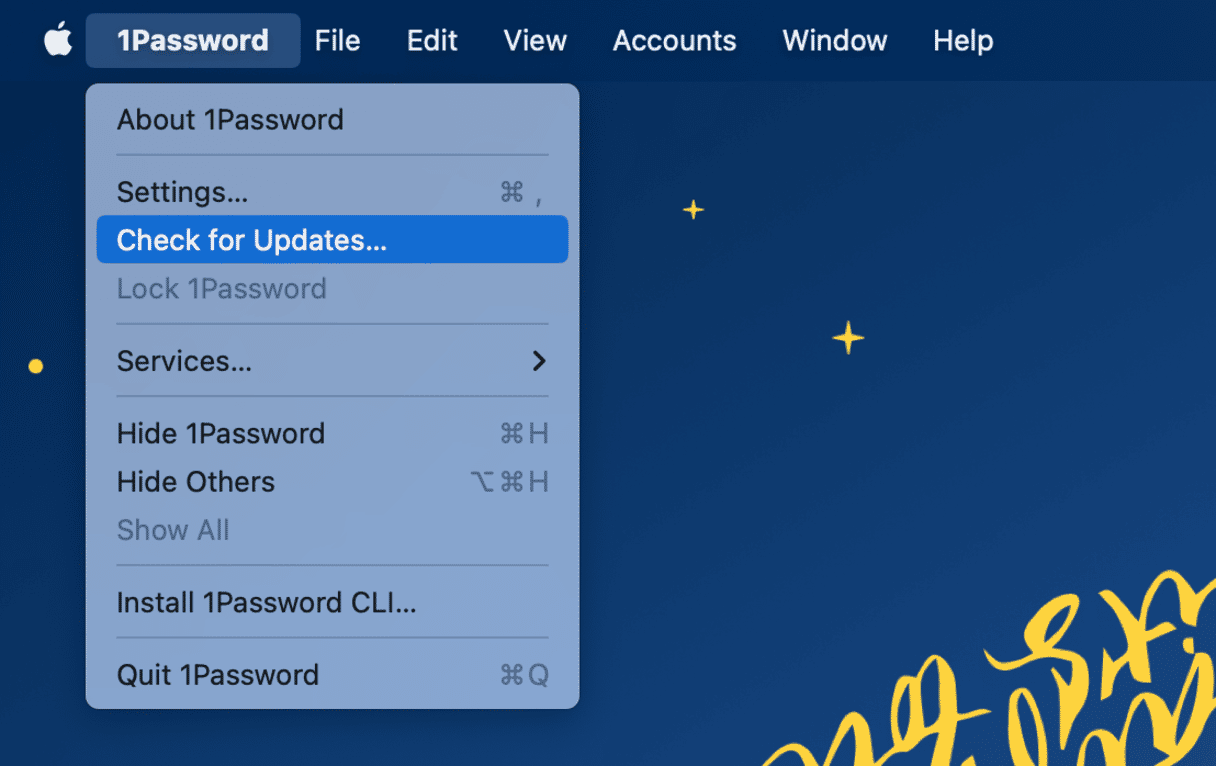
- If you downloaded it from the developer’s website, open the app, click the app’s name in the menu bar, and choose Check for Updates. If there is an update available, install it.
5. Uninstall and reinstall the app
If the notification still appears, the next step is to uninstall and reinstall the app. It’s best to use a dedicated uninstaller for this task, as it will remove all the files the app has placed on your Mac. CleanMyMac has an Uninstaller tool that’s quick and very easy to use. To reinstall the app, either re-download it from the App Store or the developer’s website.
If you don’t want to use a dedicated uninstaller and want to uninstall the app manually, drag it to the Trash. Then, use Go > Go to Folder in the Finder to check the file paths below. If you find a file or folder with the name of the app in it, drag it to the Trash. Empty the Trash when you’re done.
~/Library/Application Support/
~/Library/Containers/
~/Library/Application Scripts/
~/Library/Caches/
~/Library/Preferences/
6. Update macOS
It’s possible that the reason for all the ‘background items added’ notifications is a bug in macOS and that it has been fixed in a recent update. So, it’s a good idea to check for updates and install one if it’s available:
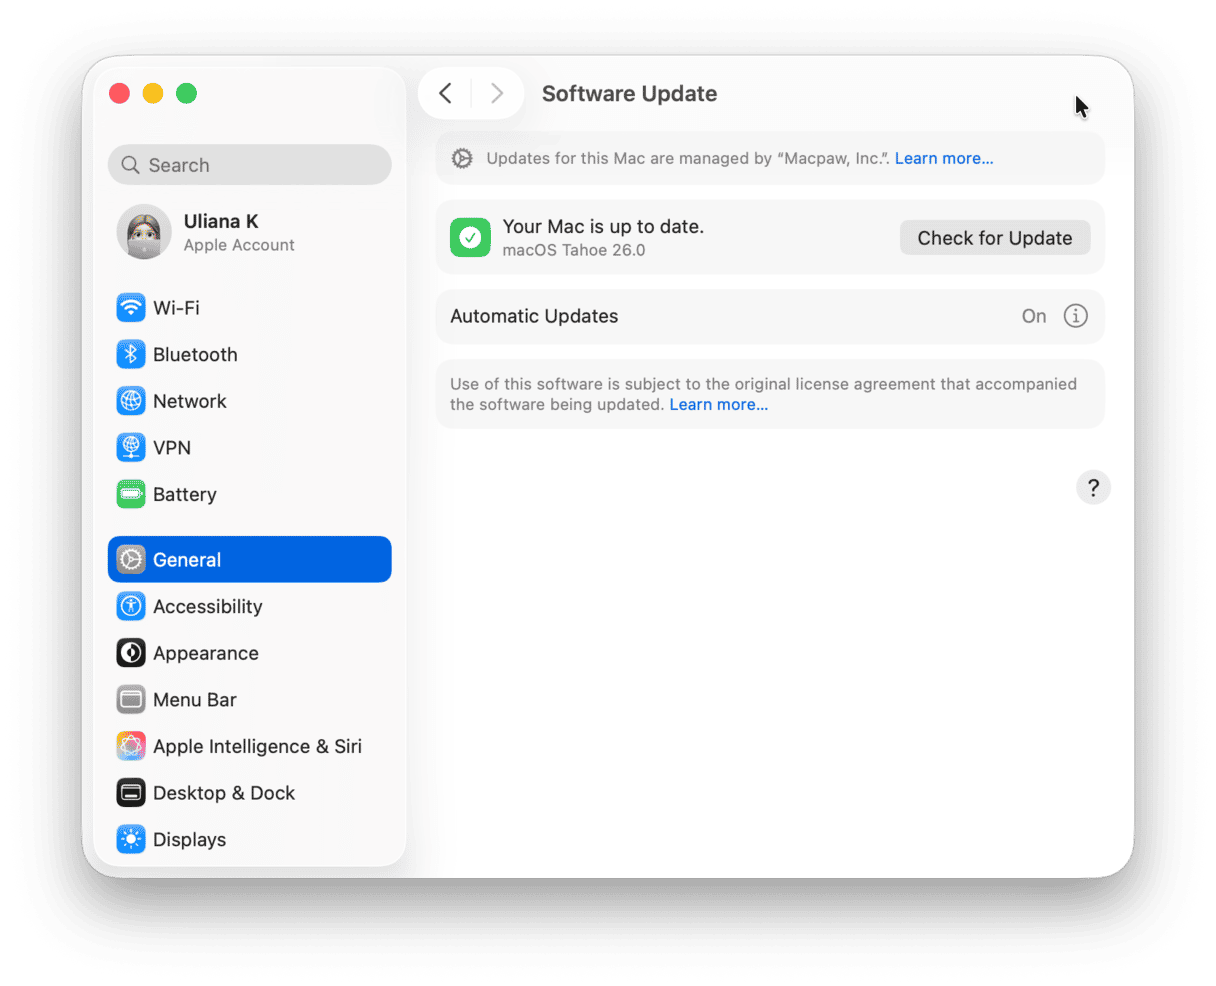
- Go to System Settings > General.
- Choose Software Update.
- Wait for it to check.
- If there is an update available, follow the instructions on the screen to install it.
If you see persistent notifications that say ‘background items added,’ it could mean that there is a problem with the app that is controlling the background items or with macOS — the notification should only appear once, shortly after the app is installed. Its purpose is to alert you to the fact that an app has started a process that’s running in the background. If you see lots of those notifications, follow the steps above to stop them.


