If you’ve ever used your Mac to record, mix, or produce music or other forms of audio, you may have installed Pro Tools. It’s one of the most widely used and well-known audio production tools on both Mac and Windows. It’s also tricky to use for beginners, so if you have tried it out, you may have decided that it’s not for you and choose another tool instead. If you no longer use it and still have it on your Mac, you should uninstall Pro Tools to free up space and prevent future conflicts. We’ll show you how to do that.

What is Pro Tools?
Pro Tools is one of the oldest and most widely used digital audio workstations (DAW) on the Mac. It’s used to create, record, mix, produce, and master music. It’s also used for sound design in movies and TV programs, as well as mastering and post-production of all kinds of audio content. Originally developed by DigiDesign, Pro Tools is now owned and published by Avid. Having been available for Mac since 1991, it supports Apple technologies like Apple silicon systems on a chip, AAC, and QuickTime.
Why uninstall Pro Tools?
It’s good practice to uninstall any software you no longer use on your Mac to free up space and prevent the possibility of conflicts with the software you install in the future. Pro Tools takes up a big chunk of disk space and places lots of files on your Mac. So, uninstalling it if you don’t use it will free up a lot of room on your startup disk.
Another reason why you may want to uninstall it is if it’s crashing or not working properly. In this case, uninstalling and then reinstalling it may solve the problem. However, there is something else you can try first, and we’ll show you that at the end of the article.
How to uninstall Pro Tools the easy way
There are several different ways to uninstall Pro Tools. One is manual, involving tracking down the files and folders associated with Pro Tools on your Mac and dragging them to the Trash. As you can imagine, that takes quite a bit of time and effort.
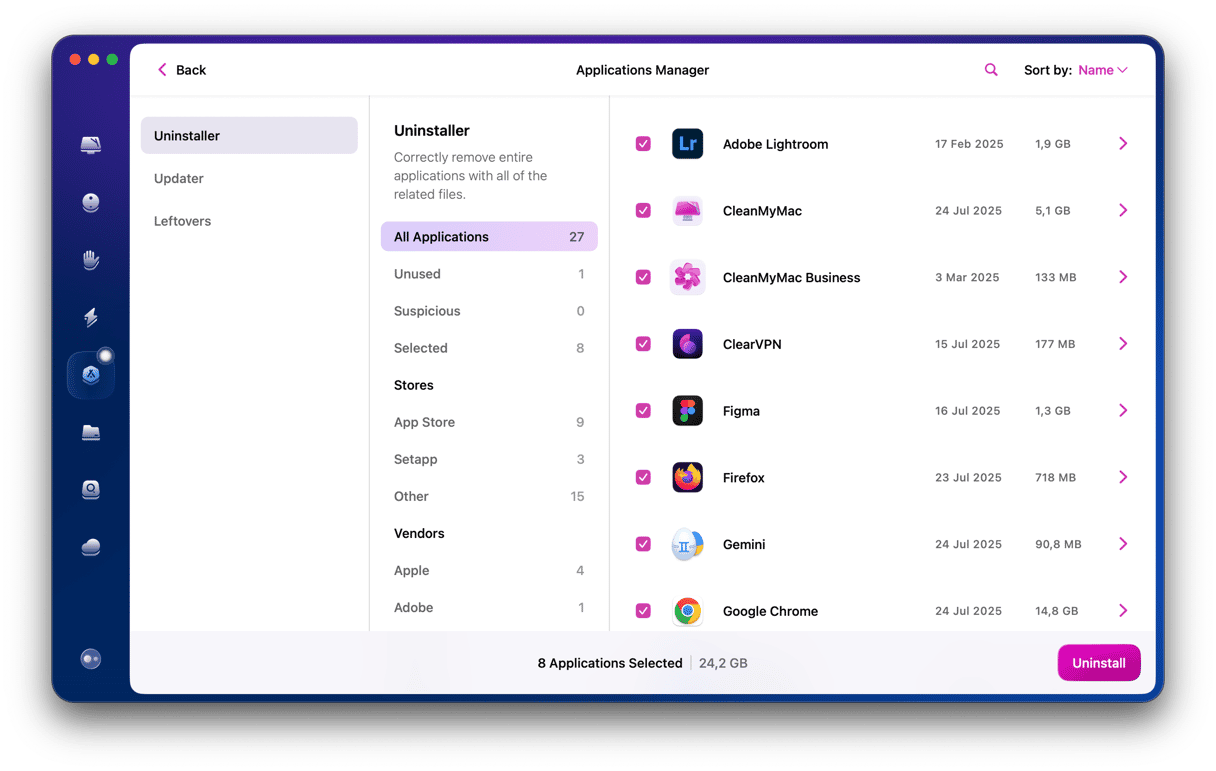
The other way is much easier. You use a dedicated uninstaller to do the hard work for you and uninstall Pro Tools with a couple of clicks. We recommend CleanMyMac — its Applications feature can quickly identify and remove all the files associated with an application. It also identifies leftover files from apps that are no longer on your Mac so that even if you didn’t completely uninstall an app previously and just left it in the Trash, you can get rid of the files it left behind.
- Start your free CleanMyMac trial.
- Open CleanMyMac.
- Click Applications in the sidebar and run a quick scan.
- Click Manage My Applications and locate Pro Tools.
- Select the box next to Pro Tools and click Uninstall.

How to uninstall Pro Tools manually
As we explained earlier, uninstalling Pro Tools manually involves tracking down the files it has installed on your Mac and dragging them to the Trash. Here’s how to do that:
- Quit Pro Tools if it’s running.
- Go to your Applications folder and drag the Pro Tools application to the Trash.
- Click on the Finder in the Dock and then click the Go menu.
- Choose Go to Folder.
- Type or paste each of the paths below into the Go to Folder text box one at a time. At each location, drag the files or folders named at the end of the path to the Trash.
- /Library/Audio/MIDI Patch Names/Avid
- /Library/Application Support/Propellerhead Software/Rex
- /Library/Application Support/Avid/Audio
- ~/Library/Preferences/Avid/Pro Tools
- Once you’ve dragged all those files and folders to the Trash, empty the Trash.
Once you’ve emptied the Trash, Pro Tools will have been completely uninstalled.
How to reset Pro Tools if it’s not working properly
If your reason for uninstalling Pro Tools is that it’s unstable or running slowly, there is something you can try that’s much quicker than uninstalling and then reinstalling it. You can reset it.
Resetting an application means putting it back to the state it was in when you first installed it and before you started using it. The process of resetting involves removing preference and settings files, and like uninstalling, you can do it manually or, much more easily, use a tool to help you.
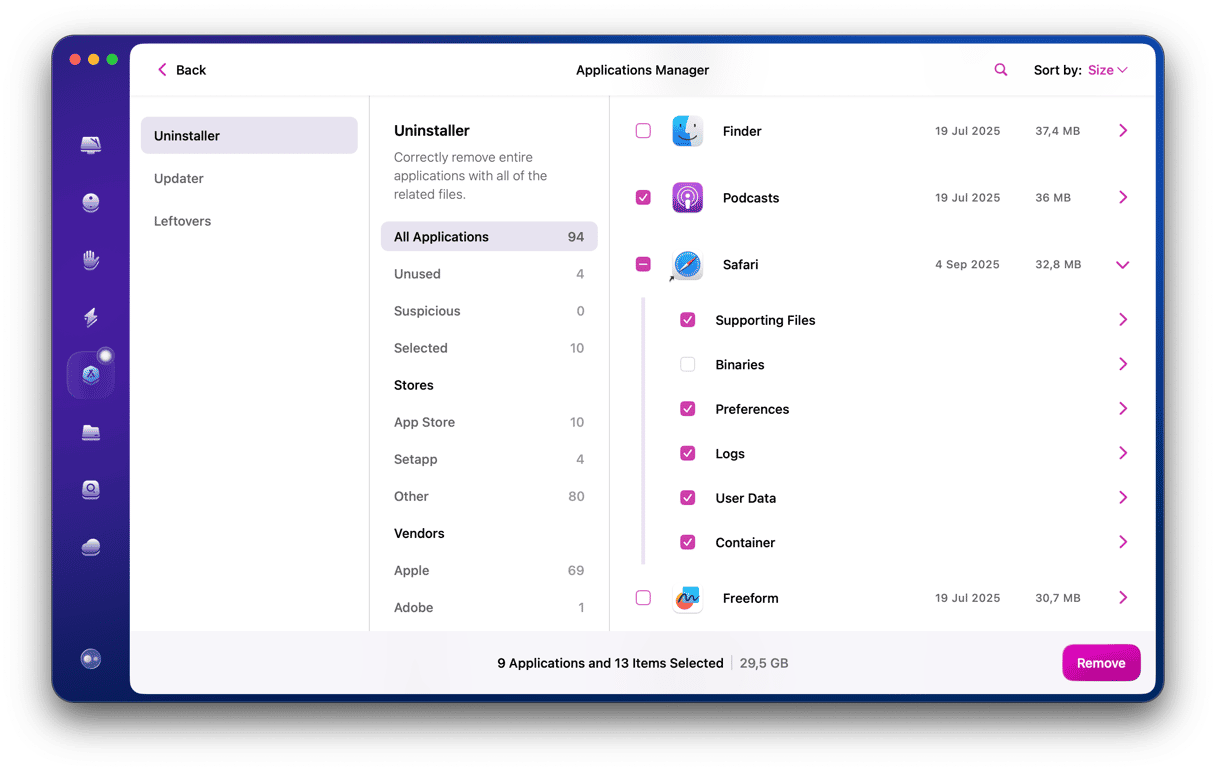
CleanMyMac’s Applications tool makes it very easy to reset any app:
- Choose Applications in the sidebar and run a quick scan.
- Click Manage My Applications and find Pro Tools on the list.
- Click the “>” sign and select all the app’s files except for binaries.
- Click Remove to reset the app.

CleanMyMac will remove Pro Tools’ settings and preferences files, meaning that the next time you open it, it will look and behave like it did when you first launched it. You might want to take a note or screenshot of any settings you want to reuse so that you can quickly configure Pro Tools again.
Pro Tools is one of the leading digital audio workstations on the Mac. It’s used to create, record, edit, mix, and produce music. It’s used by musicians, producers, sound designers, and just about anyone who works with audio. It’s a hugely powerful tool, but it’s not the easiest tool to learn how to use. So, if you’ve installed it and no longer use it, perhaps because you now use Logic or a different DAW, you should uninstall Pro Tools to free up space on your Mac and prevent possible conflicts with other apps in the future. Follow the steps above to do that.


