For many Mac users, it’s the ultimate computer: a Mac that can also run Windows. Whether you need to run Windows-only apps regularly, want to play Windows games, or need to test apps in Windows, having one computer that can run both operating systems is a great way to do it. However, the increasing popularity of MacBooks has meant that many Windows games now run natively on macOS, and there are fewer and fewer applications that only run on Microsoft’s OS. So, if Windows partition is still on your Mac but you no longer need it, we’ll show you how to uninstall Windows.
Why uninstall Windows?
The main reason for uninstalling Windows partition is to free up space on your Mac. Having Windows on your Mac, along with any applications or games you have installed, takes up a lot of room, several gigabytes’ worth, that you could be using for other things. On top of that, if you don’t use Windows often, it’s unlikely you will keep it updated, which means it won’t be patched to combat the most recent security threats. And while that vulnerability will only affect the Windows installation, it’s a headache you could probably do without. So, if you don’t use Windows anymore, you should uninstall it.
How to delete Windows on Mac
The method you use to uninstall Windows on your Mac will depend on how you installed it in the first place. While there are a number of ways of running Windows apps and games on Mac, there are only two ways to install Windows itself: Boot Camp and a virtualization tool like Parallels Desktop. We’ll show you how to delete Windows partition on Mac for both of those methods.
Boot Camp
If you have an Intel-based Mac and installed Windows using Boot Camp, uninstall it using the steps below. It’s a good idea to back up any data in the Windows partition that you want to keep before you start.
- Boot your Mac in macOS.
- Quit all open apps and log out any other users.
- Go to Applications > Utilities and open Boot Camp Assistant.
- Click Continue.
- If the ‘Select Task’ step appears, click ‘Remove Windows 10 or later version’.
- Click Continue.
- If your Mac has one internal disk, click Restore.
- If you have multiple disks connected to your Mac, select the disk with Windows on it and choose ‘Restore disk to a single macOS partition’ then click Continue.
When Boot Camp Assistant has finished, Windows and all the apps you installed on it will have been uninstalled from your Mac.
Parallels Desktop
There are two parts to the process of uninstalling Windows using Parallels Desktop, depending on what you want to do. The first part is to uninstall the Windows virtual machine from inside Parallels. The second is to uninstall Parallels Desktop itself. If you want to keep Parallels Desktop on your Mac, perhaps because you have other virtual machines you still use, just complete the first part to uninstall Windows.
- Open Parallels Desktop, but don’t boot a virtual machine.
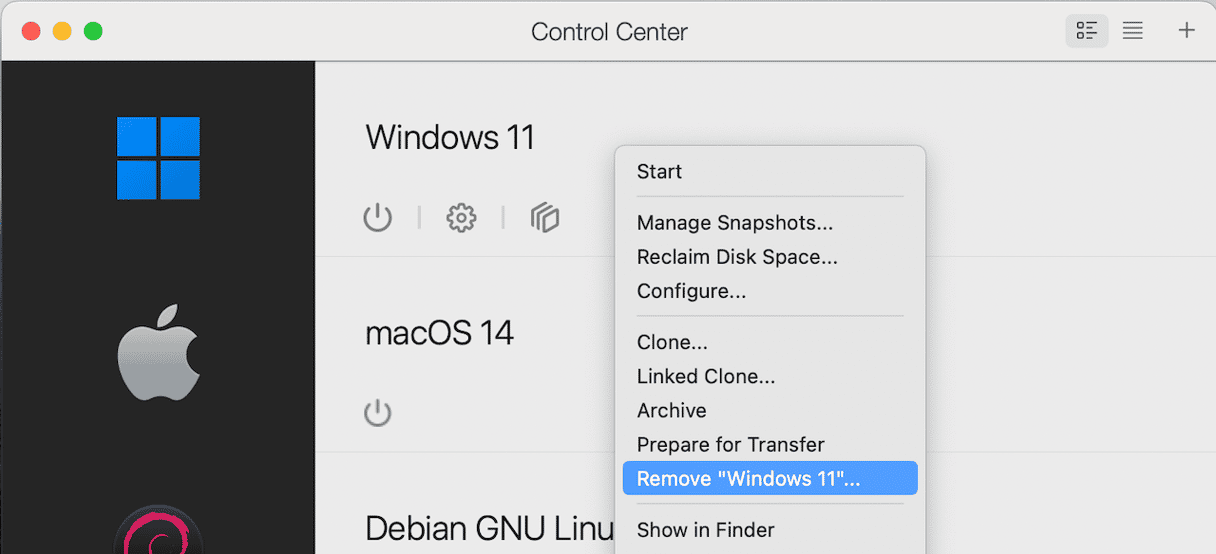
- Click the Parallels icon in your Mac’s menu bar and choose Control Center.
- Right-click the Windows virtual machine you want to uninstall.
- Choose ‘Remove Windows’.
- To completely uninstall Windows, choose Move to Trash.

The Windows virtual machine will be completely uninstalled. If you choose Keep Files at step 5, the files for the virtual machine will remain on your Mac. The virtual machine will disappear from the list of options in Parallels Desktop, but you will be able to restore it later. That means it’s not a good option for completely uninstalling Windows to free up space.
Once you have deleted virtual machines in Parallels Desktop, you can also uninstall Parallels Desktop itself.
- Quit Parallels Desktop.
- Drag the Parallels Desktop application to the Trash.
- Click the Finder icon in the Dock and choose Go to Folder.
- Paste each of the file paths below into the text box one at a time, pressing Return after each one to navigate to a location in Finder. At each location, look for files or folders with Parallels in their name. If you find any, drag them to the Trash.
~/Library/Preferences
~/Library/Application Support
~/Library/Caches
~/Library/Containers
~/Library/Logs
~/Library/LaunchAgents/
~/Library/LaunchDaemons/
~/Library/StartupItems/ - Empty the Trash.
How to effectively uninstall applications on Mac
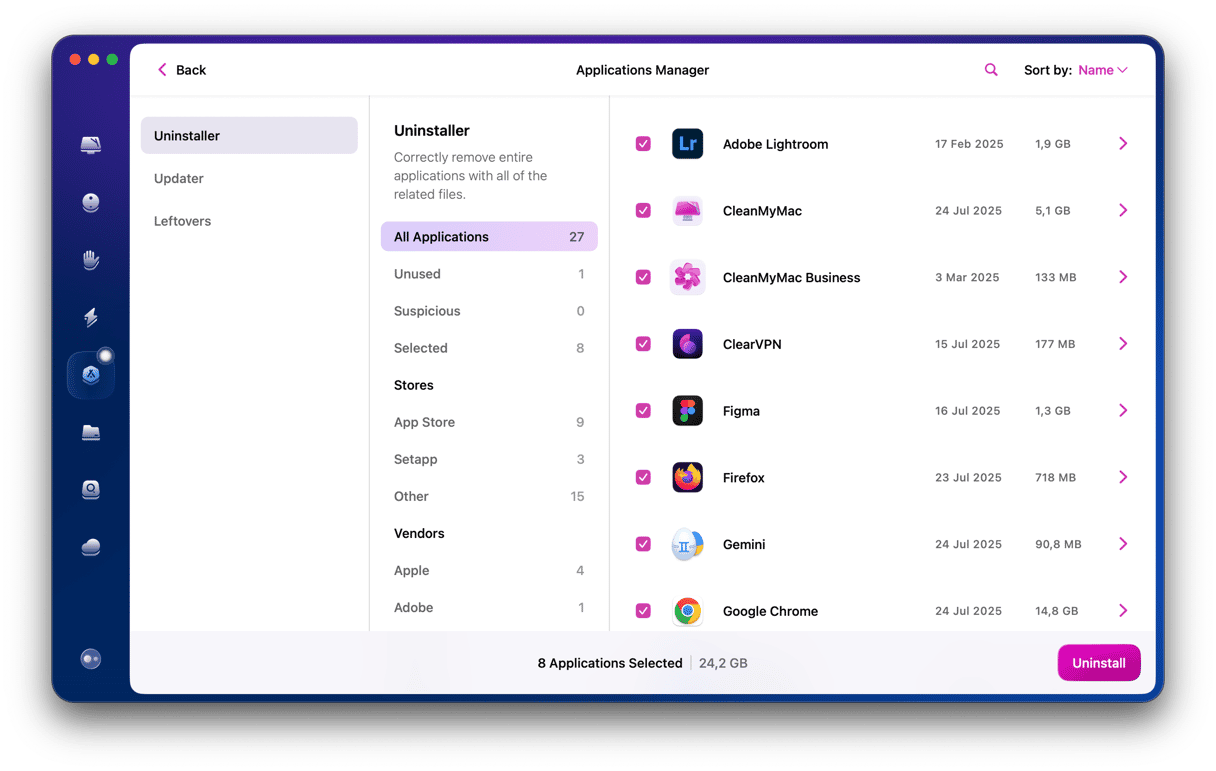
As you can see, the process of manually uninstalling apps on your Mac is somewhat tedious. Fortunately, there is another way, one that allows you to uninstall multiple apps at the same time with just a few clicks. You can use a specialist uninstaller. We recommend CleanMyMac’s Applications feature.

As well as making it easy to uninstall applications, it allows you to reset misbehaving apps and delete files left over by apps that were not uninstalled correctly. It also checks for updates to apps on your Mac, allows you to install them with a click, and shows you which apps you haven’t opened in a long time. You can test CleanMyMac for free — get your free trial here.
Follow the steps below to uninstall any app.
- Open CleanMyMac and choose Applications in the sidebar.
- Click Scan > Manage My Applications.
- Locate the app you want to uninstall in the list of applications in the right-hand pane.
- Select the application and click Uninstall.

There are lots of reasons people run Windows on their Macs. Often, it’s for a one-off or temporary project. If that’s the case for you, or if you just don’t need to use Windows anymore, you should remove it to free up space on your Mac. The process for doing that depends on how you installed it. Choose the option above that fits your situation and follow the steps to uninstall Windows on your Mac.


