Seagate is one of the biggest and most popular manufacturers of hard drives and SSDs in the world. It’s probably best known as a maker of internal hard drives, but also makes and sells external storage in the form of hard disks and SSDs. For the last decade or so, it has also owned LaCie, a name well-known to Mac users as a stylish storage specialist, and sells storage devices under the LaCie brand. If you got a Seagate portable drive, we’ll show you how to use it on your Mac.
Why use a portable drive with a Mac?
Portable drives first gained popularity on Mac with the advent of Firewire in the late 90s, thanks in part to Steve Jobs demonstrating during a keynote speech launching the Bondi blue Power Mac G3 how Firewire allowed portable drives to be plugged and unplugged with no need for a separate power supply and blazingly fast data transfer speeds.
Despite the advent of USB flash storage and then cloud storage, portable drives are still an excellent way of archiving and backing up files, as well as transferring files from one computer to another.
Seagate portable drives are some of the best available for all these tasks and come in a variety of different capacities and a wide range of prices, as well as having connectors for both USB-C and USB-A.
How to use a Seagate portable drive on your Mac
The good news is that Seagate portable drives, like most external hard drives and SSDs, are very easy to use. However, depending on which Seagate drive you buy, you might have to do more than plug and play. That’s because, unless you buy a portable drive that is specifically configured for macOS, it will likely be formatted as ExFAT. Now, ExFAT is compatible with macOS and Macs can read from and write to ExFAT-formatted drives. So, you could just leave it as an ExFAT-formatted drive, and if you plan to use the drive with a Windows PC as well as your Mac, you should.
However, tests have shown that APFS is faster and more secure than ExFAT. It’s also likely to be easier to recover data or fix problems with the drive on your Mac if it’s formatted as APFS. So, if you plan to only use the drive with your Mac, you should format it as APFS.
Here’s how:
- Plug the Seagate portable drive into your Mac.
- Go to Applications > Utilities and open Disk Utility.
- Select the Seagate portable drive in the sidebar and click Erase in the toolbar.
- Choose APFS as the format and give the drive a name.
- Click Erase and wait for Disk Utility to finish.
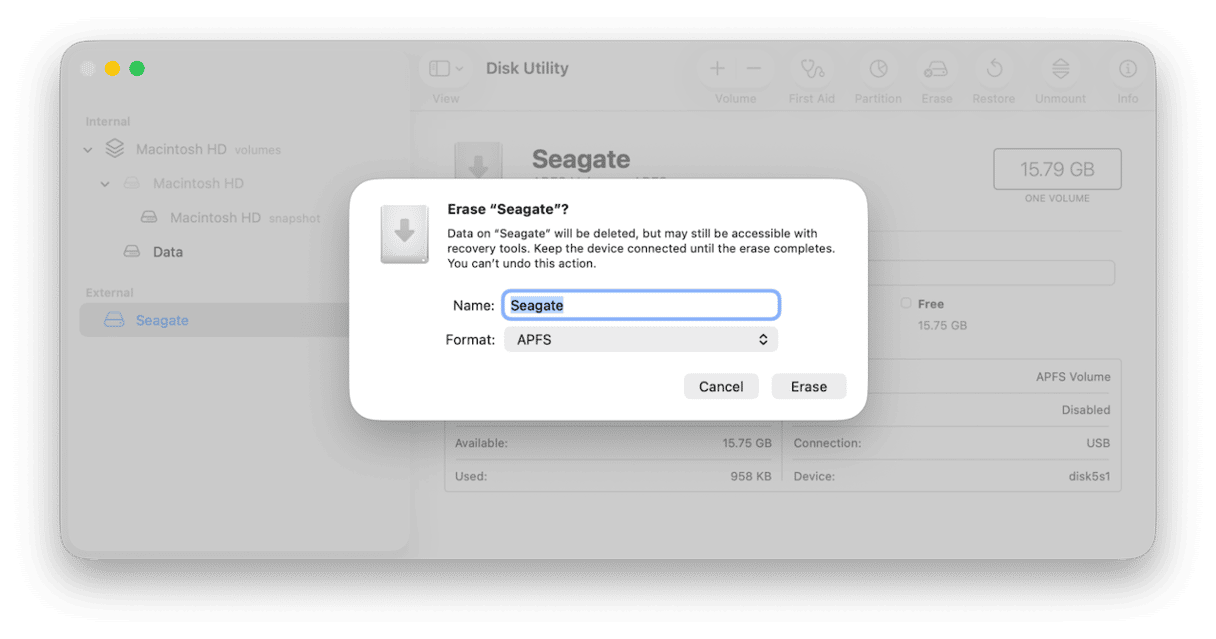
Once Disk Utility has finished, your Seagate portable drive will be formatted as APFS and ready for use.
How to use a Seagate portable drive with Time Machine
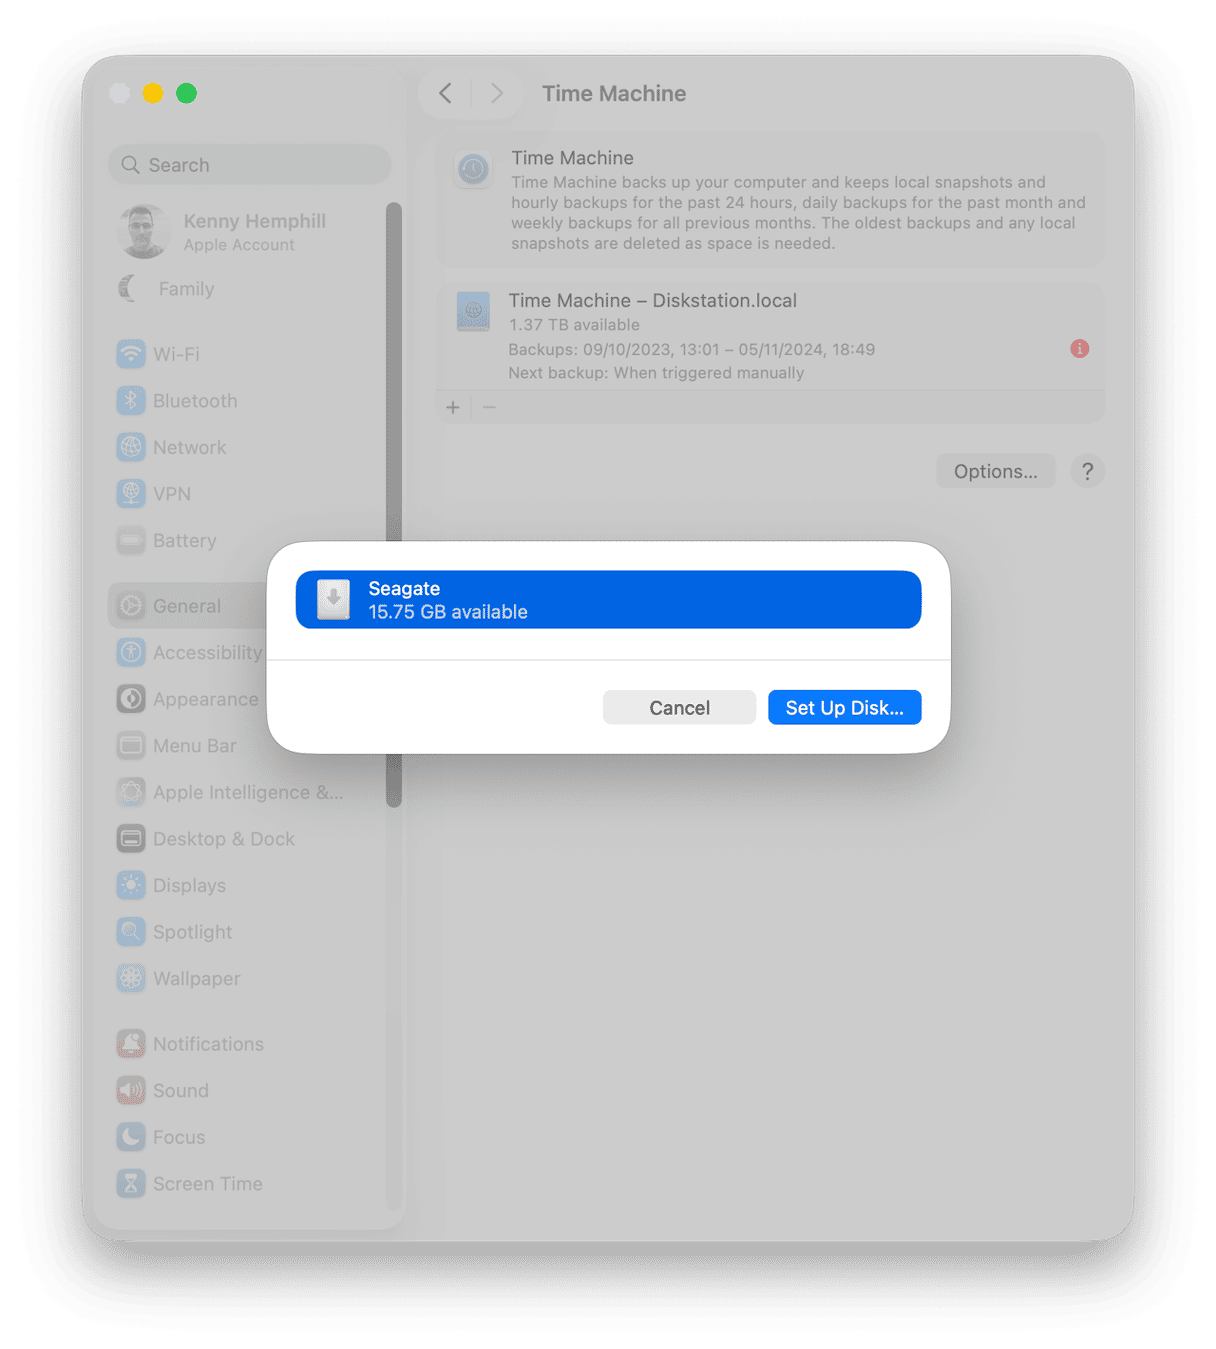
Portable drives make excellent destinations for Time Machine backups, especially if you have a MacBook Pro or MacBook Air. Here’s how to set that up:
- Connect the portable drive to your Mac.
- Click the Apple menu and choose System Settings.
- Go to General > Time Machine.
- Click ‘+’ and select the Seagate Portable Drive.
- Choose Set Up Disk.
- Choose the options you want and click Done.
How to keep your Mac and portable disk running smoothly
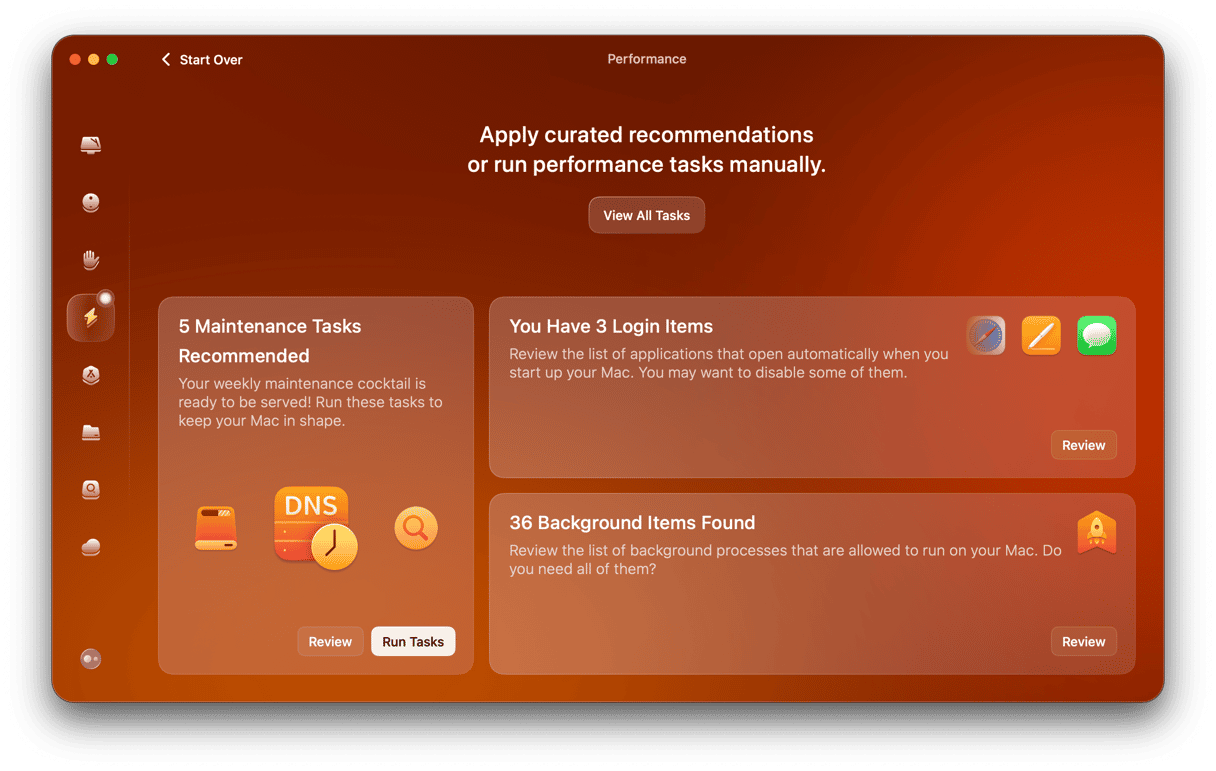
It’s a good idea to run regular maintenance tasks to keep your Mac running smoothly. These include thinning out Time Machine snapshots, reindexing Spotlight, and repairing disk permissions. Doing that manually is difficult and time-consuming, which is where CleanMyMac comes in. Its Performance feature scans your Mac for maintenance tasks that need to be run and allows you to either run them all with a click or review what it has found and choose which ones to run.
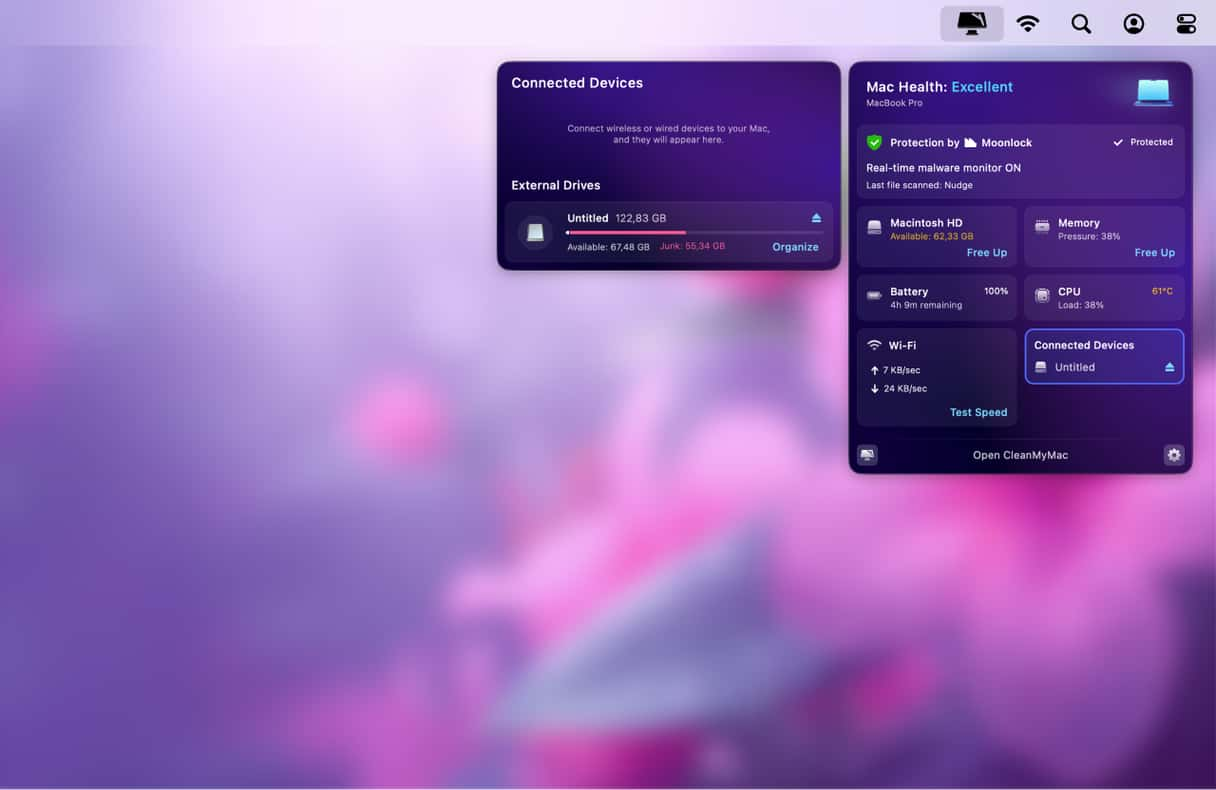
Except for your Mac, it is also a good idea to pay some attention to your portable drive. CleanMyMac can help you out, too. Its Menu App also allows you to quickly see how much space is left on the portable drive. And, if you click Organize in the disk’s pane, it will take you to CleanMyMac’s My Clutter feature and let you get rid of junk files and free up space.
Get your free CleanMyMac trial — you can test it for 7 days for free.
There we have it. With this simple guide, you’ll no longer wonder how to use a Seagate portable drive on a Mac. Thanks for reading, and stay tuned for more Mac tips and tricks.
Frequently asked questions
1. Do I have to eject a Seagate portable drive before unplugging it?
You should always eject an external storage drive before disconnecting it. Just click the eject icon next to it in a Finder sidebar window. At the very least, you’ll avoid the annoying warning message that will appear if you don’t. The risk of data loss is very small, but not worth taking for such a simple action.
2. Can I store files on a Seagate portable drive even if I am using it as a Time Machine destination?
Yes. Time Machine Backups are stored in a single file on the destination drive and Time Machine is excellent at adjusting how it backs up based on the space available. So, you are free to use the drive to store other files.
3. Should I choose a portable hard drive or an SSD?
That depends on what you want to use it for. If it’s going to sit on your desk as a destination for Time Machine backups, a hard drive is fine. However, if you plan to use it for tasks where speed is important or plan to carry it around a lot, choose an SSD.


