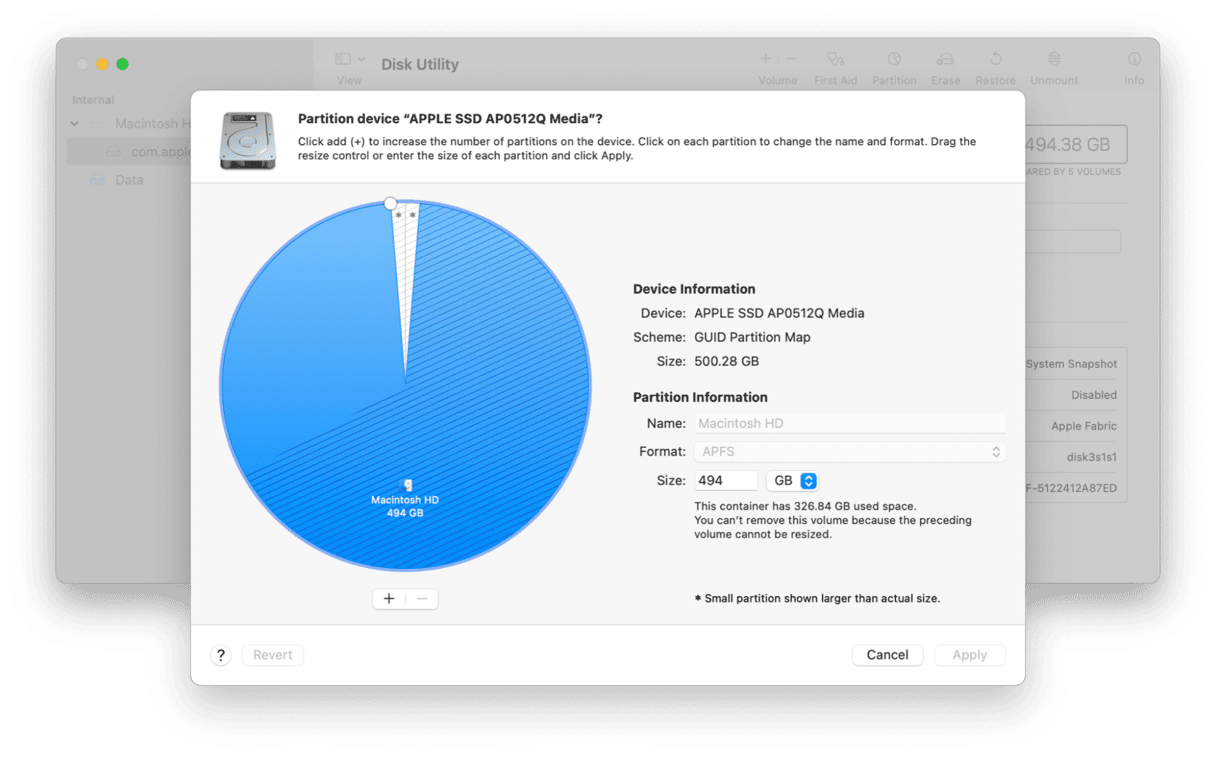
If you’ve ever used Boot Camp on your Mac or created a partition to install a beta version of macOS so you can try it out without risking your existing data, you will have partitioned your boot drive. And if you no longer want to do these things, you may want to unpartition the hard drive on your Mac. In this article, we’ll show you how.
What is a hard drive partition?
Partitioning a hard drive or SSD is the process of splitting it into two separate volumes, each with its own allocated space on the drive. Files stored on one partition are stored separately from those on the other. And because macOS recognizes each volume separately, you can choose which volume to boot from. That means you can install a different version of the OS on each partition and choose which one to run. That’s exactly how Boot Camp works.
The term partition is becoming outdated as far as macOS is concerned, however. Apple now ships Macs with drives formatted as APFS instead of HFS+ (macOS Extended). APFS drives don’t use partitions; they have containers. Containers are similar to partitions, but they can contain multiple volumes and allocate space to each volume as required. So, if you have an APFS drive, it makes more sense to add a volume than partition the drive, as volumes can grow to accommodate more data as they need to.
To find out how to partition a drive on your Mac, read this article.
To create a volume on an APFS container, follow these steps.
How to create a volume on an APFS container
- Go to Applications > Utilities and open Disk Utility.
- Click on a volume, such as Macintosh HD, in the sidebar.
- Then, click the ‘+’ Add Volume button in the toolbar.
- Give the volume a name.
- Choose APFS in the Format pop-up menu.
- Click Add, then click Done when it’s finished.

How to delete a hard drive partition on your Mac
The first thing you should do before you unpartition your Mac is back up the partition you want to remove. You can use Time Machine or any other disk backup utility. However, there’s no point backing up junk files and other data you don’t need, so you should get rid of that first. The quickest and easiest way to do that is to use CleanMyMac’s Smart Care. This tool scans your Mac for files you don’t need, potential malware threats, and opportunities to speed up your Mac.
- Get your free CleanMyMac trial.
- Install and open the app.
- Choose Smart Care.
- Click Scan.
- Wait for it to finish and click Run.

Now, back up your Mac, and you’ll be ready to wipe and remove the partition.
- Go to Applications > Utilities and open Disk Utility.
- Choose the volume you created when you originally partitioned your drive.
- Click Erase, then Erase again to confirm.
- Click Done.
- Select your boot drive in the sidebar (it’s probably called Macintosh HD).
- Choose Partition.
- Select the partition you want to remove.
- Click the ‘-’ button.
- Click Apply.
How to remove an APFS volume
As we said, recent Macs have APFS-formatted drives and use containers instead of partitions. Here’s how to remove a volume from a container.
- Open Disk Utility.
- Select the volume you want to remove in the sidebar.
- Click the Delete Volume button in the toolbar. If the volume is part of a group and you want to remove the whole group, click Delete Volume Group.
- When it’s finished, click Done.
Partitions have been replaced by containers in APFS-formatted disks. But there are still lots of Macs with HFS+ formatted drives with partitions on them. If that applies to you and you want to delete a partition, follow the steps above. Remember, though, to delete junk files and back up the partition first.


