In the previous versions of an iPhone, you’ve probably seen the HDR badge on some of your photos and the namesake setting in your Camera app — but what exactly does it do? iPhone’s HDR mode can dramatically improve your shots if you know how to use it. In this guide, we’ll explain what HDR is, why you need it, and the difference between an HDR and a non-HDR photo.
What does HDR mean?
HDR stands for high dynamic range, or more shades between the lightest and the darkest one. If HDR mode is on, your iPhone’s camera takes three photos: one very bright, capturing the darker parts of the scene well; one very dark, with the lightest parts retaining color and detail; and one of regular brightness. The best fragments of these photos are then glued together to produce one vivid, well-detailed image.
How to turn on HDR on iPhone?
You have an HDR setting on your iPhone because cameras have limited dynamic range — which means they capture far fewer shades than your eye does. So if you shoot a sun-lit street, for example, either the sky will be washed out, or the buildings will be reduced to black shapes. With iPhone’s HDR mode, your camera captures more shades and thus takes better photos under difficult lighting conditions.
So, is the HDR photo better than a non-HDR? Not always. The mode works best for brightly lit surroundings, while colorful objects and movement can actually look worse. This brings us back to the HDR setting and what you should do with it. By default, HDR is set on Auto. That means the Camera will use the mode when it deems it necessary. To turn off HDR on your iPhone for photos, follow these procedures:
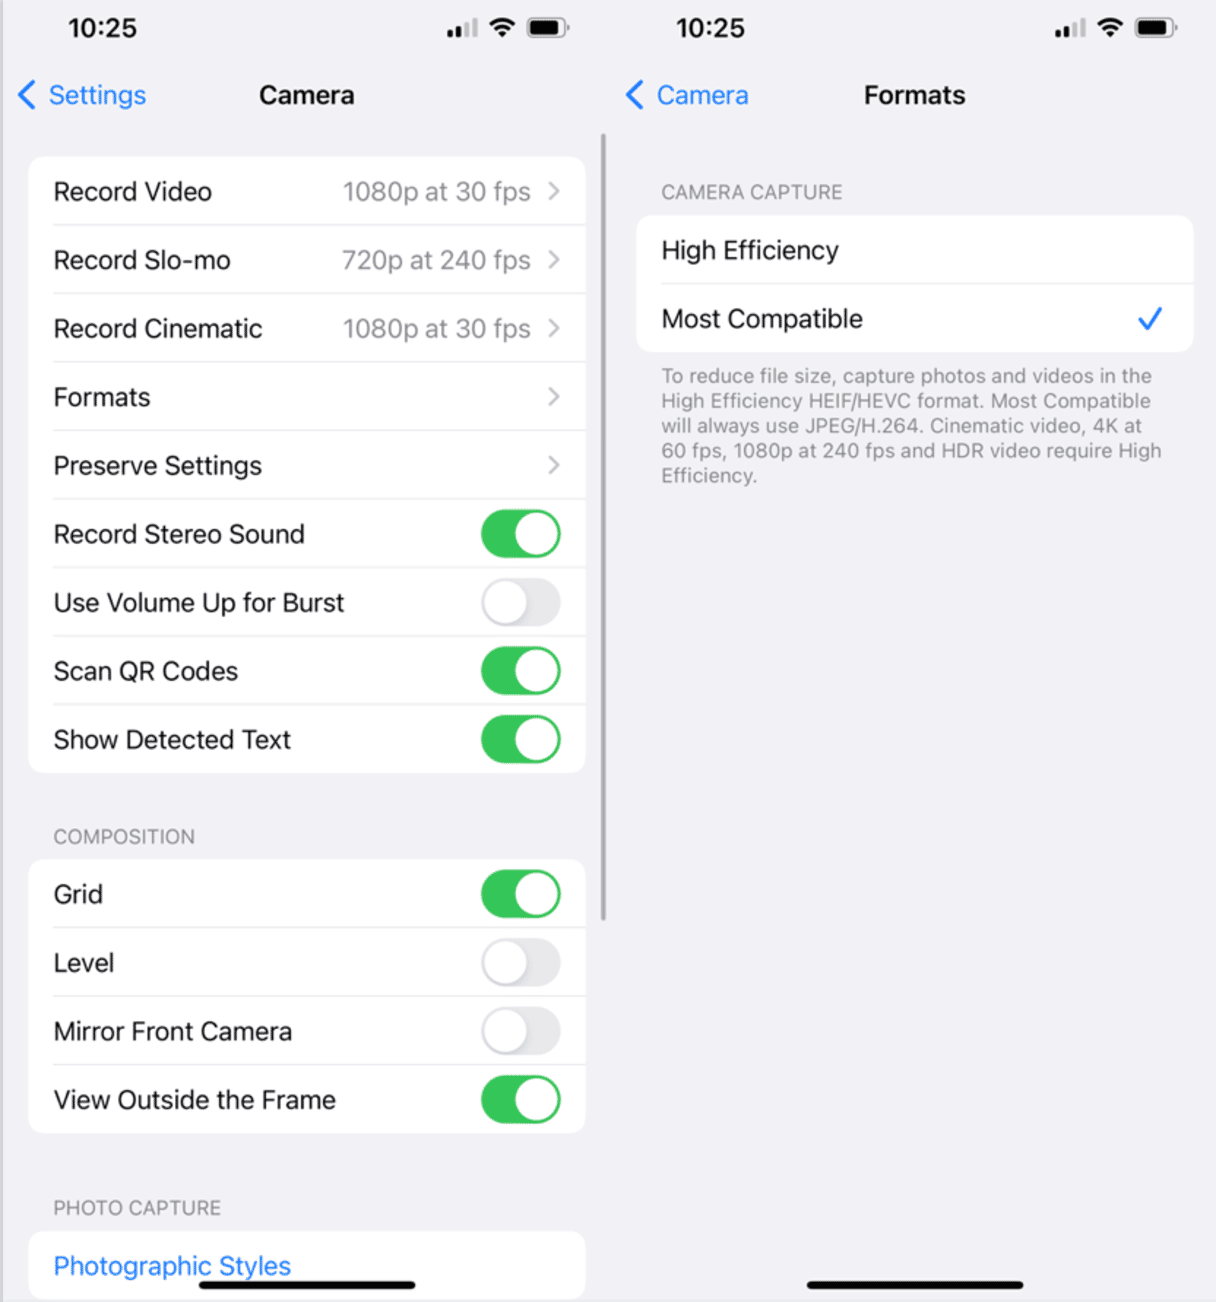
- First, go to Settings > Camera.
- Tap Formats.
- Choose Most Compatible. This will allow HDR in the first place.

As the next step, follow these instructions:
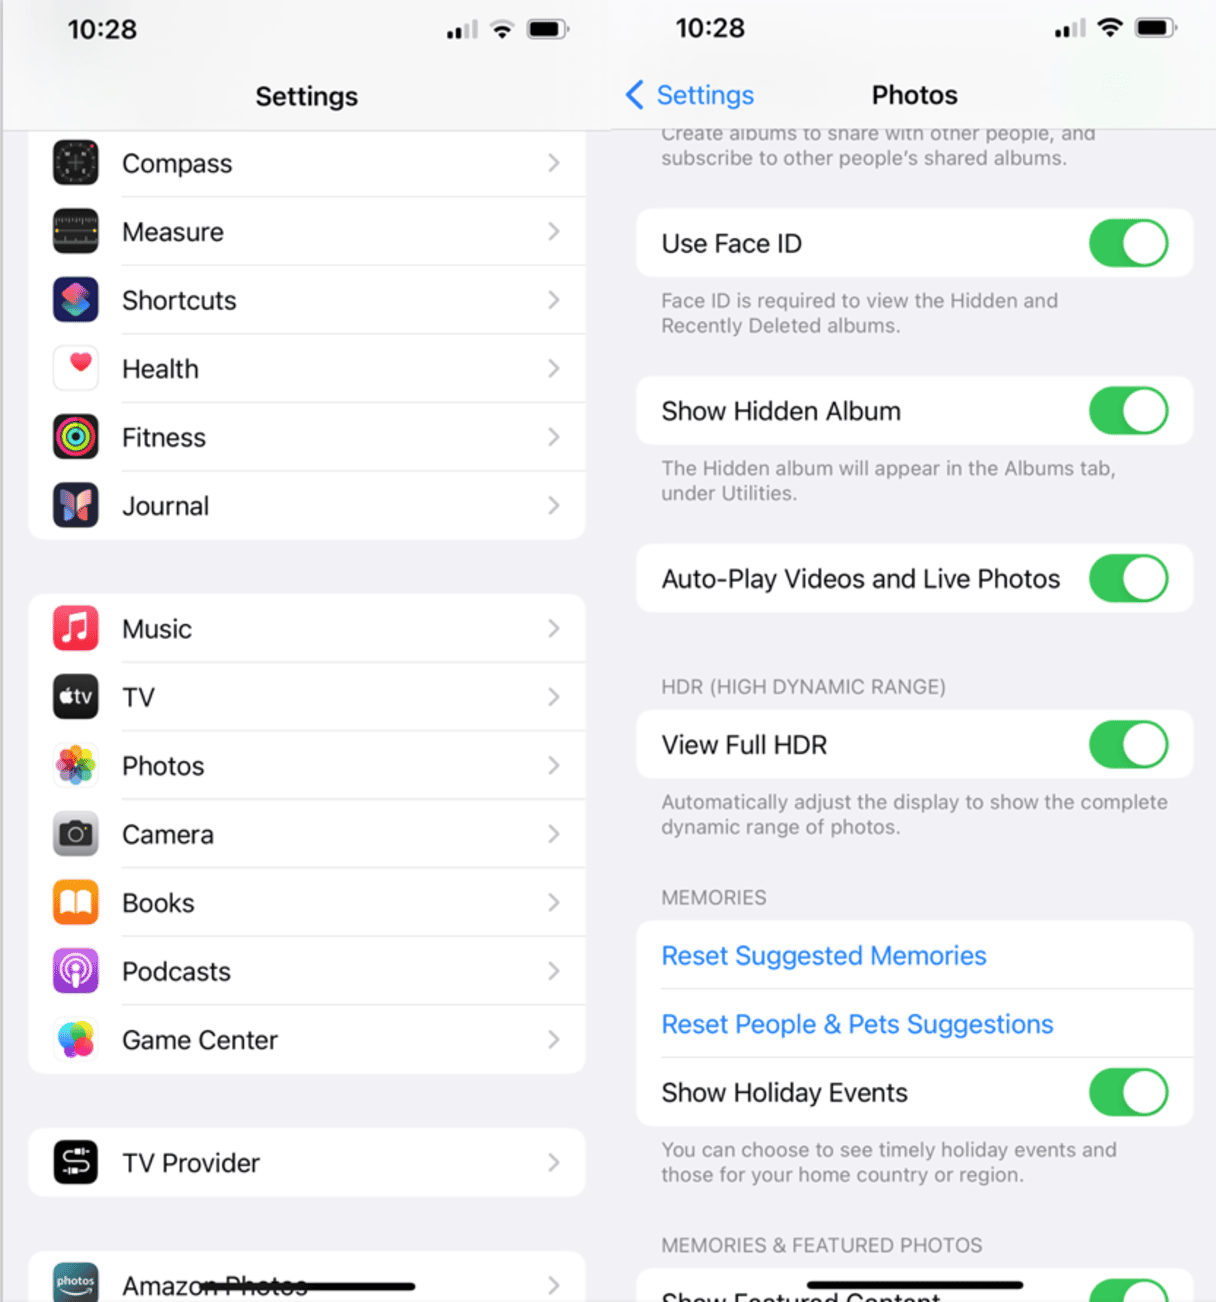
- Go to Settings > Photos.
- Toggle on View Full HDR.
- This allows you to see photos in your Photos App in full HDR.

That’s it! If you want to switch it on later, just use the same setting.
Do HDR photos use more memory?
An HDR photo shot on iPhone is roughly the same size as its non-HDR equivalent. So the photos per se are not a threat to iPhone storage. But an iPhone setting can cause your storage to deplete more quickly. See, by default iPhone saves both the HDR and the non-HDR version of your shot.
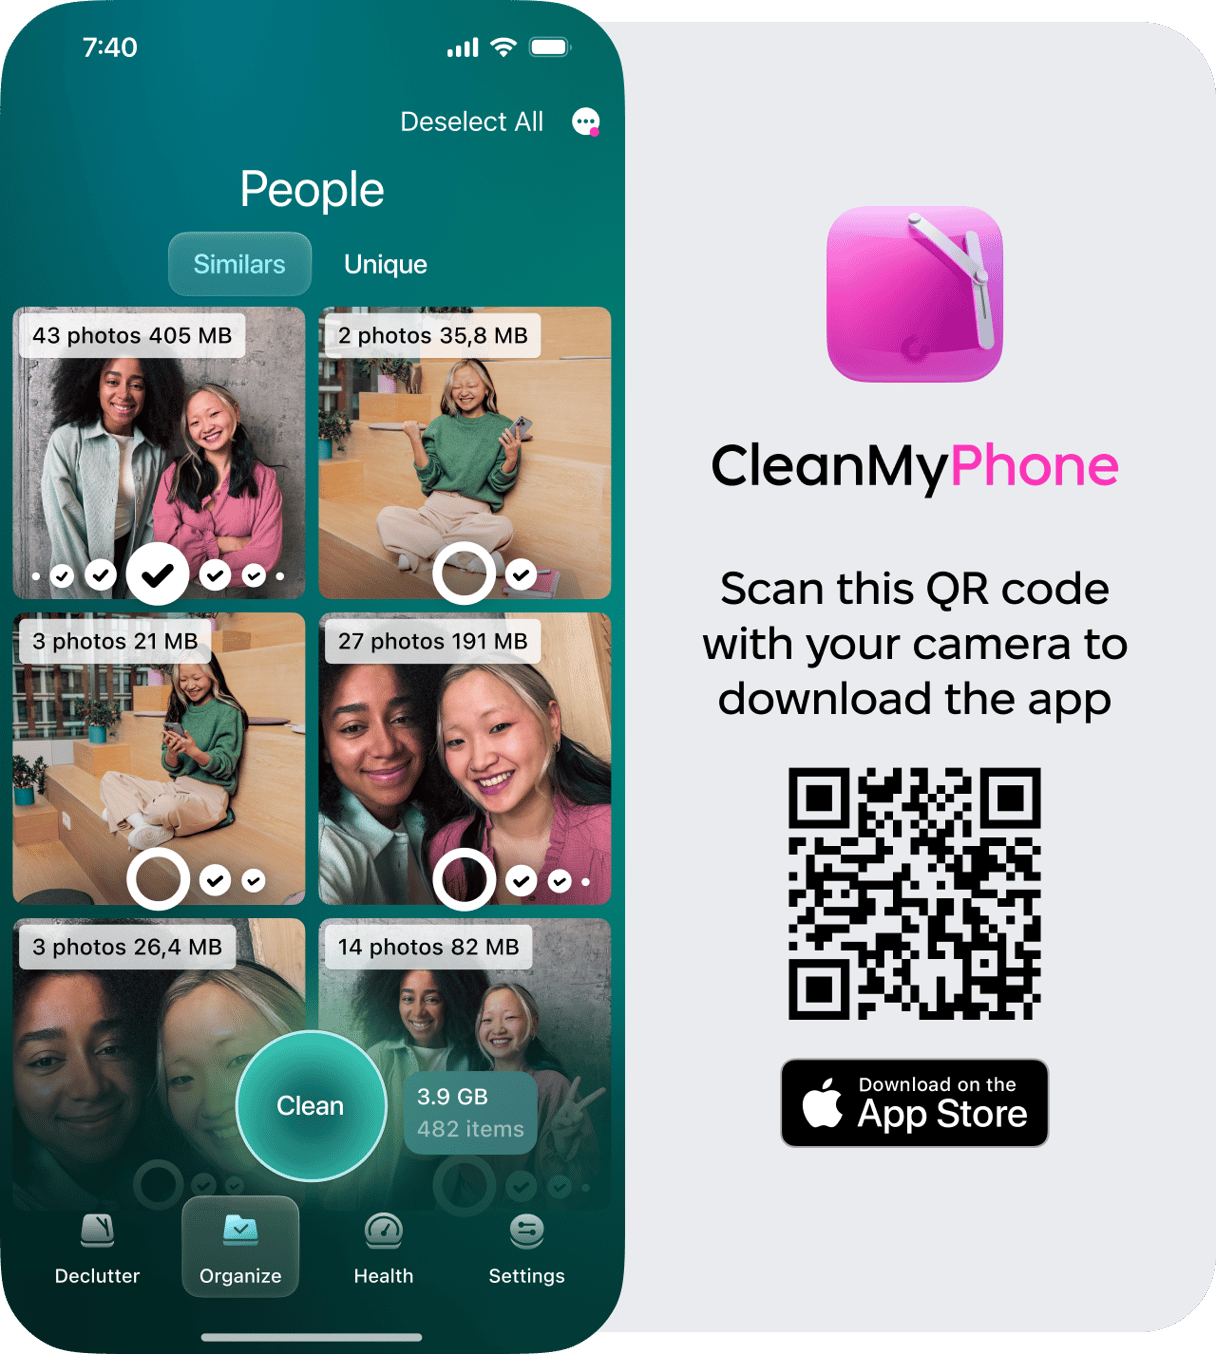
While you’re in the mood for deleting unneeded photos, check out the Declutter module that comes with CleanMy®Phone — it quickly finds all kinds of unused stuff: screen recordings, duplicates, screenshots, and blurred photos. Pics will be preselected for removal, and you can deselect anything you don’t want to be deleted.
Also, you can use the Organizer module to find and delete similar photos.
- Download CleanMy®Phone.
- Open it and tap Organize.
- Choose Last Week or Last Month. Alternatively, set up a custom filter and tap Scan.
- Check the categories of similar photos the app has found and select files for deletion.
Repeat this for all sets of similar photos you’ve got and then tap that big Clean button. Photos are now in your Recently Deleted album in the Photos app.

How to turn off HDR on iPhone
Sometimes the HDR photo looks better, sometimes the regular one is your favorite, but no matter the case, there’s always an extra copy hogging iPhone storage. That means two photos instead of one every time you take a photo in the sun! Luckily, you can easily turn that off in the Settings:
- Open Settings and then Camera.
- Find Formats
- Choose Most Compatible.
From now on, your iPhone won’t save redundant photos anymore.
How to turn on or turn off HDR for video recordings on iPhone
Turning HDR on or off for iPhone videos can improve their quality by better balancing light and dark areas. To turn on HDR for your videos, do the following:
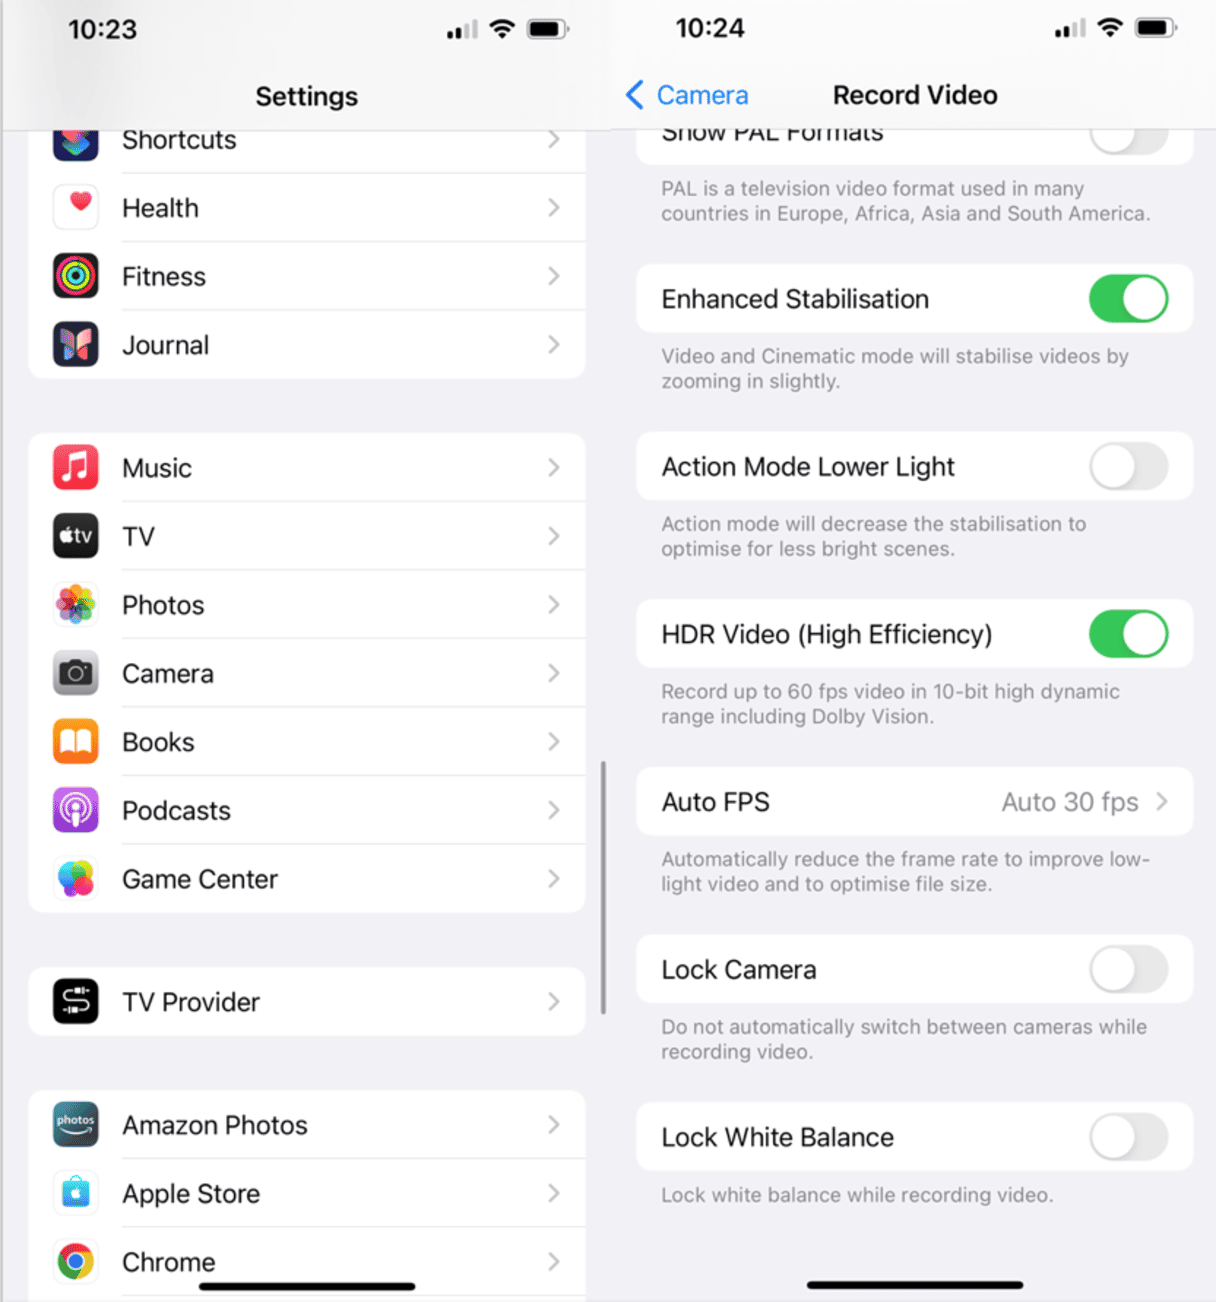
- Go to Settings > Camere.
- Tap on Record Video.
- Toggle on HDR Video (High Efficiency).

HDR mode used to be a privilege of pro photographers and camera geeks, but as iPhone cameras got more advanced, we mere mortals gained access to the trick. HDR on iPhone is still a far cry from what high-powered cameras can do, but it’s already good enough to improve your beach selfie. For more camera tricks that take your photos a step further, check out this article on the iPhone Portrait mode we published earlier.


