Over the last few years, most of us have become very familiar with using the camera on our Mac to attend meetings remotely or chat with family and friends. Whichever app you use to make or join a call — FaceTime, Zoom, Teams, or Google Chat — it’s likely that you use your Mac’s built-in camera. But how do you manage privacy when it comes to the camera? And how to adjust Mac camera settings? We’ll tell you everything you need to know.
Do all Macs have a camera?
No. The FaceTime camera, as Apple calls it, comes with the MacBook Air, MacBook Pro, and iMac. There is no camera on the Mac mini, Mac Studio, or Mac Pro. However, you can connect an external camera, such as a webcam or a DSLR, to those Macs — or, in fact, any Mac — and use it.
How to control access to your Mac’s camera
Apple allows you to manage access to your Mac’s camera on an app-by-app basis. When you first open an app that uses the camera, like Zoom or Teams, for example, you will see a dialogue box asking for permission to use the camera. When you grant permission and open the app, you’ll notice an orange dot in the menu bar where the Control Center is. That means that the app has access to your camera, but not necessarily that it’s recording or broadcasting at that moment. The light next to your Mac’s camera will also turn green when it’s in use.
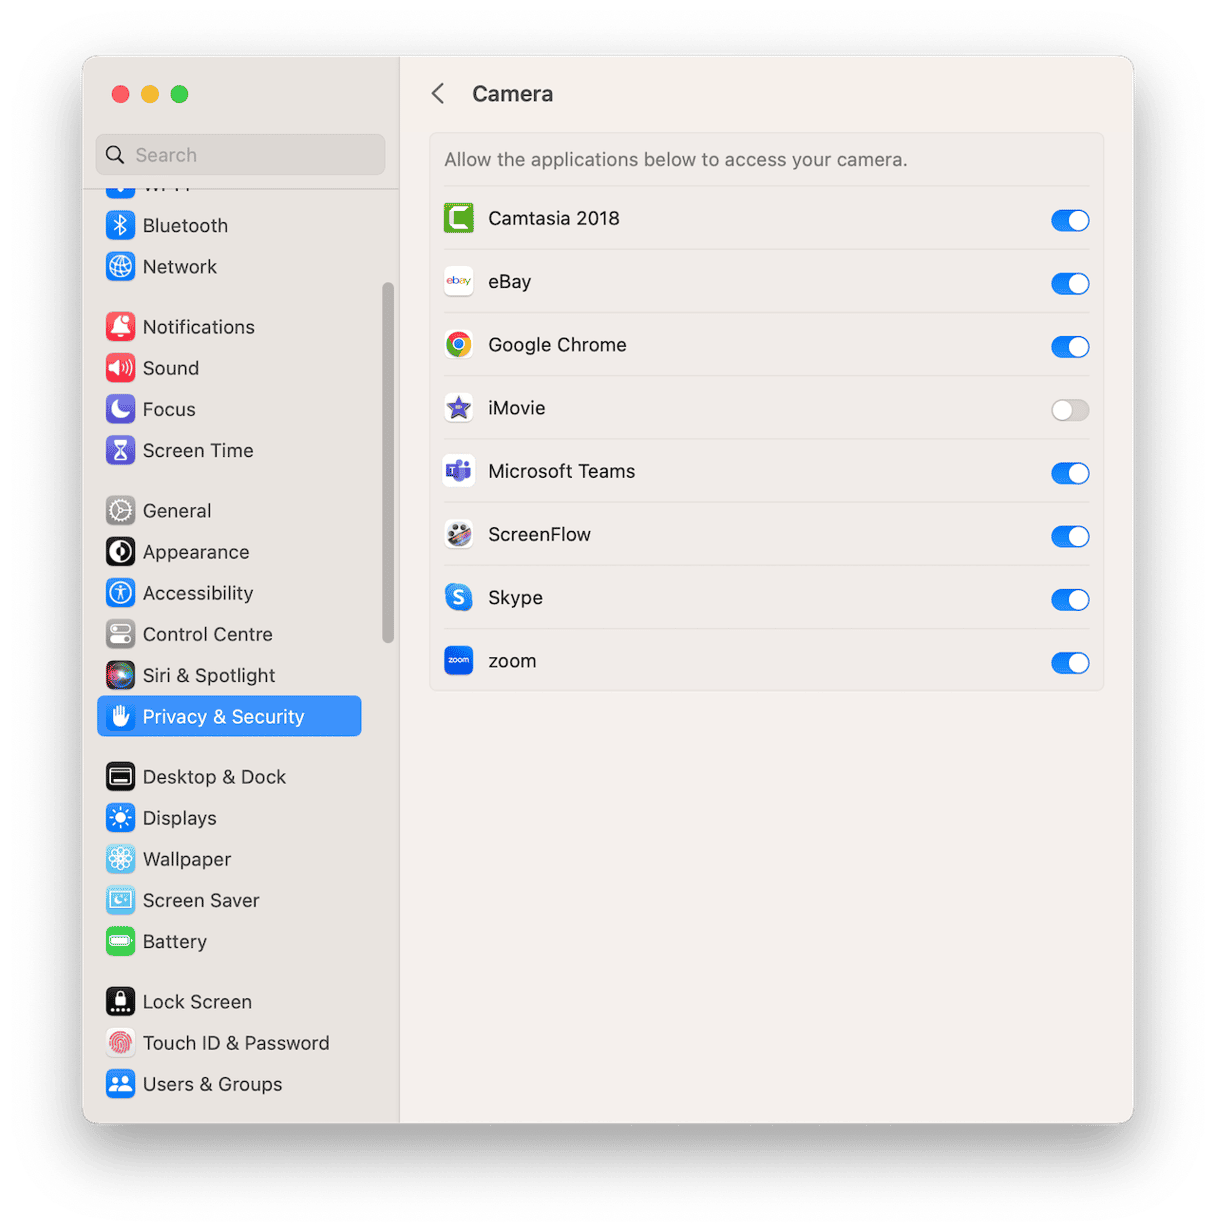
You can manage the apps that have access to the camera in System Settings.

- Click on the Apple menu and select System Settings.
- Go to Privacy & Security and then Camera.
- You will see a list of all the apps that use the camera on your Mac.
- If the toggle switch is set to on, it means the app has permission to use the camera. To revoke that permission, toggle the switch to off.
Adjust camera settings on Mac: how to improve image quality
There are no settings to change the resolution or any other quality settings for your Mac’s camera. So, to improve the image quality, you need to make changes to your environment. Make sure you’re in a well-lit room. Don’t sit in front of the window and try to keep direct light away from the camera lens. Plain backgrounds work best. Remember, the camera autoadjusts focus and brightness depending on what it ‘sees,’ and you want the brightest and sharpest part of the image to be you.
Adjust Mac camera settings: how to choose your Mac’s camera in an app

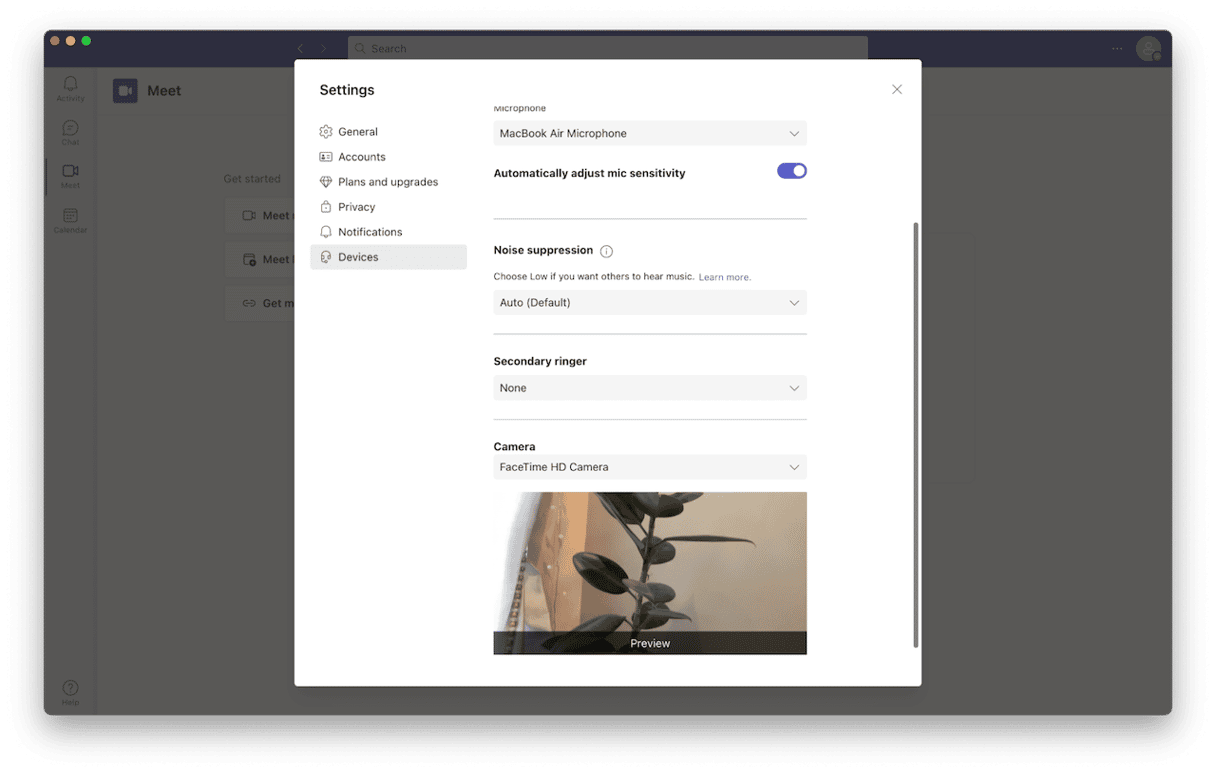
If you have more than one camera connected to your Mac — perhaps the built-in FaceTime camera and a USB webcam — you will want to choose which one to use. Most apps, including Zoom and Teams, have Settings controls which come with a section for video and audio. Here, you can choose and usually test both the camera and microphone you want to use. You can also use these settings to help you adjust the position of the camera so that it is pointing where you want it to because it shows a preview of the image.
How to check your camera is working
If you’re trying to make a video call, but no video from your camera is appearing, it could be either your camera or the app you’re using that’s at fault. The easiest way to check if your camera is working is to open either FaceTime or PhotoBooth. Both of these apps display a feed from your camera as soon as they launch. If there is no feed, try restarting your Mac. If that doesn’t work, go to System Settings from the Apple menu and use Software Update to check if there is an OS update available. If there is, install it.
Most of us have become used to utilizing the camera on our Mac for making video calls and attending meetings. But not many of us know how to adjust FaceTime camera settings on Mac. In truth, there isn’t much you can do. But one important setting is the one that controls which apps can access the camera. Follow the steps above to make sure that only the apps you want to use with your Mac’s camera can access it.


