AirDrop is a tool for transferring files from one device to another wirelessly over a local network. On a Mac, you can drag and drop a file onto a device in the AirDrop window in the Finder. On an iPhone or iPad, you can use the Share feature. Like most Apple technology, it usually just works. But if it doesn’t, here’s what to do with MacBook AirDrop not working to fix it.
Why is AirDrop not working on my Mac?
There are a number of possible reasons, and the only way to find out which is causing the problem with AirDrop on Mac not working is to eliminate them one by one. The first thing to do is to make sure that your Mac and the device to which you want to send or receive files meet the conditions below:
- They are within 30 feet (nine meters) of each other.
- They have Wi-Fi and Bluetooth turned on.
- Your Mac was released in 2012 or later and is running Yosemite or later.
- Your iPhone is iPhone 5 or newer running iOS 7 or later.
- If you use an iPad, it should be iPad (4th generation) or newer running iPadOS 13 or later. All other iPad models (Air, mini, and Pro) support AirDrop.
How to fix it if AirDrop is not working on your Mac
1. Make sure AirDrop is enabled on a Mac
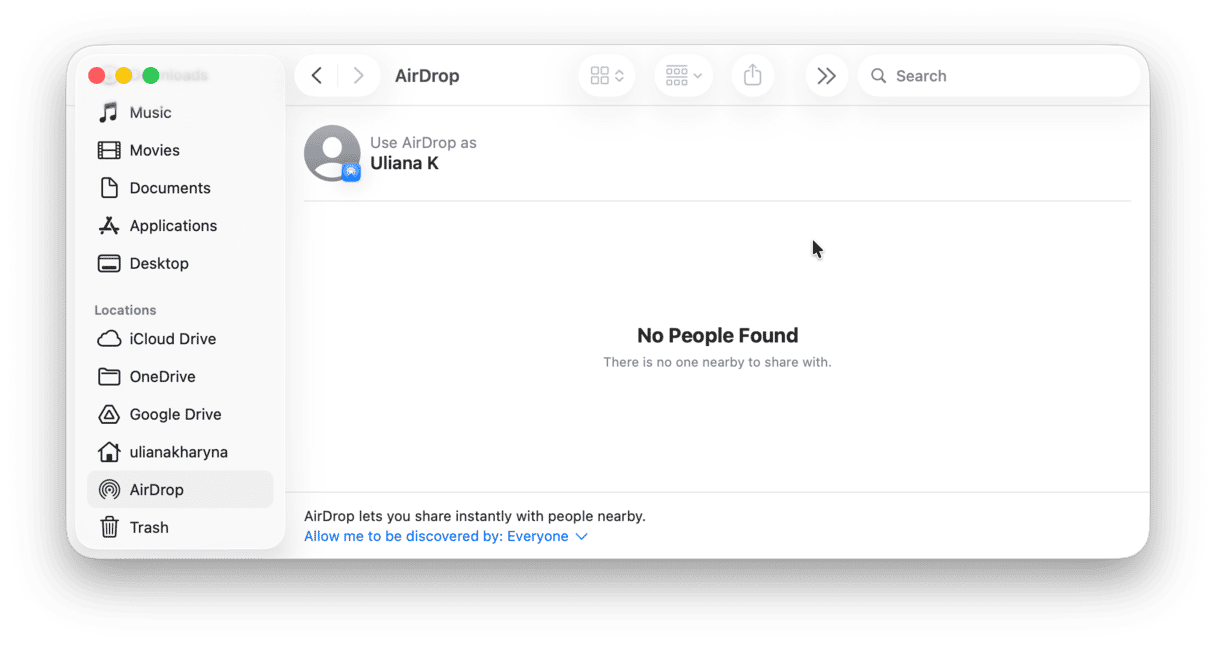
In the Finder, click on the Go menu and select AirDrop. Or open a Finder window and click on AirDrop in the sidebar. At the bottom of the window, where it says ‘Allow me to be discovered by,’ make sure it says either Contacts Only or Everyone. If not, click on the down arrow and choose one of those.
2. Check settings on an iPhone or iPad
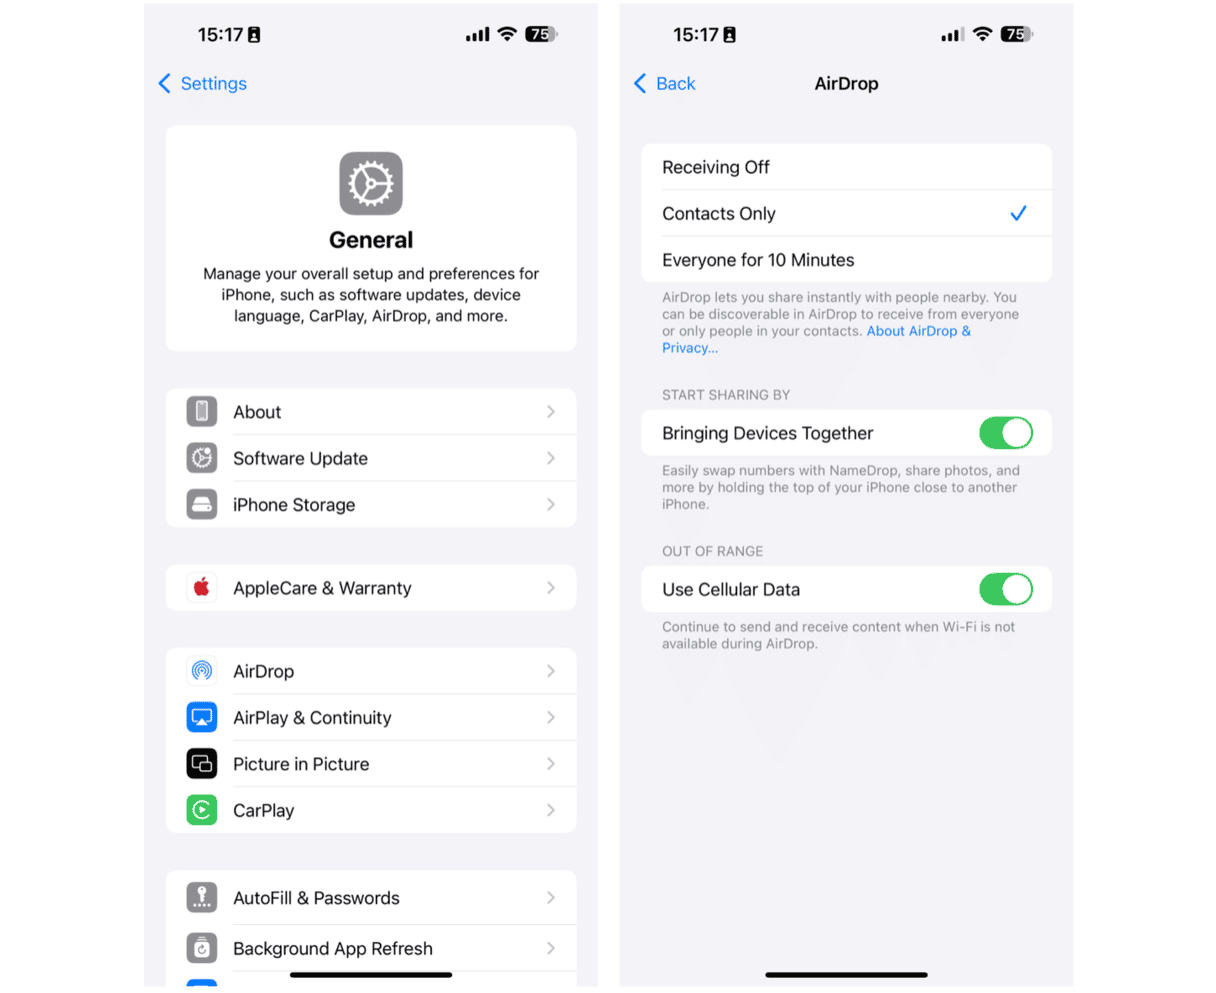
It works for both devices — the one you’re sending from and the one you’re receiving with. If it’s an iOS or iPadOS device, launch the Settings app, and go to General > AirDrop. Make sure either Contacts Only or Everyone for 10 minutes is selected.
3. Make sure both devices are on the same network
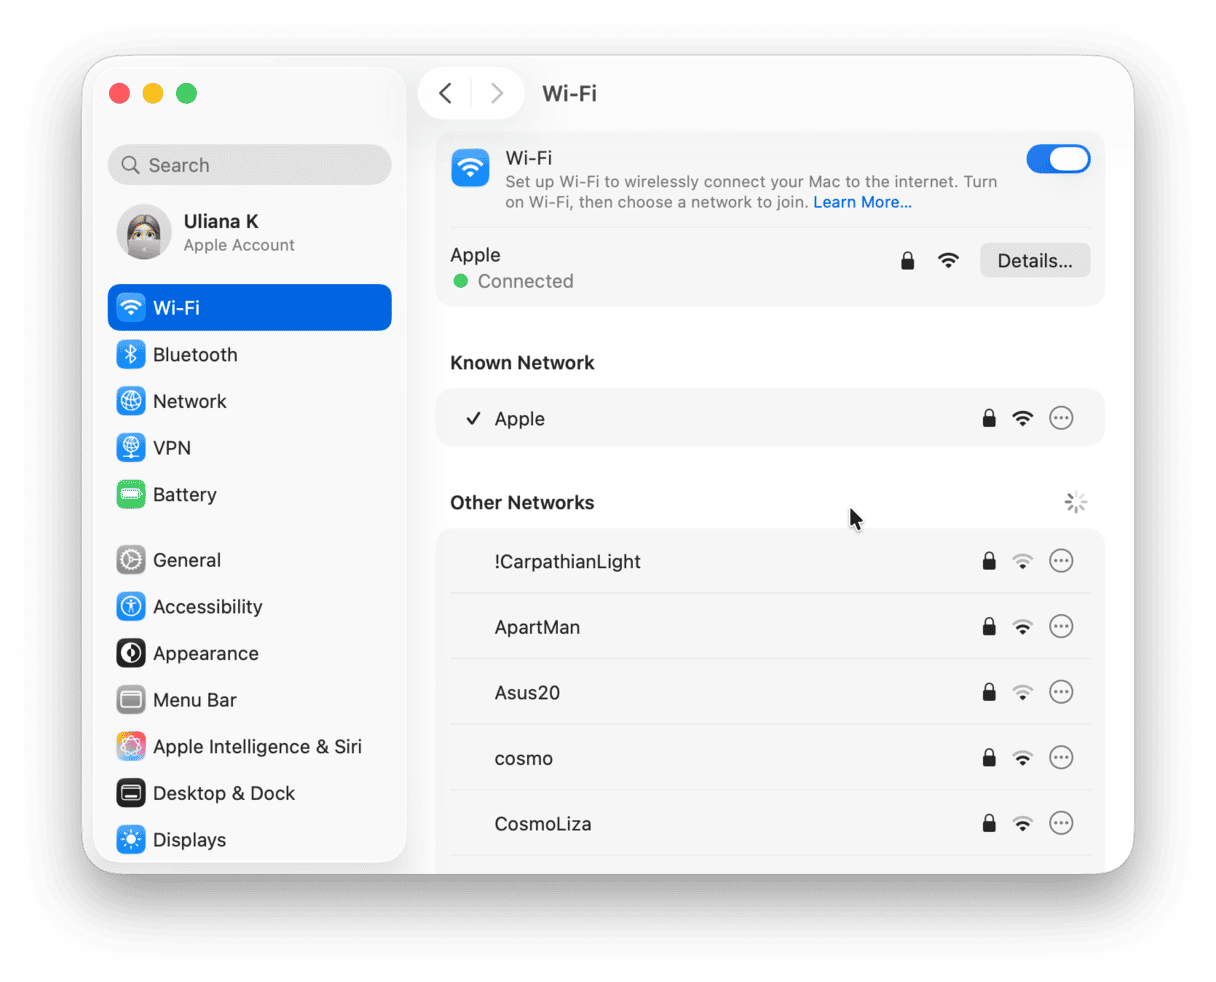
AirDrop uses Wi-Fi as its first choice for connecting two devices, and for that, they both need to be on the same network. If they’re not, AirDrop will attempt to use Bluetooth, but it’s not as effective as Wi-Fi.
4. Make sure devices are unlocked and battery is not low
If you’re transferring files to or from an iPhone or iPad, make sure the device is on and unlocked. Your Mac should be awake if you’re using that. If devices are locked or asleep, they won’t appear in the list of devices to which you can AirDrop files.
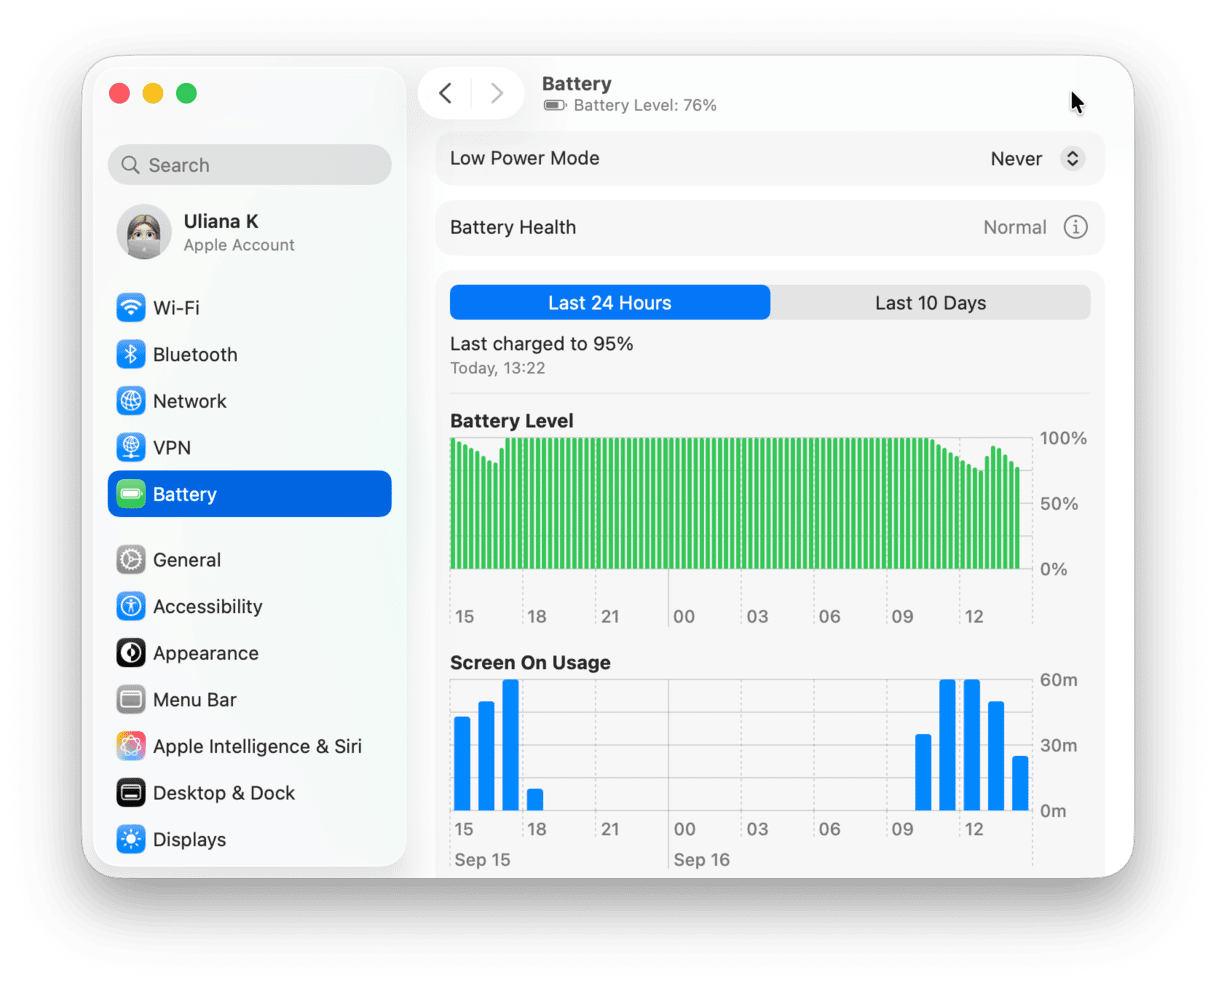
More than that, check the battery power. If it is lower than 20%, disable Low Power Mode.
- On an iPhone or iPad, go to Settings > Battery and turn off Low Power Mode.
- On a Mac, navigate to System Settings > Battery and choose Never from the menu next to Low Power Mode (you can change it back to your preferred option later).
5. Move the devices closer together
Although AirDrop should work as long as the devices you’re transferring files between are within 30 feet of each other, it’s not always the case. Note that obstacles, such as walls and interference from appliances like microwave ovens, can cause problems. The solution is to reduce the distance between the devices. The closer they are to each other, the better.
6. Turn off Personal Hotspot and VPN
While AirDrop will work with Personal Hotspot turned on, it won’t work if the Personal Hotspot is in use. So, if your iPhone is currently being used as a hotspot, go to Settings > Personal Hotspot and toggle Allow Others to Join to the off position.
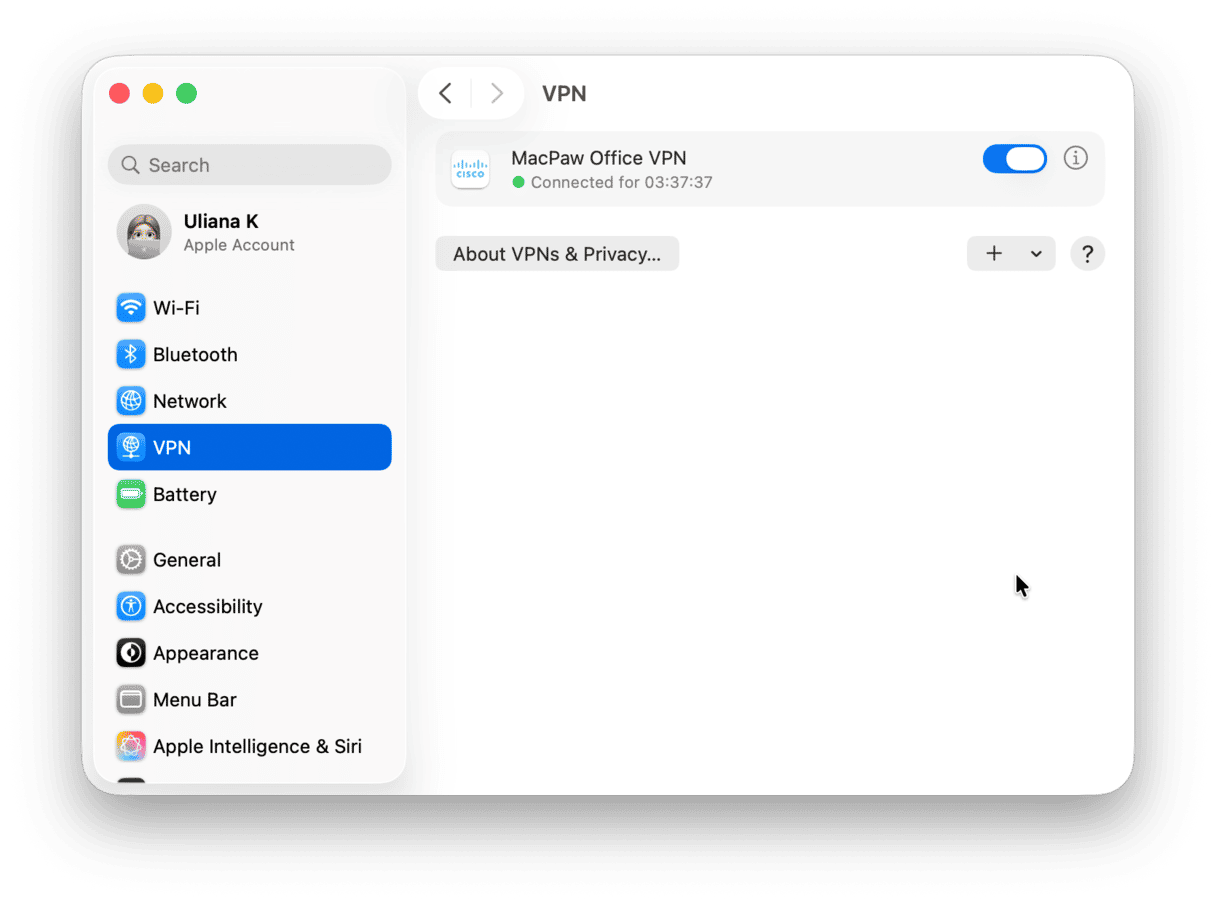
As for VPN, it might interfere with AirDrop, so it’s worth disabling it and trying to send or receive a file once again. Just go to System Settings/Settings> VPN & Filters and turn it off. You can enable it when you no longer need to use AirDrop.
7. Turn Bluetooth and Wi-Fi off and then on again
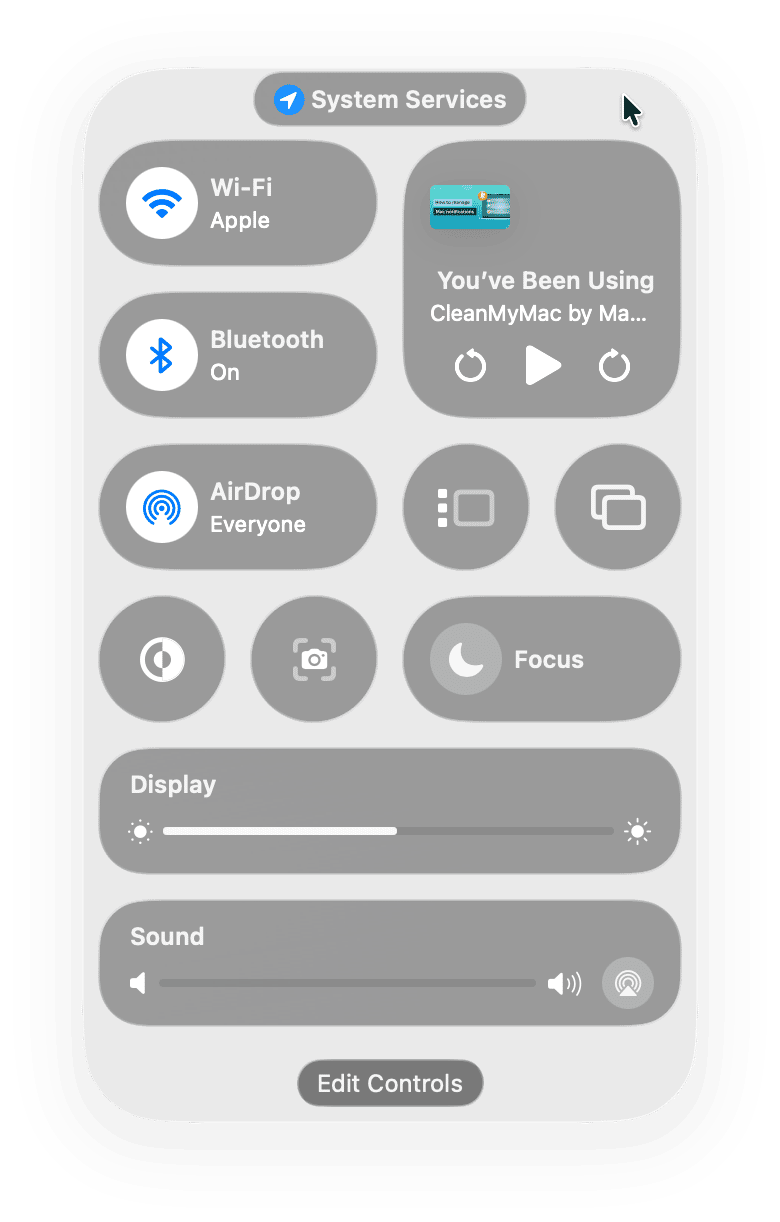
Lots of problems with wireless connections, including with AirDrop, can be solved by turning Wi-Fi and Bluetooth off and then on again. On your Mac, click on the Control Center icon, then on the down arrow next to Wi-Fi, and toggle the switch to off. Repeat for Bluetooth. On iOS or iPadOS, swipe down from the top left corner of the Home screen to pull up Control Center, then tap Wi-Fi and Bluetooth twice each to turn them off and then on again.
8. Check the Firewall settings on your Mac
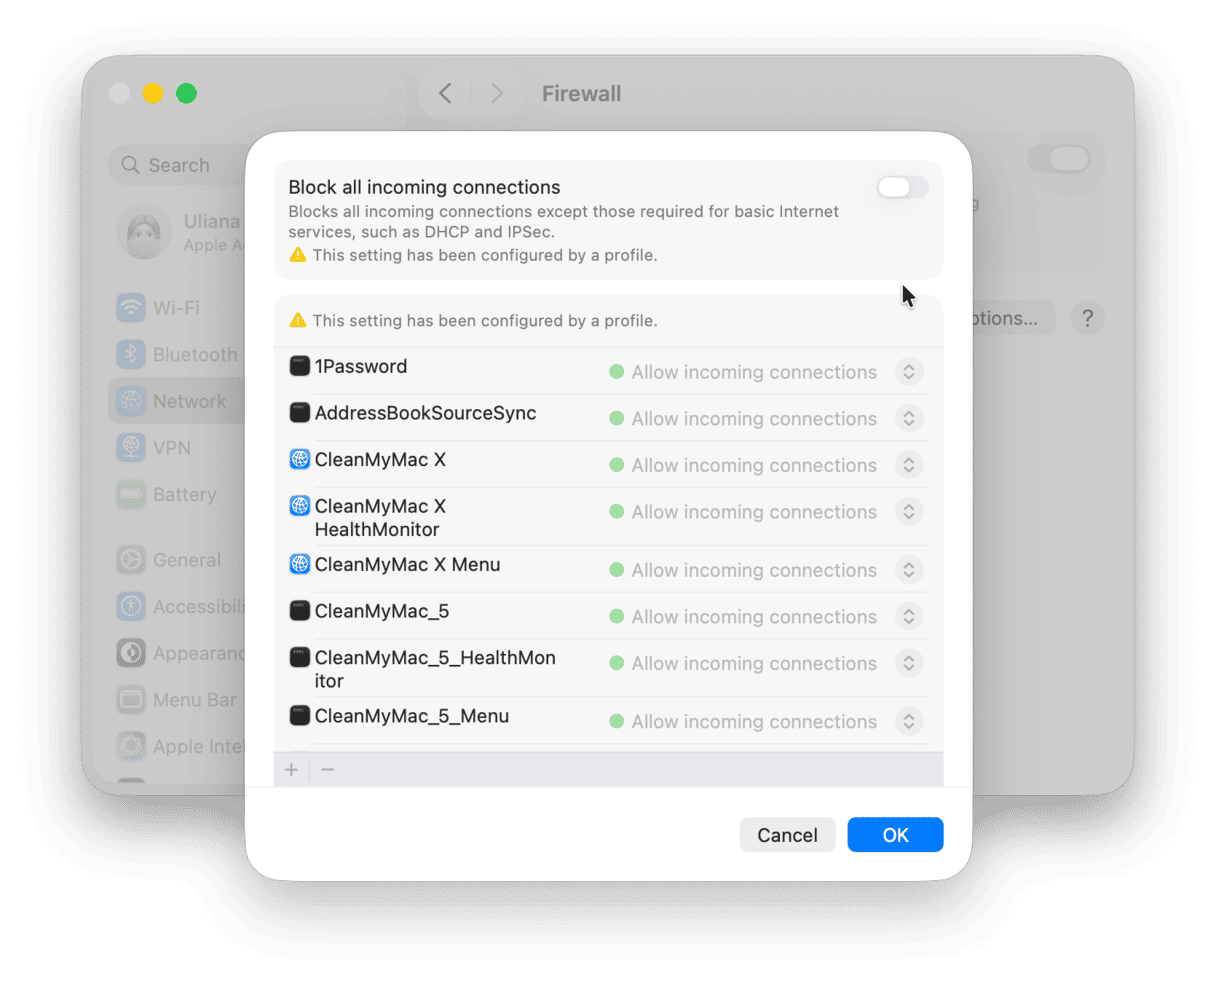
Your Mac’s built-in firewall is there to prevent unauthorized applications and services from accepting incoming connections. However, if you have it set to block all incoming connections, that could prevent AirDrop from working properly.
- Click on the Apple menu and choose System Settings.
- Select Network and then click Firewall.
- Click Options.
- Make sure Block all incoming connections is set to off.
- Make sure Automatically allow built-in software to receive incoming connections is set to on.
- Quit System Settings.
9. Restart your Mac and other devices
If nothing so far has worked, restart your Mac and then turn off the device you’re trying to send files from or receive files to and turn it on again. If that doesn’t work, try performing a hard reset on the iPhone or iPad. The process for this differs depending on whether the device is running iOS 16 or later or an earlier version of iOS.
You can find out how to do it on your devices on Apple’s website. If the device is an iPad, the process differs depending on whether it has a Home button or not. You can find the instructions for your iPad on Apple’s website.
10. Update your Mac
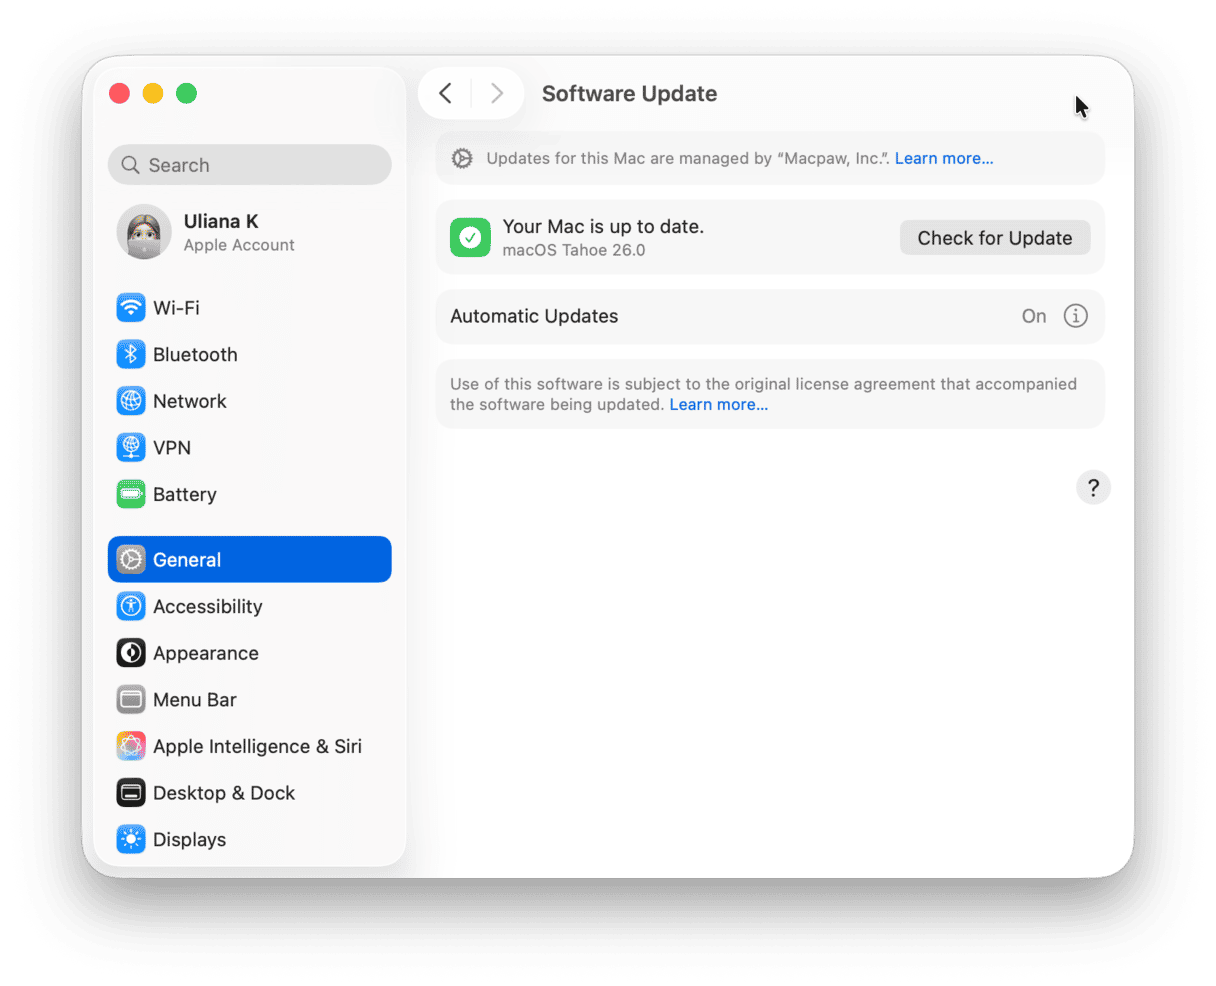
If none of the steps above works, the next thing to do is to check for updates for your Mac. If there’s an update available, you should install it. The process is slightly different for Macs running macOS Ventura or later than it is for those running earlier versions of macOS.
macOS Ventura or later
- Click on the Apple menu and choose System Settings.
- Go to General > Software Update.
- Wait for it to check for available updates. If there’s one available, click Install.
Earlier than macOS Ventura
- Click on the Apple menu and choose About this Mac.
- Choose Software Update.
- Wait for it to check for an update. If there’s one available, install it following the on-screen instructions.
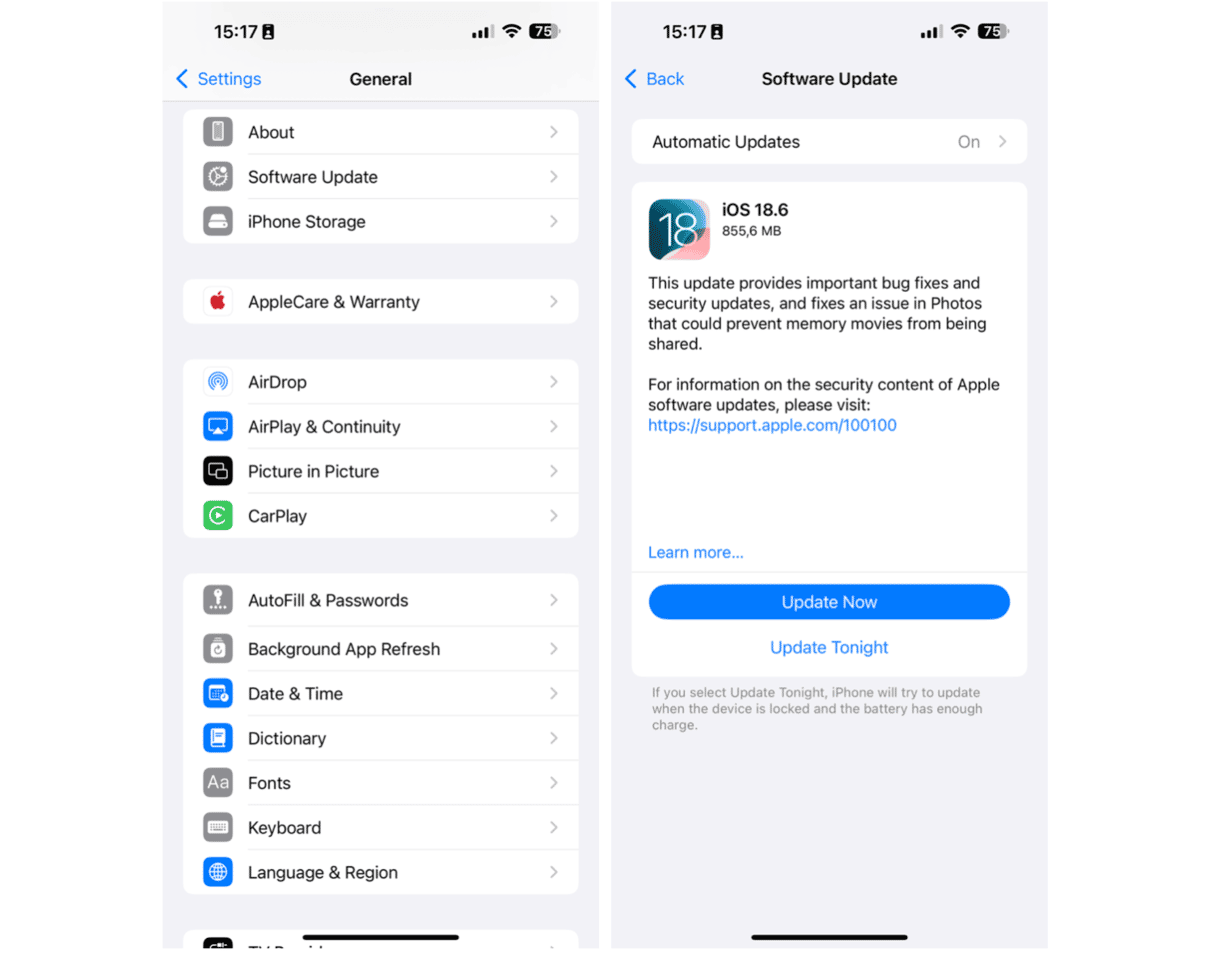
11. Update the iOS device
If the device you’re trying to send files from or receive files to is an iPhone or iPad, check whether there is an update available by opening the Settings app and going to General > Software Update. If there is an update available, install it.
12. Free up some space
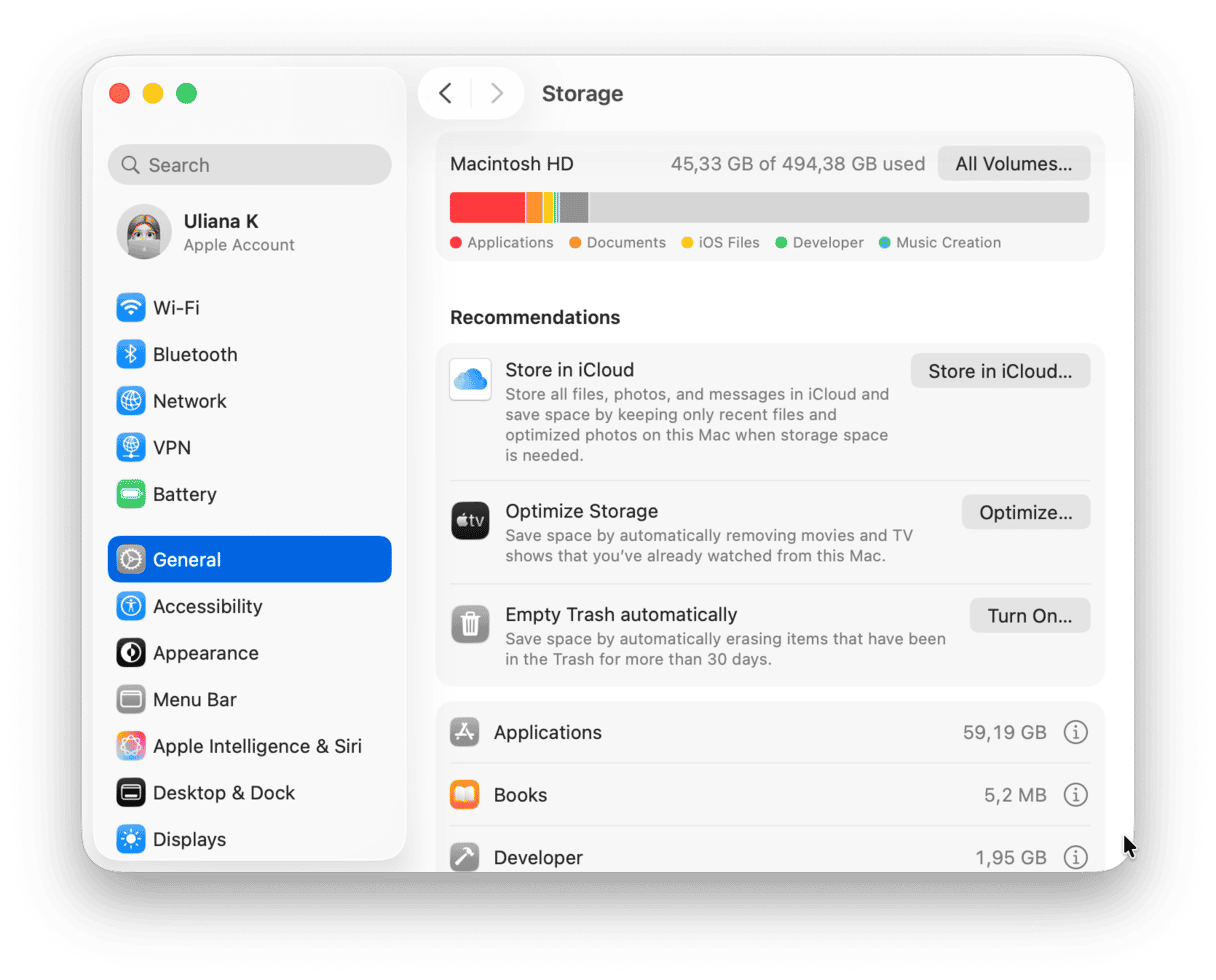
If you are running out of free space, AirDrop might stop working. Both Mac and iOS devices need enough storage to either send or receive files. So, take some time to clean up your devices.
For a Mac, go to System Settings > General > Storage and browse the categories under the colored graph. Click the i next to each of them and select what you can delete.
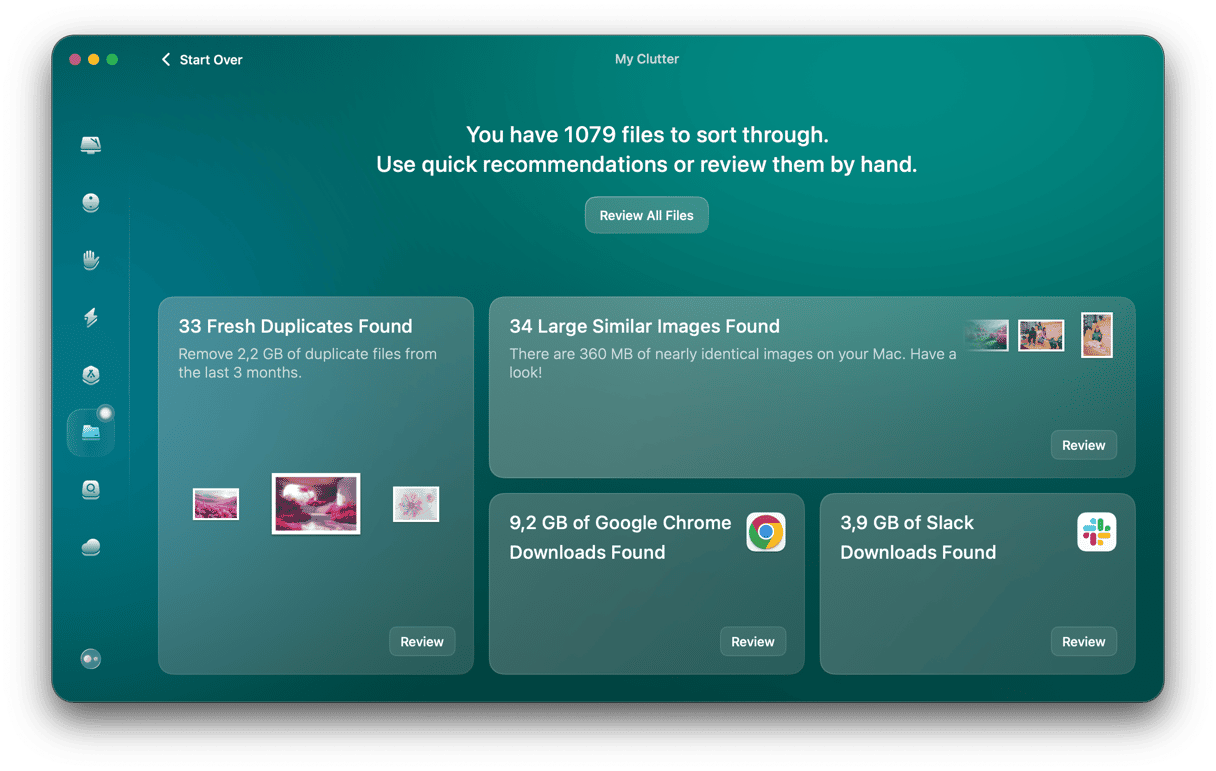
There is a quicker way to clear Mac storage, and it is to use CleanMyMac, a Mac cleaner app we’ve mentioned earlier in the article. All it takes is just a few scans, and you’ll be able to reclaim gigabytes of space. Here are the tools you may use:
- Cleanup — quickly and effortlessly remove system junk (old, unneeded cache files, language files, and other stuff)
- Applications — uninstall apps (including all app-related files) with a click
- My Clutter — identify and remove large and old files, duplicates, and similar images
For an iPhone, check out this handy guide on how to free up space. The same tips with also work for an iPad.
13. Try a different method
If all else fails, there are alternatives to AirDrop. You could, for example, use iCloud Drive. If the devices you want to transfer files between are signed into the same Apple Account, it’s just a case of copying the file to iCloud Drive on one device, waiting for it to sync, and then opening it on the other device.
If the devices are not signed in with the same Apple Account, you can copy the file to iCloud Drive and share it from there using the Share menu (Control-click on the file on Mac and choose Share). Or you could copy it to OneDrive or Google Drive and share it from there.
Finally, if you have access to a network-attached storage device, you could connect both devices and copy the file to and from it.
AirDrop is a great way to transfer files directly between your Mac and an iOS device, two Mac computers, or even two iOS devices. Most of the time, it works very well. However, it’s also prone to not working properly sometimes. In most cases, the fix is pretty simple. Sometimes, it takes a bit more work, though. Follow the steps above one by one to identify why AirDrop is not working on your Mac and fix it right away. As a last resort, try transferring the file using a different method.


