Apple’s AirDrop is one of those features that you either love or never use. And if you never use it, that could be because it’s always very slow and there are faster options for transferring files between your devices. If, like me, though, you find that using AirDrop to share photos and videos is quicker than waiting for Photos to sync, you probably wish it was faster and would use it more if it was. In this article, we’ll explain why AirDrop is taking so long on your Mac and tell you what you can do about it.

What is AirDrop?
AirDrop is a proprietary Apple technology that allows you to quickly transfer files between your Mac and another Apple device close by. That device could be your own iPad or iPhone or one belonging to someone else. Crucially, you can control whether your Mac accepts incoming AirDrop transfers from anyone, just contacts, or no one at all. When a file arrives on your Mac, you get a notification, and the file lands in your Downloads folder.
In order for AirDrop to work, you need to be connected to Wi-Fi and have Bluetooth switched on. Usually, AirDrop works very well. But sometimes, it can be a bit slow.
Why is AirDrop so slow?
There are a number of reasons why AirDrop might be taking so long.
AirDrop slow between Mac and iPhone
- Your Wi-Fi network is slow.
- The file you’re transferring is very large.
- There’s a problem with your Mac.
- There’s an issue with your iPhone.
- Your iPhone is not connected to Wi-Fi.
AirDrop slow between two iPhones
- One or both iPhones are not connected to Wi-Fi.
- The file is very large.
- The iPhones are too far away from each other.
How to fix it when AirDrop is taking too long
1. Move closer to the other device
If your Mac and iPhone are in different rooms, that may slow down the transfer as the speed of the Wi-Fi network will be impacted by walls, doors, and other solid objects between them. So move the two devices closer to each other.
2. Run maintenance on your Mac
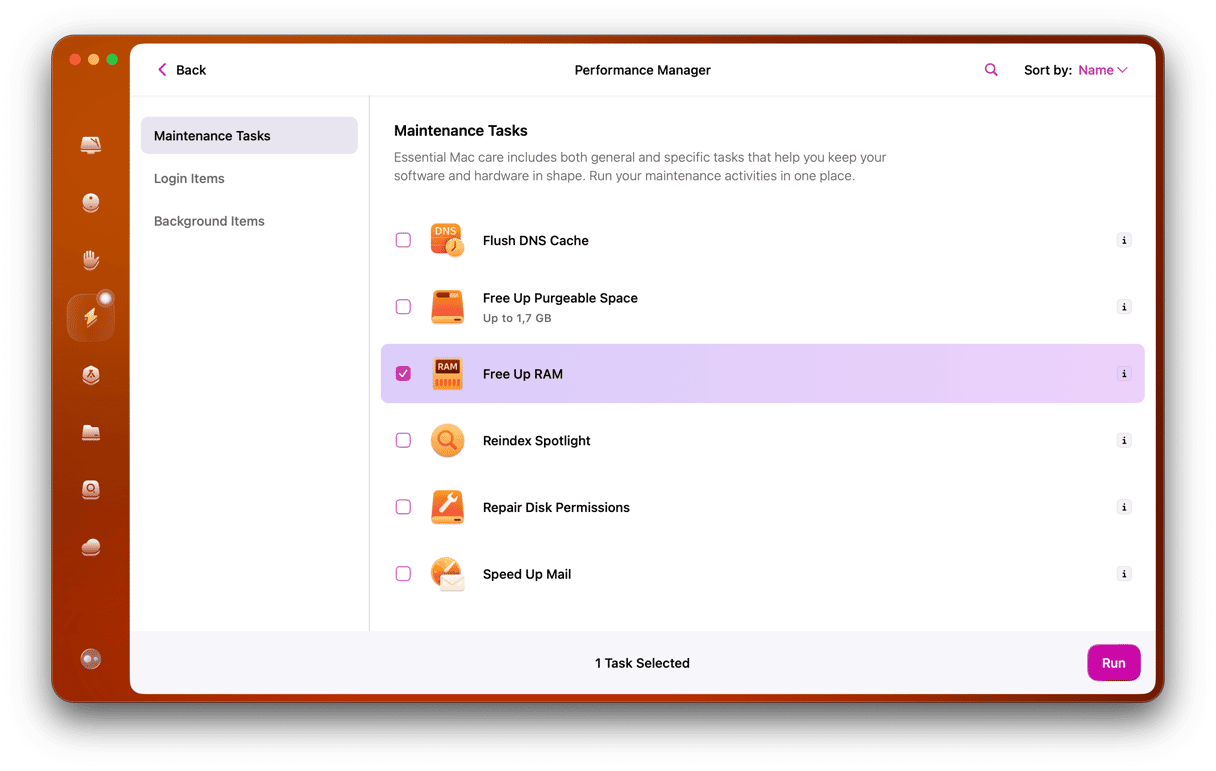
There are lots of reasons why things can run slowly or even not work at all on your Mac. But you can minimize the chances of them causing problems and having a serious impact on the way you work. The way to do that is to carry out regular maintenance on your Mac by flushing DNS cache, reindexing Spotlight, and managing login items and background processes.
Doing all that manually on a regular basis is very time-consuming and laborious. However, there is an easier way. CleanMyMac’s Performance module can run all those tasks and even more. It’s very easy to use — you can do all of that with just a couple of clicks. Get your free CleanMyMac trial and try it for yourself.
Once downloaded, follow these steps:
- Open CleanMyMac.
- Go to Performance from the sidebar and run a scan.
- Click View All Tasks, select the tasks you want to perform, and click Run.

You can also review Login Items and Background Items and remove those you don’t need to launch at login and run in the background to ensure that no resources are wasted.
3. Make sure it is slow and hasn’t stopped completely
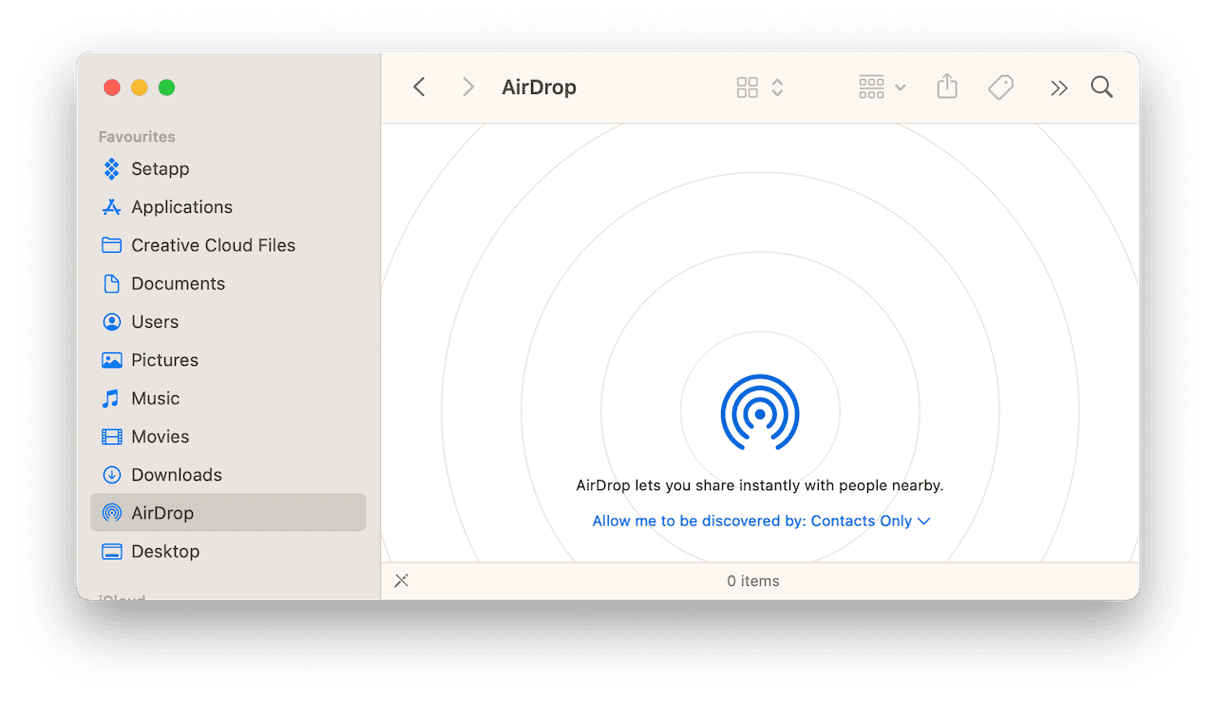
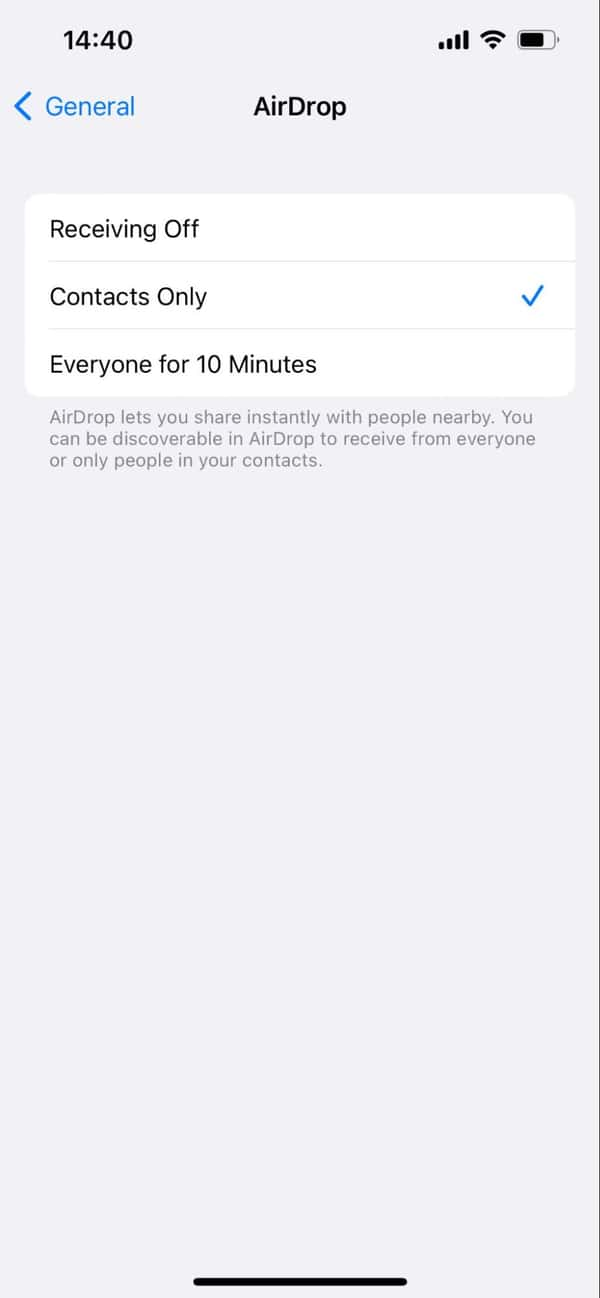
If AirDrop isn’t working at all, check that the Mac and iPhone are both connected to Wi-Fi and both have Bluetooth switched on. Also, check that AirDrop is enabled on both. To check that AirDrop is enabled on Mac, open a new Finder window and click on AirDrop in the sidebar. In the main window, under the AirDrop log, it should say ‘Allow me to be discovered by’ and then either ‘Everyone’ or ‘Contacts only.’ On iPhone, go to Settings > General > AirDrop. It should be set to either ‘Contacts Only’ or ‘Everyone for 10 minutes.’ If you have AirDrop on either device set to Contacts Only, make sure your contact card in Contacts has your Apple ID email address listed.

4. Check that iOS or macOS is up to date
While AirDrop will work with older versions of macOS and iOS, it’s better to have the most recent versions installed to minimize the chances of problems occurring.
To check for macOS updates, go to System Settings > General > Software Update.
For an iOS device, do it in Settings > General > Software Update.
5. Try switching Wi-Fi and Bluetooth off and then on again
On your Mac, you can do that from the Control Center in the menu bar. Click on Wi-Fi, toggle the switch to off, then click on Bluetooth and do the same. On an iPhone, you can put it in Airplane mode, wait for a few seconds and then turn Airplane mode off.
6. Try again with a smaller file
It may just be that the file is large and the network is slow, and so it’s taking its time. But if you want to check, cancel the transfer and try again with a smaller file. That will tell you if there really is a problem or not.
7. Keep the devices awake
Sometimes, a Mac or an iPhone going to sleep can interrupt a transfer and stop it from completing. So, try to keep both devices awake while AirDrop is in use.
8. Reset network settings on your iPhone
This is the last resort because it will remove existing networks from your iPhone, and you’ll have to re-add them. It will also reset the device name to ‘iPhone.’ However, if nothing else works, it’s worth trying. To reset network settings, go to Settings > General > Transfer or Reset iPhone > Reset > Reset Network Settings.
AirDrop is a fantastic feature on Mac, iPhone, and iPad, allowing you to transfer files and photos between devices quickly and easily. Most of the time, it works very well and pretty quickly. However, occasionally, it can be very slow, even seeming like it’s not working at all. There are a number of reasons that might happen, and it can be difficult to work out why it’s so slow. However, if you follow the steps above, you should be able to diagnose the problem and fix it.


