Having a recent Mac backup is the most effective way to restore files after an accidental data loss due to physical damage or malware. There are several methods to choose from. Keep on reading, and you’ll learn how to back up MacBook in three different ways: using iCloud, an external drive to make a Time Machine backup, and a third-party app. Hopefully, it will give you some peace of mind. Let’s dive in!
How to prepare your Mac for a backup
First things first, take some time to prepare your Mac for a backup. Obviously, you don’t want to store a copy of unnecessary digital clutter. But what is this clutter? Old cache files, duplicate downloads, document versions, or even malware are just a few examples of things you won’t need to back up, so consider getting rid of them as a preliminary step.
You might be wondering how to do it. Of course, you can dig deep into your Mac’s folders to find anything you no longer need or want on your computer. But it would take hours and hours. Luckily, there’s an easy way to deal with it — use a dedicated Mac cleaner app.
We recommend CleanMyMac. It comes with a Smart Care feature that can identify all kinds of unnecessary junk and malware. Not only will it make your backups lighter, but it will free up some much-needed space. Smart Care can also run maintenance tasks and update apps, which may speed up your Mac.
Here’s how to use it:
- Get your free CleanMyMac trial — check out how all 25+ tools work for 7 days free.
- Install the app and open it.
- Click Scan on the main Smart Care screen.
- Click Run to remove unneeded junk and malware, update apps, delete duplicate downloads, and run maintenance tasks.

You can go even further in preparing your Mac for a backup and use another tool that comes with CleanMyMac — My Clutter. It can find large and old files, duplicate photos, and similar images. All of these are well-known space eaters. Just click Scan in the My Clutter tool and check out what CleanMyMac has found for you to remove. What’s the point in keeping all this stuff you never return to anyway?

The benefits of using CleanMyMac
- Helps keep Macs clean: on average, users remove 15 GB of junk files, 49 similar images, and 92 duplicates with the help of Cleanup and My Clutter features
- Except for decluttering, CleanMyMac helps protect Mac from malware — on average, users find and remove 1 malware after the first scan
- Comes with tools for maintaining Macs — you will need just 26 seconds (on average) to run the Performance feature and the tasks it recommends
Try CleanMyMac for free — see it in action on your MacBook.
Now that you’ve taken care of your Mac, let’s move to the fun part — creating backups.
How to back up MacBook 3 different ways
Now, let us show you three different Mac backup methods so that you can choose one that works best for you.
1. iCloud
The easiest way to ensure you have timely backups is to use iCloud. By default, Apple gives you 5GB of iCloud storage with your Apple Account, but you can change your subscription and upgrade to as much as 12TB of storage space.
The best part about using iCloud is that once it is up and running, you don’t have to worry about losing any files; you just select what to store in iCloud, and it is automatically uploaded there.
First, make sure that you’ve installed the latest macOS version by going to System Settings > General > Software Update.

Next, follow these steps:
- Go to System Settings > Apple Account (formerly known as Apple ID).
- Click iCloud.
- Next to Saved to iCloud, click See All.
- Check what you want to have backed up automatically by turning on the needed options and disabling the unneeded ones.
- Make sure to click Drive there and enable the option that says Sync this Mac.
- Once happy with your selection, click Done.

If you want to upgrade your iCloud plan, click Upgrade in your Apple Account > iCloud window. Alternatively, click Manage > Change Storage Plan.

Did you know? Storing your data in iCloud is technically named syncing, not a backup. The main difference between the two is that a backup is a one-way process and a copy of data for long-term storage and disaster recovery. Syncing, on the other hand, is a dynamic process of mirroring your data (e.g., to a cloud storage). So, if a file is deleted on one device, it is deleted from all synced locations. However, in iCloud, you can check the Recently deleted folder and may be able to restore a file, so using it is still a good idea.
If you need an alternative for syncing files, you can also consider using Dropbox, OneDrive, or Google Drive. All these options are safe and can be accessed remotely from any location.
How to keep your cloud storage clutter-free?
If you back up your Mac to iCloud, make sure that you have enough free space, so you do not need to upgrade your plan. But how to do it? CleanMyMac can help you out. It now comes with a smart Cloud Cleanup feature that lets you quickly find the largest files.
Just open the app, click Cloud Cleanup, connect your cloud account, and run a scan. You can then review and remove unneeded stuff with a few more clicks.

Get started with a free CleanMyMac trial — you can test it for 7 days.
2. External drive
Although the fastest and easiest way to create a Mac backup, iCloud may not be the safest option. There have been reports of glitches that removed users’ data, so it is a good idea to have an additional backup stored on an external hard drive.
First, you’ll have to purchase one that meets your requirements. We suggest investing in an SSD (solid-state drive) because it is fast and reliable. Not sure which one to choose? Here’s our review guide with a few recommendations to help you out.
Once you’ve bought an external drive, you’ll need to format it. Here’s what to do:
- Connect your external hard drive to your Mac.
- Go to Applications > Utilities and open Disk Utility.
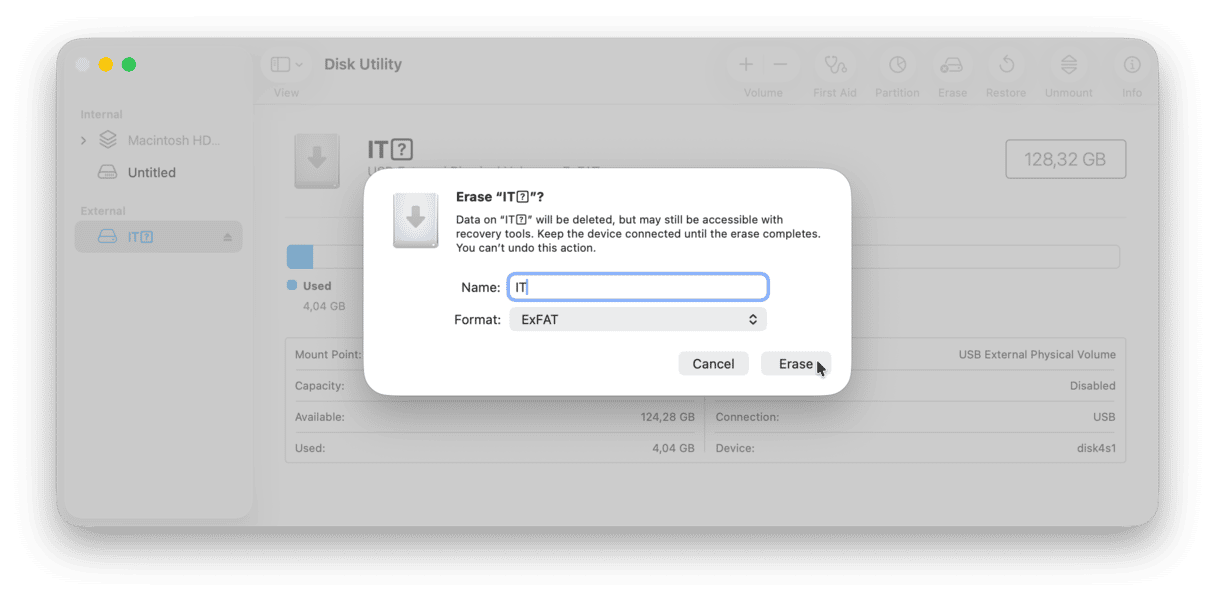
- Select your hard drive from the sidebar (under External) and click Erase from the toolbar.
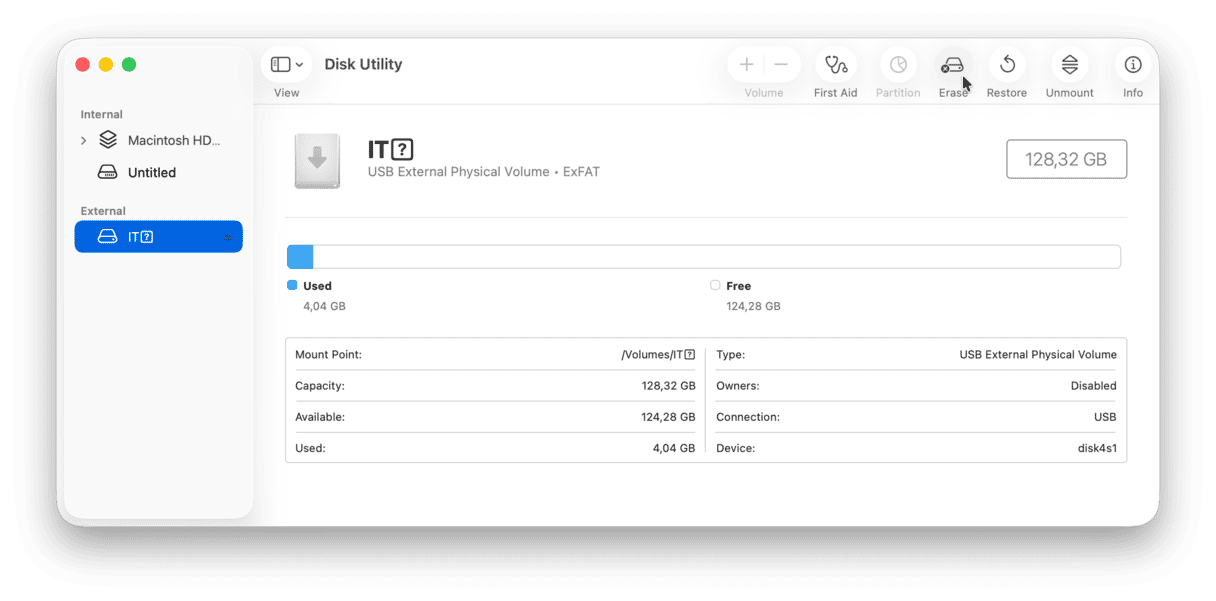
- In the window that opens, choose APFS under Format.
- Click Erase.


Now, your hard drive is ready for a backup. You can manually copy all the files you need to this drive. However, for a complete backup, you will need to use Time Machine — a built-in tool for creating Mac backups. We’ll show you how it works below.
How to create Time Machine backup on Mac
To back up your Mac via Time Machine, make sure that the external drive you’ve formatted in the previous step is still connected to your Mac. Now, follow these steps:
- Go to System Settings > General > Time Machine.
- Click Add Backup Disk and choose your connected hard drive.
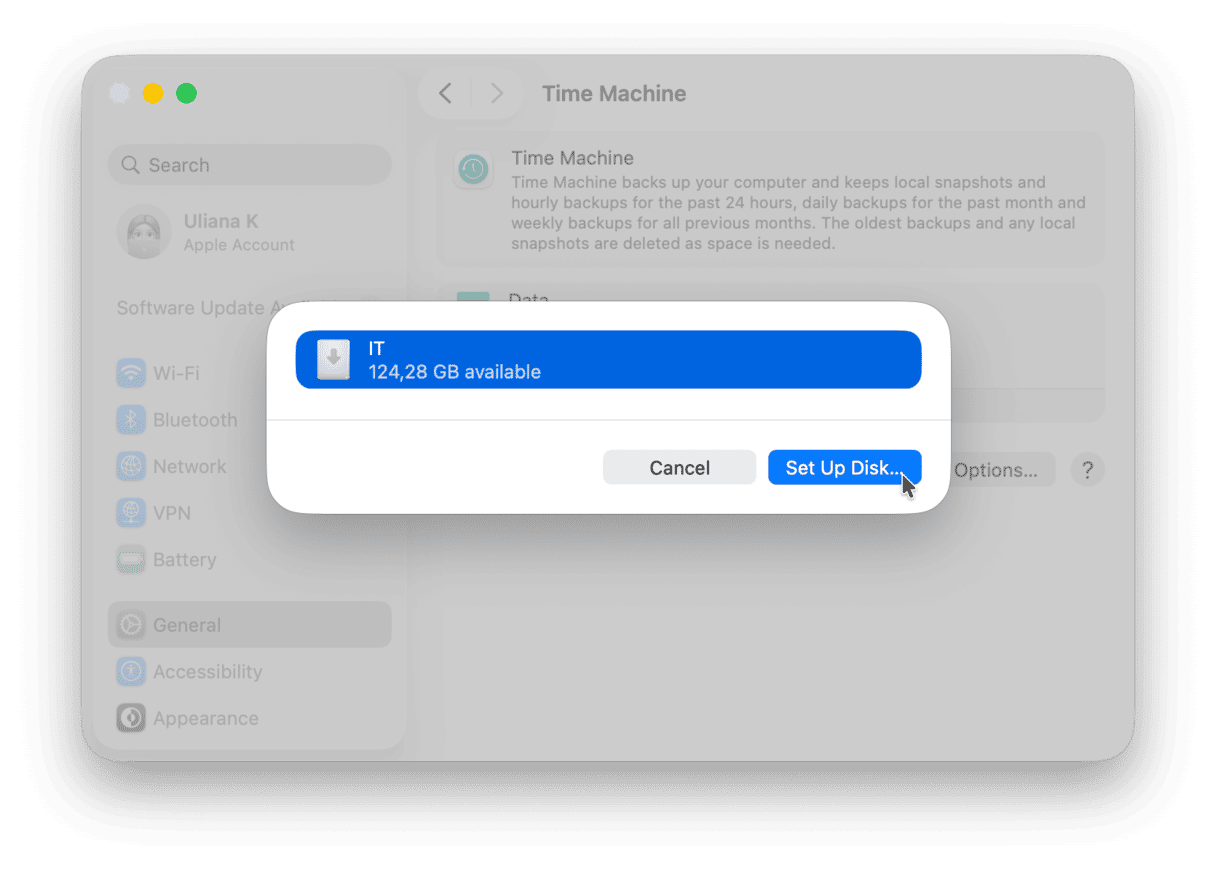
- Click Set Up Disk and follow the on-screen instructions.
- Once set up, Time Machine will create a backup.


You can even encrypt each backup in Time Machine settings.
What to know about Time Machine:
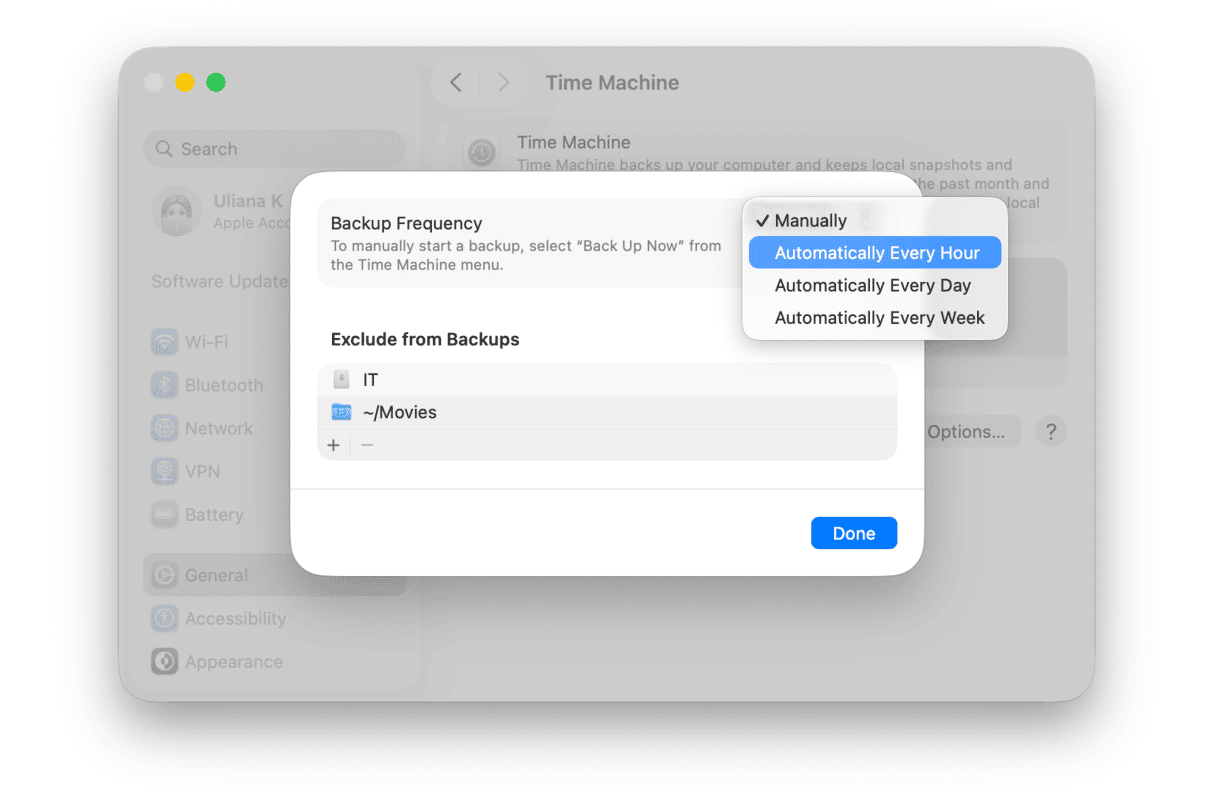
- You can exclude some locations from the backups. To do it, click Options in System Settings > General > Time Machine. Now, click the + button, choose a folder or folders for exclusion, and hit Exclude. You can repeat it for different locations or apps. Once happy with the selection, click Done.
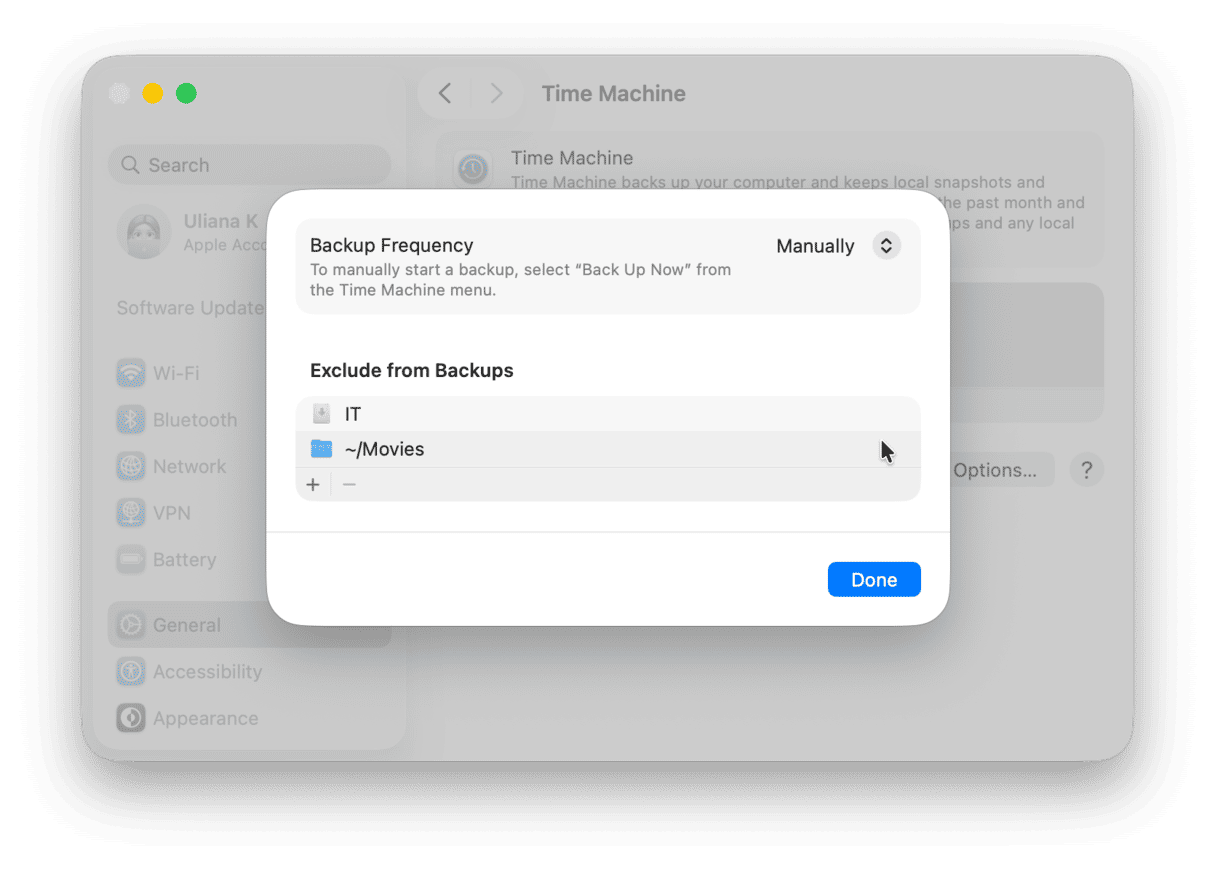
- You can choose backup frequency by clicking Options in System Settings > General > Time Machine. Next, choose what works best for you from the menu next to Backup Frequency. Note that you will need to keep your external drive connected to your Mac for it to work properly if you choose automatic backups.
- You can add Time Machine to menu bar to quickly access it. To do it, go to System Settings > Control Center and scroll down to Menu Bar Only. Choose Show in Menu Bar next to Time Machine, and you’ll be able to back up your Mac by clicking a little Time Machine icon in the menu bar.


- Time Machine backups (except for the initial backup) are versioned, meaning that if you enable automatic backups, this built-in tool will back up only what has changed since the last backup (e.g., new files or new versions of files).
- Time Machine backs up only local copies of your files, meaning that if anything was offloaded to iCloud, it will not be backed up. Also, for automatic backups, you will need to keep your external drive connected to your Mac all the time.
How to restore files from Time Machine backup?
If you need to restore files from Time Machine, click the Time Machine icon in the menu bar and choose Enter Time Machine. Now, browse your files — you will see the Finder-like window with dates on the right of the screen. Find the needed files and click Restore — it will be returned to its original location.
At the same time, you can use the Time Machine backup to transfer all your data to a new Mac. You can do it with the help of Migration Assistant when setting up your new device.
3. Third-party software
As a final option, you can choose third-party software to back up your Mac. There are both free and paid apps, but make sure to download only trusted apps to avoid infecting your Mac with malware.
Here are several Mac backup software options to choose from.
ChronoSync
ChronoSync is a complete backup solution, also allowing you to sync files. With its help, you can back up your Mac to both an external drive and cloud storage. It provides tools for a complete 3-2-1 backup strategy and can also create bootable backups to make restoring a Mac easier.
Acronis True Image
Acronis True Image offers cybersecurity protection against data loss. It allows both local and cloud backups, lets you schedule them, and provides antivirus and ransomware protection. With its help, you can ensure that your backups are malware-free and intact. The product also offers disc cloning — an exact, immediately bootable, 1-to-1 copy of a drive ideal for instant disaster recovery or drive upgrades.
Carbon Copy Cloner
Carbon Copy Cloner is another backup tool. It comes with numerous backup options: creating snapshots, the ability to back up cloud-only files, automatic backups based on your own schedule, and backup encryption. With its help, you can back up your files to NAS (Network Attached Storage).
For a few more backup apps and a detailed description of the tools mentioned above, check out this review article.
How to back up Mac that won’t power on
If your Mac won’t turn on, try booting it into target disk mode. You will need another Mac, though. Use a MacBook that won’t power on as an external drive and drag files from there to your target Mac.
If you don’t have another Mac, contact Apple Support for help — you might need to book an appointment with an Apple-authorized repair center.
So, there we have it. Now you know about the most common ways to back up your MacBook and how they work. Remember that regular backups are key to easy data recovery should you need it.
Frequently asked questions
What is a Mac backup?
A Mac backup is a copy of all your data (settings and files) stored separately from your primary device with the aim of restoring it in case of data loss caused by accidental deletion, physically damaging your Mac, or even malware.
Why backup Mac?
The most obvious reason is to be able to restore your files: those that have been deleted by accident, those that are no longer accessible, or older versions of files. It will also help recover settings, accounts, and apps if you lose your Mac or when you set up a new one.
Why is my Mac backup taking so long?
Probably you have a lot of large files and apps. If it is your first time backing up a Mac, it may take hours to complete, and it is absolutely normal, regardless of the backup method you use. Subsequent backups will be faster.
Why does my Mac backup keep failing?
There may be an issue with your external or startup disk, a software glitch, or malware. Another reason is antivirus software interrupting the process. Also, if your Mac does not have enough space, a backup may fail.
Why back up a Mac before an upgrade?
If you do not have a backup before upgrading your Mac, and something goes wrong while installing a new macOS version, you won’t be able to restore your data.
What happens when the backup disk is full?
When a backup disk is full, the system typically stops backing up new data and may issue errors. Sometimes, the oldest backups will be deleted automatically. However, in most cases, you will have to remove unneeded ones manually in order to back up your files again.