One of the first things you need to learn to do when you get your first Mac is to browse files. To do that, you need to find them, which gives a clue to the origins of Mac’s file browser — the Finder. In this article, we’ll show you how to use it to browse files on Mac.
What is the Finder?
It is an application like any other, but it’s perhaps the most important of all. It boots at startup and allows you to search files, move and copy them, open them in any application that supports them, and manage things like permissions.
How to browse files on Mac using the Finder
To access the Finder file browser, click on its icon in the Dock or click anywhere on the Desktop. You’ll see the Finder menu appear in the menu bar. To get started, try the following:
- Click the File menu and choose New Finder Window.
- Press Command-N to open a new Finder window or Command-T to open a new tab in the same window.
- Click the leftmost icon in the toolbar at the top of the Finder window and choose an option from the menu to change the view.
- Click the icon to the right of that one and choose one of the options to change how the files in that window are sorted.
- Click the folders in the left sidebar to see their contents.
- Select any file and press the spacebar to see a preview of the file.
There are several different ways you can browse files in the Finder, and they are useful in different circumstances.
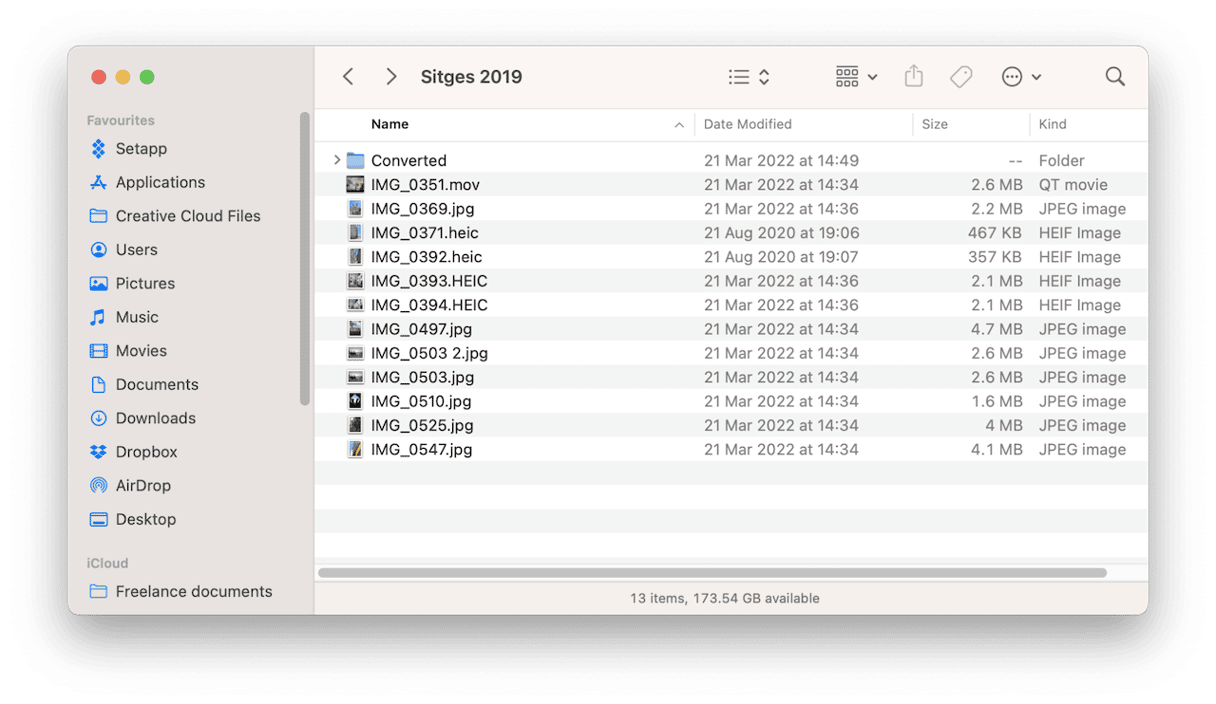
List
List view is useful when you want to be able to sort files and folders by date. Just click the top of the Date Modified column, and you’ll see the contents of the folder organized by date, starting from the most recent. Click it again, and it will swap to the oldest at the top. Double-click on a folder to see its contents.
Column
If you want to dig into folders but keep the parent folders on screen, column view is the best choice. When you click on a folder in column view, it displays the contents in the next column in the Finder window.
Icon
Icon view arranges files and folders in a grid in the Finder window, with a preview of each file on its icon. You can sort files and folders however you want. And you can change the size of the icons.
Gallery
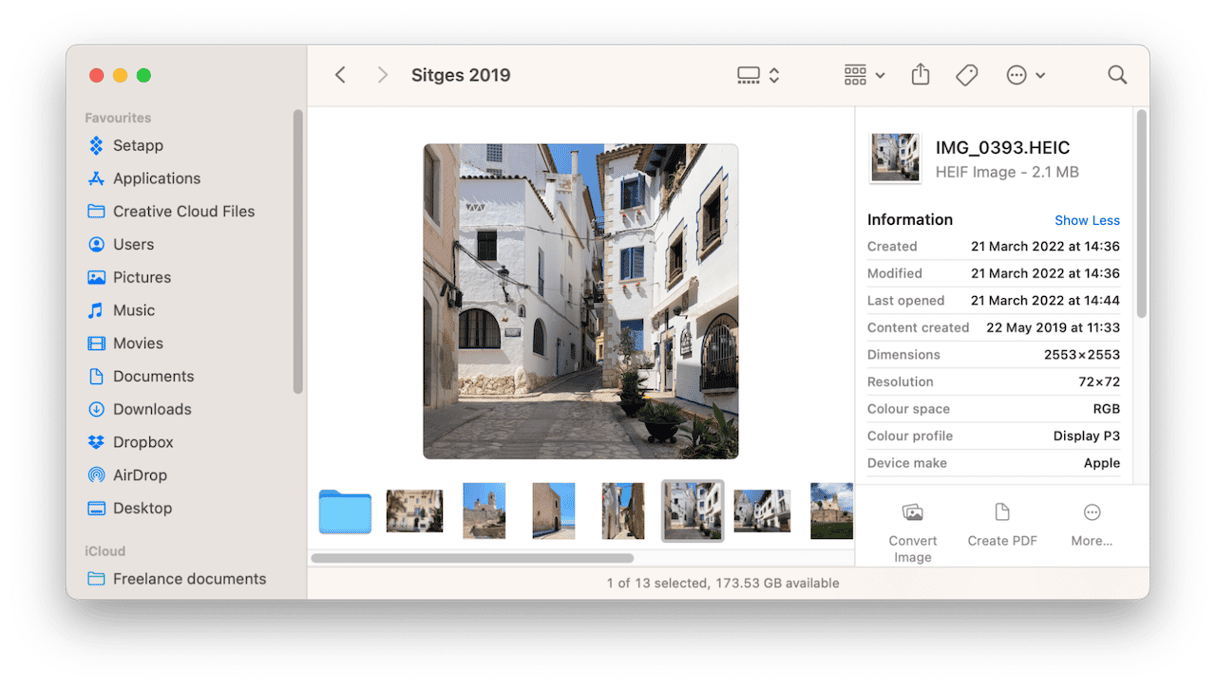
Gallery view is useful for images. When you choose this view, a preview of the currently selected file is shown in the main window, with other files and folders in that folder shown at the bottom. Information about the selected file is displayed on the right side. Also on the right are Quick Actions, which allow you to rotate images, convert them, or perform custom actions on them.
In any view, pressing the spacebar invokes Quick Look, which shows a large preview of the file and allows you to perform some actions on it. For example, if you Quick Look an image file, you can rotate it and mark it up as well as open it in Preview.
How to configure the Finder to browse files more easily
You can customize the Finder file browser Mac comes with, so it’s easier to find the files you need. The sidebar in each window only has a few locations by default. But you can drag any folder onto it to create a shortcut. And if you click the Finder menu and choose Settings > Sidebar, you can select which of your Home folders appears in the sidebar.
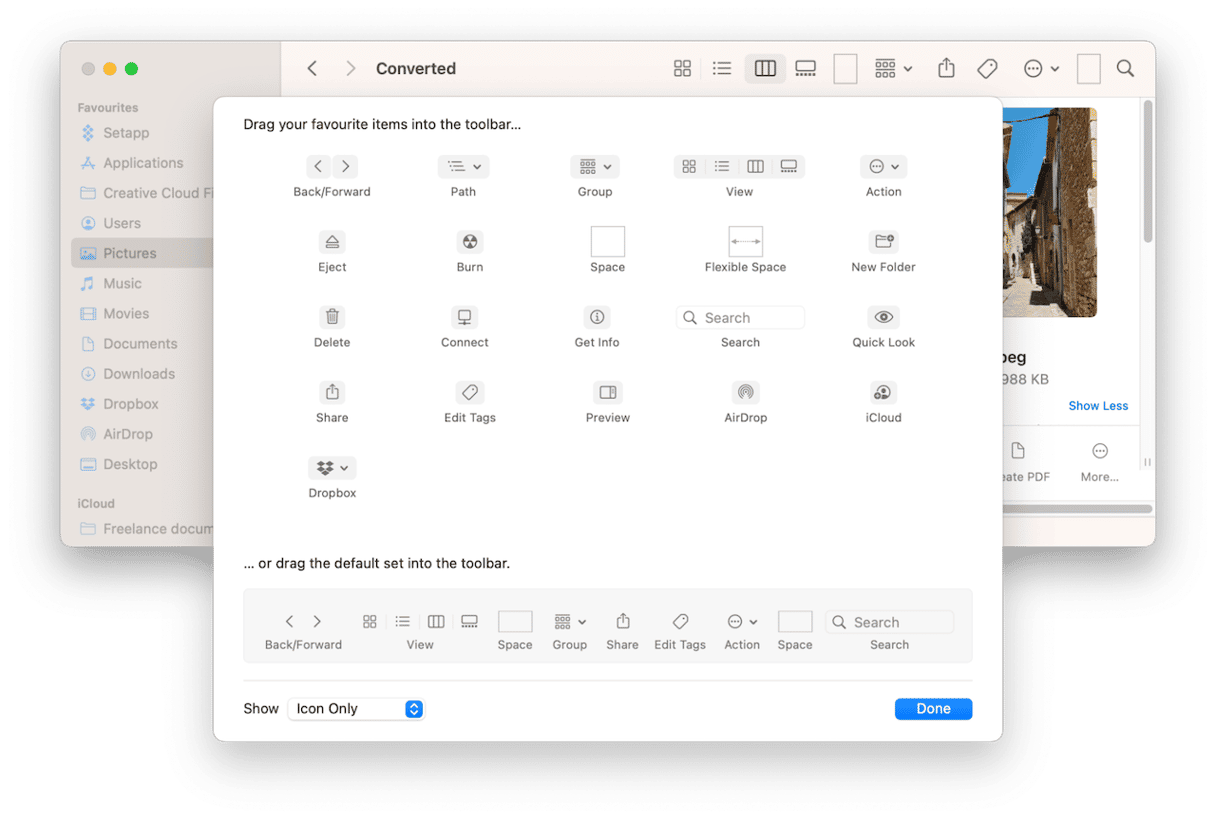
If you Control-click or right-click in the toolbar in a Finder window and choose Customize Toolbar, you can choose which tools appear there.
How to search for files
There are two ways to search for files. You can use Spotlight and start typing the name of the file and wait for it to appear. But if you don’t know the name of a file, that won’t work. Let’s say you know a file is in a folder, what type of file it is, and that it starts with ‘A.’ You could do this:
- Open a Finder window and navigate to the folder.
- Type ‘A’ in the search box.
- Click the name of the folder next to ‘Search:’
- If that doesn’t work, click ‘+’ and then ‘Kind’ followed by the kind of file it is.
- You can even save the search by clicking Save to create a smart folder that updates automatically based on the search criteria.
There are lots of ways to browse files on Mac using the Finder. Use the guide above as a starting point and then go and explore for yourself.


