Introduced at WWDC2022, macOS Ventura is the nineteenth major release of macOS. It comes with Stage Manager, Continuity Camera, Passkeys in Safari, and terrific updates to Mail, Spotlight, and System Preferences (or should we say System Settings?). There are a lot of exciting things in this update, but many users put off installing new macOS because of bugs and other issues that may come along. In this article, we’ll show you how to clean install macOS Ventura to make sure it runs smoothly on your Mac.
What’s a clean installation?
You may think clean installation is an unnecessary complication. If your Mac runs smoothly and you don’t have any performance issues, you can definitely opt for a regular installation. Erasing all your data before installing macOS Ventura can help prevent potential bugs and free up space. So, if you feel like your Mac has slowed down over the years, it may benefit from a clean installation.
Clean installation wipes every file stored on your Mac. That’s why backup is needed.
How to clean install macOS Ventura from a bootable USB
If you’ve been terrified by the clean installation process, don’t worry, we’ve broken it down into easy-to-do steps:

- Cleanup & backup
- Download installer
- Create a bootable USB
- Erase & install macOS from USB
1. Clean up and back up your Mac
Before you back up your important files, it’s essential to get rid of those you don’t need. Old screenshots, incomplete downloads, and other stuff may take GBs of space — you may not even remember you have them on your Mac. So, it’s time to run a cleanup.
Digital cleaning may be tiresome. But there’s an app for that — CleanMyMac has many features to help you deep-clean your Mac and make it feel like new again. Download the app here and run a scan with the Cleanup feature. It will help:
- Remove old cache and logs
- Get rid of broken items & document versions
- Free up space on your hard drive

When the cleanup is complete, let’s move to the next step — the backup.
Back up your data with Time Machine
In this step, you’ll need an empty USB drive. Connect your drive to your Mac, and let’s start a backup:
- First, go to System Preferences and click Time Machine.
- Select your drive to back up your data.
- Click Use Disk.

The backup will start automatically — the more data you have, the longer it will take to copy it all.
Alternatively, you can back up your files to iCloud or store Desktop and Documents folders in iCloud Drive. Here’s how:

- Go to System Preferences > Apple ID.
- Click iCloud.
- Check that iCloud Drive is turned on.
- Click Options located next to iCloud Drive.
- Check the box next to Desktop & Documents Folders and click Done.
Now that your important files are backed up, let’s download the Ventura installer.
2. Download the macOS Ventura installer
First, you need to download the official version of macOS Ventura from the Mac App Store. Click Get to download the macOS Ventura installer.
3. Create a bootable installer
Once macOS Ventura is downloaded, you’ll see the “Install Now” option. Don’t click that button — this will install macOS Ventura the usual way. To perform a clean installation, you need to save that installer to your empty USB drive. Make sure it has 14GBs of available storage and is formatted as macOS Extended (Journaled). If not, you can format the drive correctly using Disk Utility.
Here’s how to copy the macOS Ventura installer to your USB drive:
- Go to Applications to find the installer.
- Now, connect your USB drive to your Mac.
- Find Terminal through Spotlight Search (Command-Space) and open it.
- Enter the following command:
sudo /Applications/Install\ macOS\ Ventura.app/Contents/Resources/createinstallmedia --volume /Volumes/MyVolume
“MyVolume” is the name of your USB drive — if it has a different name, replace it in the command.
Press Return and enter your admin password you use to log into your Mac.
When Terminal completes the copying, your drive will have the same name as the installer you downloaded, such as Install macOS Ventura.
You can now close Terminal and eject your USB drive.
4. Erase your current macOS and install macOS Ventura
Now, plug in your bootable installer and make sure your Mac is connected to the internet. The installation instructions are slightly different for Apple silicon and Intel-based Macs. We’ve provided guidelines for both types of Macs.
Macs with Apple silicon
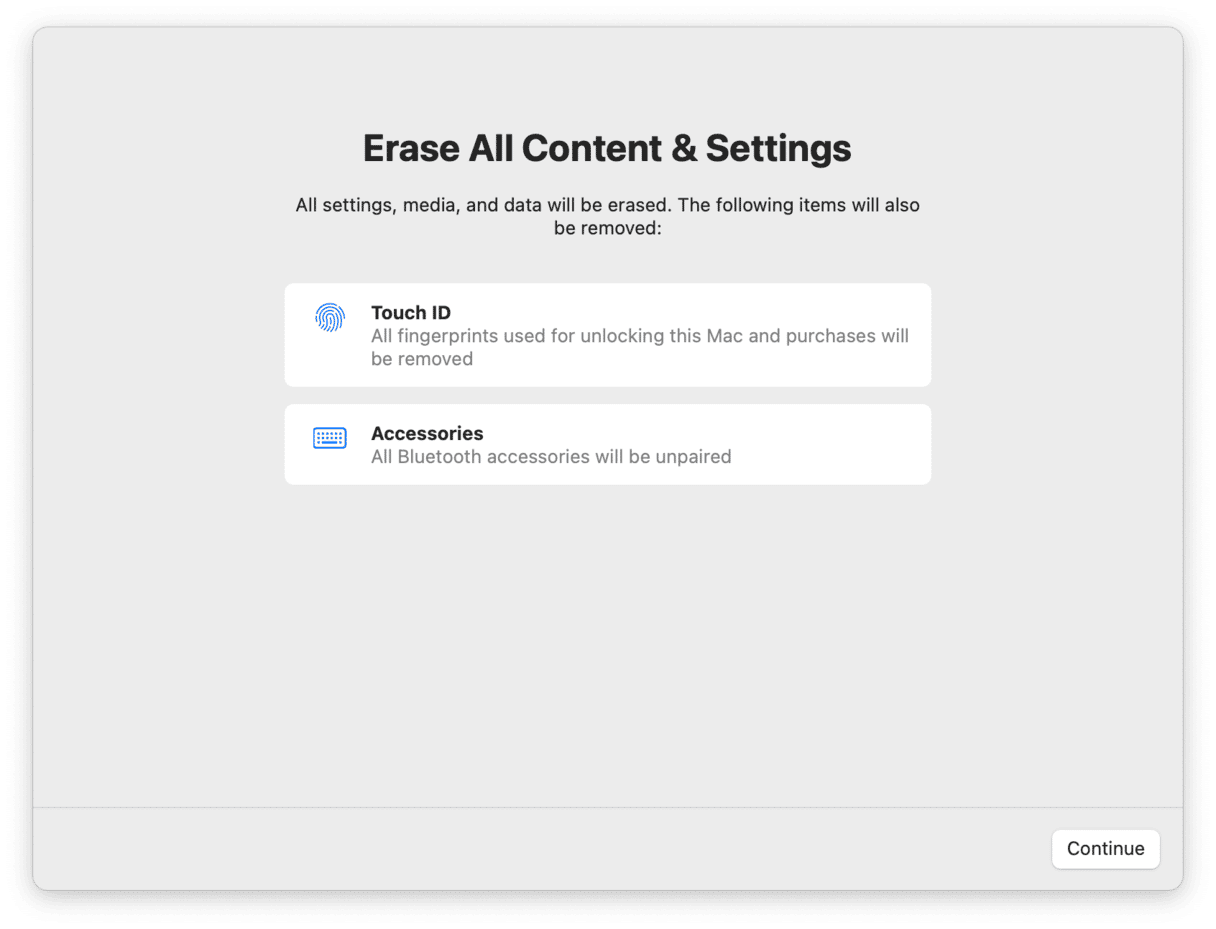
On Macs with Apple silicon, you first need to erase your current macOS. It’s easy to do with Erase Assistant:
- Open System Preferences.
- Choose System Preferences in the menu bar > Erase All Content and Settings.
- Enter your password.
- Review things that are going to be erased and click Continue.
Your Mac is ready for macOS Ventura clean installation.
- Restart your Mac and keep holding the power button until the startup options window appears. It will show your bootable drives.
- Select the drive containing the macOS Ventura installer and click Continue.
Once the installer opens, follow the onscreen instructions to install macOS Ventura.
Intel-based Macs
Here are the steps for erasing your current macOS and installing Ventura:
- Restart your Mac and press and hold the Option key immediately.
- When a screen showing your bootable volumes appears, release the Option key.
- Select your drive containing the installer and press Return.
- Choose Disk Utility.
- Select your internal hard drive in the window that appears and click Erase.
- When erasing is complete, close Disk Utility and select Install macOS from the Utilities window.
Now, wait till the clean installation is complete. And you’re good to go!
How to reinstall macOS Ventura
In case anything goes wrong after the update, here are quick instructions to help you reinstall macOS Ventura:
Macs with Apple silicon
Restart your Mac and keep holding the power button. Release when the startup options window shows up. Click the gear icon labeled Options and then Continue. Choose Reinstall macOS Ventura in the Utilities window.

Intel-based Macs
Restart your Mac and press Command-R to enter recovery mode. Release the keys when the Apple logo appears. Choose Reinstall macOS Ventura in the Utilities window.
What to do if Mac is slow after the update
A slight performance drop is something we often encounter after the update. If your Mac has become sluggish and the apps are unresponsive, try running optimizations. The Performance feature in CleanMyMac helps turn off unnecessary login and background items and run some essential Mac maintenance. Get the app right here.

So that’s how you clean install macOS Ventura!
Frequently Asked Questions
Should you clean install macOS Ventura?
If you don’t have any speed issues and you have enough free space, you may do a regular installation. A clean installation is one way to make your slow and cluttered Mac feel like new again.
Will reinstalling macOS wipe all your data?
Reinstalling macOS doesn’t erase your data on Mac. Clean installation, on the contrary, will remove all your files and data.
Can you install Ventura without an internet connection?
You need a stable internet connection to clean install or reinstall macOS Ventura. This will help load firmware and other important information.


