Let’s get back to how things used to be when your Mac was all shiny and new. Follow these tips to clean up and organize your desktop.
Why clean up your desktop
Aside from the obvious — improved aesthetics, easier file management, and improved workflow — there are a few more reasons to declutter:
- Reduced distraction — a cleaner desktop can make you more focused.
- Faster startup — since macOS does not have to load a preview for all files on the desktop, your Mac will boot faster.
- Improved performance — a cluttered desktop consumes RAM, and so can slow down your MacBook, especially if you have a lot of processes running in the background.
- Optimized iCloud sync — fewer unnecessary files are synced to iCloud if you enable Desktop & Documents sync.
How to organize desktop items on Mac
The first step is to add some kind of structure to your desktop. You can do this by grouping files into folders of related items.
- Right-click a blank space on your desktop.
- Click New Folder.
- Click the newly created folder.
- Give your folder a name.
- Drag items from your desktop into the folder.
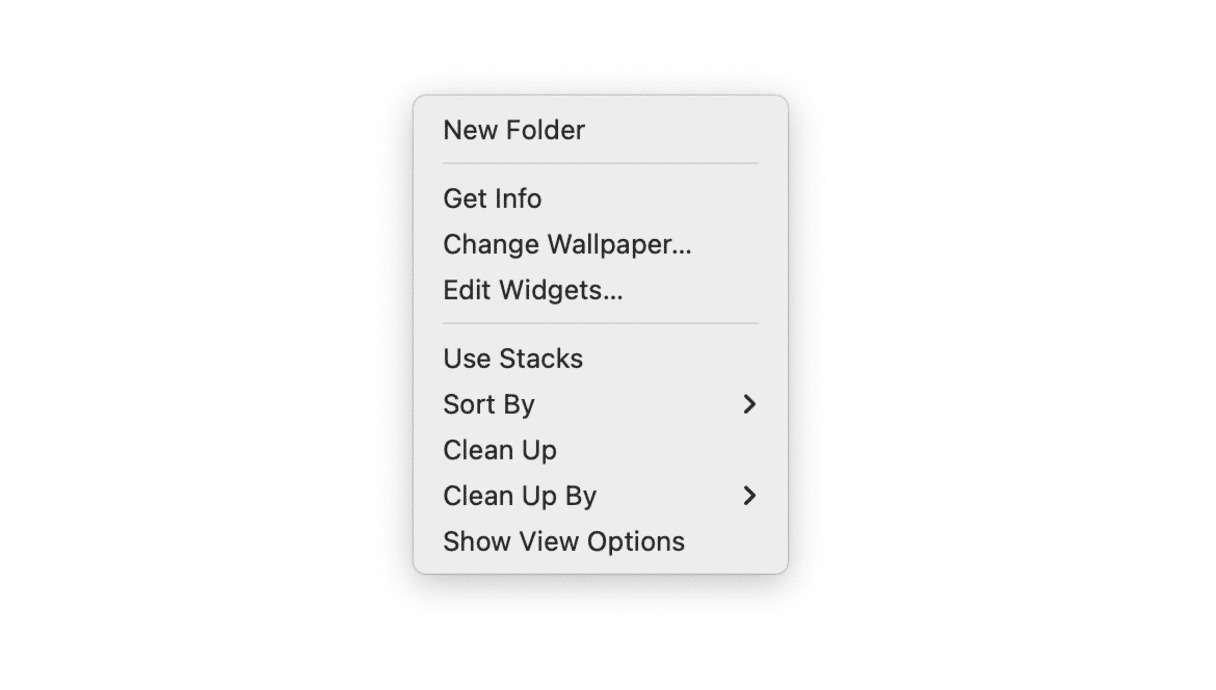
When you’ve grouped things into folders, you can sort them into grids:
- Right-click a blank space on your desktop.
- Click Clean Up By.
- Choose an option from the following: Name, Kind, Date Modified, Date Cleated, Size, or Tags.
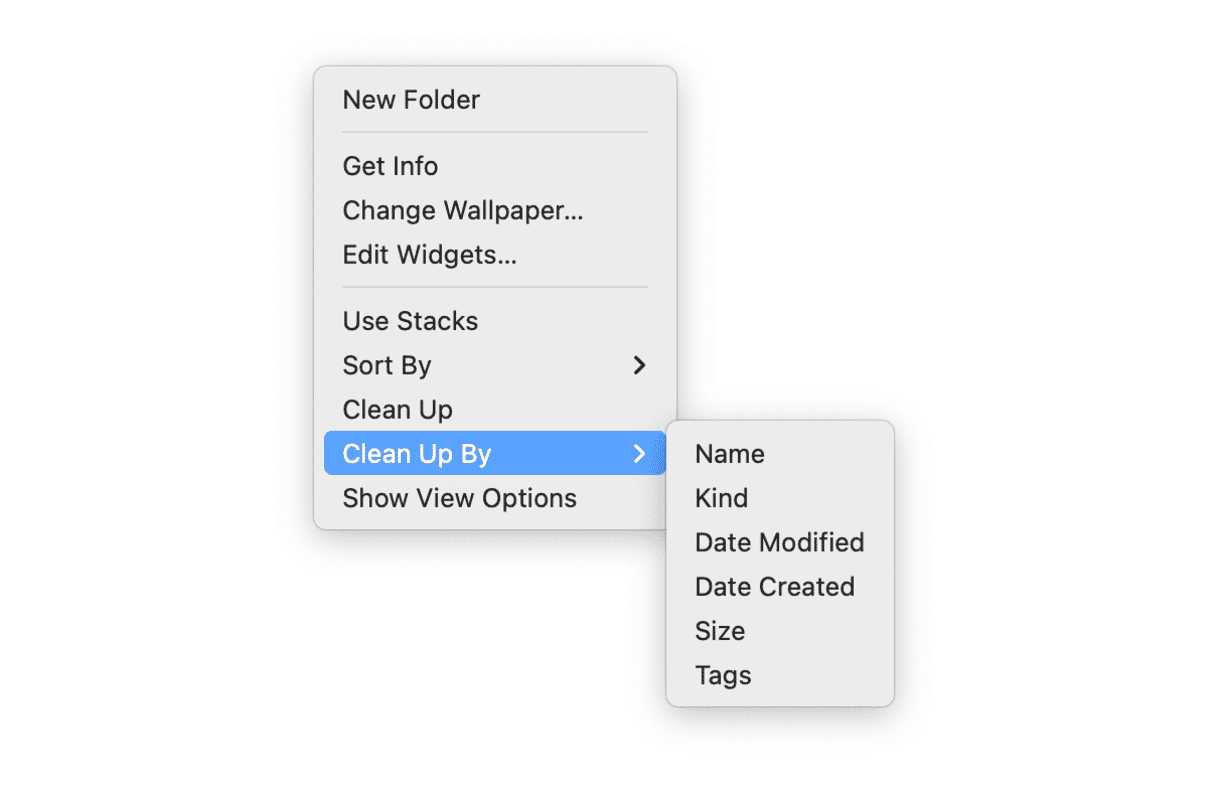
Once you’ve created a grid, you can modify its spacing in Show View Options by right-clicking your desktop. By right-clicking the desktop and selecting Sort By, you can choose Snap to Grid to automatically have files organized more neatly.
How to use Stacks
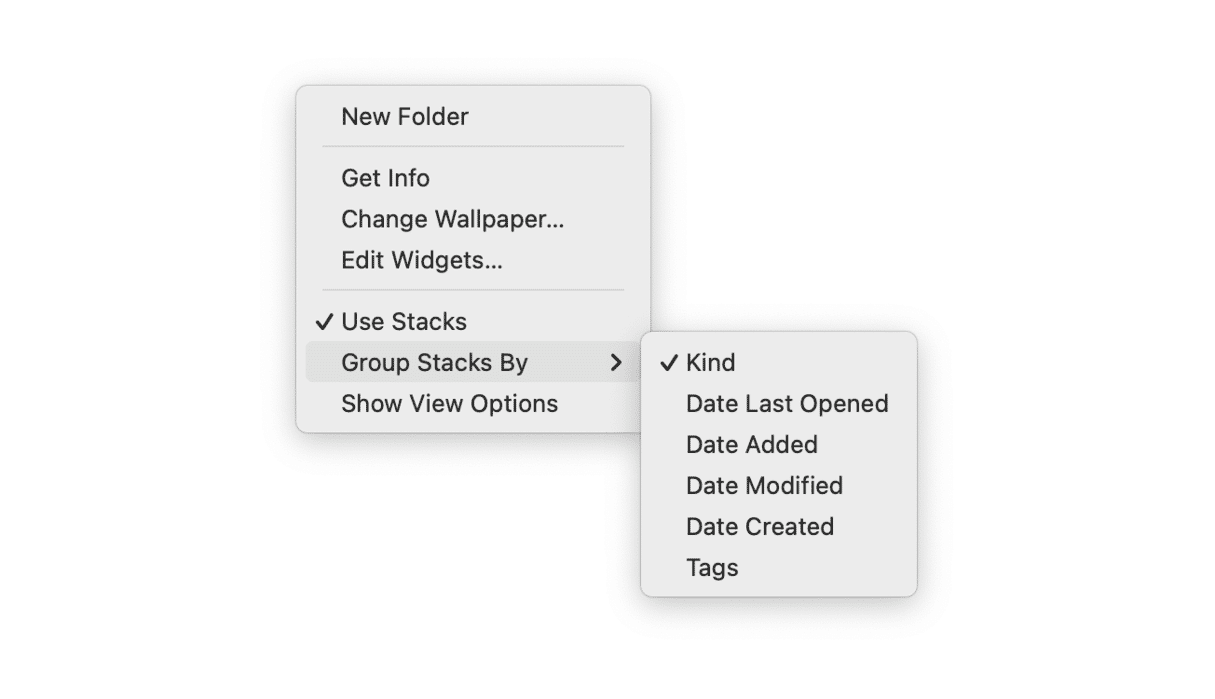
If you are not in the mood for adding structure manually, macOS can do it for you with the feature named Stacks. When you enable it, all files are neatly grouped by files type like movies, screenshots, or pictures.
Here’s how it works:
- Right-click a blank space on your desktop.
- Select Use Stacks.
- You can also click Groups Stack By to manage how they will be placed — it has the same options as the Clean Up By feature described above.
The only problem with Stacks is that it can turn into a graveyard of forgotten files, so take some time to delete unneeded ones regularly.
How to hide desktop icons on Mac
Hiding desktop icons is the quickest way to remove clutter. You can choose to hide selected icons, or if you want to go full minimalism, hide all icons.
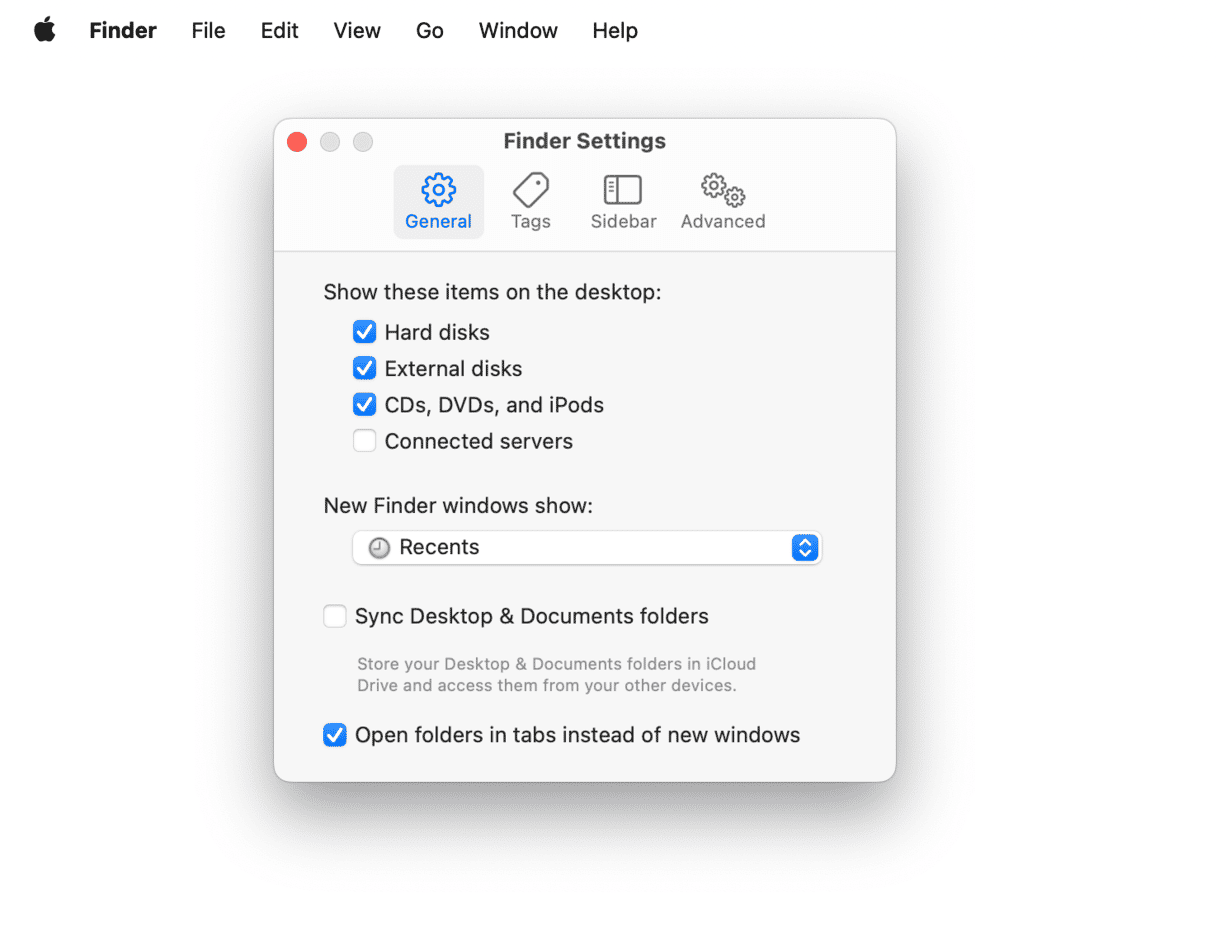
To do it, use the Finder’s Settings.
- Click a blank space on your desktop and select Settings from the Finder menu.
- In the General tab, deselect the checkboxes next to Hard disks, External disks, CDs, DVDs, and iPods, and Connected servers.
How to delete and remove desktop items
There’s bound to be files on your desktop that you no longer need so before you do any organizing these will need to be cleaned up. You can delete anything you don’t need manually by dragging it to the Trash but be warned: if your desktop is particularly cluttered this may prove a time-consuming task. Do not forget to empty the Trash afterward.

You can also use the built-in optimized storage feature to delete files. Just go to System Settings > General > Storage and click the i next to Documents. If you now click File Browser and select Desktop, you will see all your files listed there, along with the space they occupy.
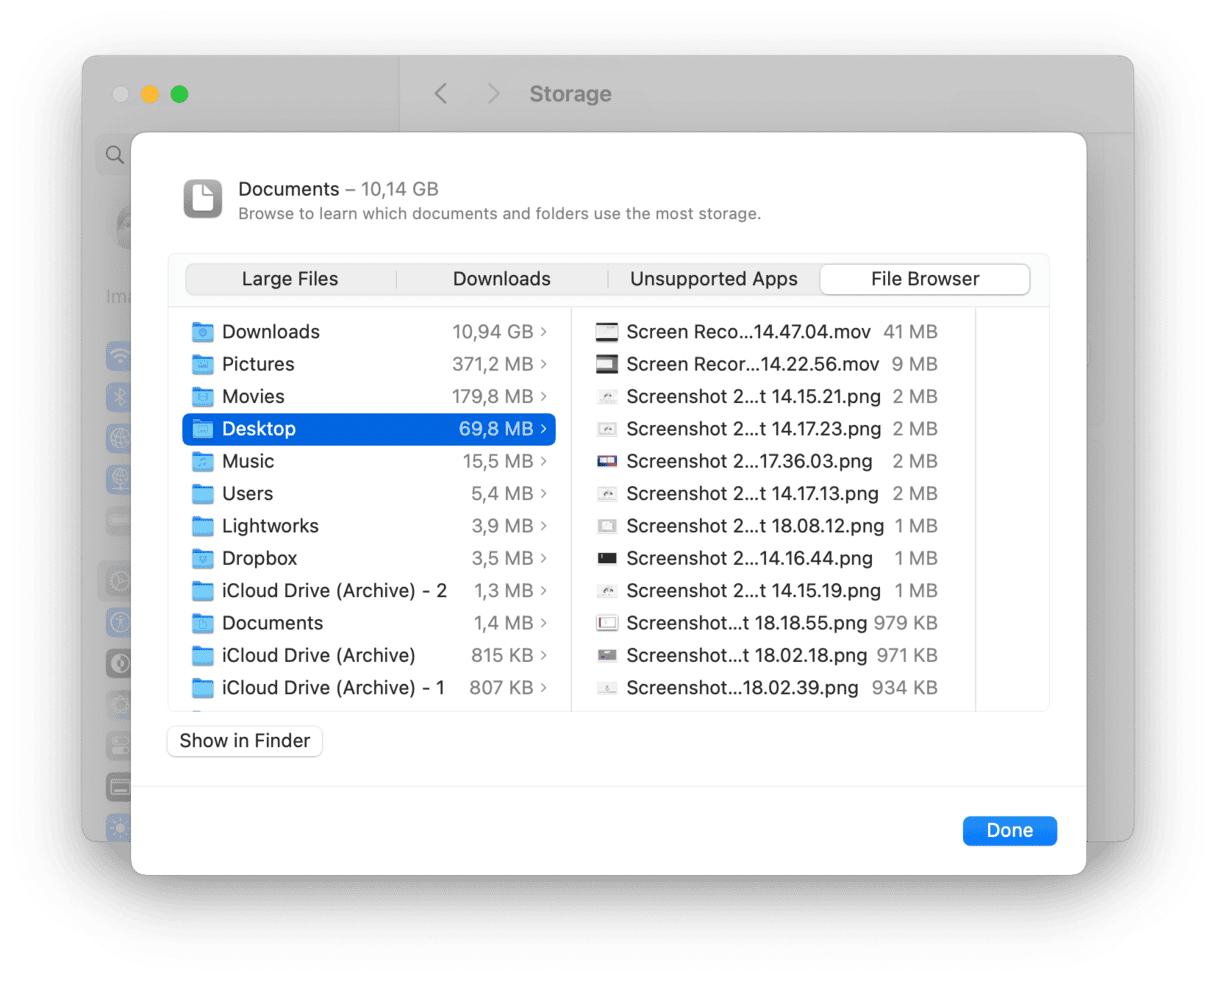
It is also a manual cleanup that can take a lot of time, but it may be more convenient than viewing files on the desktop. If you want some kind of automatic cleanup, keep on reading — we’ll introduce an alternative further in the article.
How to change the size of desktop icons on Mac
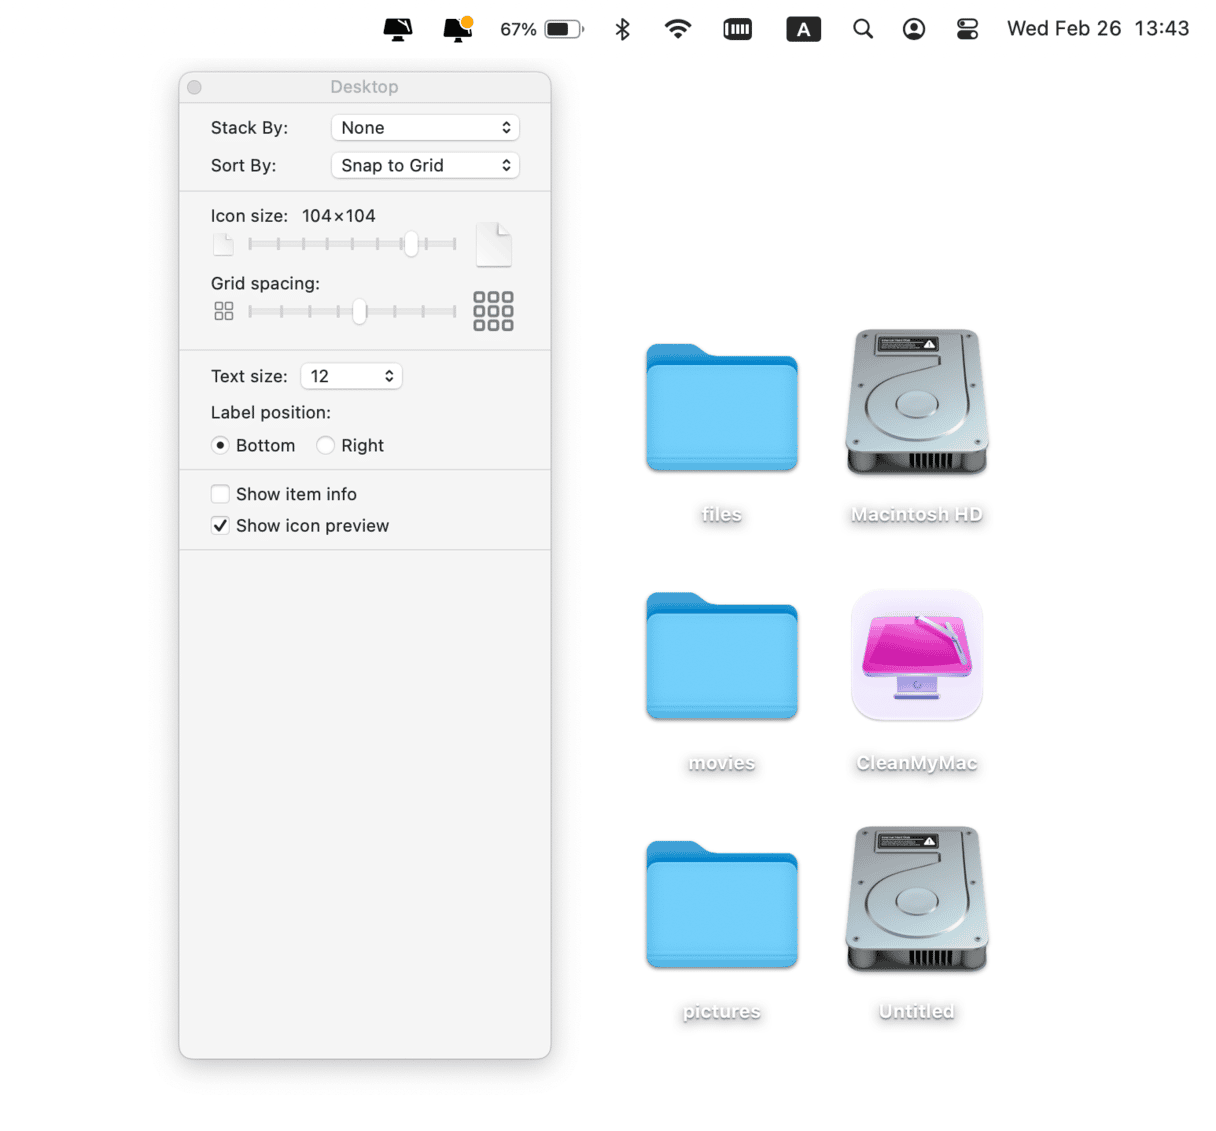
By now, your desktop should be looking more manageable. The final thing you can do to improve it is adjust the size of the icons — make them larger or smaller depending on your preference.
- Right-click a black space on your desktop.
- Click Show View Options.
- Use the slider to adjust the icon size.
How to remove all icons from Mac desktop
If you’re sick of the sight of desktop icons, you can hide them all by using a Terminal command. Here’s what to do:
1. Open Terminal from Applications > Utilities.
2. Type in these two commands one by one, each followed by Return:
defaults write com.apple.finder CreateDesktop -bool false
killall Finder
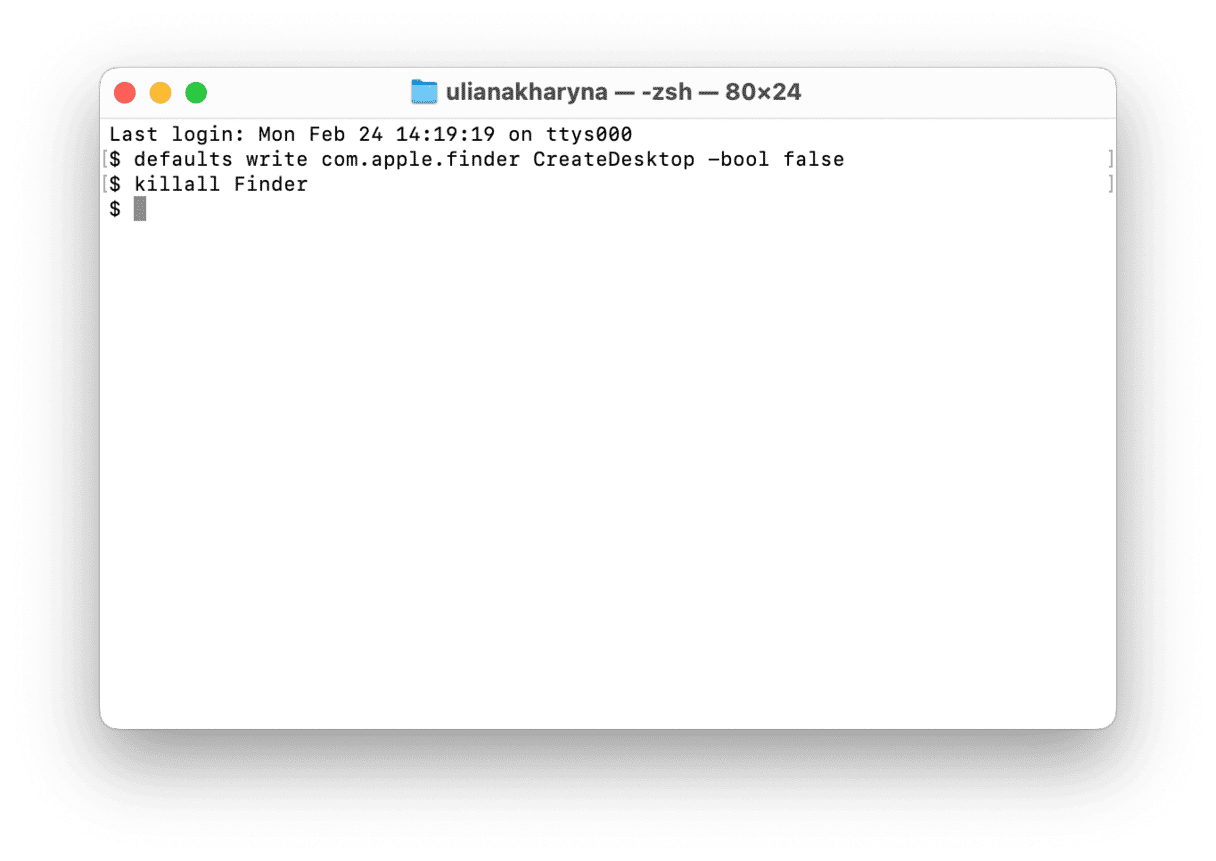
Your desktop will now be blank. To bring your icons back, use the following commands:
defaults write com.apple.finder CreateDesktop true
killall Finder
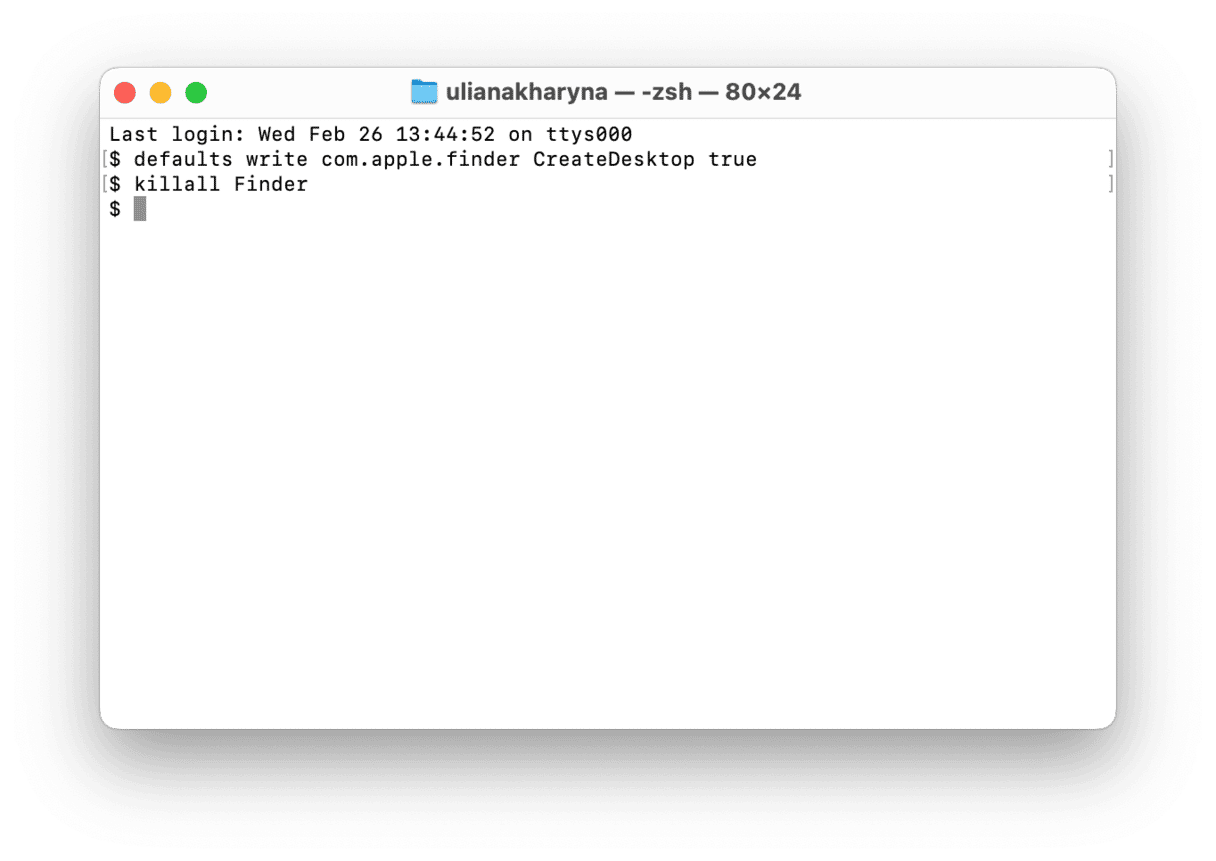
All icons will now return to your desktop.
Clean up the rest of your Mac
Now that you’ve cleaned up your desktop, why not take a few extra steps to declutter your Mac? A quick and easy solution is to use a tool like CleanMyMac, which scans your system for junk files and removes every trace of a file at the click of a button. You can get rid of anything you don’t need in a matter of minutes, which is a lot more appealing than digging around the desktop for hours on end.
For quickness, CleanMyMac’s Smart Care feature is the best one to use. Here’s how it works:
- Get your free CleanMyMac trial.
- Open the app and click Scan on the welcome screen.
- When the scan is complete, review the summary.
- Click Run to complete the cleanup.

This way, you will remove junk files, any malware that may have sneaked onto your Mac, and duplicate downloads. You will also install vital app updates and run recommended maintenance tasks. All with just two clicks!
Once you’ve worked through these tips, your desktop should resemble the good old productive days when you could easily find what you needed. Hide any icons you don’t regularly use, organize files into folders, and place them in grids. Adjust the size of icons for the cherry on the cake.


