Gaming on Mac has changed hugely over the last decade or so. It’s partly because of Steam, the online platform that allows you to purchase, download, and manage games on several platforms, including macOS.
Steam has some of the biggest and best titles available, and so if you’re into gaming on your Mac, you almost certainly have Steam installed. When Steam goes wrong, and the first thing to do is to clear the cache. In this article, we’ll show you how to do that.
What is Steam?
Steam is an online distribution platform for games on macOS, Windows, Linux, iOS, Android, and Windows Phone. It was originally developed by Valve, an American video game developer, as a way to distribute updates for its games. Now, Steam is the biggest games distribution service in the world, carrying some of the most popular titles like Counter-Strike: Global Offensive and Dota 2.
How to clear Steam game cache on your Mac?
If Steam starts to misbehave or behave erratically, clearing its cache can fix those problems. Other issues that you might experience include:
- Being stuck in offline mode
- Games not updating when there are updates available
- Downloads becoming “stuck”
- Games missing from your library
- Steam takes forever to open
If you experience any of those issues, clearing the cache can help. And if you want to know how to make Steam download faster, clearing the cache is the answer!
Steam cache files are stored in several different folders on your Mac. So, to clear the cache completely, you’ll have to track down these folders and move them to the Trash. Luckily, we can show you where to look.
Clear Steam download cache
There are two steps to removing the Steam cache on your Mac. The first is to remove the download cache, which you can do in the Steam app. The second is to delete the individual files and folders that Steam places on your computer.
Here’s how to clear Steam download cache:
- Launch the Steam app from your Applications folder.
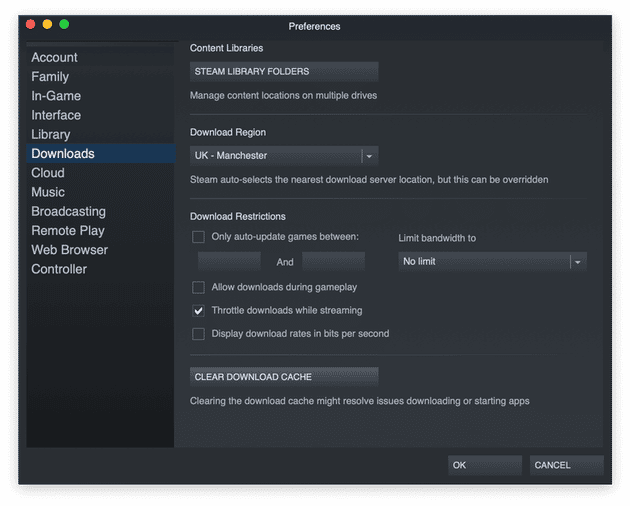
- Click the Steam menu and choose Preferences.
- Select Downloads on the left of the Preferences window.
- Press Clear Download Cache.
- You will now be logged out of Steam and will have to log back in again.

Remove Steam files
Like most applications on your Mac, Steam stores cache files in your Library folder and you’ll need to drag them to the Trash manually. To navigate to the files, do the following:
- In the Finder, click the Go menu.
- Choose Go to Folder.
- In the window, paste each of the locations below in turn and drag any files or folders with Steam in their name to the Trash.
/Library/Application Support/Steam (note this is the main Library folder, not your user library. The locations below are all in your user library, denoted by ‘~’)
~/Library/caches
~/Library/Preferences
~/Library/Logs
When you’ve done that and emptied the Trash, every trace of Steam should be removed from your Mac.
An easier way to get rid of cache files
CleanMyMac can remove all kinds of cache and other junk files with a couple of clicks. Here’s how.

- Download CleanMyMac and install it.
- Launch CleanMyMac from your Applications folder.
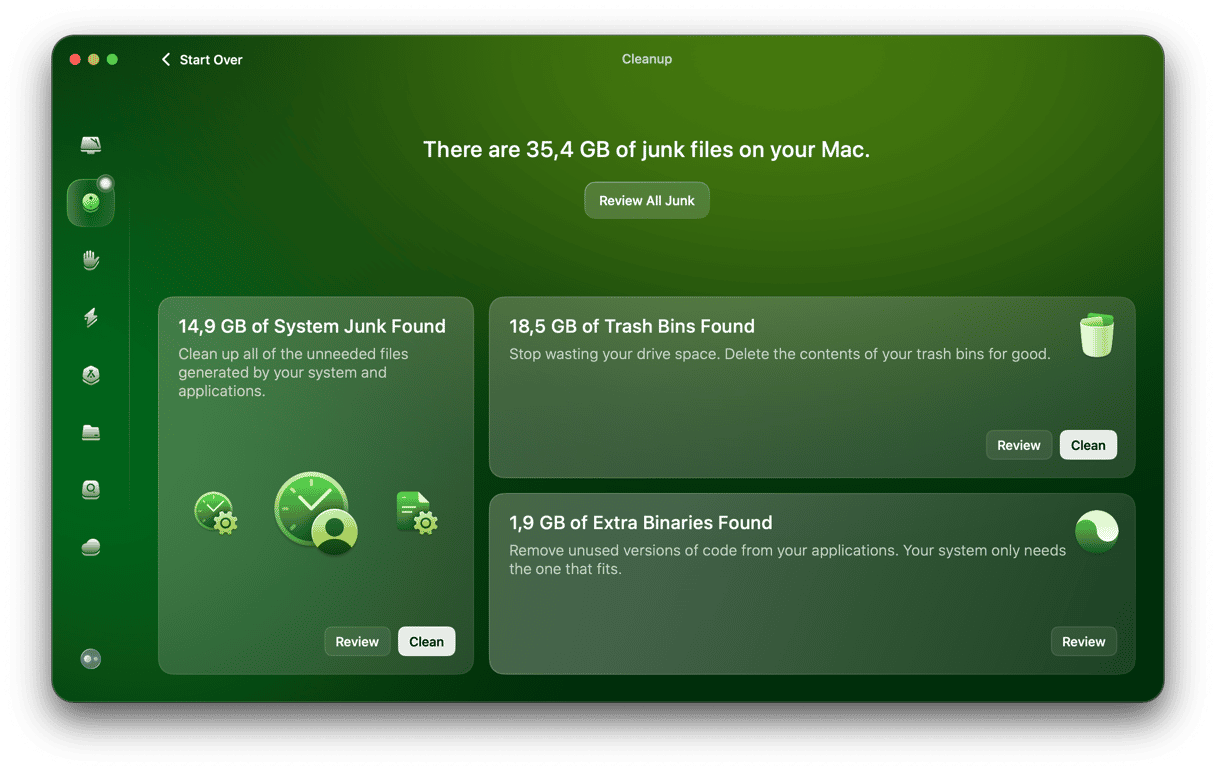
- Choose the System Junk module on the left.
- Press Scan.
- Press Clean to get rid of all the junk or Review Details to choose what to remove.
Additionally, you can go to the Maintenance module to free up RAM and run maintenance tasks. This will optimize your Mac’s performance and help your Steam games run smoother.
As you can see, clearing Steam cache on your Mac is not difficult, but can be a lengthy process. However, if you use CleanMyMac to help, it will be much quicker.


