When Apple launched macOS Big Sur in 2020, one of the headline new features was something that had been a part of iOS for years — Control Center. Added to Mac as a part of Apple’s move to integrate its two operating systems more tightly, Control Center on Mac does many of the same things its iOS counterpart does and adds a few extra features. In this article, we’ll show you where Control Center is on your Mac and how to use it.
What is Control Center?
As its name suggests, Control Center is a hub for many of the switches and sliders you use to control your Mac. From display brightness and sound volume to Bluetooth, Wi-Fi, and Stage Manager, it’s all there in Control Center.
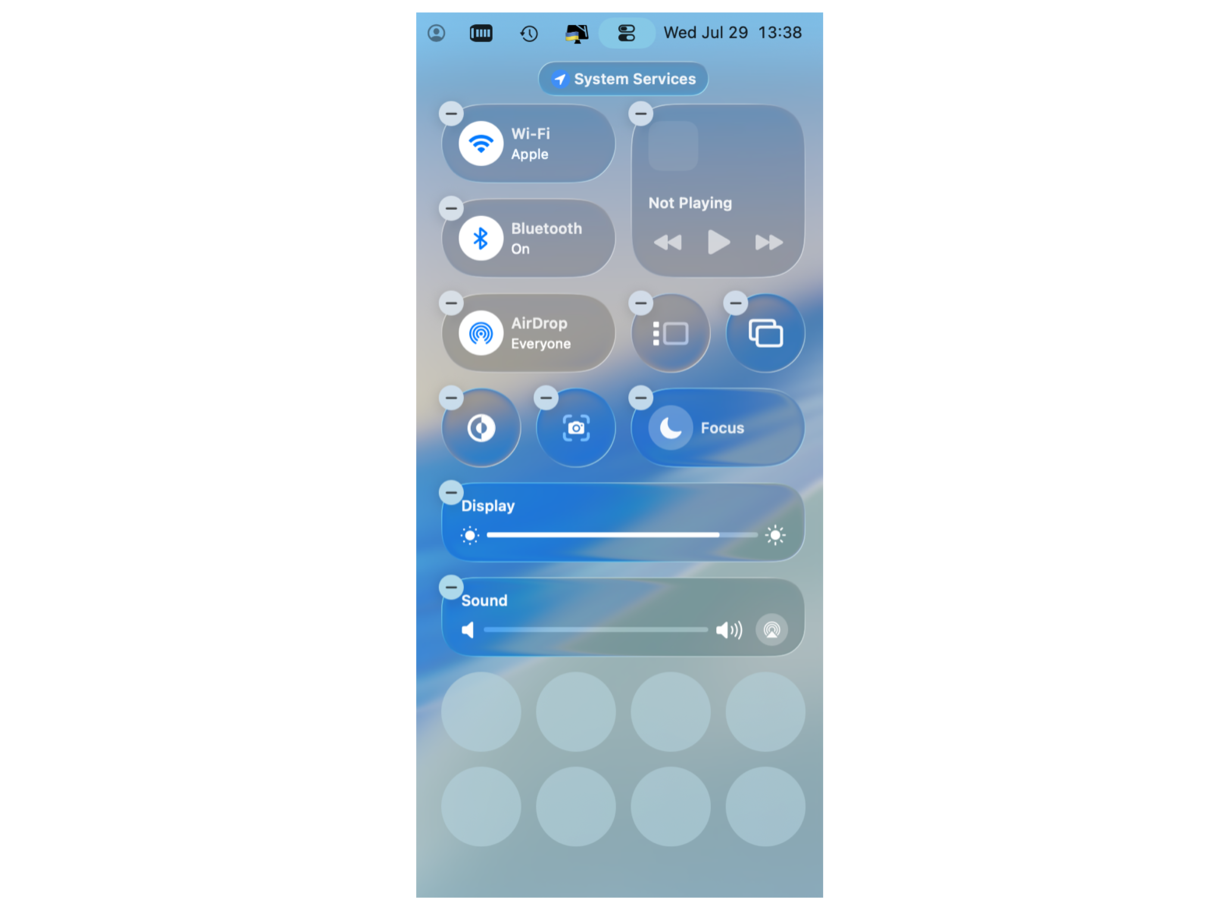
You can also add other modules to Control Center to manage things like keyboard brightness and some accessibility settings. And you can make it even more useful by pressing a modifier key when you use Control Center, which, in most cases, will cause it to display more detailed information or options for a module.
Where is Control Center on Mac?
Control Center in macOS sits in the menu bar — on the right side, just to the left of the date and time. You can customize it straight from Control Center. You can also access its settings to, say, add or remove modules from System Settings, although the steps would differ a bit for macOS pre-Sequoia and macOS Tahoe.
How to keep your Mac running smoothly and free from junk
One thing that you can’t do in Control Center is scan your Mac for junk files that are taking up gigabytes of space on your boot disk. These files include temporary files that were never deleted, cache files, and language files for languages you don’t need. Neither can Control Center look for ways to make your Mac run more smoothly or check for malware.
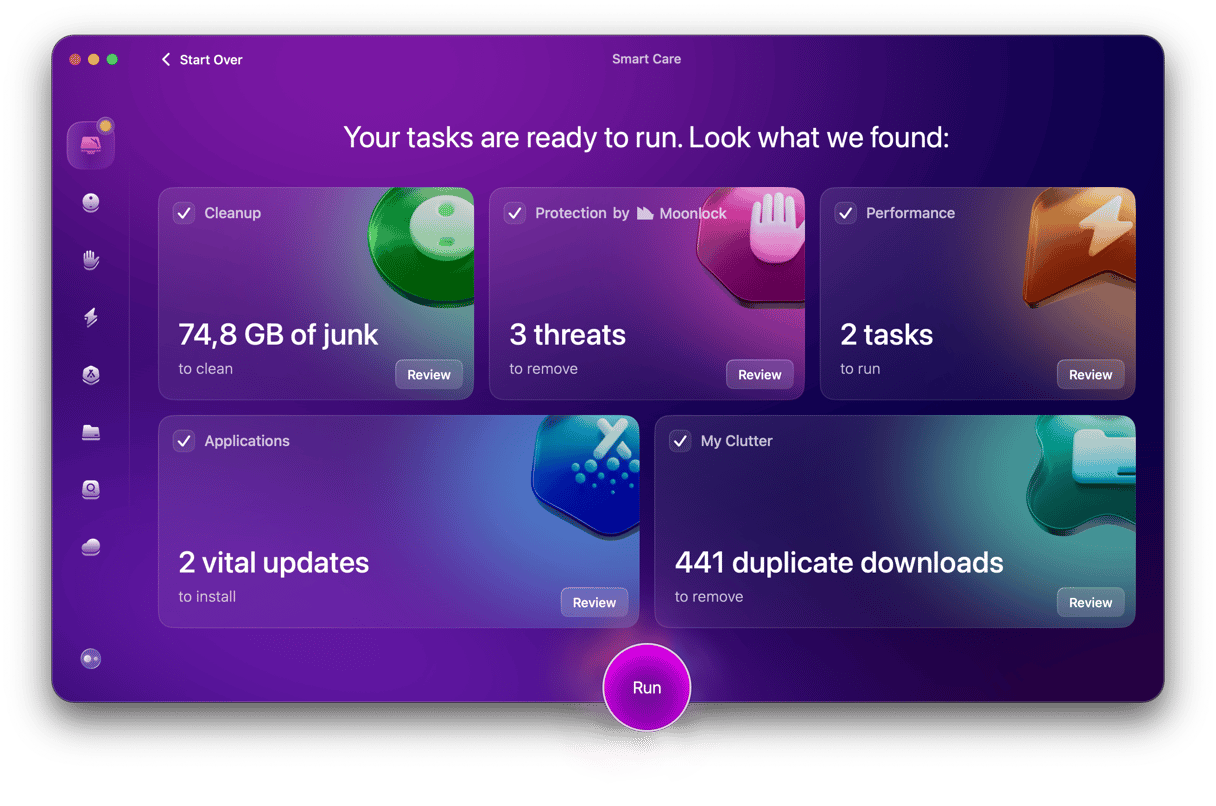
However, CleanMyMac’s Smart Care feature can do all of those things. It has five elements: to check for junk, look for ways to optimize your Mac, scan for malware, detect duplicate downloads, and install vital app updates. Use it to scan your Mac, and you’ll free up disk space and keep your Mac running speedily and smoothly. You can test CleanMyMac for 7 days — get your free trial here.
How to use Control Center
Using Control Center is fairly simple, but to make it even easier, we’ll break it down module by module and show you how to use it.
Wi-Fi
Click on Control Center, and you’ll see Wi-Fi at the very top. Click it, and you’ll see the switch to turn Wi-Fi on and off and a list of Wi-Fi networks. To connect to one of those networks, just click it. To connect to a network that is not displayed, click Other. And to access more Wi-Fi settings, click Settings to go to the Wi-Fi section of System Settings.
Bluetooth
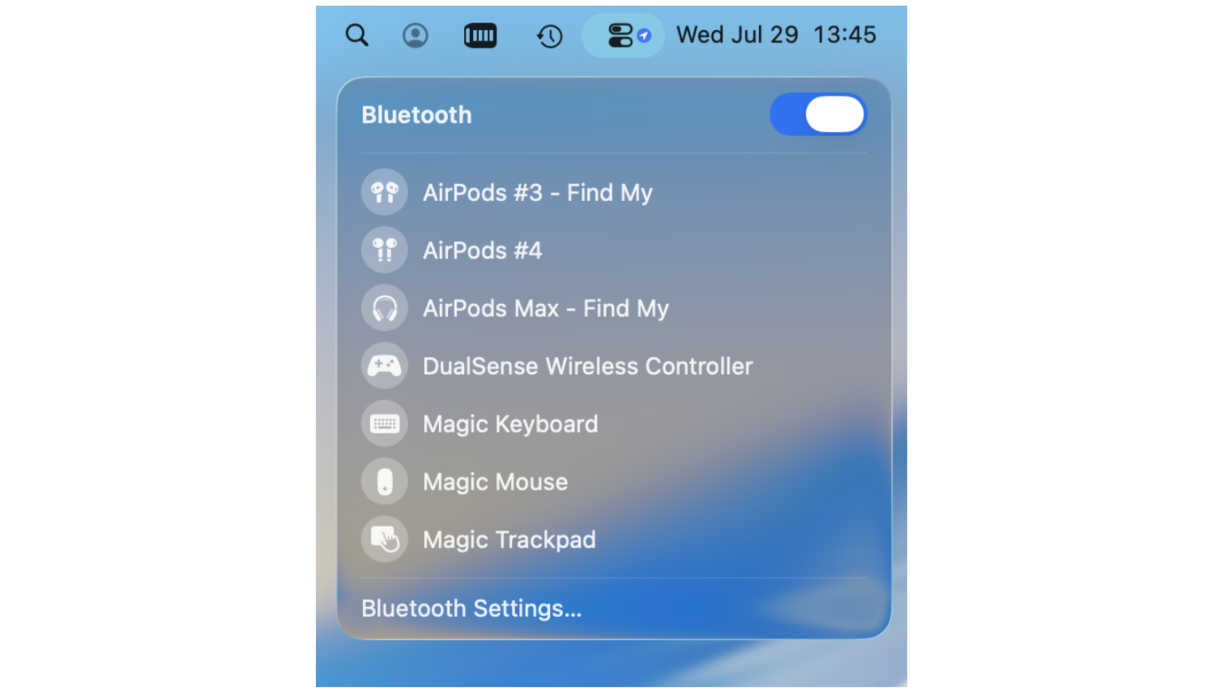
Click on Control Center, then click Bluetooth. You’ll see an on/off switch for Bluetooth and a list of devices that are paired with your Mac, along with an indication of whether they are currently connected. Click a device to connect it. You may also see battery life information for connected devices. To pair a new Bluetooth device, click Bluetooth Settings.
AirDrop
From the AirDrop module in Control Center, you can switch AirDrop on and off and choose whether to allow files to be sent from Everyone or Contacts only.
Display
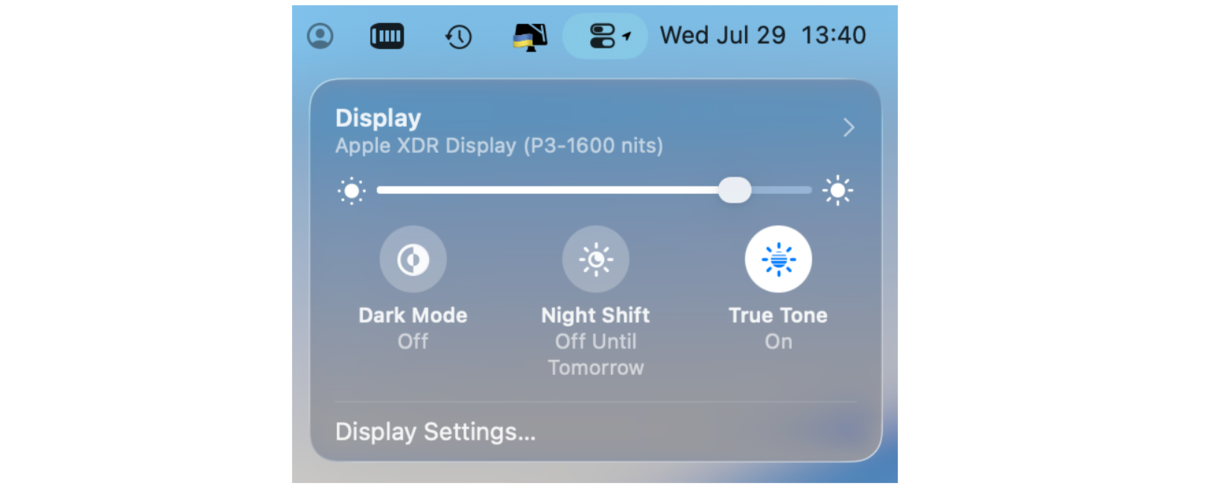
The slider in the Display module allows you to change brightness, and clicking the dropdown arrow shows options for Dark Mode, Night Shift, and True Tone.
Sound
In the Sound module, you can adjust the volume of your Mac’s speakers as well as choose an option for sound output.
The rest
Focus allows you to choose and turn it off. Stage Manager allows you to activate or deactivate Stage Manager. And Screen Mirroring allows you to turn that feature on and off.
Modifying Control Center
macOS Ventura — macOS Sequoia
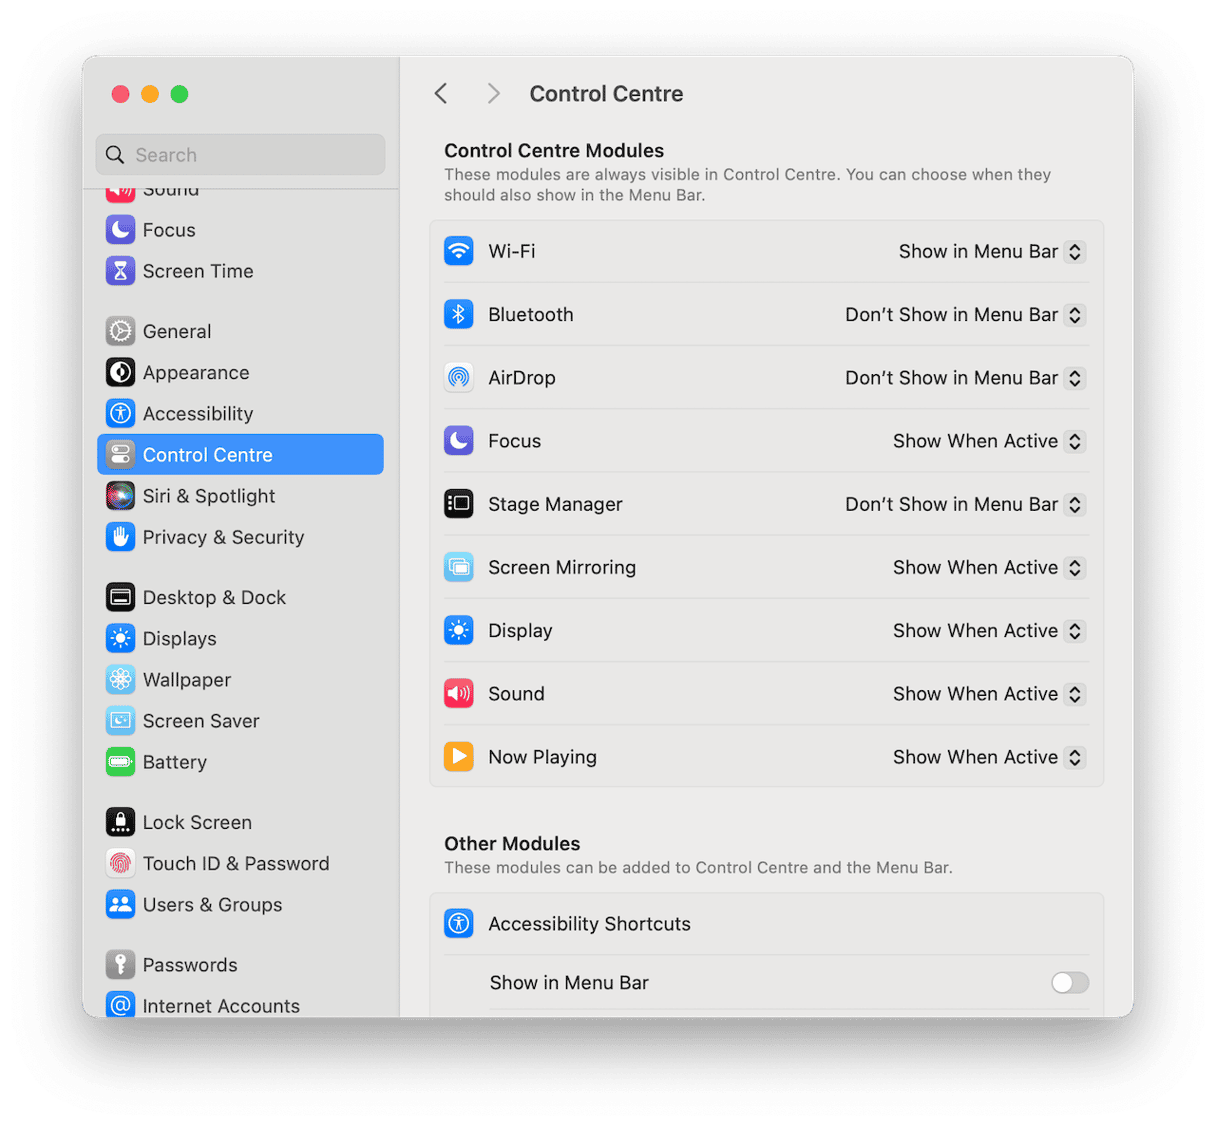
If you go to the Apple menu > System Settings > Control Center, you can add or remove modules to and from Control Center. You can also choose to put some modules permanently in the menu bar or remove items like Siri from the menu bar.
macOS Tahoe
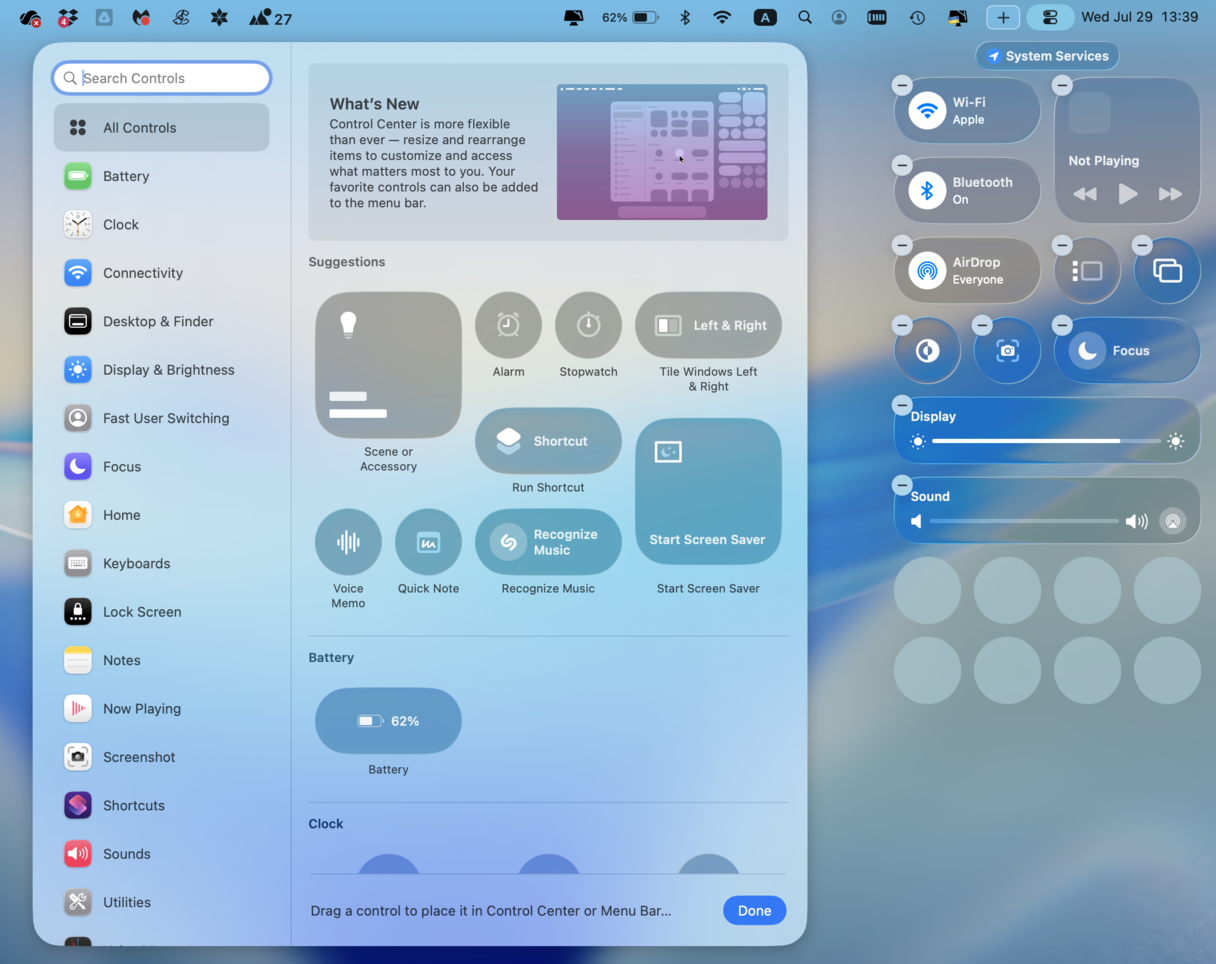
Go to System Settings > Menu bar. Click Add Controls under Menu Bar Controls. From there, you can choose items to add either to the menu bar or Control Center.
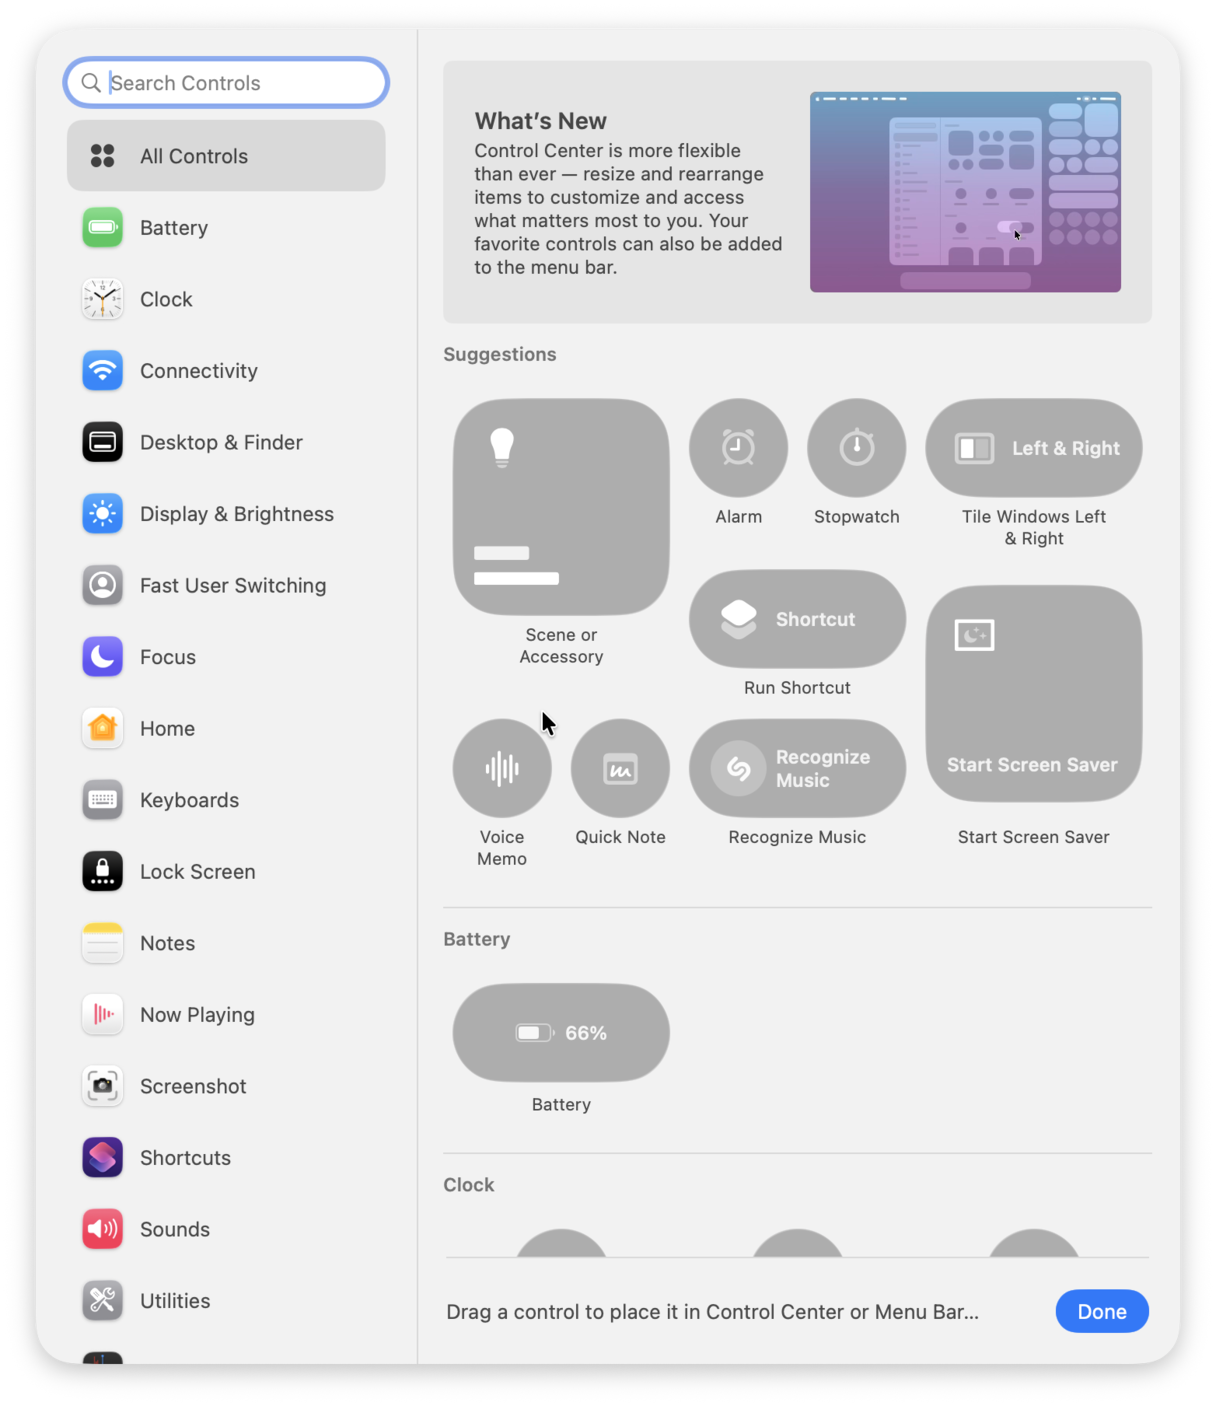
Alternatively, go straight to Control Center and click Edit Controls. It will open the same window that popped up when you clicked Add Controls in System Settings.
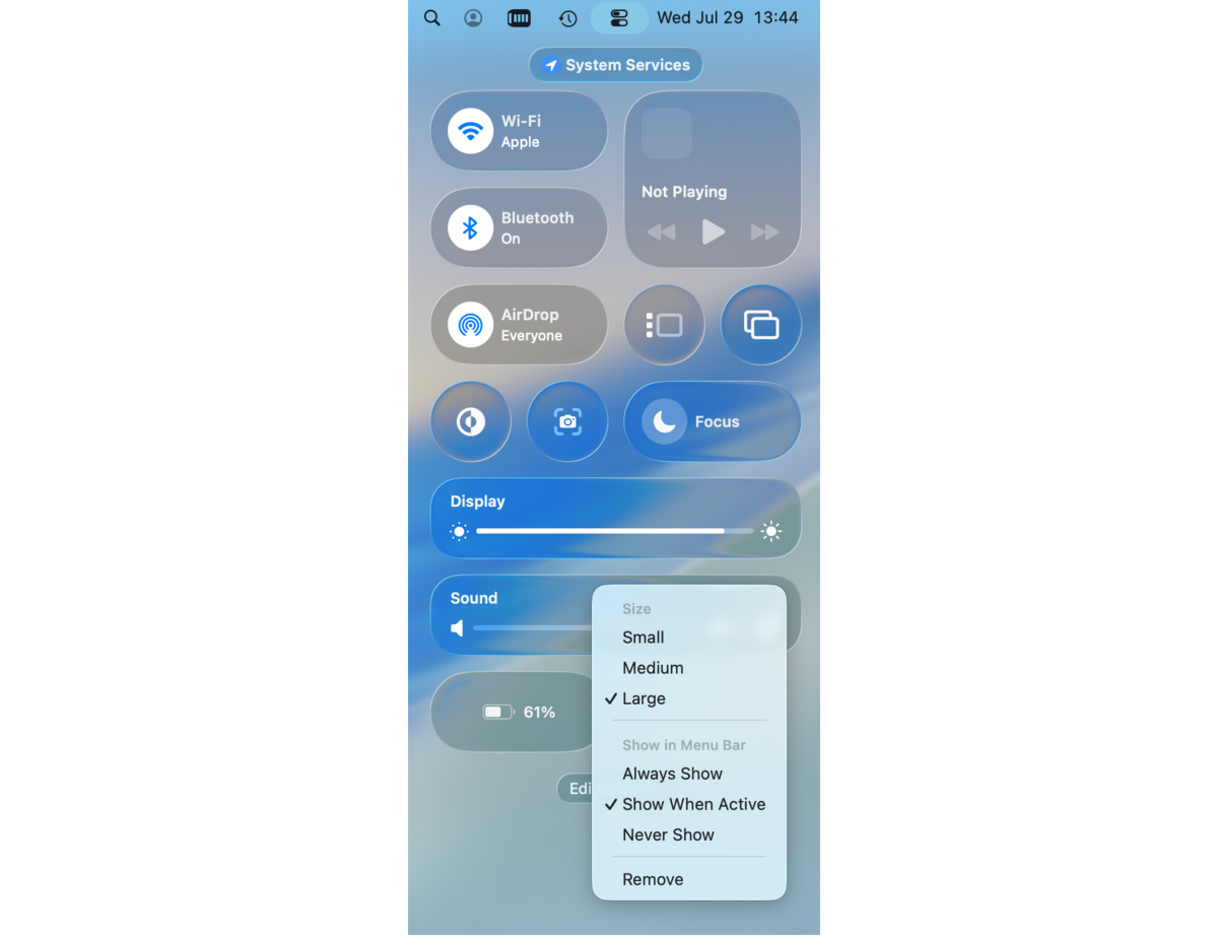
You can also change the size of the module by right-clicking it and choosing one of three options: small, medium, or large.
Now that you know where Control Center is on your Mac, you will find it to be a very useful tool in that it allows you to quickly access many of the same settings as Control Center in iOS. In addition, you can also move things like the battery life indicator and Fast User Switching from the menu bar to Control Center. To do that and further customize Control Center, check System Settings as described above.