There are few technologies as important to the way we live our lives as Wi-Fi. Without Wi-Fi, most Macs just wouldn’t be able to go online because they no longer come with ethernet ports. And even if you could connect to your router using a cable, it’s much less convenient than connecting wirelessly. Even using your iPhone as a hotspot requires Wi-Fi to be enabled and working on your Mac. So, it’s clear that if you’re having Wi-Fi issues on your Mac, it can be a serious problem and prevent you from doing most of the things you need to do. In this article, we’ll show you how to fix macOS Sequoia Wi-Fi issues.
First, make sure your Mac’s Wi-Fi is the problem
Wi-Fi problems can occur at any stage of the connection between the app you’re using on your Mac and the online destination you’re trying to reach. In this article, we’re going to focus on macOS Sequoia Wi-Fi not working, so before we start, it’s important to make sure that macOS Sequoia is the problem. To do that, we need to rule out other possible causes. Here’s how to do that:
- If the problem occurs with a specific application, try a different one.
- Check other devices connected to your Wi-Fi router to see if they can connect.
- Restart your Wi-Fi router by using the power switch on the back. Turn it off, wait for ten seconds, then turn it back on again after making sure all cables are securely connected. Wait for it to boot before trying to connect again.
If the problem occurs with multiple applications and doesn’t affect other devices or if, after restarting your router, other devices work, but your Mac still won’t connect, you can rule out other causes and focus on fixing macOS Sequoia Wi-Fi issues.
How to fix it if macOS Sequoia Wi-Fi is not working
1. Turn Wi-Fi off and then turn it on again
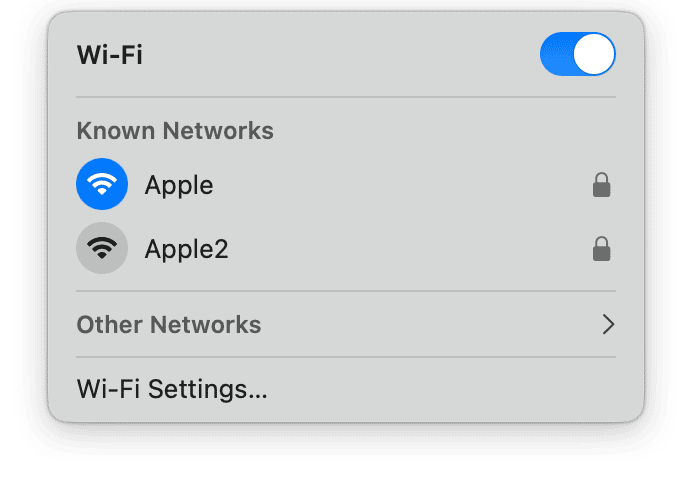
Click the Wi-Fi icon in the menu bar (if it’s not there, click Control Center and then the dropdown arrow next to Wi-Fi). Toggle the Wi-Fi switch to off, wait for a few seconds, then turn it on again.
2. Restart your Mac
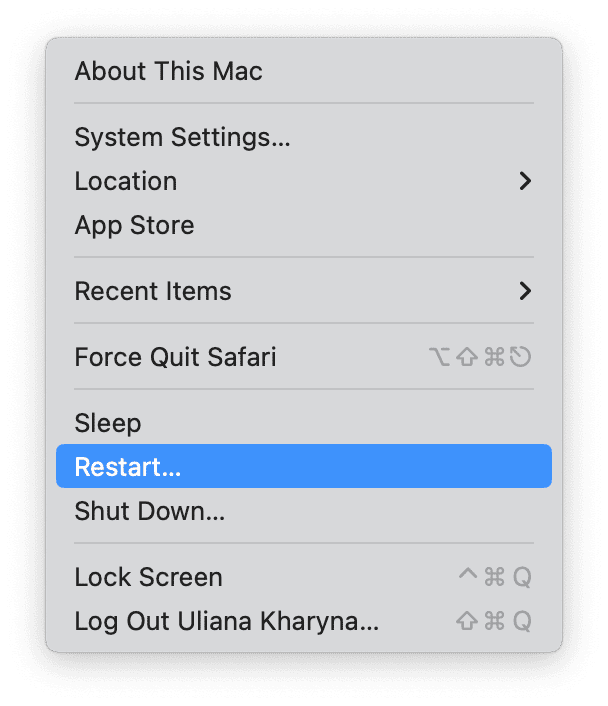
This will free up RAM, clear out temporary files, and perform checks on your startup disk. It may be all you need to do to fix the problem. So, head over to the main Apple menu and choose Restart.
3. Flush the DNS cache
DNS is what your Mac uses to translate the URL you type in a web browser or the one contained in a link you click into an IP address. It’s usually configured by your broadband provider in the router they provide, though you can also set it yourself to any DNS you choose, such as Google’s free DNS. Your Mac caches DNS inquiry results for websites you visit often so that it doesn’t have to look them up again, but sometimes, that cache can become corrupt or grow so large it becomes unwieldy.
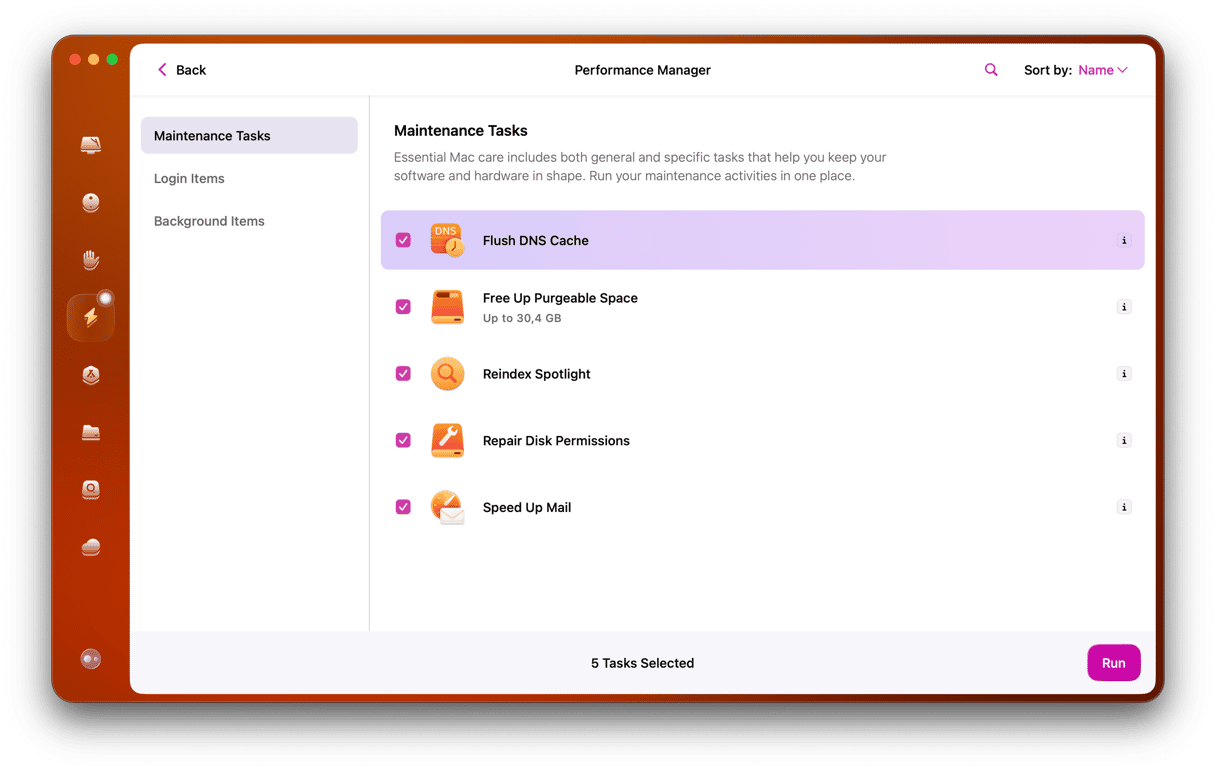
The solution is to clear the DNS cache. The easiest way to do that is to use the Performance tool in CleanMyMac. You can download CleanMyMac for free here. Once you’ve done that, follow the steps below:
- Open CleanMyMac and choose Performance in the sidebar.
- Run a scan and click View All Tasks.
- Select the checkbox next to Flush DNS cache.
- Click Run.
4. Change DNS servers
If flushing the DNS cache doesn’t work, you can try changing DNS servers:
- Open System Settings.
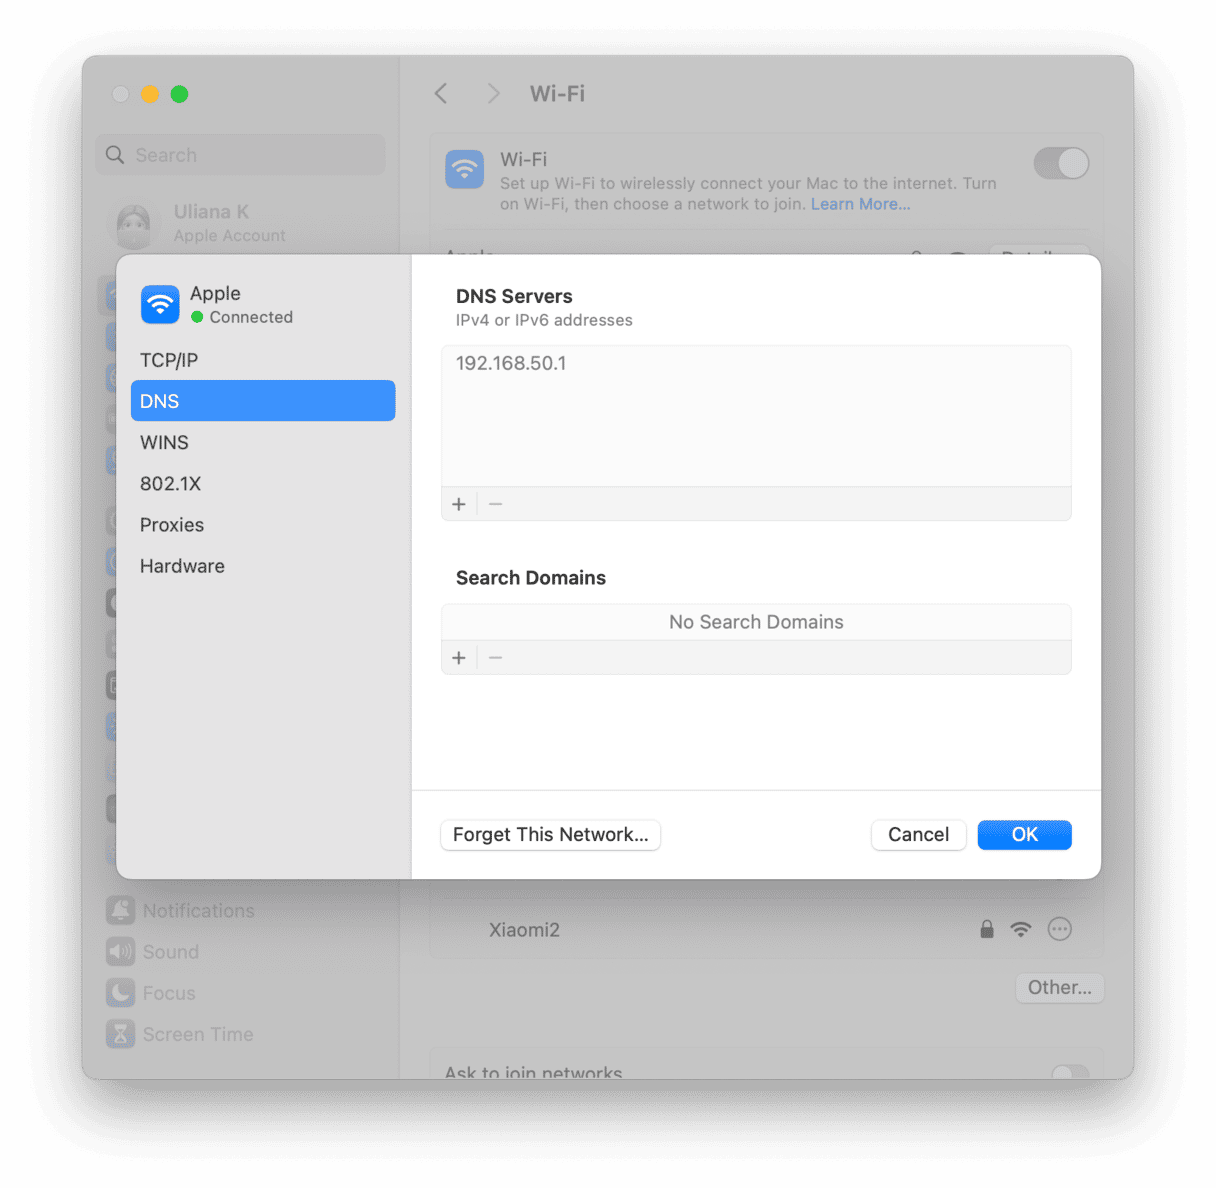
- Click Wi-Fi and then choose Details next to the Wi-Fi network you’re connected to.
- Select DNS in the sidebar.
- Click the ‘+’ under DNS Servers.
- Type in the following IP address:
8.8.8.8 - Press Return.
- Click ‘+’ again to add a secondary DNS server.
- Type:
8.8.4.4and press Return. - Quit System Settings.
5. Forget the Wi-Fi network and re-add it
If nothing else has worked, the next step is to make your Mac ‘forget’ the Wi-Fi network and then re-add it from scratch:
- In System Settings, choose Wi-Fi.
- Click Details next to the network you’re connected to.
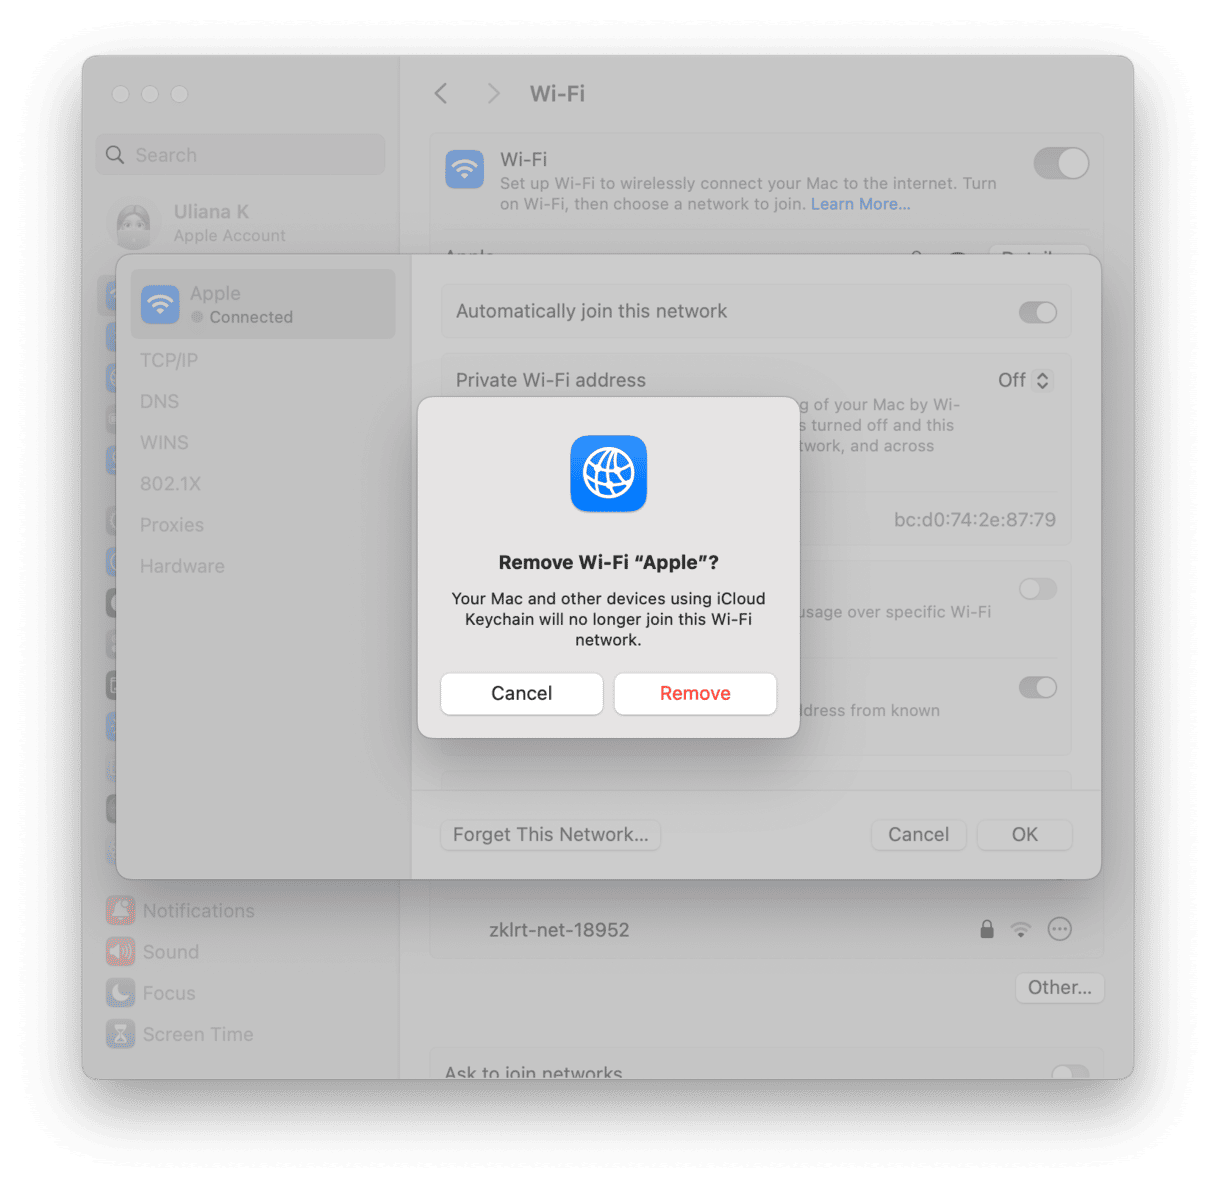
- Choose Forget This Network and then click Remove.
- In System Settings > Wi-Fi, look for the name of your Wi-Fi network under Other Networks.
- Click Connect next to it and type in your Wi-Fi password.
6. Turn off Firewall
Firewalls manage incoming connections to your Mac, so they shouldn’t affect your Mac’s Wi-Fi. But, if nothing else has worked, it’s worth checking whether the Firewall is the issue by switching it off. If you use third-party firewall software, turn it off there.
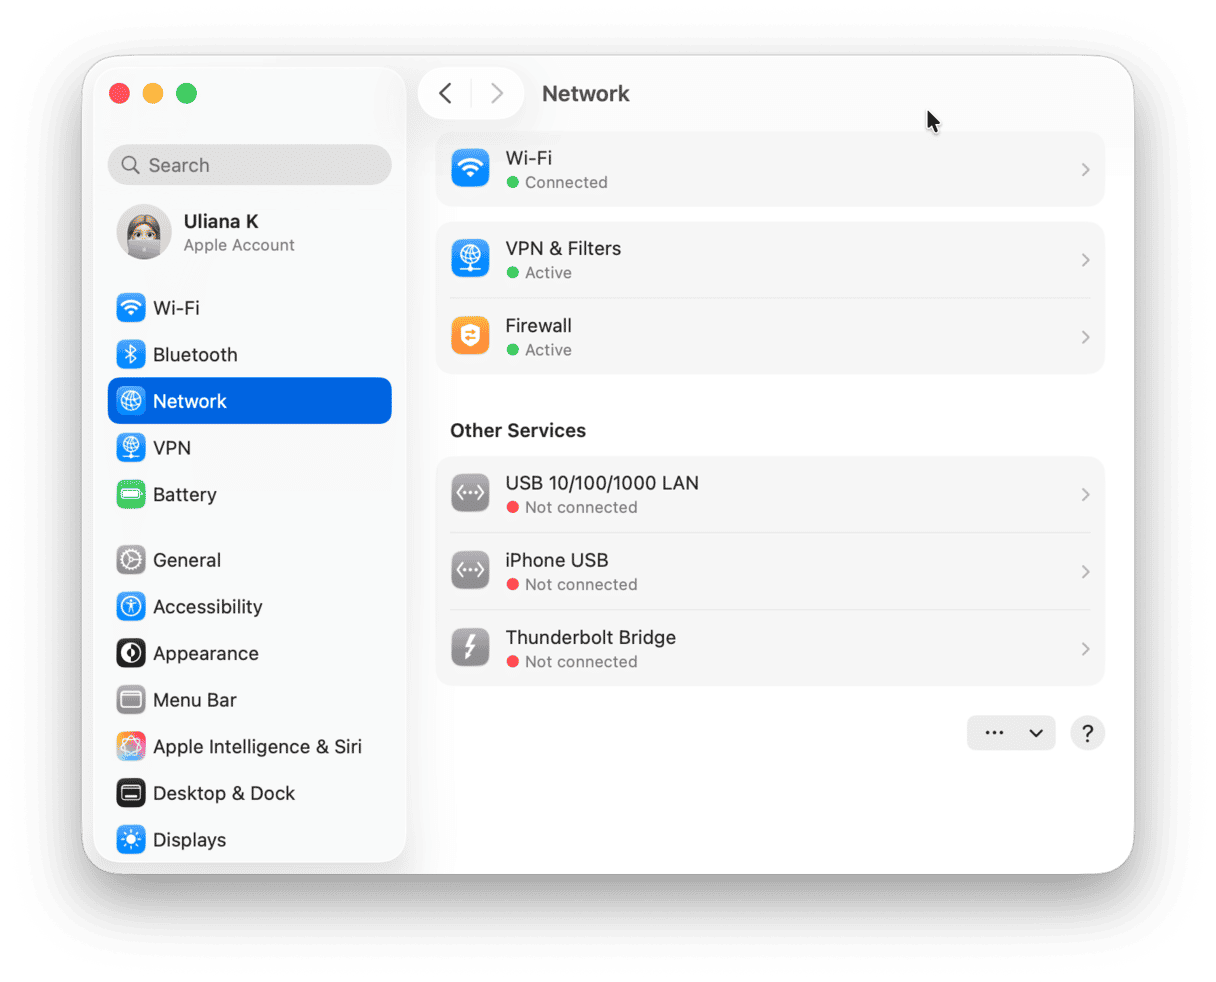
If you use macOS’ built-in firewall, go to System Settings > Network, choose Firewall, and toggle the switch to off. Remember to turn it back on again once you’ve checked.
7. Check your apps and extensions
There have been reports that third-party apps for monitoring network activity (like VPN or Little Snitch) can interfere with your Wi-Fi, especially after upgrading to a new macOS version. So, if nothing so far has helped, try quitting these apps and test your internet connection again. If you cannot quit an app, uninstall it. It is also recommended to update all of your apps to make sure that they do not cause conflicts leading to Wi-Fi problems. The same goes for extensions.
There are a number of things that can cause macOS Sequoia Wi-Fi issues. If you experience them after upgrading, the first thing to do is to make sure that it’s your Mac that’s at fault. Once you’ve confirmed that, follow the steps above to fix your Wi-Fi and get online again.


