Every file on your Mac has a breadcrumb trail that leads from the root level of the disk on which it’s stored to the file. That breadcrumb trail is called a path, and knowing what that path is can be very helpful in some circumstances. If the file is contained within several folders, searching for it and then noting the file path can help you find it more quickly again in the future. Or if you need to execute a command in Terminal on a file, it’s useful to know the path. In this article, we’ll show you how to find and copy a file path on your Mac using several different methods.
What is a file path
Put simply, a file path is the address of the file on your Mac. The path describes the location of the file in terms of the nested folder in which it’s stored, usually starting with the root directory, or your user folder, on your Mac. Each folder is separated by a ‘/‘. If you know the path, you can use Go to Folder in the Finder’s Go menu to navigate directly to the file. If the file is on a server, you can use the path in Connect to Server in the file to connect directly to the folder in which the file is located.
Why copy a file path?
Copying a file path can be useful in several circumstances. If, for example, you are in a conversation with a colleague and need to explain to them how to find a file on a server or their Mac, copying the file path into the chat is the simplest method to do it. You may want to note down the location of a file so you can find it easily again in the future. Or you may want to use Terminal to execute a command on a file.
How to copy a file path on Mac
There are several methods for copying a file path. Choose the one that works best for you.
1. Get Info
Every file on your Mac has information associated with it, like the creation date, the date it was last modified, and, crucially for our purposes, its location on your Mac.
- Navigate to the file in the Finder and select it.
- Right-click or Control-click on it and choose Get Info.
- In the window that opens, look at the Where field.
- Copy the path from the Where field and paste it wherever you need it.
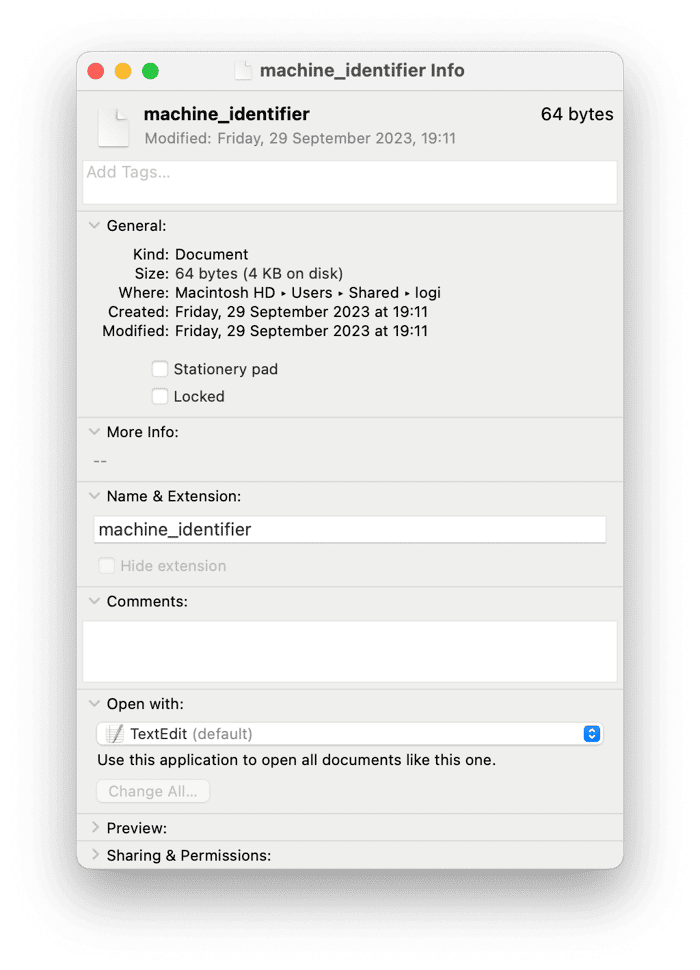
You can also view the Get Info window by pressing Command-I with the file selected or by choosing Get Info from the File menu in Finder.
How to find files even if you don’t know their name or where they are
If the file you’re looking for on your Mac is very large or very old, there’s an easy way to find it. CleanMyMac’s Large & Old Files tool scans your Mac, looking for the largest files and the oldest files. You can then choose to display them by kind, size, or access date. It’s designed to make it easy to free up lots of space quickly by either getting rid of the largest files first or, with the least disruption, deleting the files you haven’t opened in the longest time. But it’s also a useful way to find files that fall into the criteria of large or old. You can download CleanMyMac for free here. Here’s how to use it:
- Open CleanMyMac and choose My Clutter in the sidebar.
- Click Scan > Review All Files > Large & Old Files.
- You’ll see a list of filtering options in the middle pane.
- If you know the file type you’re looking for, choose it under By Kind.
- If you want to filter by size, use one of the options there. If you want to narrow down the search by the date you last opened the file, choose an option under By Access Date.
- You’ll now see a list of files that meet the criteria in the right-hand window.
- Select the file you want and use the menu at the bottom of the window to choose what to do with it.

2. Contextual menu
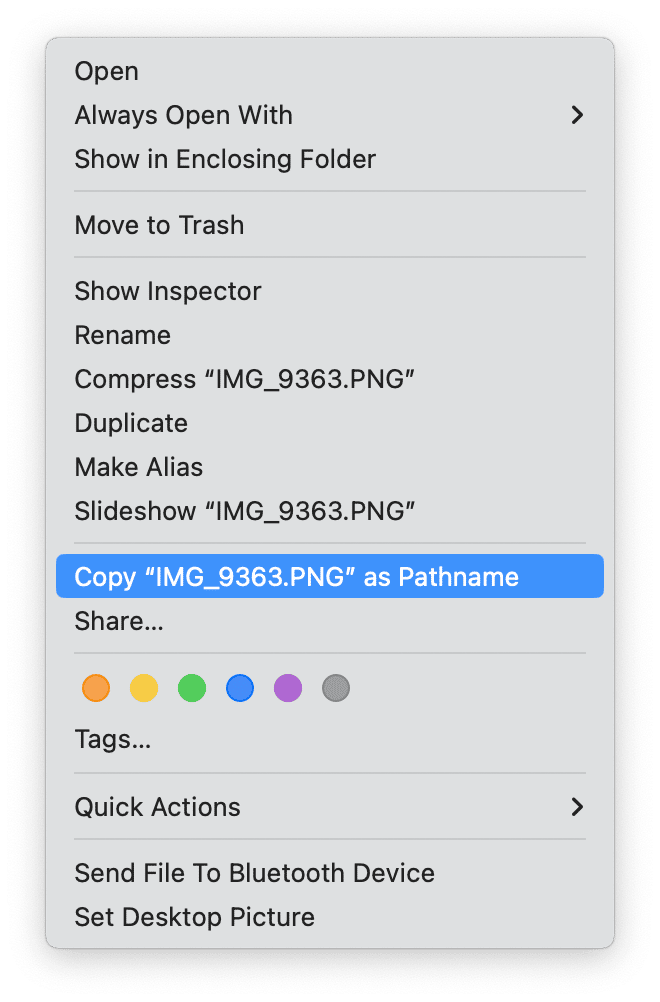
When you Control-click or right-click on a file in the Finder, the menu that appears, and from which you chose Get Info in step 1 above, is called a contextual menu – the options available depend on the context in which you right-click. You can change the contents of the menu by pressing the Option key.
- Control-click or right-click on the file in Finder.
- Press the Option (Alt) key.
- Choose ‘Copy [filename] as Pathname’ where [filename] is the name of your file.
- Paste the path wherever you need it.
3. Show path bar
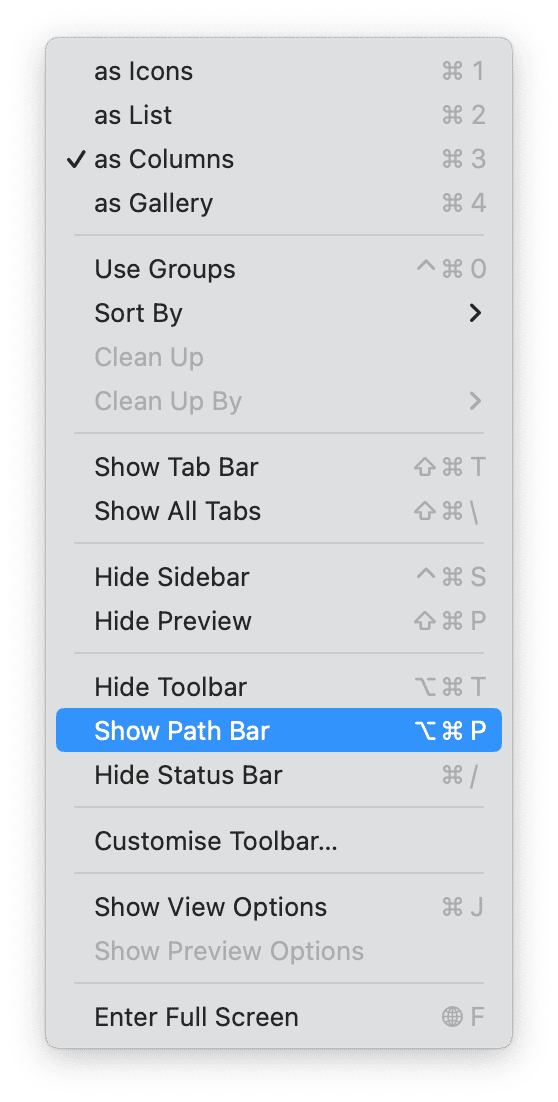
You can configure Finder to automatically show the path of any file you select in a Finder window at the bottom of the window. You can then copy the path from there. Here’s how to do it:
- Click the Finder menu in the Dock.
- From the View menu, choose Show Path Bar (you can also press Cmd-Option-P in Finder).
- Navigate to the file whose path you want to copy and select it.
- You will see its file path at the bottom of the window. Control-click or right-click on it and choose Copy “[filename]” as Filepath, where [filename] is the name of the file you selected.
- Paste the file path wherever you need it.
4. Go to Folder
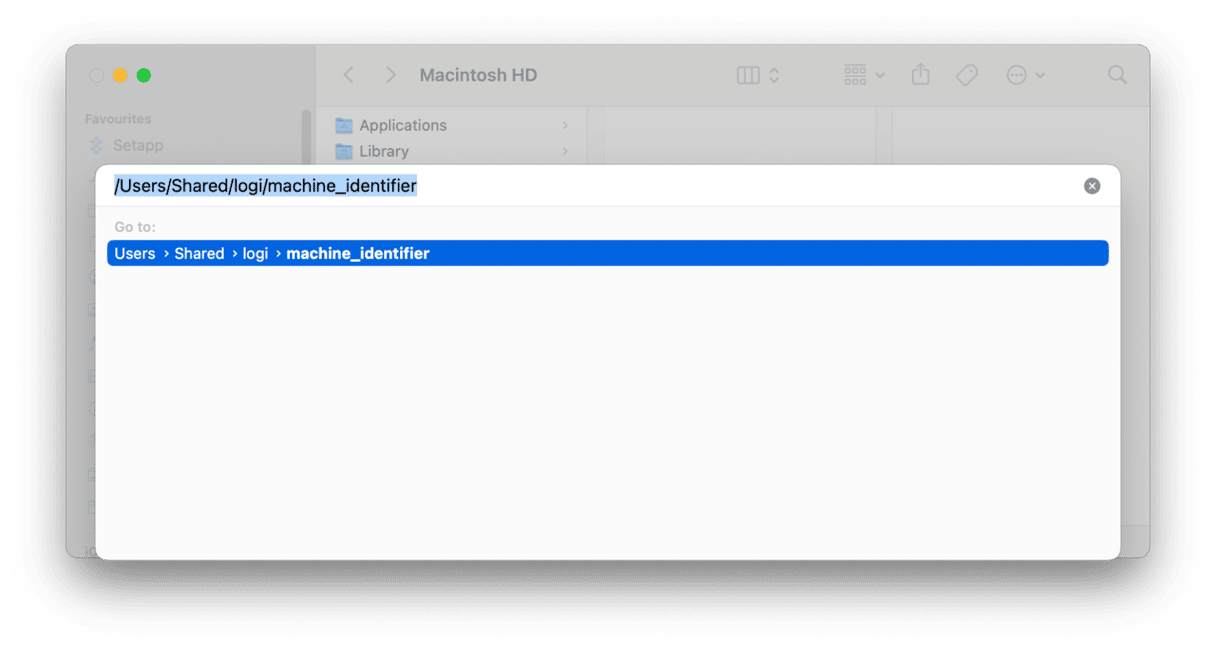
One of the most useful commands in the Finder is Go to Folder accessed from the Go Menu. It allows you to type or paste any file path and go directly to the folder. But we can also use it the other way round to find the file path for a file. Here’s how:
- Click the Finder icon in the Dock and then the Go menu.
- Choose Go to Folder.
- When the text box appears, click the ‘x’ at the right to delete the current path.
- Drag the file whose path you want to copy onto the text box.
- When the path appears, right-click or Control-click on it and choose Copy.
- Alternatively, select it and press Command-C.
- Paste the path wherever you need it.
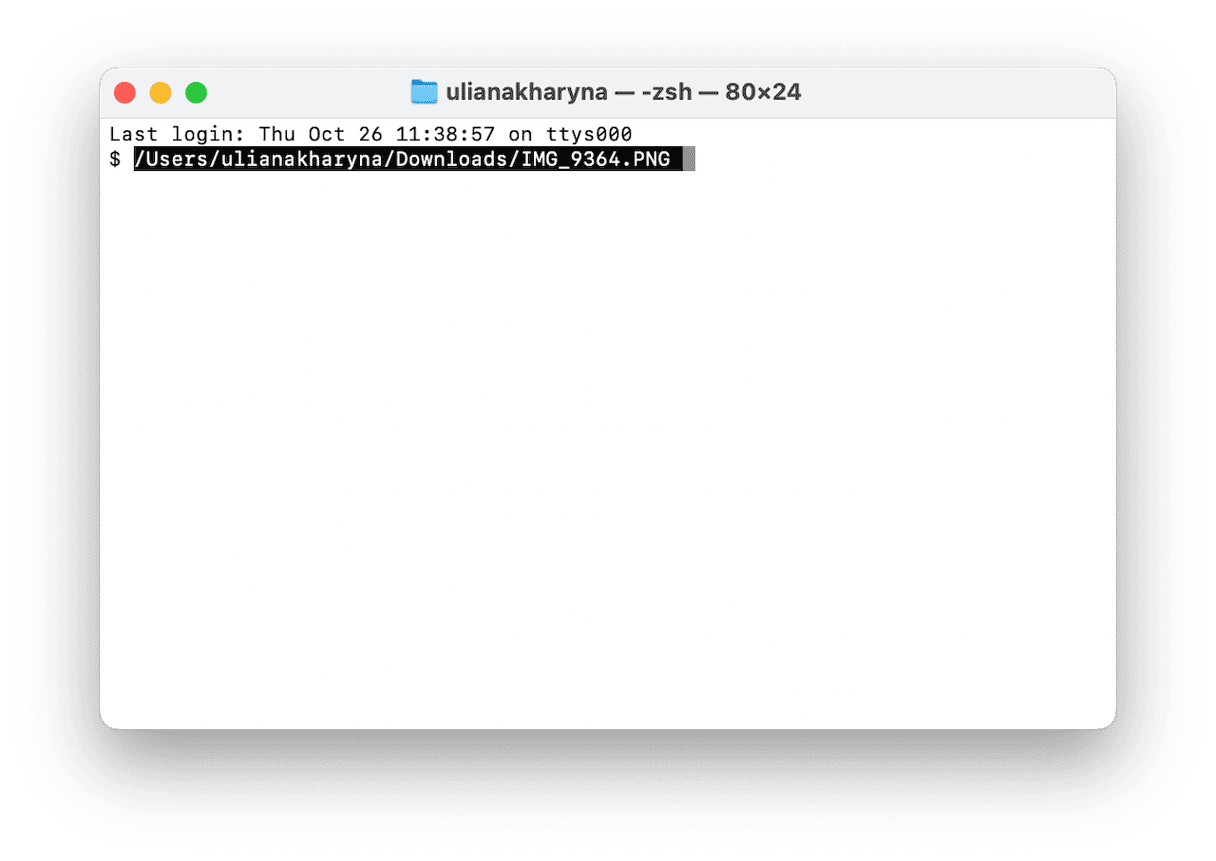
5. Terminal
If you’re comfortable using Terminal, you can use that to copy a file path. Here’s how:
- Go to Applications > Utilities and double-click Terminal to open it.
- Drag the file whose path you want to copy onto the Terminal window.
- Its path will appear and will be selected.
- Right-click or Control-click on the path and choose Copy. Or just press Command-C.
- Paste the file path wherever you need it.
Knowing the file path for a file can be very useful if it’s located in several nested folders or if you need to explain to someone else where it is. To do that, you’ll need to copy the path. Choose the method above that suits you best to copy a file path on your Mac.


