Wondering how to clear downloads on Mac? It can be a pain because it involves two separate things: hunting down and deleting all kinds of downloads first and emptying your Trash afterward. Want to know how to do it quickly? Keep on reading and we’ll show you all there is to know about how to remove downloads from Mac.
How to delete downloads on Mac
Below, you’ll find several different locations of the downloads and how to clear them. Let’s dive in!
Use the Finder and clean up the Downloads folder
Finder is the first place you should look for downloads on your Mac. If you have a mountain of download files stored, it’d be smart to sort your items and see which of them are the heaviest. Here’s how:
- Open the Finder and press Command+Shift+G.
- In the window that pops up, type ~/Downloads/ or go to the Downloads folder from the sidebar. You can also click the Downloads icon in the Dock to access the folder faster.
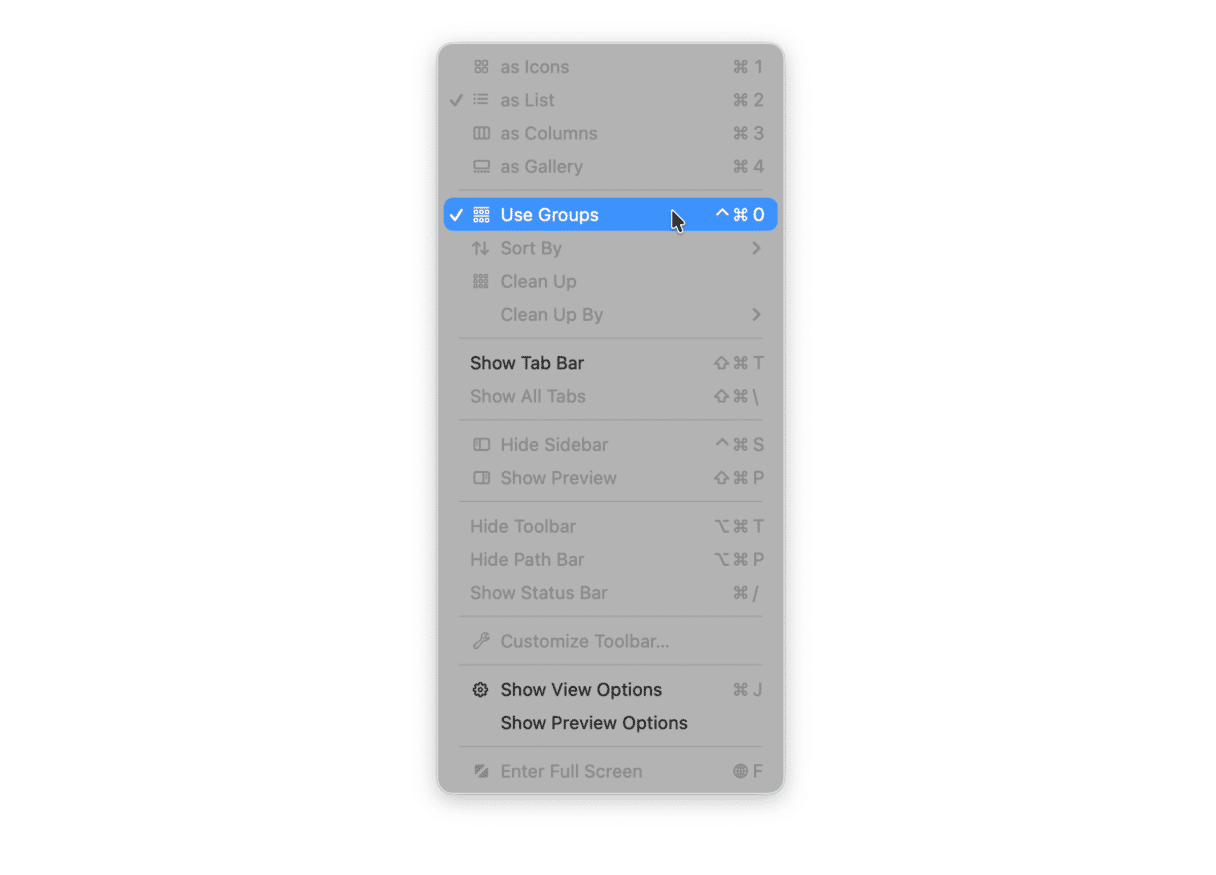
- Click View in the menu bar and choose Use Groups — the Finder will then gather your downloads in groups, such as Applications, PDF documents, Images, and others, so you can quickly look through them and delete files you don’t need.
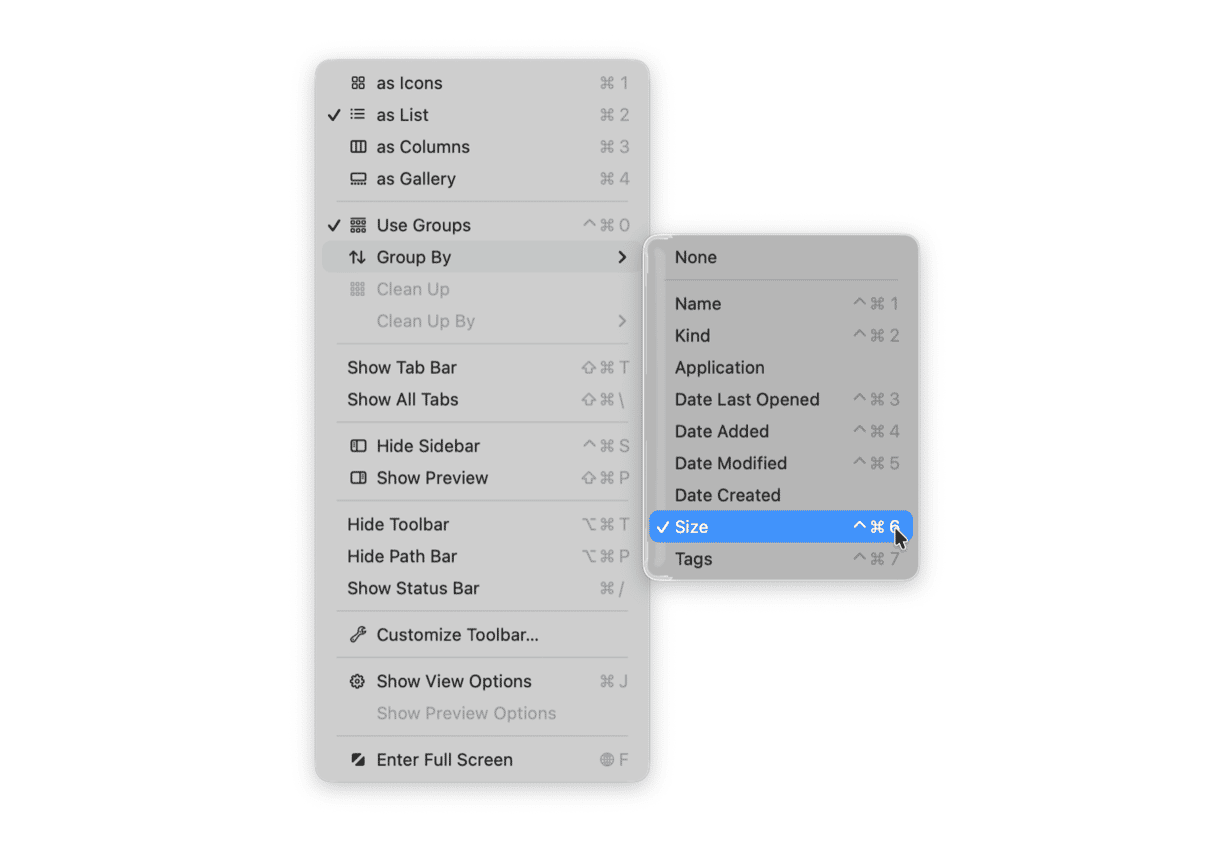
Then, you can sort downloads by size: in the View menu, click Group By and choose Size.
While you are cleaning up your Downloads folder, here are a few shortcuts to help you make the process faster:
📌 Command + A — select all files in your Downloads folder (and any other folder, in fact)
📌 Press and hold Command and select files — select multiple individual files
📌 Press and hold Shift, select one file, and then click another file — select a range of files (all files located between the first and the last one)
📌 Command + Delete key — send the files to the Trash (so you don’t have to drag it to the Trash or choose Move to Trash from the menu that pops up when you right-click the files)
📌 Command + Option + Delete — delete the files permanently (it is not sent to the Trash but removed from Mac right away; this action cannot be undone)
Remove downloads from software (e.g., WhatsApp) — hard-to-find files
It can be a challenge to find the files you downloaded from different apps, such as WhatsApp, on your Mac. By default, all the items you want to save go into the Downloads folder. But if you have changed these settings or disabled them, your files would be stored elsewhere or not downloaded at all.
If you search for WhatsApp downloads, here’s how to locate them:
- Open WhatsApp.
- Go to the WhatsApp menu and choose Settings.
- Click Chats in the sidebar and select the checkbox next to Save to Downloads. If you do not want your files downloaded, do not select this checkbox.
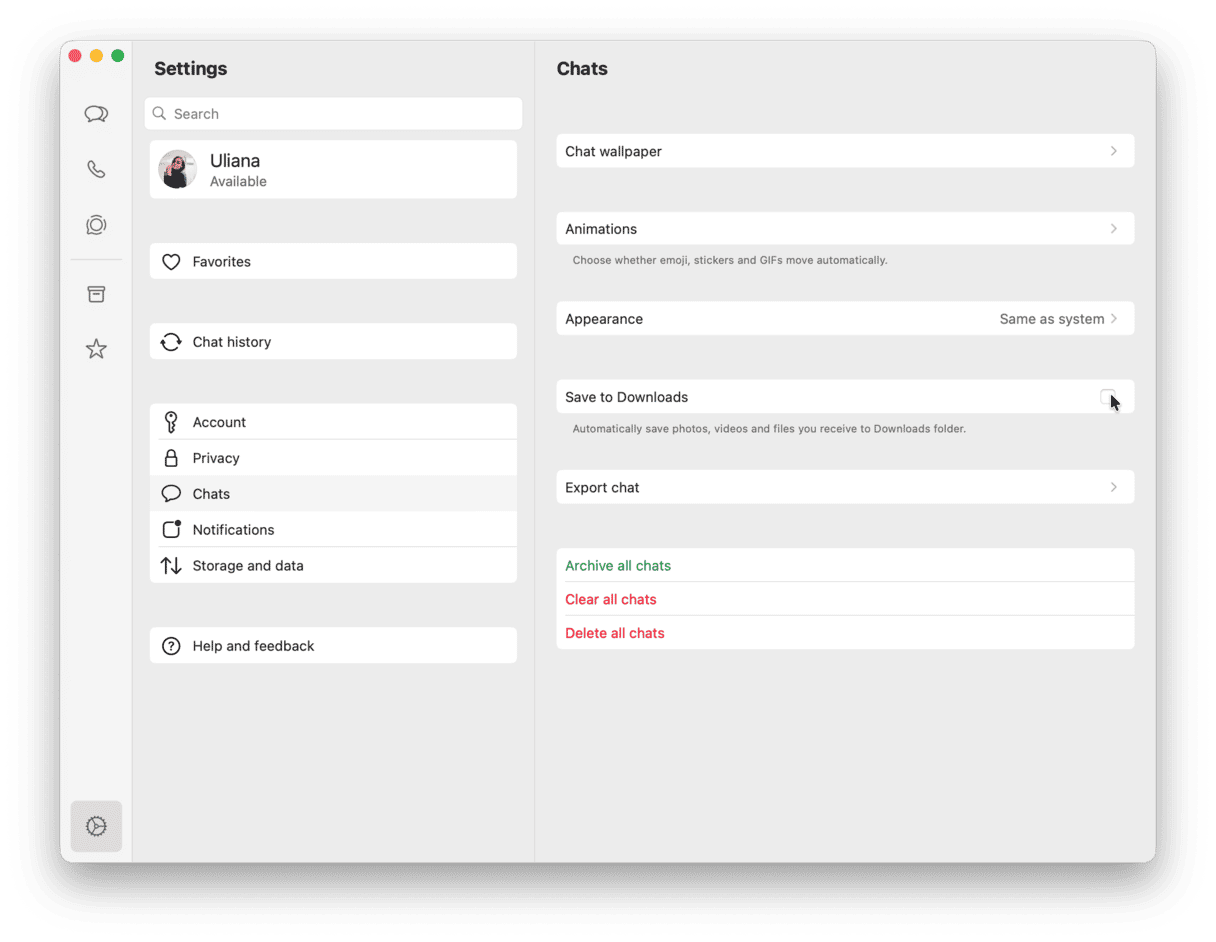
For any other app, look for an option like “When I receive a file” in settings. If it’s set to Downloads, it will mean that all files you download from an app will automatically go into this folder. Open it to locate the files this app saved and delete them. You can change the directory to save your files elsewhere.
To make it easier to find files you saved, choose one download location for all your apps. You will eliminate clutter in lots of folders and will be able to delete many files at once.
Once you’re done deleting your downloads, it’s time to clear the downloads history from the browser you use. Select the section below based on the browser you use. But first let us show you a quick way to delete downloads on Mac.
The easy way to delete large and old files on Mac
If you’re looking for a solution that makes clearing out your large downloads (including your downloads history from different apps) simple, check out a cleaning app like CleanMyMac.
The My Clutter feature scans your storage for heavy files piling up on your Mac for a long time. It shows how much space each file takes up and helps to quickly get rid of all old documents, .dmg files, and archives that clutter your storage. It automates the whole search and filtering process.
With its help, you can clean up your Downloads folder with just a few clicks. Here’s how to remove downloads from Mac:
- Open CleanMyMac — get your free trial here.
- Click My Clutter and run a scan.
- Review the files and delete what you no longer need.
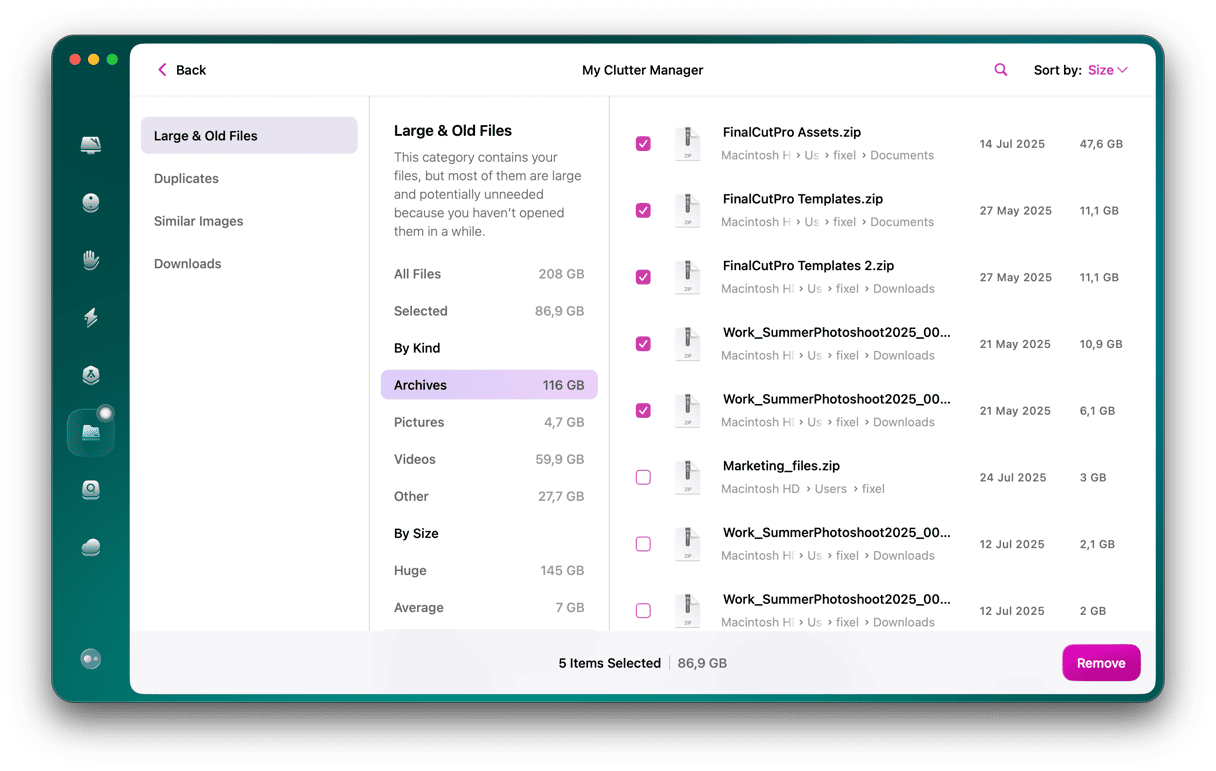
And you’re done. As you can see, it’s incredibly easy to remove your downloads on Mac with CleanMyMac. And have you noticed? It finds not only large and old files but also duplicates and similar images so that you can free up even more space in addition to removing multiple downloads at once.
But if you’d still like to clean up your downloads and download history manually, just follow the steps below.
Use the Manage Storage feature
If you are removing downloads to reclaim some space, there is another easy way to do it — a built-in Manage Storage tool. Not only does it show how much free space your Mac still has, but it also lets you delete unneeded stuff.
Here’s what to do:
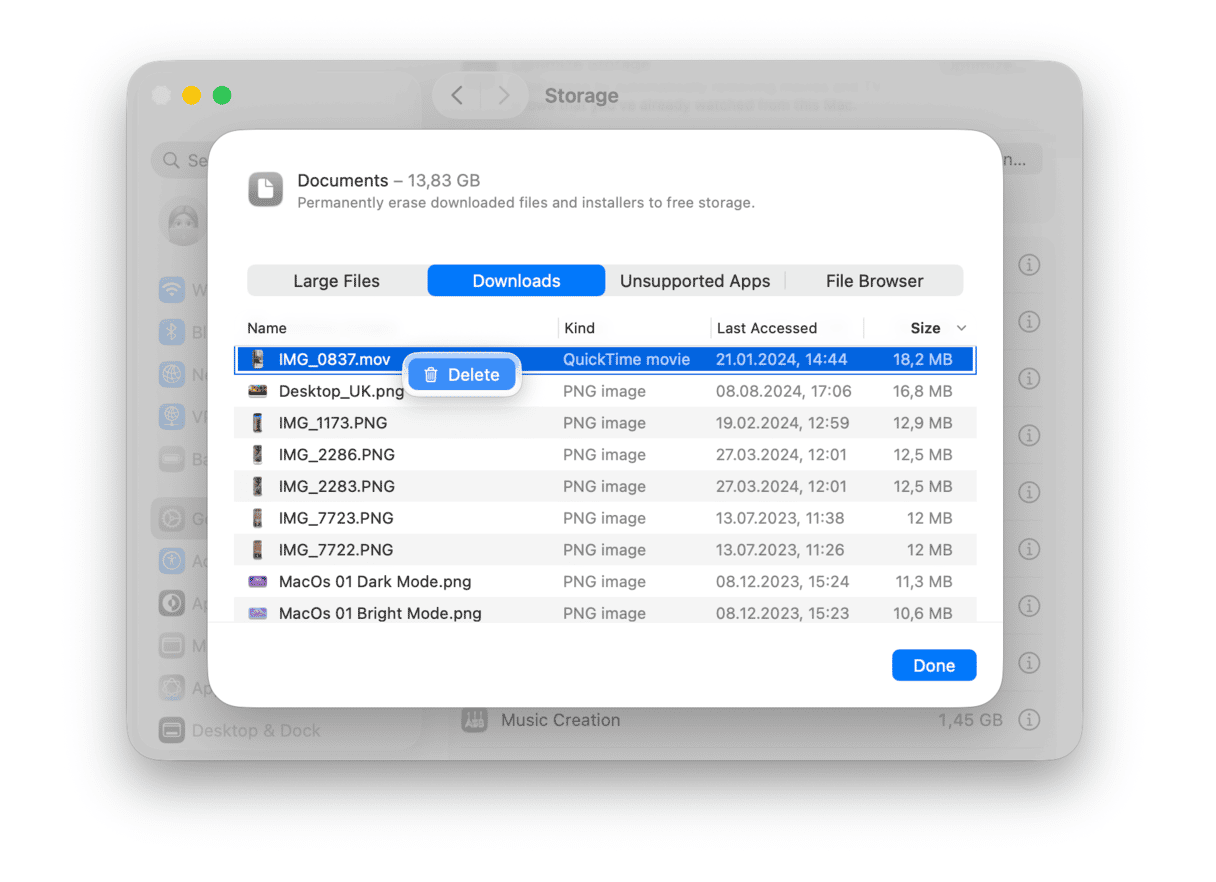
- Go to System Settings > General > Storage.
- Click i next to each category. To delete downloads, click i next to Documents and check out the Downloads tab.
- Right-click what you no longer need and choose Delete.
Get rid of old .DMG files on Mac
On macOS, the majority of apps you download come in .dmg format — a disk image that contains a compressed download file. These files work like hard drives: they can be mounted and ejected.
When you open the .dmg file, you’ll see the application you’re about to install. After installing the application (dragging it to the Applications folder), the .dmg file will stay on your Mac until you delete it. Imagine how many .dmg files you may have unintentionally stored on your Mac. Now, let’s see how to delete them.
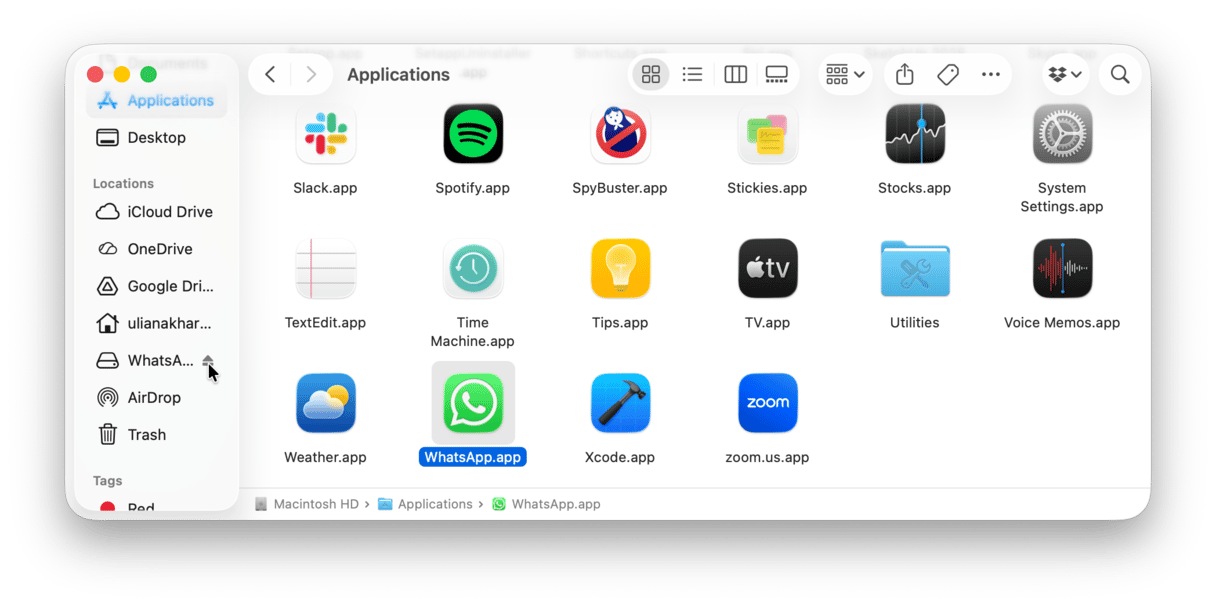
First, you need to eject those .dmg files that are still open.
- Open the Finder.
- Under the Locations, you will see the list of all .dmg files.
- Click the Eject icon to eject a disk image.
To delete .dmg files:
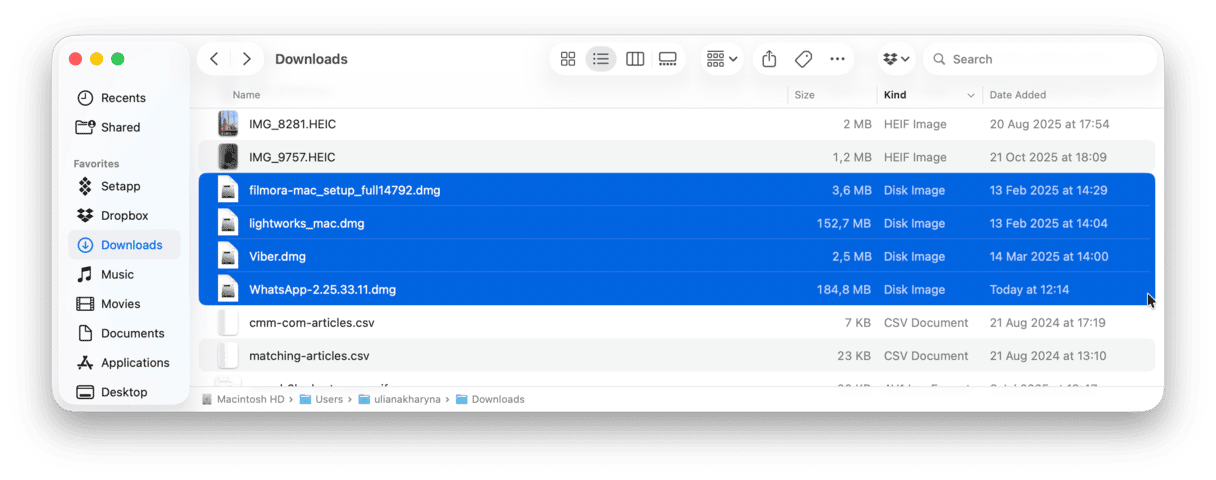
- Open the Finder.
- Filter by Kind and find Disk Image files.
- Move the unneeded files to the Trash.
Voila! Now, your Mac is much cleaner.
Clear downloads history in your browsers
Next, do not forget about clearing up the downloads history in your browsers. You do not have to worry: deleting the downloads history does not remove the actual files — it just tidies up your browser, reclaims some space, and enhances your privacy.
Chrome
To clear downloads history in Google Chrome manually:
- Open Chrome.
- Type chrome://history/ in the search field and press Return.
- Select Delete browsing data > Advanced.
- Set the time range and select Download history.
- Click Delete data.
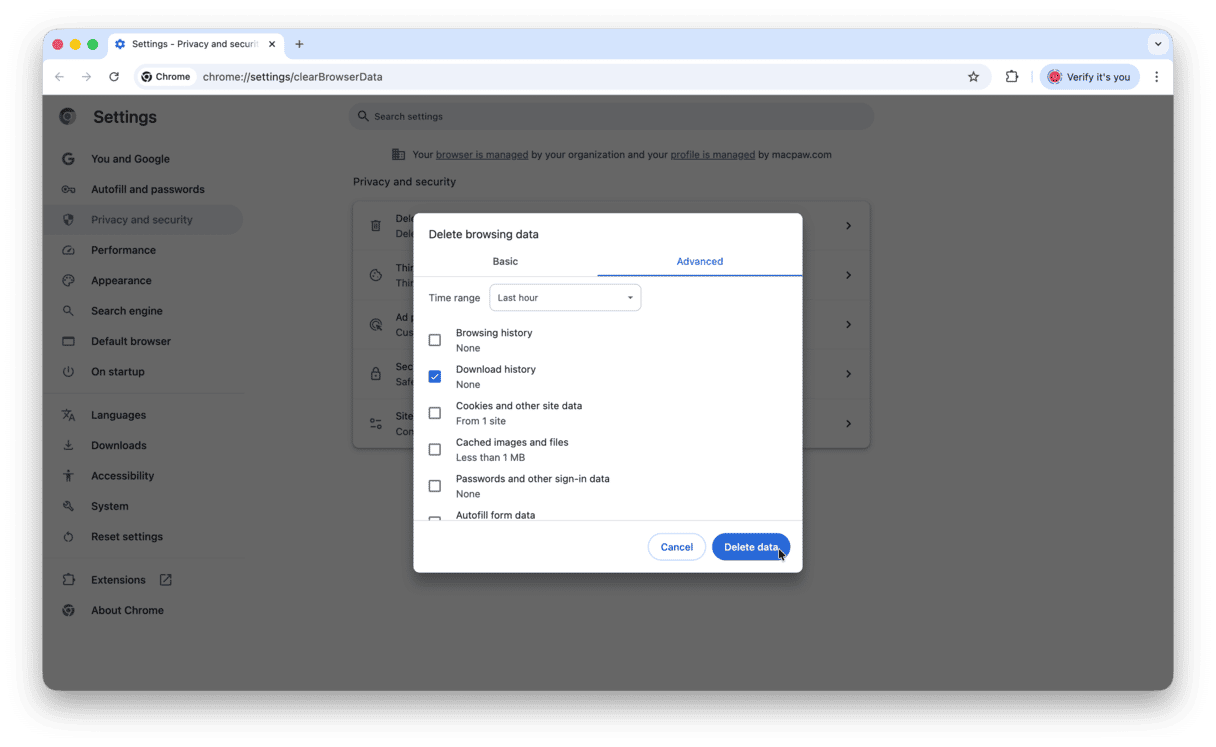
By default, the downloaded files go to the Downloads folder. If you want to change the location, open Chrome Settings and go to Downloads from the sidebar. Click Change next to location and choose your preferred destination.
Safari
To clean downloads history in Safari:
- Open Safari.
- Click View in the menu bar and select Show Downloads.
- Safari will show you all the files you downloaded. Click Clear to remove downloads history.
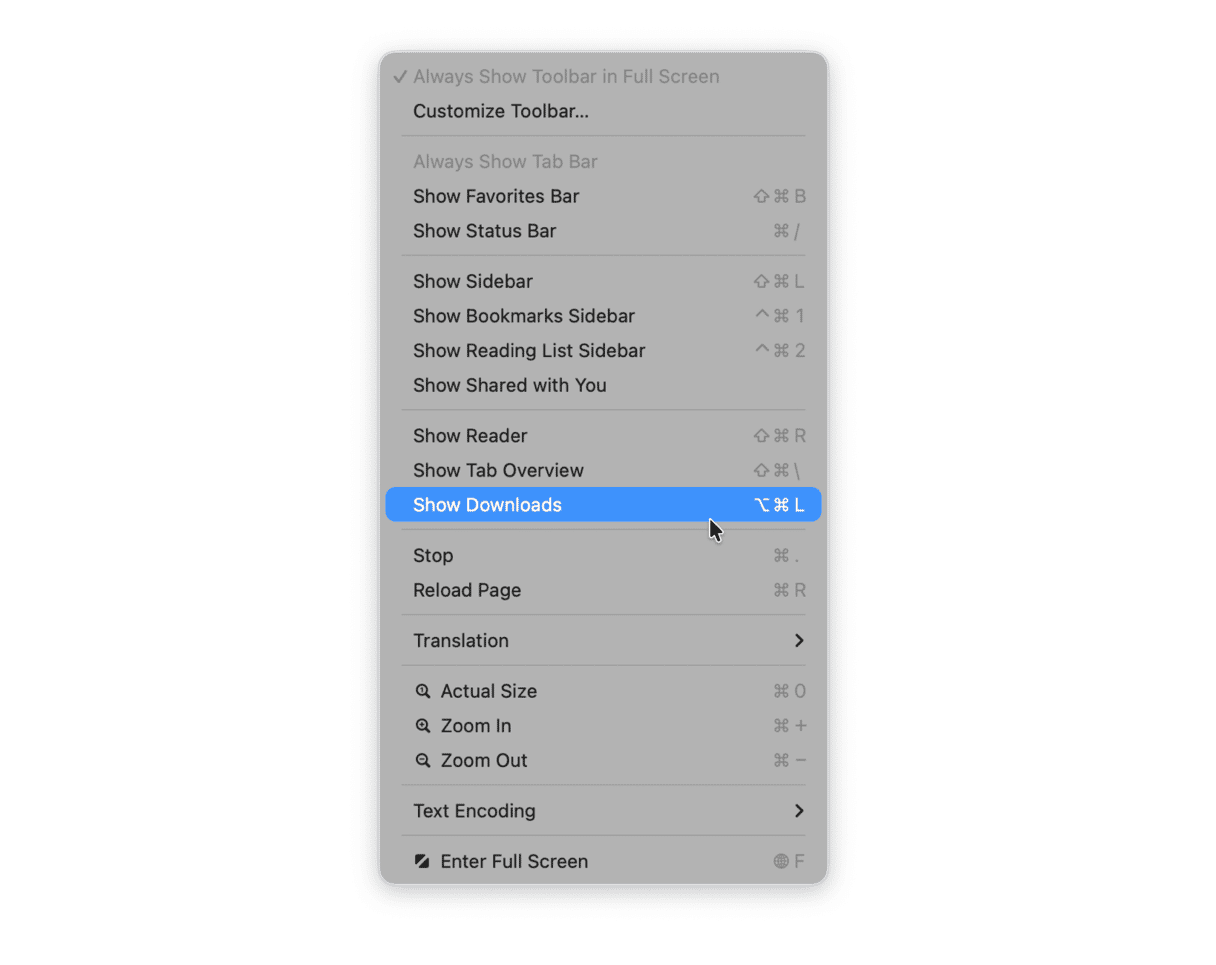
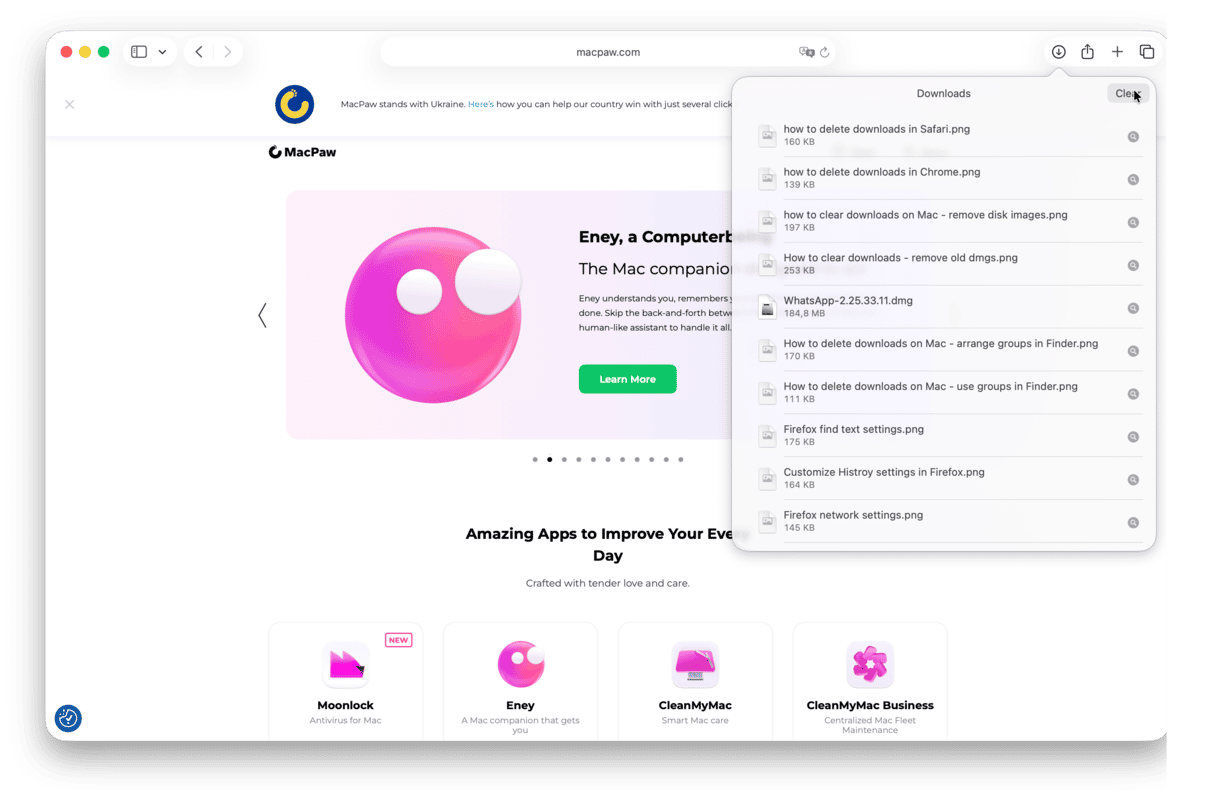
You can alternatively click the arrow down icon top right (↓) to see and clear downloads.
If you want to change the downloads destination, go to Safari Settings (press Command + comma) and choose your preferred File download location in the General tab.
Firefox
To remove downloads history in Firefox directly:
- Open Firefox.
- From the menu bar, click History > Clear Recent History.
- Set the time range.
- Select Browsing & Download History and click Clear.
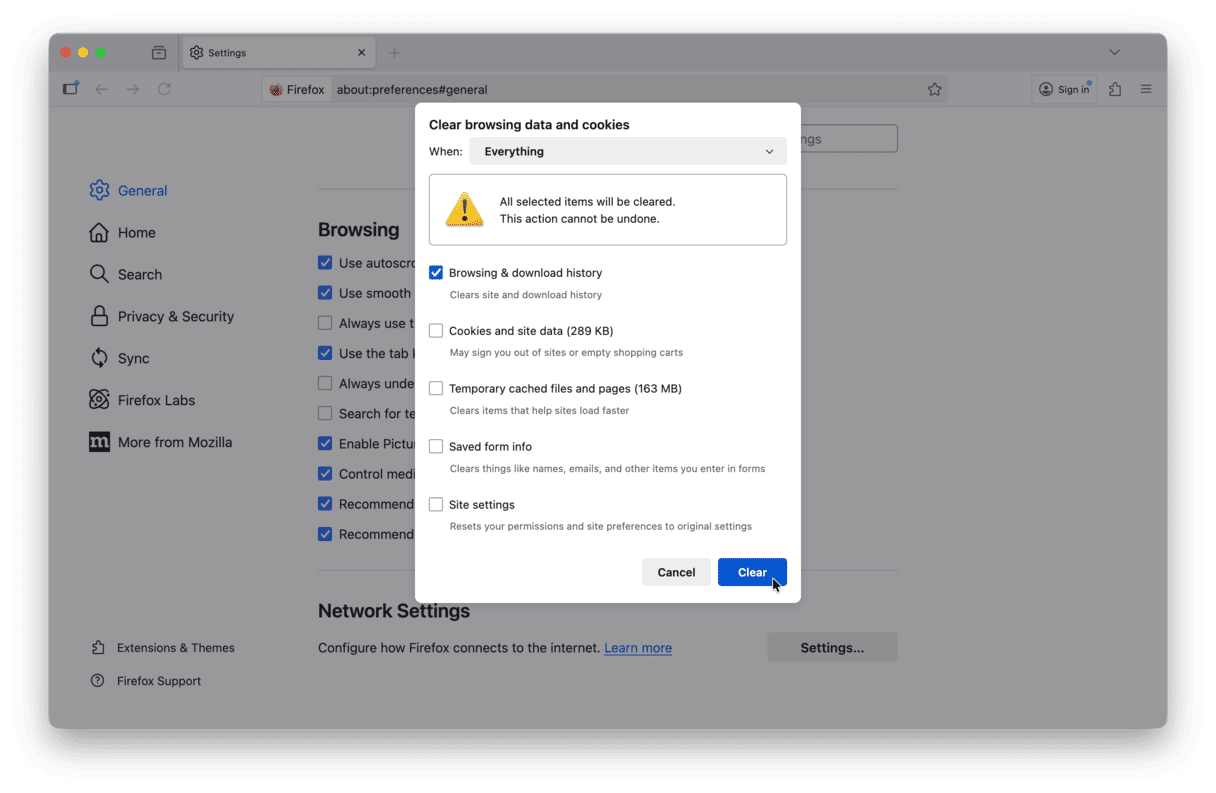
Like with the other browsers, you can change the location of the downloaded files. To do it, choose your preferred destination under Files and Applications (Save files to) in the General section of Firefox settings.
How to permanently delete downloads on Mac
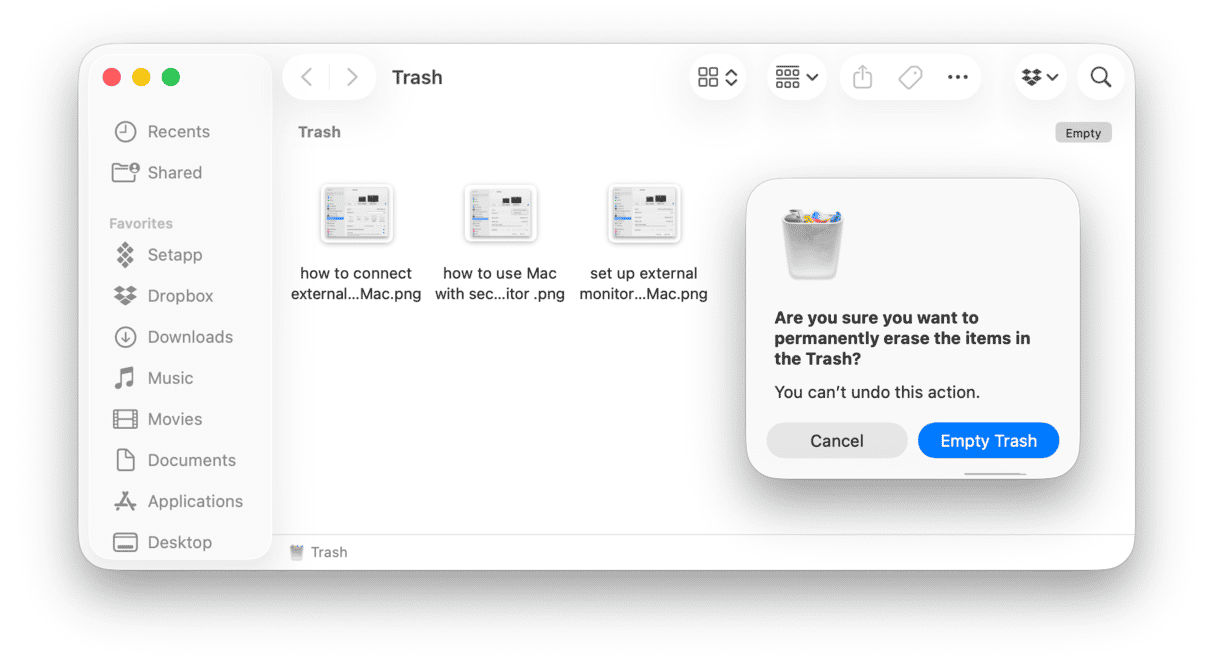
Now, your Mac is probably clean of old downloads that used to take up space. But do not forget about the final step. To delete all of these downloads permamently, empty the Trash. Even if you’ve set up automatic Trash emptying, the downloads will still be in the Trash for the next 30 days. So why waste that time if you can clean up everything right away?
What to do if I cannot delete downloads
If, for some reason, you cannot remove downloads, here are some effective troubleshooting tips:
- Make sure that the file you try to delete is not in use (a message will pop up telling it). If it is, quit the app that’s using it.
- Select a file, press and hold the Option key, and choose Delete Immediately from the File menu in the menu bar.
- Relaunch the Finder: press and hold Option, right-click the Finder icon in the Dock, and choose Relaunch.
- Run this command in Terminal:
sudo rm -r [filepath]— you can simply drag and drop the file into Terminal window so that you do not have to type the path to the file. - Check file permissions: select your file, press Command + I, and make sure Read & Write is set next to your user.
- Restart your Mac from the main menu bar.
- If nothing helped, try removing the file in safe mode.
There we have it. This was our take on how to delete downloads on Mac. Remember that keeping your digital space tidy and organized will help you locate files faster and avoid clutter in your folders. What you can do is use tags to arrange files, create folders for the most important files and send them there (you can also send them to the Documents folder so that you never lose them), and, ideally, remove unneeded downloads right away.
Getting rid of downloads and other unneeded stuff on a timely basis is a sure way to fix it if your Mac is slow — it is a known fact that cluttered Macs have lower performance. Also, removing downloads is one of the first solutions if your drive is full. Thank you for reading, and come back later for more tips and tricks.
Frequently asked questions
Which files are safe to delete from my Downloads folder?
Basically, you can delete any file you see in the Downloads folder. macOS does not store anything vital there, so the deletion of these files is completely safe.
Do downloaded files leave copies in my Downloads folder even after I move them?
No. As long as you haven’t duplicated your files or downloaded them multiple times, there’s always one copy of the file, and you delete it when you send it to the Trash.
Which downloaded files should I keep and which can I delete?
You can remove any files you no longer need. If you are not sure whether you still need it, you can move it to an external drive so that you can restore it later.
Can I use Spotlight Search to delete downloaded files?
Yes and no. If you know the exact file name, type it in the Spotlight search and then right-click it. Choose Show in Finder and delete the file using one of the ways above. It works well if you do not know the location of the file you want to delete, but it takes more time than simply browsing the Downloads folder (if you bulk-delete files).


