Xcode is an invaluable tool for macOS and iOS developers. But, over time, it becomes slower and may even start to crash frequently. One sure way to fix it is to remove Xcode cache. It allows you to not only force the simulator to reload the code from the server and address other app glitches but also free up gigabytes of space — in fact, it can be 100 GB+ of eaten-up storage. So, keep on reading and learn how to delete Xcode cache manually and automatically.

What are Xcode caches?
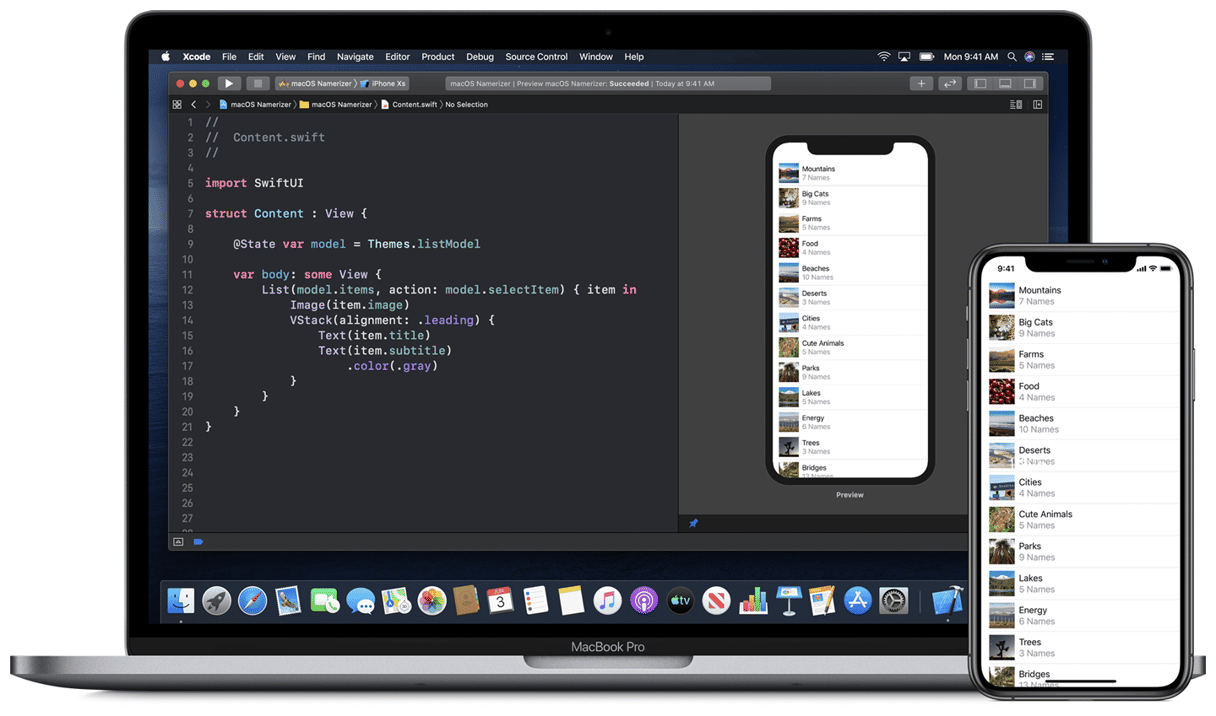
Caches are tiny bits of information an app stores to work faster. In the case of Xcode, this app usually caches different information it might need to make the development process faster. Specifically, cache helps speed up subsequent builds, thus reducing build times. Here are some types of these Xcode caches: module cache, derived data, simulator cache, and build cache.
Сan I delete Xcode caches?
The short answer is yes, especially if Xcode becomes sluggish and unresponsive over time. Deleting app cache, including Xcode cache, is an absolutely safe procedure as long as you accurately follow the prescribed steps. Once you open the app again and start using it, they will be re-created.
How to clear Xcode cache
Now, we’ll show you how to delete Xcode cache. We’ll provide steps for manual and automatic removal so you can choose which one works best for you.
Use a Mac cleaner [automatic Xcode cache removal]
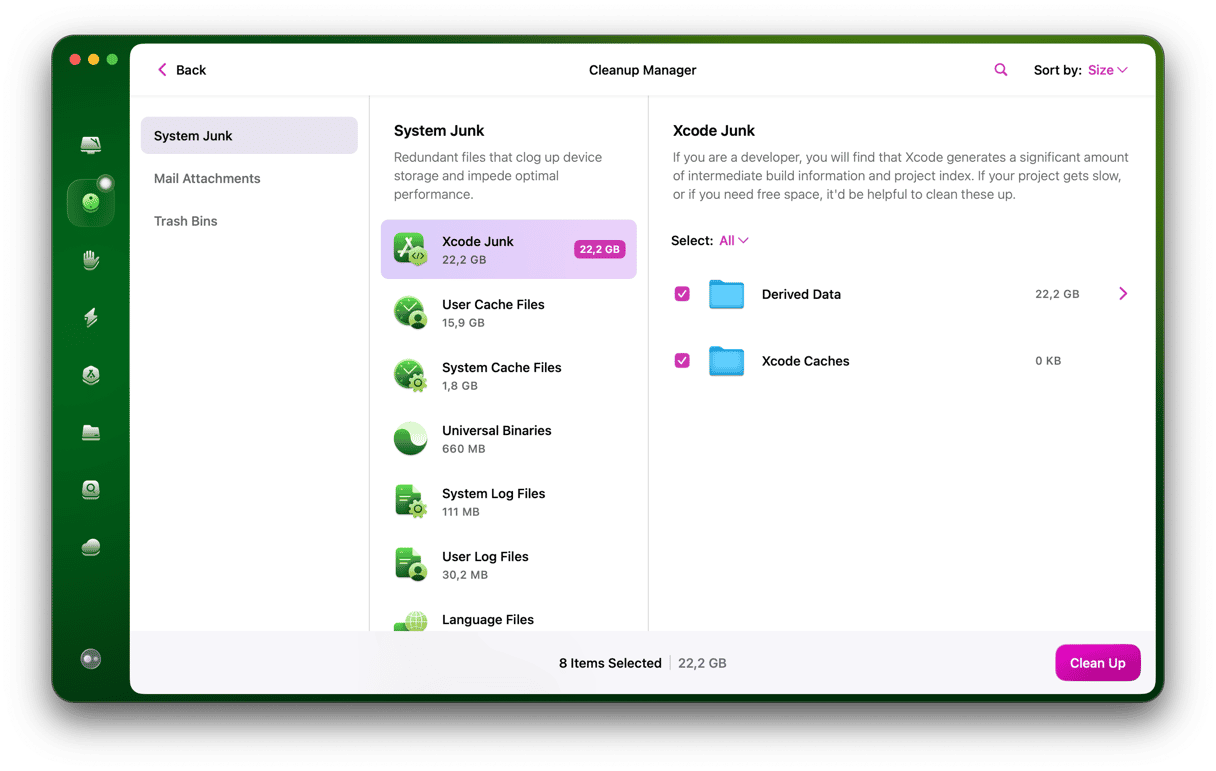
Let’s start with an easy, automatic method to delete cache in Xcode. It is based on a Cleanup feature in CleanMyMac that allows you to clean your iOS Simulator with the click of a couple of buttons. This makes it quick and easy to use, and you won't risk running into problems with the file system.
- Get your free CleanMyMac trial.
- Go to the Cleanup tab and run a scan.
- Click Review All Junk and remove Xcode Junk.
That’s it! Now, let’s proceed with the steps for manual Xcode cache removal.
Remove Xcode cache manually
1. Clear the cache
To delete Xcode cache, you will have to run the following Terminal commands:
rm-rf ~/Library/Developer/Xcode/DerivedData/*
rm -rf ~/Library/Caches/com.apple.dt.Xcode
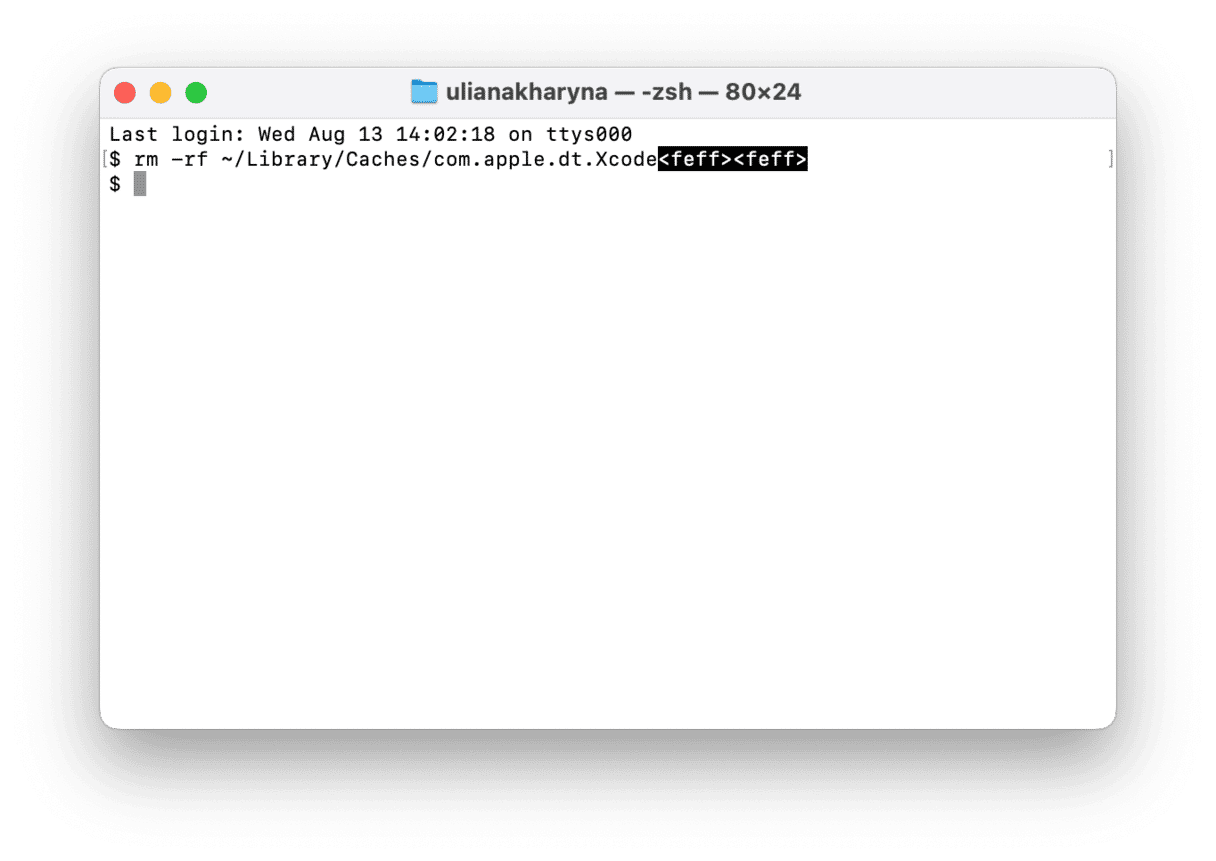
Basically, you can stop here, but there’s more to cleaning Xcode-related files. Check out the steps below.
2. Clean the project build
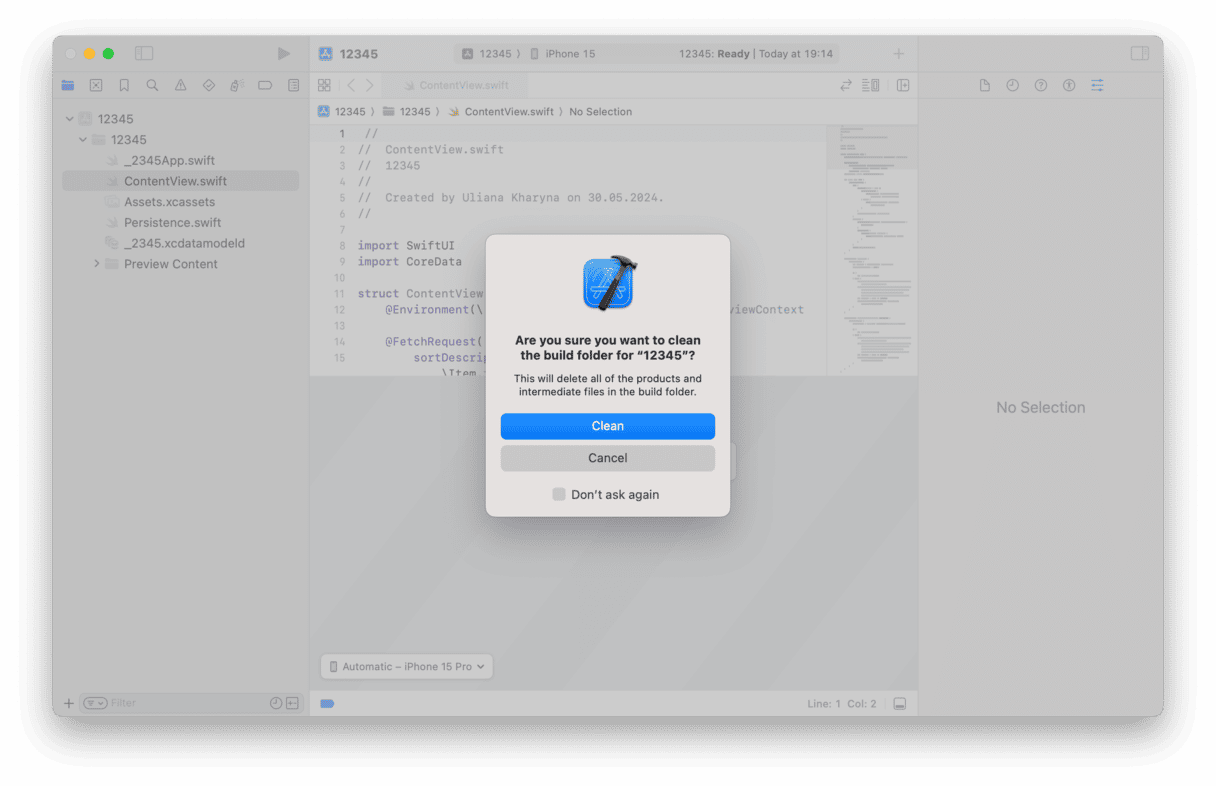
If you’re trying to fix a problem with Xcode crashing, it’s worth cleaning the project build first. This will get rid of the current build and create a new one next time you run the code.
- With the project open in code, go to the menu bar, choose Product, and click Clean Build Folder > Clean, or:
- With the project open, press Command + Shift + K
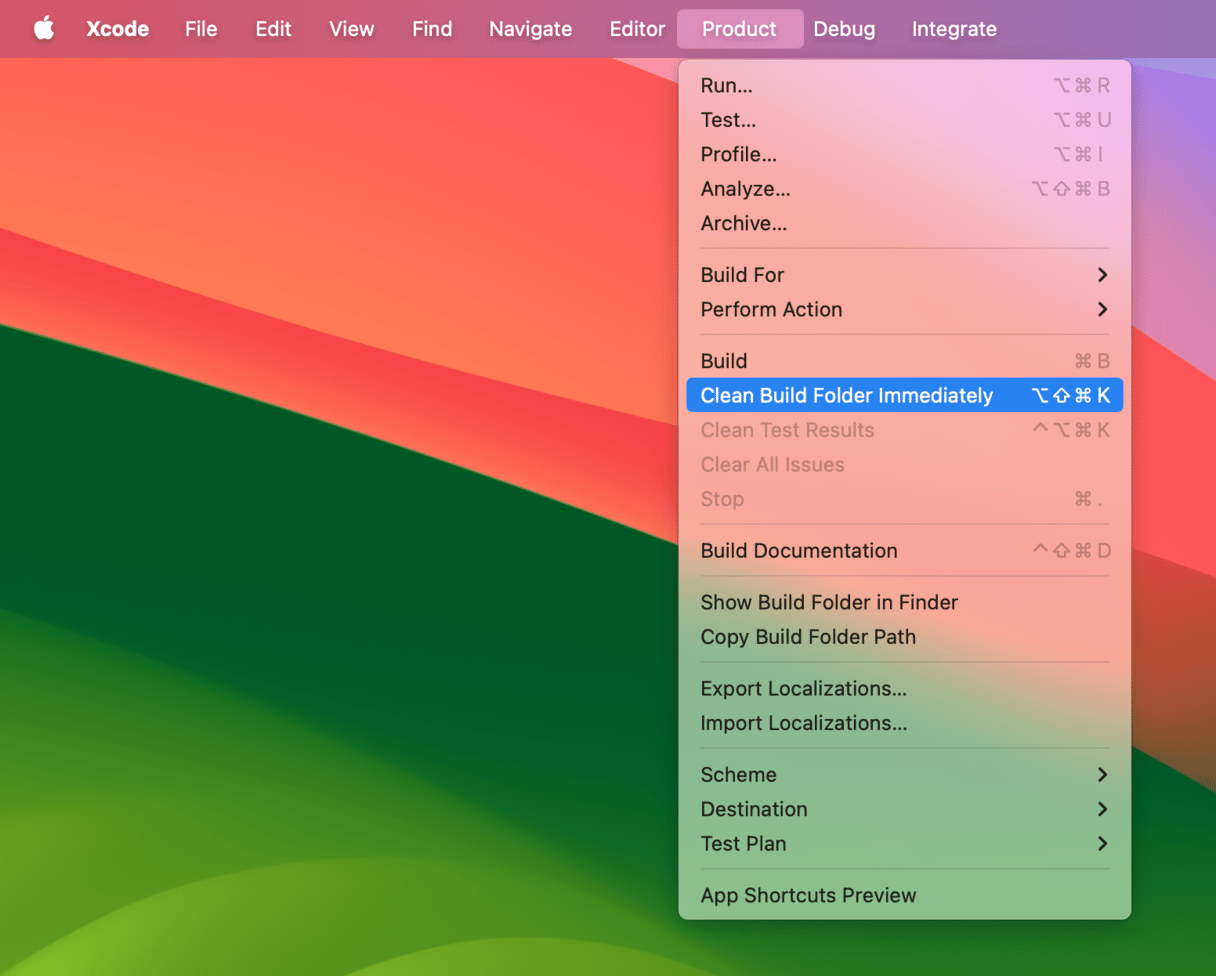
3. Clean out the build folder
To clean out the build folder, and get rid of cache files, do the following:
- In the Code project, click on the Product menu while holding down the Option (Alt) key and choose Clean Build Folder Immediately > Clean, or
- Press Command + Shift + Option + K
4. Reset Simulator content and settings
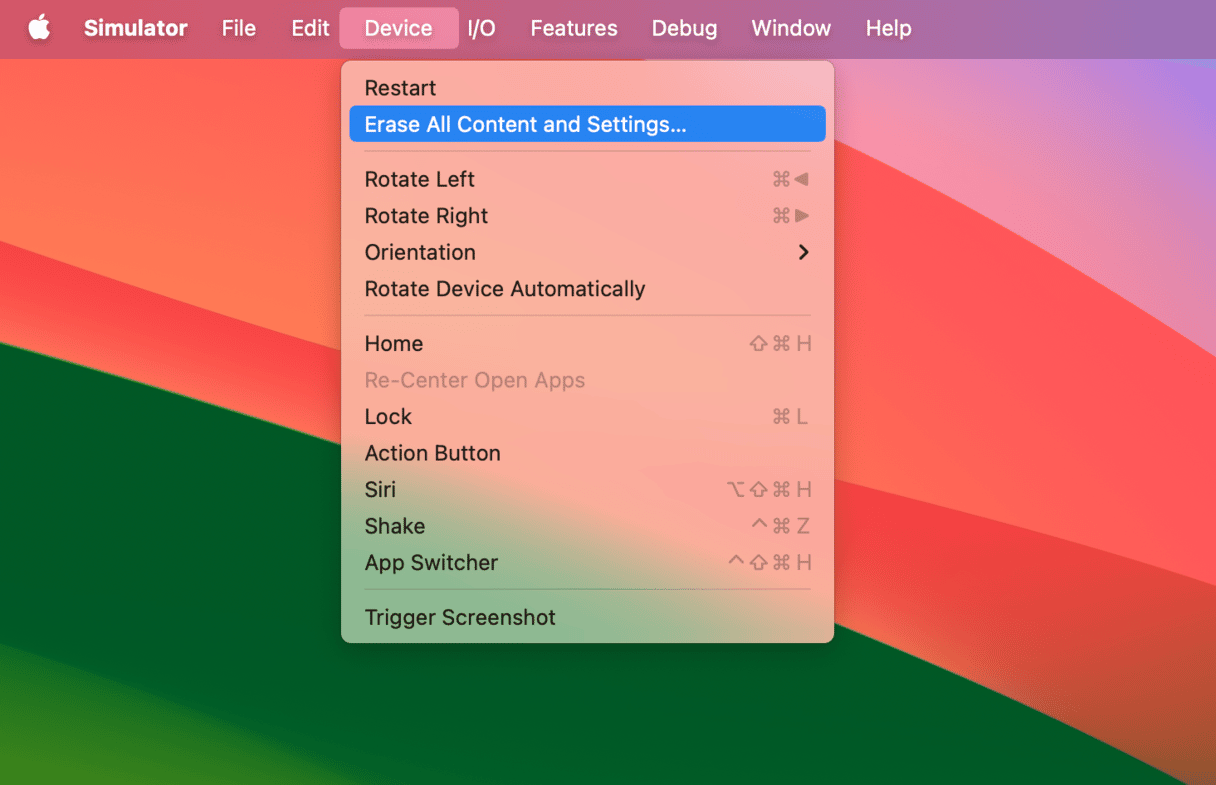
If neither of the steps above resolves your problem, try resetting the simulator content and settings:
- Go to Xcode menu and choose Open Developer Tool > Simulator.
- Then, click Device > Erase All Content and Settings.
5. Delete Xcode’s derived data
Derived Data is the place for all temporary build info and project indexes. If something’s not working right, it is okay to delete this folder.
So if you’re still having problems or things are working slowly, try deleting derived data, which will force Xcode to recreate it when you next run it.
- In the menu bar, choose Window, then Organizer.
- Now, select Projects, and then click Select your project.
- Choose the project whose derived data you want to delete.
- In the window that opens, you’ll see the Derived Data folder listed, along with its Finder path.
- To the right of the folder, there’s a Delete button. Click it.
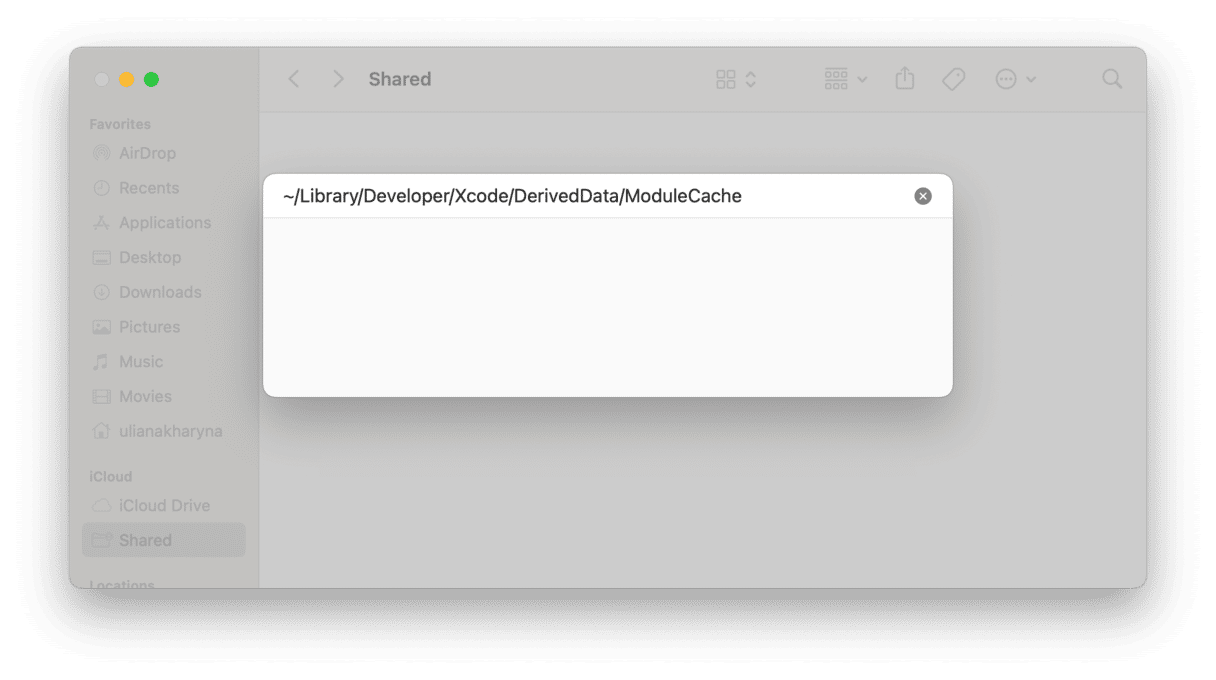
Now, delete the module cache.
- Go to
~/Library/Developer/Xcode/DerivedData/ModuleCachefrom Finder > Go > Go to Folder. - Drag the files from the ModuleCache folder to the Trash and empty it. Do not delete the folder itself.
6. Delete iOS device support files
There’s another folder inside Derived Data called iOS device support. For every iOS version you test using the simulator, a new folder is created inside this folder. That can build up over time. You can delete all these subfolders (though not the iOS device support folder itself), and Xcode will create a new one next time you run the simulator. If you’re uncomfortable deleting them completely, you can move them to a temporary folder until you’re sure that moving them hasn’t caused any problems and then delete them afterward.
7. Use Terminal
If none of the above helps, you can use Terminal to reset Xcode’s preferences.
- Open Terminal from Applications > Utilities
- Type
defaults delete com.apple.dt.Xcodeand press Return.
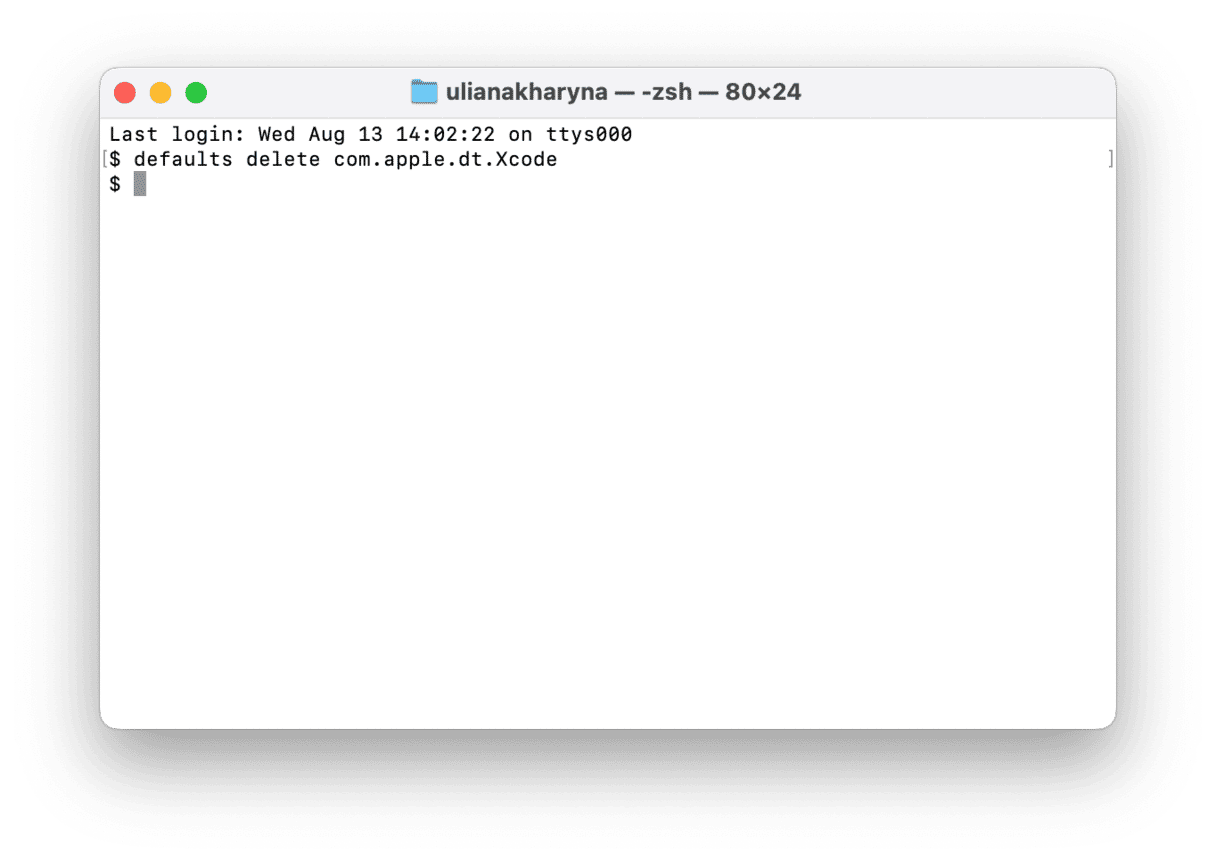
When you next open Xcode, it will create new preferences.
There is also a method of cleaning cache files that involves navigating to ‘private/var/folders’ (use the Go menu in the Finder, choose Go to Folder, and then type that path), digging through folders until you find an Xcode cache file and deleting it. However, we wouldn’t recommend this route unless you are absolutely certain you know what you’re doing. Removing the wrong file can create lots of problems, not just in Xcode but in the OS as a whole. In some instances, users who have done that had to reinstall macOS from scratch.
If you’re having problems with Xcode and need to clean the project build or clear out the cache, following the steps above will help them. It’s a good idea to follow the manual steps one by one, checking each time whether the problem has been resolved. Using the method of navigating to “private/var/folders” is not recommended because while it might fix the issues you’re having, it carries the risk of messing up the macOS’ file directory, and you may end up having to reinstall the operating system.
Thanks for reading, and stay tuned!


