Deleting individual files and folders on your Mac is easy. Just drag them to the Trash, empty it, and they’re gone. But what if you want to delete everything on your Mac? It includes all the data and all your settings. How do you do that? And what do you do next? In this article, we’ll explain everything. We’ll show you how to delete everything from MacBook, explain why you might not need to, and show you what to do next.
Why delete everything on your Mac?
There are two main reasons you might want to delete everything on your Mac.
- You are selling it or giving it to a friend or family member and don’t want to risk leaving personal data on it.
- You want to clean install a new version of macOS. A clean install means wiping your Mac before you start the installation, so you need to delete everything on your Mac.
Before erasing everything on Mac
If your reason for deleting everything on your Mac is that it’s running slowly or crashing a lot, there is something else you can do first — get rid of junk files and unneeded files.
Junk files build up in your Mac over time, taking up space on your boot drive and causing problems like impeding performance and causing your Mac to be unstable. These junk files include temporary files that were never deleted, cache and settings files from apps that are no longer on your Mac, and language files for languages you don’t use. Unneeded files are either large, occupying too much space, or old files that you rarely open.
Tracking them down and getting rid of them manually is time-consuming and, well, boring. But you don’t have to. CleanMyMac, an Apple notarized Mac cleaning and maintenance app, comes with two modules that can do it for you. It scans your Mac looking for junk files and allows you to either review what it has found or delete them all with one click. CleanMyMac can also delete large and old files you don’t need. It’s free to download here. Once installed, follow these steps:
- Open CleanMyMac.
- Click System Junk > Scan.
- Once the scan is complete, you can review details and select what will be removed or click Clean right away.
- Now, go to Large & Old Files and click Scan.
- Review files for deletion, select the removal type, and click Remove.

How to delete everything on your Mac
As we said, there are a couple of scenarios in which you may want to delete everything on your Mac. The method you use will depend on the situation you’re in. Both methods will delete everything on your Mac.
Erase content and settings
This method uses Erase Assistant to remove and delete everything on your Mac. In addition to doing that, it also does the following:
- Signs you out of iCloud and other Apple services like iMessage, Apple Music, and iTunes Store
- Turns off Find My and Activation Lock, so the Mac is no longer associated with your Apple ID
- Erases all accounts on your Mac
- Erases all volumes, including Boot Camp, if you have one
Here’s how to use Erase Assistant:
- Click the Apple menu and choose System Settings.
- Choose General then > Transfer or Reset.
- Click Erase all Content and Settings.
- Type in your admin password and click Unlock.
- Erase Assistant will open, and you will be prompted to back up using Time Machine. Click Continue.
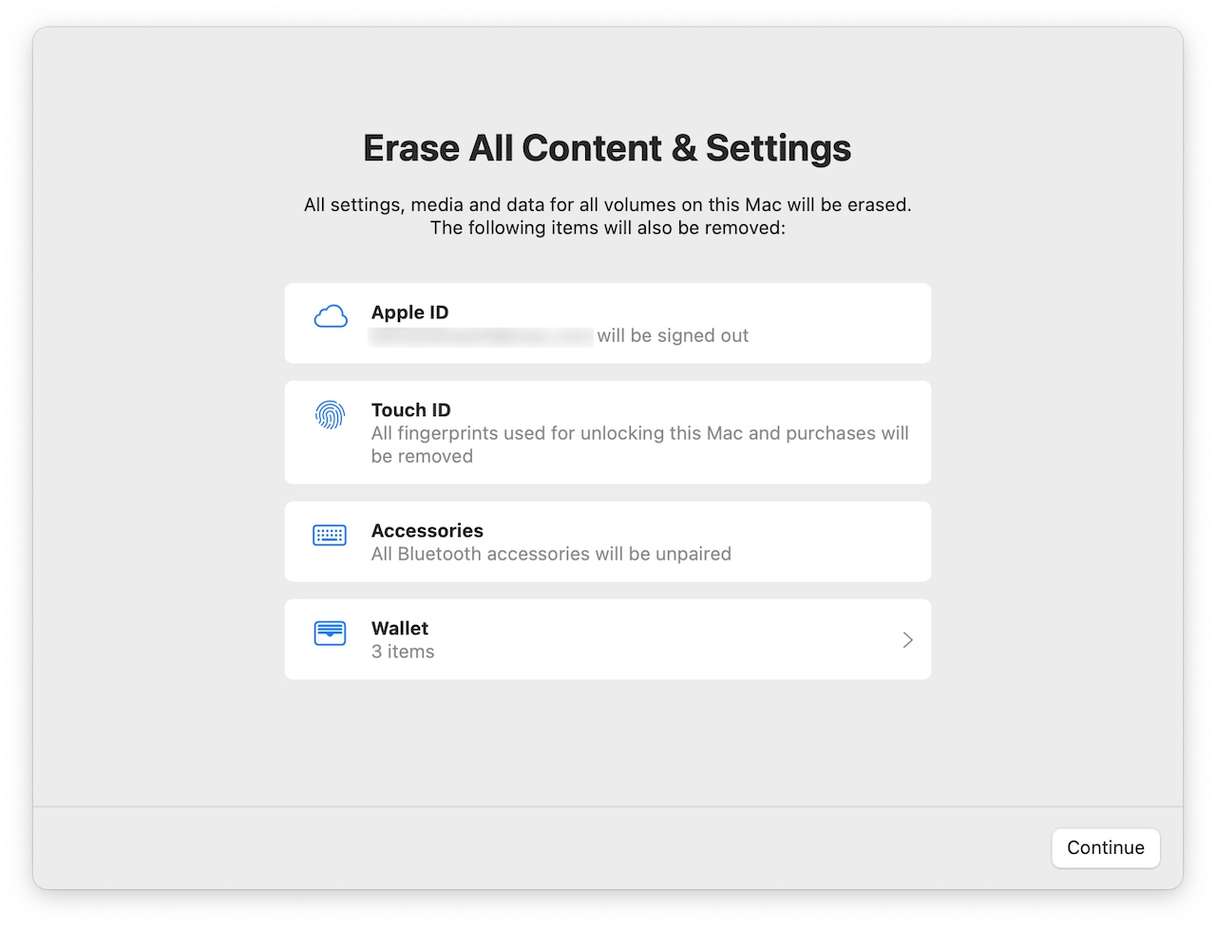
- You’ll see a list of things that will be deleted. Review the list and then click Continue.
- Follow the on-screen instructions to sign out of your Apple ID.
- Click Erase all Content and Settings.
- Choose Restart.

Use Disk Utility in recovery mode
The other way to delete everything on your Mac is to use Disk Utility. With any other disk connected to your Mac, you can just open Disk Utility and select Erase.

However, to delete everything on your Mac’s startup disk, you first need to boot your Mac into recovery mode. You would typically use this method when you want to do a clean install of macOS because you need to reinstall macOS immediately after erasing your startup disk.
Before booting in recovery mode, if you plan to sell or give away your Mac after deleting all the data on it, you should sign out of iMessage, Find My, and Apple ID and deauthorize Apple Music. You should also log into icloud.com and remove the Mac from your account.
The process for booting into recovery mode is different depending on whether you have an Intel-based or an Apple silicon Mac.
To boot a Mac with Apple silicon into recovery mode, shut down the Mac and then hold down the power button until you see startup options. Click Options. You will see macOS Utilities.
On an Intel-based Mac, shut down your Mac and then press the power button and hold down Command-R until you see macOS Utilities.
Once you see macOS Utilities, do the following.
- Click Disk Utility.
- Select your startup disk in the sidebar and click Erase.
- Give the disk a name and choose AFPS as the file format. Click Erase.
- When the disk has been erased, quit Disk Utility.
- Choose Reinstall macOS from macOS Utilities. Follow the instructions on the screen to reinstall macOS.
- Once macOS is installed, follow the instructions to set up your Mac.

There are only a couple of reasons why you are likely to want to know how to erase everything on MacBook. One is that you are selling it or giving it away, and the other is that you want to clean install macOS. Follow the steps above for whichever situation you’re in. And don’t forget to back up your data before you start.


