While upgrading your phone’s iOS usually means a slew of new features, if you upgrade on an older iPhone or are using older apps, it can come with its own frustrations. Which, if you find yourself in the latter category, you might be wondering if there’s a way to downgrade your iPhone. Keep reading, as this article will answer that question and more.
Is there a way to downgrade iOS?
Downgrading your iOS is possible, but Apple has gone to great lengths to make sure people don’t accidentally downgrade their iPhones. As a result, it might not be as simple or straightforward as you may be used to with other Apple products. We’ll walk you through ways to downgrade your iOS below.
Now, should you downgrade the iOS on your iPhone?
The answer is, only if you absolutely have to. If your phone is buggy after updating to iOS 13, it’s better to wait for updates that will fix it rather than trying to go back. That’s because anytime you upgrade to a new iOS, it also updates the firmware on your phone, and downgrading could cause other issues.
How to downgrade your iPhone
Similar to upgrading your iPhone, before you downgrade, you should make sure you back up your phone. If something happens while you’re trying to downgrade and, for some reason, you need to go back to iOS 13, you want to make sure you don’t lose any data.
Roll back to iOS 12 using iTunes and Recovery Mode
Before you put your iPhone into Recovery Mode, the first thing you’re going to want to do is turn off Find My iPhone. Go to Settings > Find My > Find My iPhone and toggle it off.
Then download the iPhone software (or the .ipsw file) to your computer. The .ipsw is different depending on which model of iPhone you have. Click your iPhone model from the list below.
- iPhone XS
- iPhone XS Max
- iPhone XR
- iPhone X
- iPhone 8
- iPhone 8 Plus
- iPhone 7
- iPhone 7 Plus
- iPhone 6s
- iPhone 6s Plus
- iPhone SE
Once you’ve done that, you’ll put your phone into Recovery Mode and start the restore.
- Turn your iPhone off.
- Connect it to your computer using the Lighting cable.
- Press and hold the button(s) below, depending on your phone.
- iPhone 8 and 8 Plus or newer: Press and hold the Side button.
- iPhone 7 and 7 Plus: Press and hold the Volume Down and Sleep/Wake buttons.
- iPhone 6s or older: Press and hold the Home and Sleep/Wake buttons.
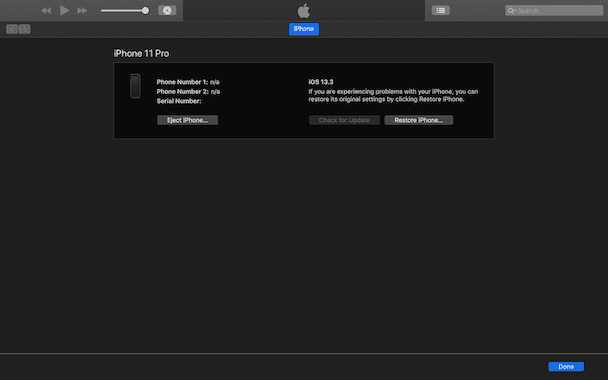
- Once you see the Recovery Mode icon on your iPhone, launch iTunes on your computer.
- iTunes will prompt you to restore. Hold down Option and click Restore iPhone…
- A file browser will pop up. From there, locate the .ipsw file you downloaded.
- Click Open.
- You’ll see a popup confirming the restore. Click Restore.
Now, leave your iPhone plugged in until the restore completes.
Downgrade from iOS 13 using an archived backup
After your iPhone reboots and the restore is complete, you’ll have the choice to set it up as a new phone or restore from an archived backup of iOS 12. If you’d like to do the latter, keep your iPhone connected to your computer, then follow the steps below.
- Follow the prompts on your iPhone until it asks you about restoring your data.
- Select Restore from this backup in iTunes (or Finder in macOS Catalina).
- Choose the archived backup you made before installing the beta software update.
Now your iPhone should be back to where it was before you installed iOS 13.
Whatever your reason for wanting to revert your iOS, downgrading your iPhone is possible. Even though it might not be as easy or straightforward as other things on your iPhone, it can be done with a lot of patience. And, as it was mentioned earlier in the article, if it’s at all possible for you to wait for a new iOS upgrade to come out, that is the recommended option. As with most things in life, it’s always better to go forward than to go back.


