If you set up your network configurations, transfer your website to another server, or protect your system from a cyber attack, you may need to edit your Mac’s hosts file. Luckily, it’s easy to do, and we’ll explain everything you need to know in this article. Let’s dive in!
What is hosts file, and how does it differ from DNS?
The Domain Name System is the database that corresponds to an IP address’ “dotted quad” numerical format with a website’s alphabetized web address. It’s a giant directory of which name belongs to which IP address, like online yellow pages.
Your Mac’s hosts file, however, is localized to your own device, like a list of contacts on your phone: The web address acts as your contact’s name — that’s how you find who you want to talk to — and the IP address is their cell phone number, which is your actual way of getting in touch with them.
How editing the hosts file works
Editing your Mac hosts file is a bit like changing the phone number in your contact book. If you save the contact details with the wrong name, well, it’s still going to connect to that person when you ring the contact. If, however, you entered an incorrect phone number in our contacts analogy, whether that’s an invalid number or one that links to someone else’s, then you have no chance of getting through to that particular cell phone.
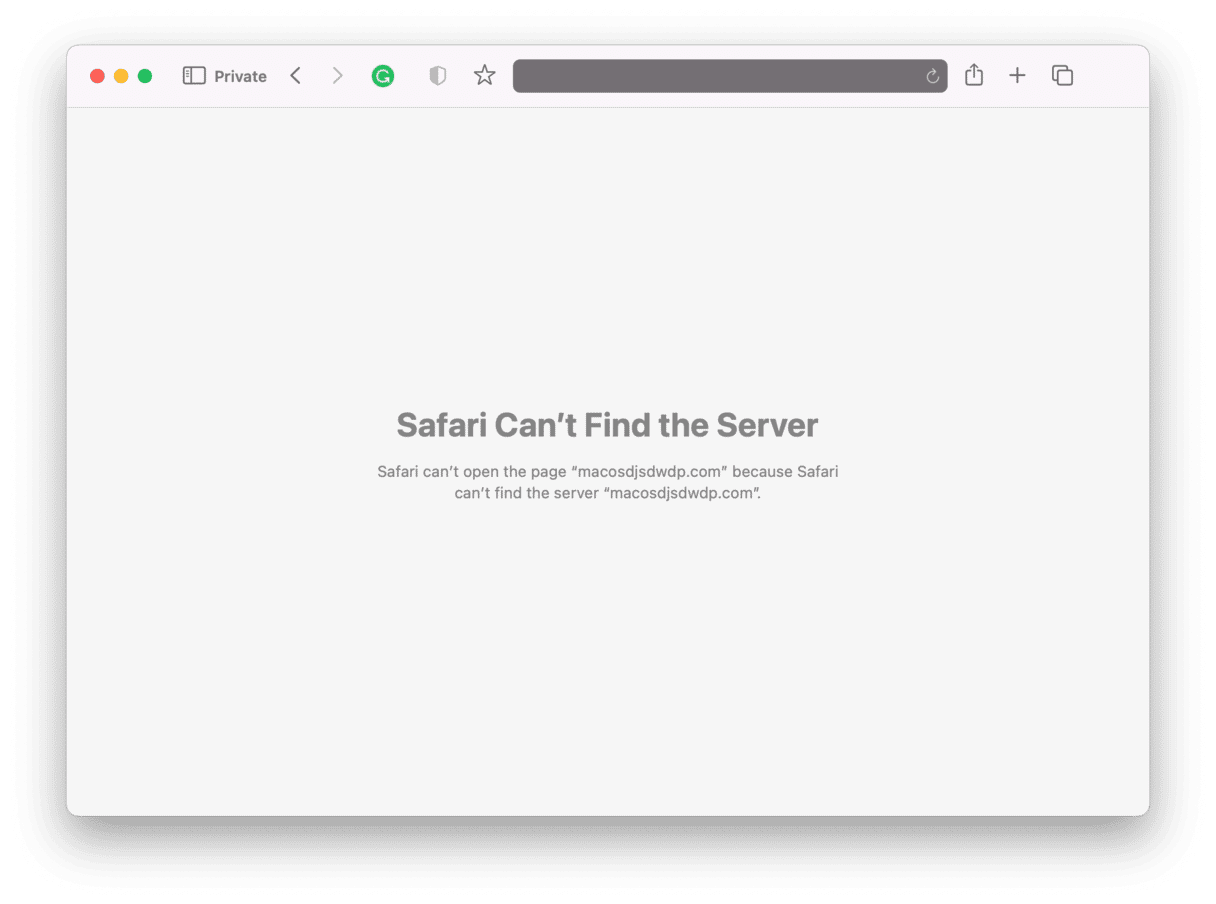
Editing the hosts file reroutes the IP address, but only from your own Mac. Entering the web address will bounce you to a different IP address of your choosing (and therefore a different website) or to an invalid IP, which will give you an error page on your browser that says it can’t find the website you’re looking for.
Can it boost my Mac’s speed?
Editing a hosts file is a way to speed up your browser performance. But if you’re tired of half-measures and want some solid improvement, we recommend a full browser cleanup, including the deletion of the browser cache. Our personal favorite is CleanMyMac as it has a tool to remove the garbage Macs accumulate from the web, emails, and message chats. Check it out — get your free trial here.

So why would you want to change your hosts file?
Typically, if you enter a web address in your browser, it’s because you want to reach that IP address. So, what are the benefits of rerouting?
- Network testing: If you’re developing a network, you can reroute the actual domain name to the development site to see how real users experience it. This will not affect other users accessing the real site.
- Block malicious websites: Apart from the risk of viruses and malware, undetected add-ons can also find their way into your system and begin slowing things down. Although it’s always worth investing in pop-up ad blockers, editing the hosts file prevents known malicious websites from being accessed. If a link or pop-up attempts to enter the site, your OS simply reroutes it and takes you to a safer page.
- Increased speed: As we said earlier, finding a website via the DNS is like flicking through the yellow pages for the correct address. With the hosts file being localized to your Mac, this could potentially speed up your browsing by omitting the middle man.
- Improved productivity: Maybe you or your team are getting distracted by social media websites or video streaming. Blocking access to time-wasting sites is a good way of keeping focused on the job at hand.
How to edit the hosts file on Mac
Use Terminal
Note: You will need administrator privileges, including the password, to edit the Mac hosts file.
- Find the Terminal application on your system: it is in Applications > Utilities.
- Once you have the Terminal window open, you can access the Nano text editor, where you will edit the hosts file.
- Type
sudo nano /etc/hostsand hit Return.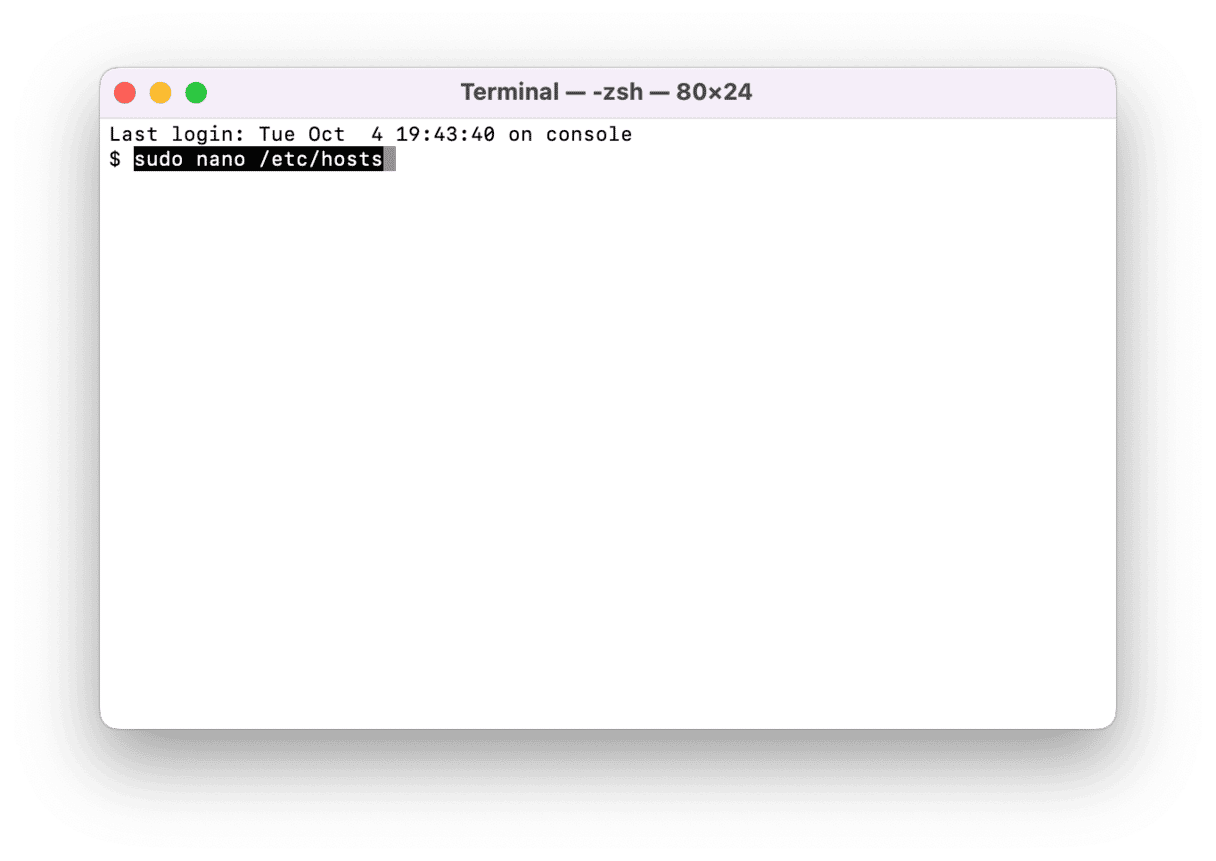
- You’ll then be prompted for your administrator password. Once you’ve entered it, hit Return again, and you will be in the Nano text editor.
The Nano text editor might look intimidating if you’re not used to coding on your macOS, but don’t worry: it’s very simple and very easy to do.
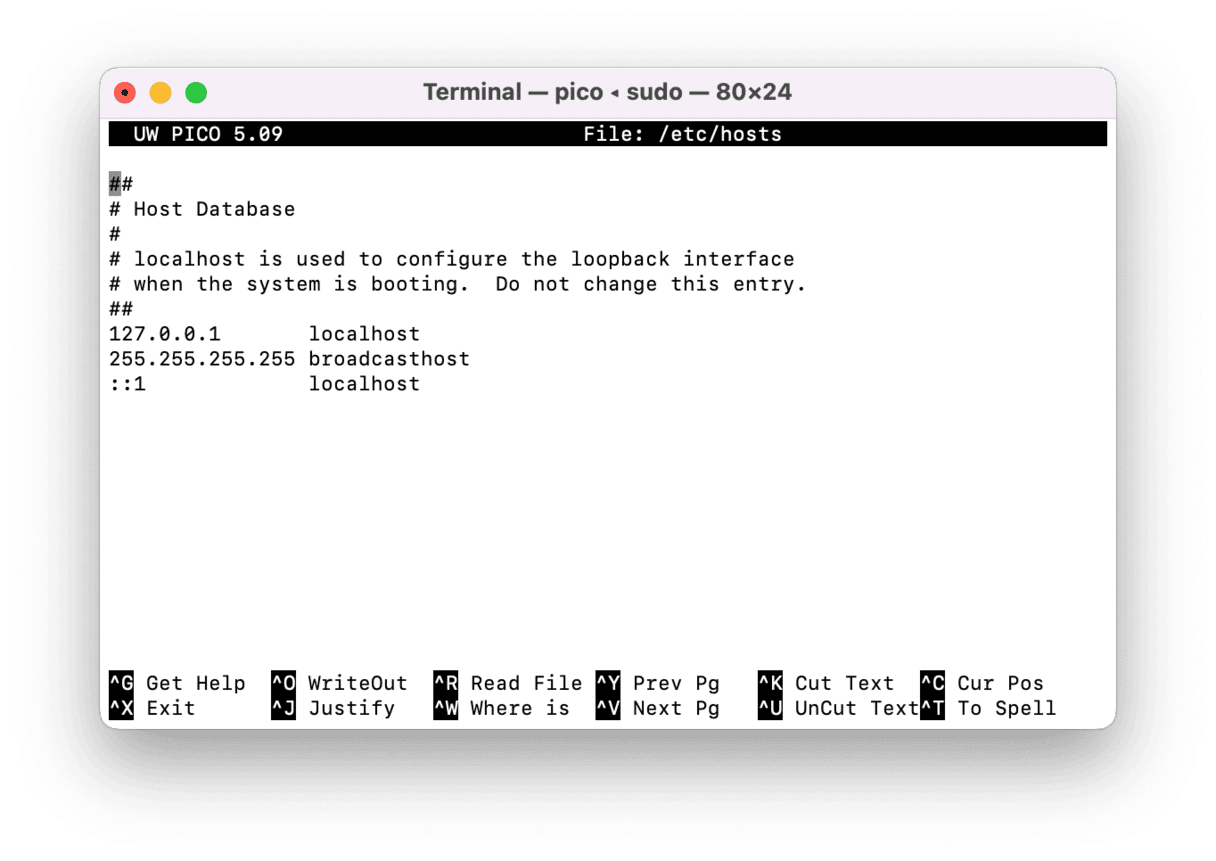
Use your keyboard arrow keys to position your cursor beneath the text that is already there. This is where you’re going to enter your alternative IP address. Type the IP address that you want the site to reroute to, hit Tab, and then type the domain name you want to be associated with it. So, if you would prefer that YouTube reroutes to your homepage, simply type the numerical IP address of your site, hit Tab, and then type www.youtube.com. To add another entry, simply enter a new line of text.
If you have no particular alternative site in mind or simply want to block access to it entirely, you can either enter an invalid IP address, such as 000.0.0.100, or use 127.0.01, which always refers back to your own system.
Save the changes by pressing Control-O, and then exit the Nano text editor by pressing control and X, which will return you to the main Terminal screen.
To make sure your Mac doesn’t get confused by the conflicting information from its hosts file and the DNS before you exit the command line, type sudo killall -HUP mDNSResponder and hit Return. This clears your Mac’s DNS caches so that the old directory doesn’t conflict with your newly updated hosts file.
Use TextEdit
An alternative to the Terminal application is to use TextEdit instead.
- Click Finder > Go > Go to Folder...Then type
/private/etc/hostsand press Return. This will locate the hosts file in the ‘etc.’ folder.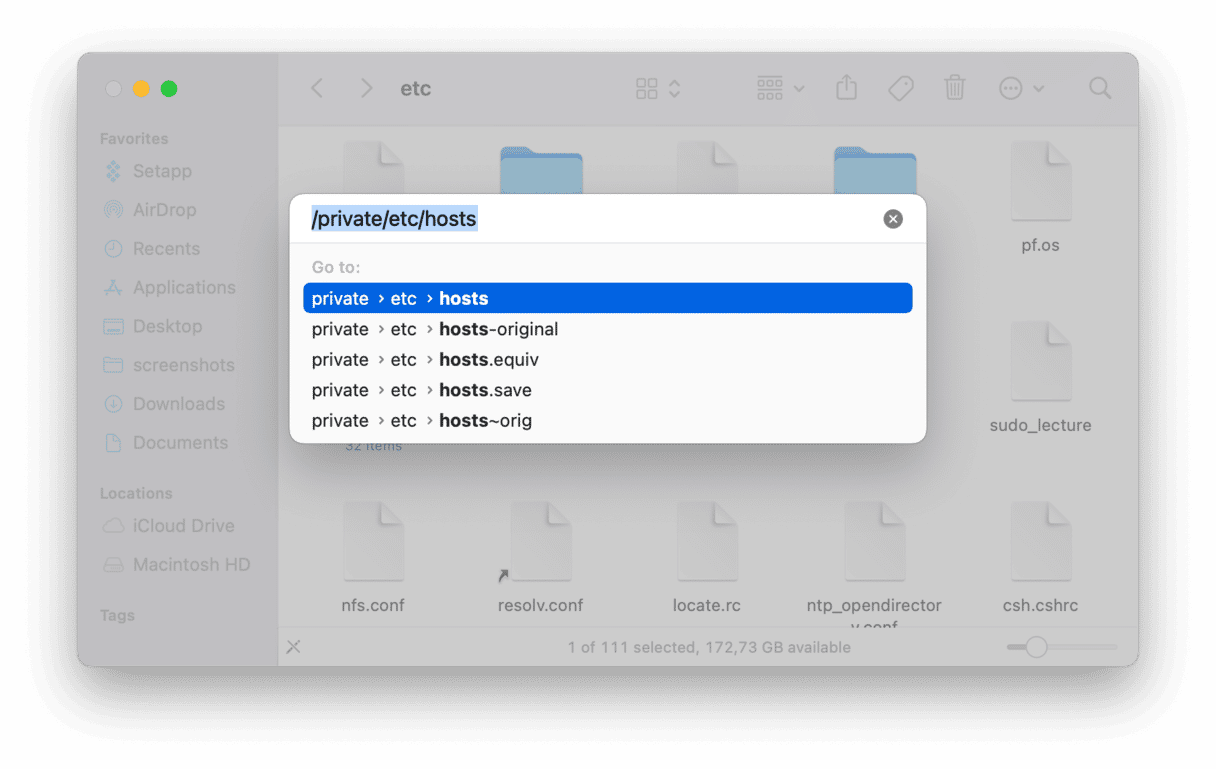
- Copy the file onto your desktop, and then double-click the copied file to edit it. In the open text file, add your line of alternative IP addresses just as you would in Terminal: First, the rerouted IP address and then the corresponding domain name. Make sure that there is a space between the IP address and the domain name. Otherwise, it won’t work.
- If you don’t want your Mac to access certain websites, use
127.0.0.1for the IP address. This will reroute the address back to your Mac. For example, if I wanted to block access to Facebook on a particular Mac, I would edit hosts file to look like this: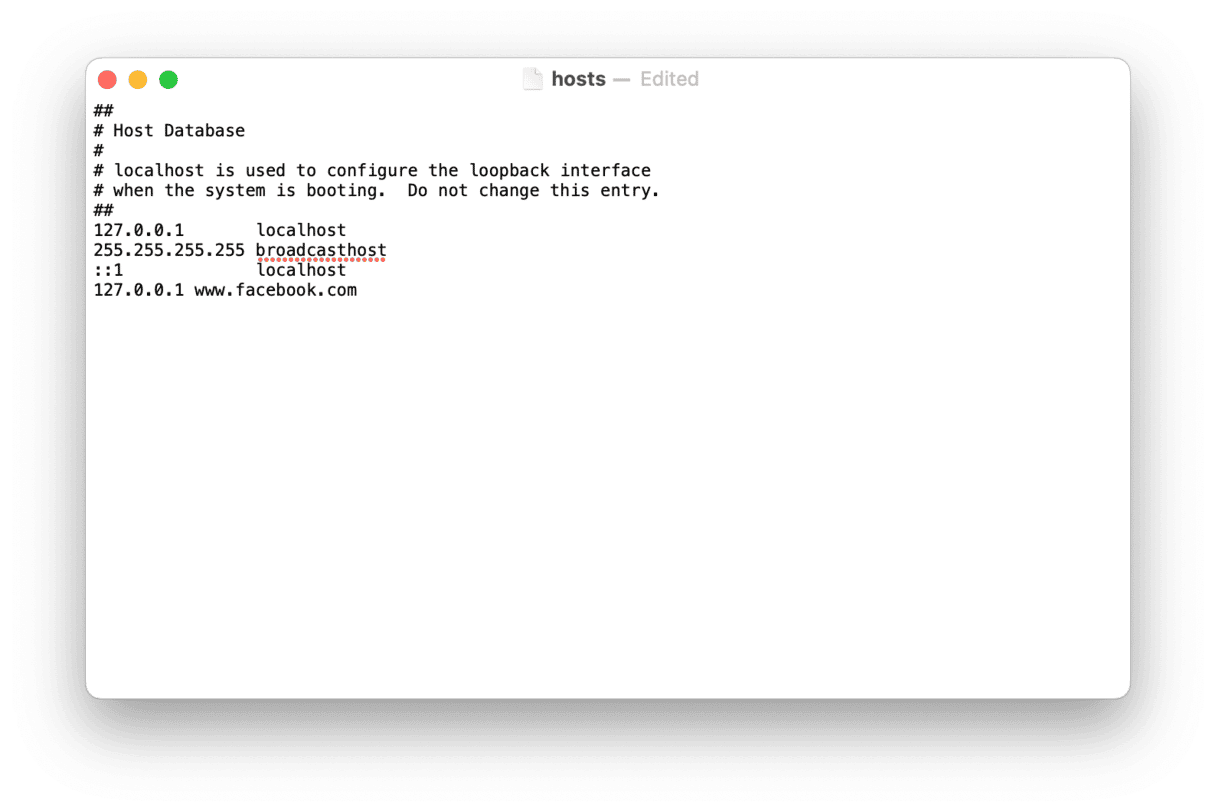
- Save the file, and then drag it back into the ‘etc.’ folder. Your Mac will ask if you want to replace the file, which you do, and you will have to enter your administrator password to save the changes.
- Remember, even if you own the domain name you are rerouting, the web address itself will not be affected. The hosts file only changes what happens on the Mac that contains it.
The risks of editing hosts file
Remember, you’re rerouting a domain to an IP address, not specifically a website. So if you have set one domain to be sent to another site, this depends on the IP address staying the same. If the destination website changes its IP address, your new route will no longer be valid, with the domain either ending up in a new website or producing an error message.
If your server is still taking too long to process requests, it may not be the DNS lookup that is slowing you down. It might be worth running a full clean of your OS to make sure the lag isn’t coming from your Mac.
How else you can protect privacy on your macOS
Anyone reading this is concerned enough about privacy and security to want to find a solution. As we’ve outlined in this article, there are several ways this can be done manually. Some of these fixes take time. Other solutions are fairly quick and easy to implement.
With CleanMyMac, you can clean your system cache, user cache (including app and DNS cache history), and browser cache. Of course, there is the manual way, as outlined in this article, or you can save a lot of time with one download and a few clicks to remove any digital footprints you want to delete.
If you want to clear cache safely and easily, here is how you can with CleanMyMac:
- Open CleanMyMac (get your free CleanMyMac trial).
- Select Cleanup.
- Click Scan > Clean.
In case you need to remove just the DNS cache, do the following:
- Click Performance > Scan > View All Tasks.
- Select Flush DNS Cache in the Maintenance Tasks tab.
- Click Run.
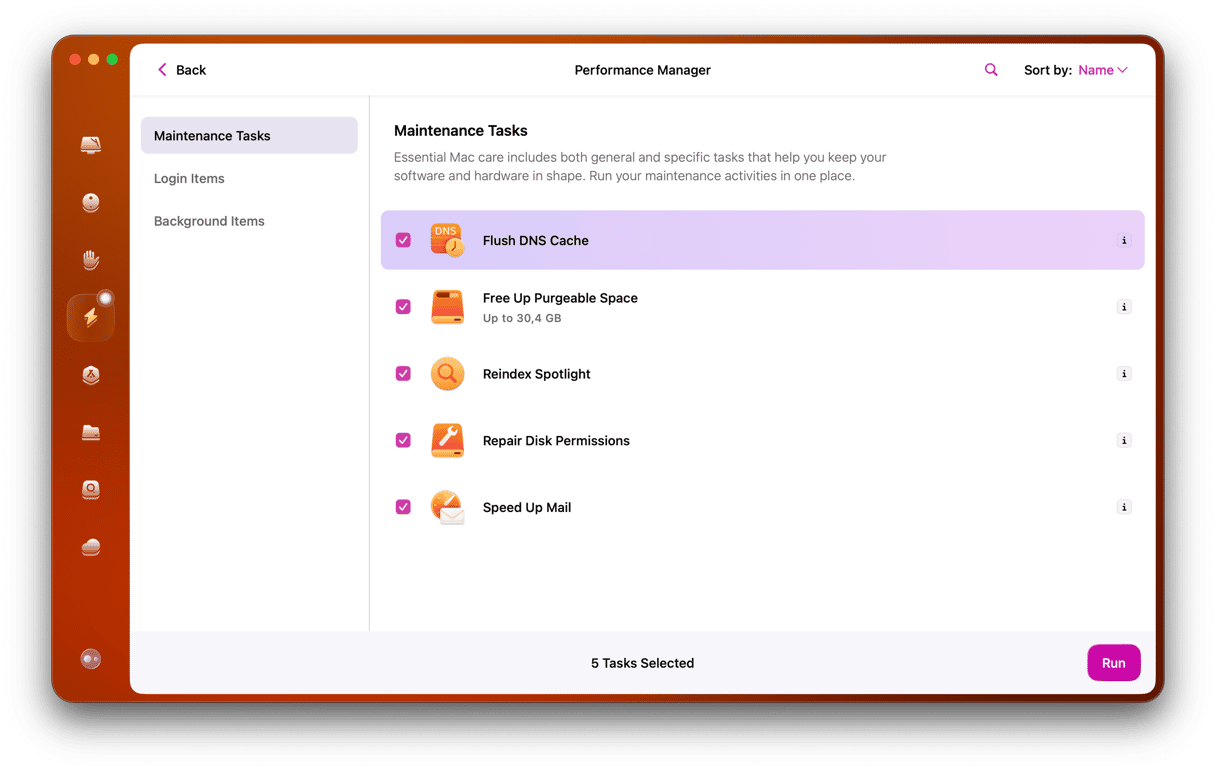
Done! Your DNS cache flushed✅
That’s all you need to do. Give it a try, or go through the steps outlined above to do this manually.


