You probably noticed that after you upgraded to OS X El Capitan, slow Mac started to become a trouble. Why does this happen? Well, we found out that El Capitan needs a lot more disk space and RAM to run quickly. The good news is, it's not just possible to speed up El Capitan — it's pretty simple.
The easiest way to get a faster Mac with El Capitan is to get a Mac cleaner. You can start your free CleanMyMac trial and simply let the app do everything for you. Speeding up El Capitan with it will only take a few minutes. But if you want to do it manually, read on.
Go over each step to speed up El Capitan system.
1. Speed up your Mac's startup
It starts at the very beginning. When you turn your Mac on, it typically launches a dozen apps at once. And you probably don't need most of them at that moment. This could be one of the reasons El Capitan running slow. To stop them from launching on startup, go to System Preferences, choose Users & Groups and then click your username. Check the unnecessary apps and click.
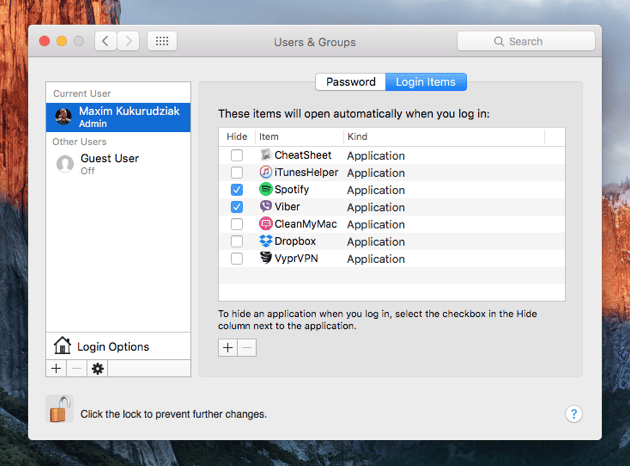
Don't worry, if you accidentally remove something useful, just add it back by clicking and choosing it from the Applications folder.
2. Major hard drive cleaning
One of the reasons a Mac gets slow is a full hard drive. To find out how cluttered yours is, click on the main Apple menu in the top left corner and choose About This Mac > Storage. If you see the top bar getting full, like in the screenshot below, it's time to clean up some space.
It might take a while, so here's a piece of advice on how to approach it.
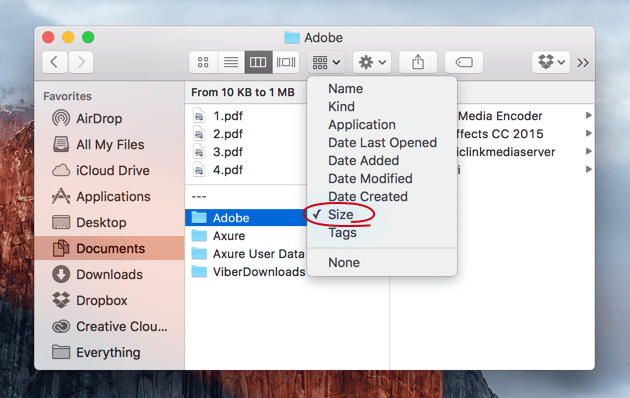
- Arrange your files and folders by size to find the biggest.
To do it: open Finder, click on All My Files in the left menu bar (if you don't see it there, press Command+Shift+F (?+?+F), and then click View in the top menu bar and select Show View Options. Now choose Sort by Size and Arrange by Size. Now all your files are arranged from the biggest to the smallest.
- Arrange your files and folders by date.
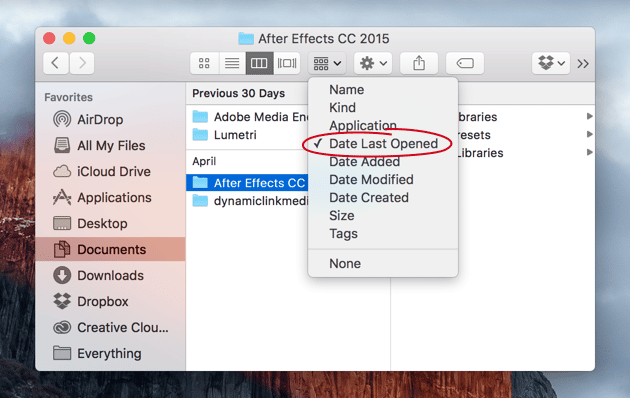
If you'd like to arrange them by date to find files you haven't opened in a while (maybe you forgot they were even there!), you can do this by following the steps above, and then changing arrange by Size, to arrange by Date Last Opened. Now click on Date Last Opened in the name of the column and you get a list starting with the oldest files you have.
Don't forget to look at the file type distribution in the Storage tab. It might give you a hint on the folders that occupy the most space and need cleaning.
This process takes a while because your Mac can't arrange files by both size and date at once. However, there are apps that can, such as CleanMyMac. It has a special module that looks exactly for large and old files and sorts them for you. You can delete the files you don't need directly from the app in just a few clicks.
3. Trim down your system
Trimming down your system includes cleaning cache and temporary files, and flushing DNS.
Cleaning cache files on El Capitan
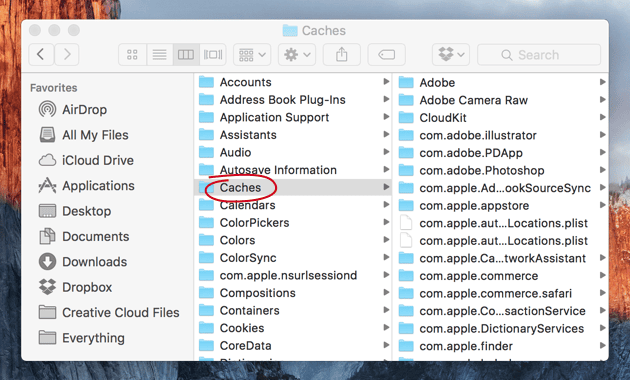
- Open a Finder window and select “Go to Folder” in the Go menu, at the top of the screen.
- Type in ~/Library/Caches and hit “enter” to proceed to this folder. Important: remove the insides of these folders, but not the folders themselves.
- Repeat 1 and 2, but replace ~/Library/Caches with /Library/Caches (simply lose the ~ symbol).
- Restart your Mac. Yes, it's kind of a pain.
It's also much easier (and faster) with an app, you can take a look at how to clean caches on Mac OS X.
Flush DNS cache on OS X 10.11
When you flush the DNS cache, what you're doing is removing old cache entries that translate internet domain names (example.com) into IP addresses. You're going to need the Terminal for this. To open Terminal, open Spotlight and type in Terminal, or find it by clicking on the Applications folder and then clicking on Utilities.
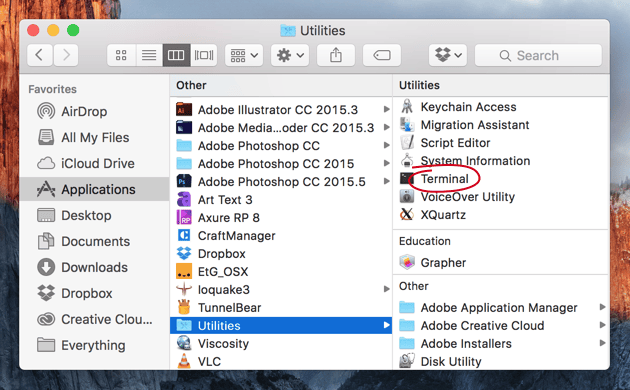
Once launched, type in:
sudo dscacheutil -flushcache;sudo killall -HUP mDNSResponder;say cache flushed
You'll need to enter the admin password to execute the command.
4. Free up memory
Usually Macs are pretty handy with memory management, but sometimes you just have to give them a direction. Check out your memory usage in the Activity Monitor (find it with Spotlight) by clicking on the Memory tab.
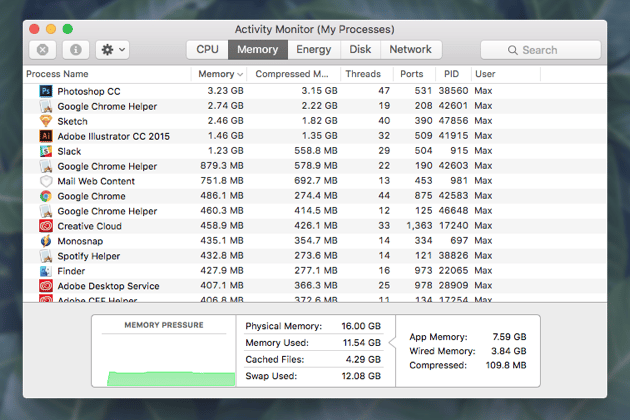
If Physical Memory and Memory Used have nearly equal values, it means your Mac will start using Virtual Memory soon. Virtual Memory relies on your Mac's hard drive and is so slow that you don't want to get it involved. When you start running out of memory, just clean it manually with Terminal.
Open it as explained in the Step 3. Then, once opened, type in:
sudo purge
Give your system a moment to process the command.
If you don't want to use the Activity Monitor or Terminal commands each time you need to free up some RAM, you can download CleanMyMac (a link to the free version) and do it with just one click instead. After downloading CleanMyMac, freeing up memory is… Well, free.
5. Use CleanMyMac
You can go over each step to speed up El Capitan, or you can keep it fast with CleanMyMac. This app is notarized by Apple and has gradually grew into one of the classic Mac apps.
In the latest version, you can find a special feature called Performance. You can use it to run various maintenance tasks and do the tweaks on your own.
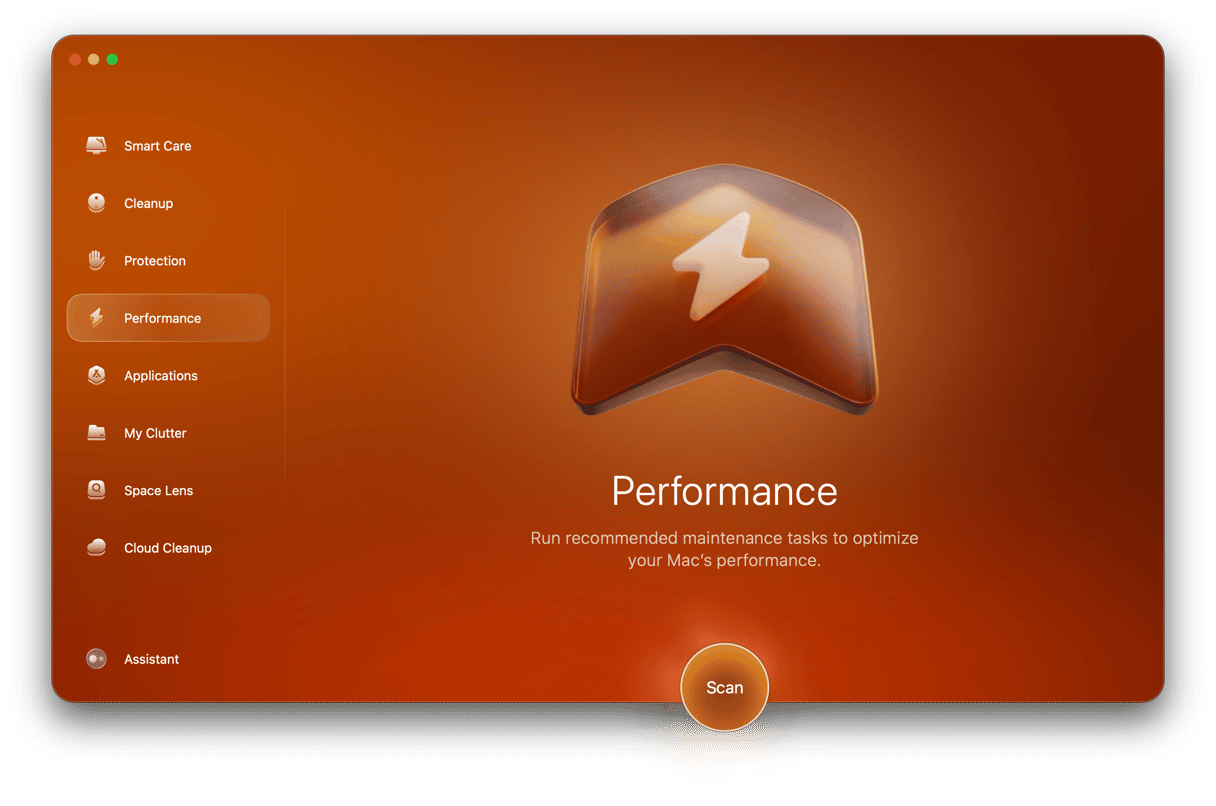
This is basically it. If you're still running the good old OS X Capitan, now you know how to push it a little bit so it runs faster. Well done on your part!


