Dark mode is one of those features that started out on mobile devices like iPhone and then became so popular that Apple decided to add it to macOS too. Now you can use Dark mode on your Mac all the time or only when you choose to. And you can set it to go on and off automatically. We’ll show you how to do all of that in this article.
What is Dark mode?
Dark mode changes the toolbars, sidebars, and other elements in macOS windows from light to dark. In some cases, like the Finder windows, it also turns the background dark. It also changes other elements of the user interface so that they contrast with the dark background. Turning Dark mode on in the evening may be more comfortable for your eyes. As well as Apple apps and macOS, Dark mode also changes the appearance of apps that support it. There are many third-party apps that change from light to dark when you enable Dark mode. You can turn it on and off manually, or you can set it to go on and off according to your Night Shift settings.
How to enable Dark mode on your Mac
There are a couple of different ways to turn Dark mode on and off on your Mac.
System Settings
- Click on the Apple menu and choose System Settings.
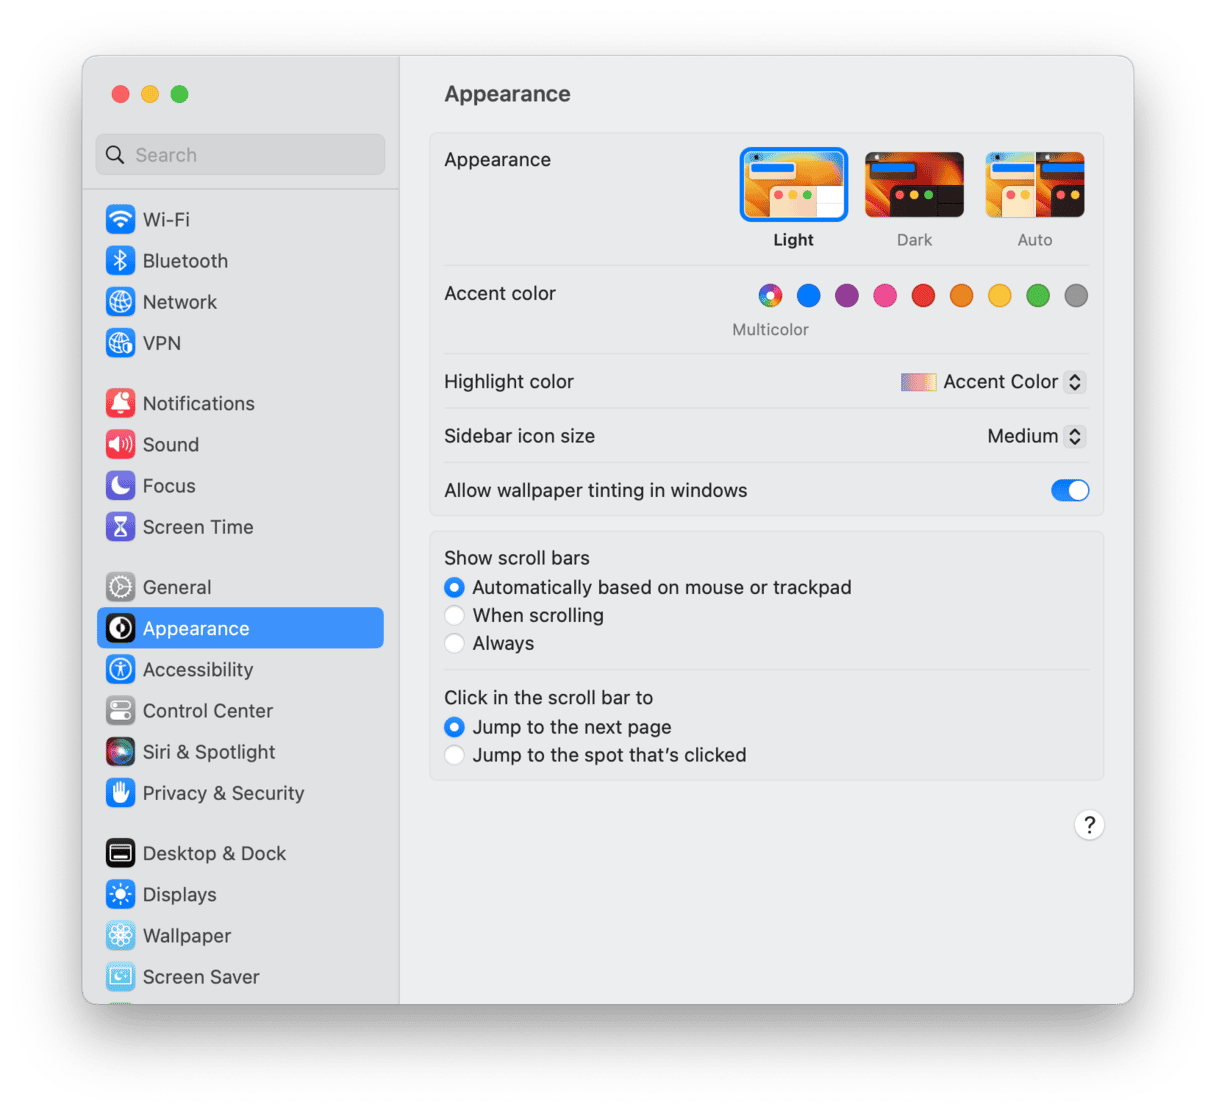
- Select Appearance.
- Choose Light, Dark, or Auto at the top of the window.

Control Center
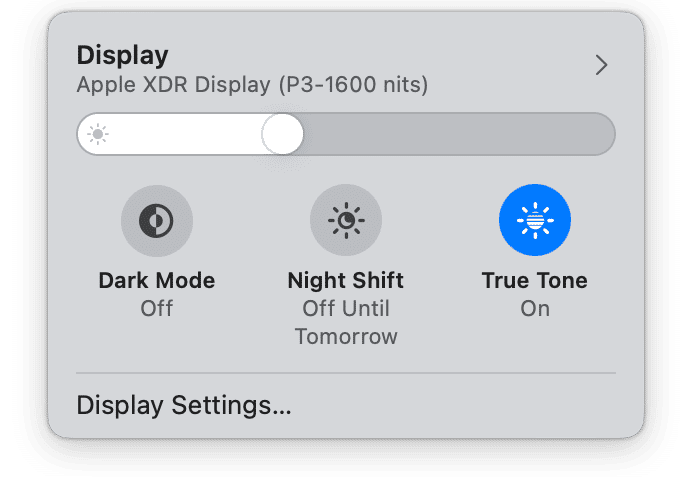
- Choose Control Center in the menu bar.
- Click on the arrow in the Display section.
- Click the Dark mode button to switch it on or off.

What does Dark mode auto do?
You’ll have noticed that one of the Dark mode options in System Settings is ‘Auto,’ but what does it do? Auto switches Dark mode on and off according to the schedule you have set up for Night Shift. Night Shift changes the colors on your display so that they are warmer in the evening when the ambient light is low and cooler during daylight when ambient light is brighter. The idea is that blue light in the evening can prevent you from getting a good night’s sleep, so making colors warmer and less blue should help you sleep better.
How to clean and optimize your Mac
Customizing your Mac using Dark mode is fun, but it shouldn’t distract you from the important stuff like making sure your Mac is optimized and running smoothly or that it’s free from junk and safe from malware. The best way to make sure your Mac is running as well as it can is to use a tool designed to optimize it, free up disk space, and check for malware. CleanMyMac’s Smart Scan feature does all those things. Here’s how it works. First, download CleanMyMac for free here and install the app. Next, follow these steps:
- Open CleanMyMac and select Smart Scan in the sidebar.
- Click Scan.
- When it’s finished, click Run to clean up and optimize your Mac as well as to get rid of any malware.

How to enable Night Shift on your Mac
- Click on the Apple menu and choose System Settings.
- Choose Displays in the sidebar.
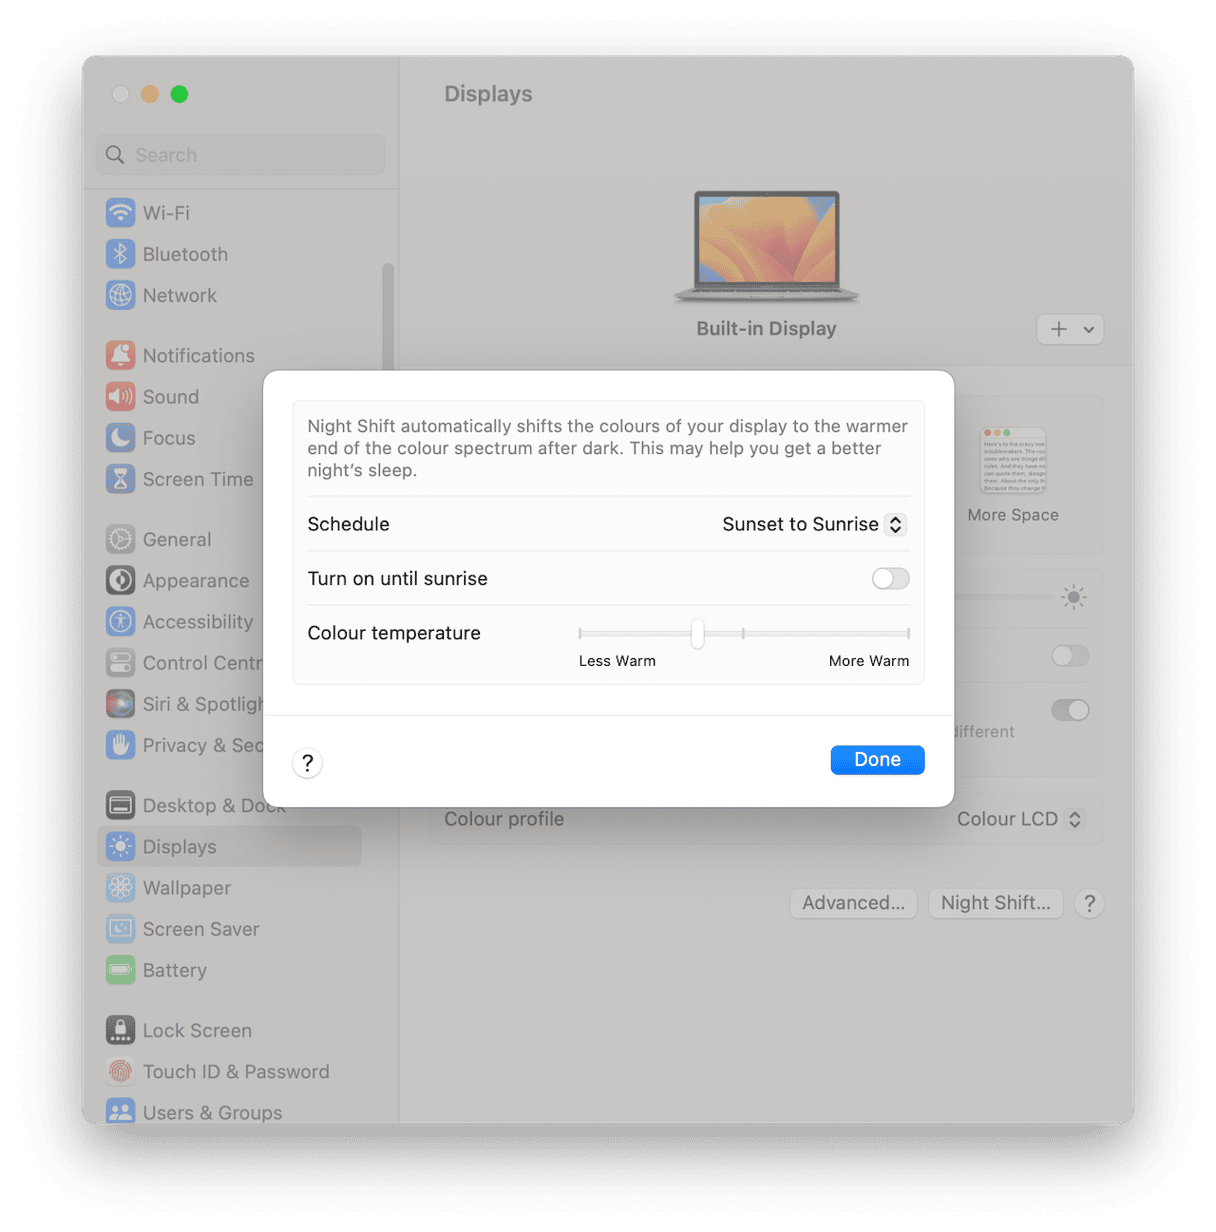
- Click Night Shift.
- Click the menu next to Schedule and choose Sunset to Sunrise or Custom.
- If you chose Custom, set the on and off times you want.
- If you want to turn Night Shift on now, click Turn on until sunrise.
- Use the slider to set the color temperature when Night Shift is on.
- Click Done.

Dark mode allows you to change windows and other interface elements on your Mac from light to dark. You can do it at any time in System Settings or Control Center, but it’s very useful when you set it to auto, so it comes on at the same time as Night Shift. Follow the steps above to set up both Dark mode and Night Shift.


