Erase Assistant is one of those macOS features that you probably don't realize is great until you need to use it. When you do, it turns out that it makes wiping your Mac before selling it or giving it away really easy. However, occasionally you may get the "erase assistant is not supported on this Mac" error message. This article will explain what to do if you get that error.
What is an Erase Assistant?
Before we explain what to do if you get the "Erase Assistant is not supported on this Mac" error, let's recap exactly what Erase Assistant is and what it does.
If you've ever erased all content and settings on your iPhone, you have met Erase Assistant's iOS version. Erase Assistant does the same but on the Mac. It wipes all your content and settings, so your Mac is ready to be given away or sold. Before using it, you should back up your Mac using Time Machine or another backup tool. If you're going to move to another Mac, using Time Machine will make it easy to restore everything using Migration Assistant.
Why is Erase Assistant not supported on my Mac?
Erase Assistant only works on Macs with Apple Silicon or Intel Macs with the T2 security chip. If your Mac doesn’t fall into one of those categories, you will see the error message. Unfortunately, in that instance, there is nothing you can do except manually wipe your Mac by booting in Recovery mode and using Disk Utility to erase the disk and reinstall macOS.
If your Mac is either Apple Silicon or has the T2 security chip, follow the steps below to use Erase Assistant, which should work.
How to use Erase Assistant

- Back up your Mac. There’s no way back once you erase your Mac with Erase Assistant, so backup your data and settings now using Time Machine or another backup tool.
- Click the Apple menu and choose System Settings.
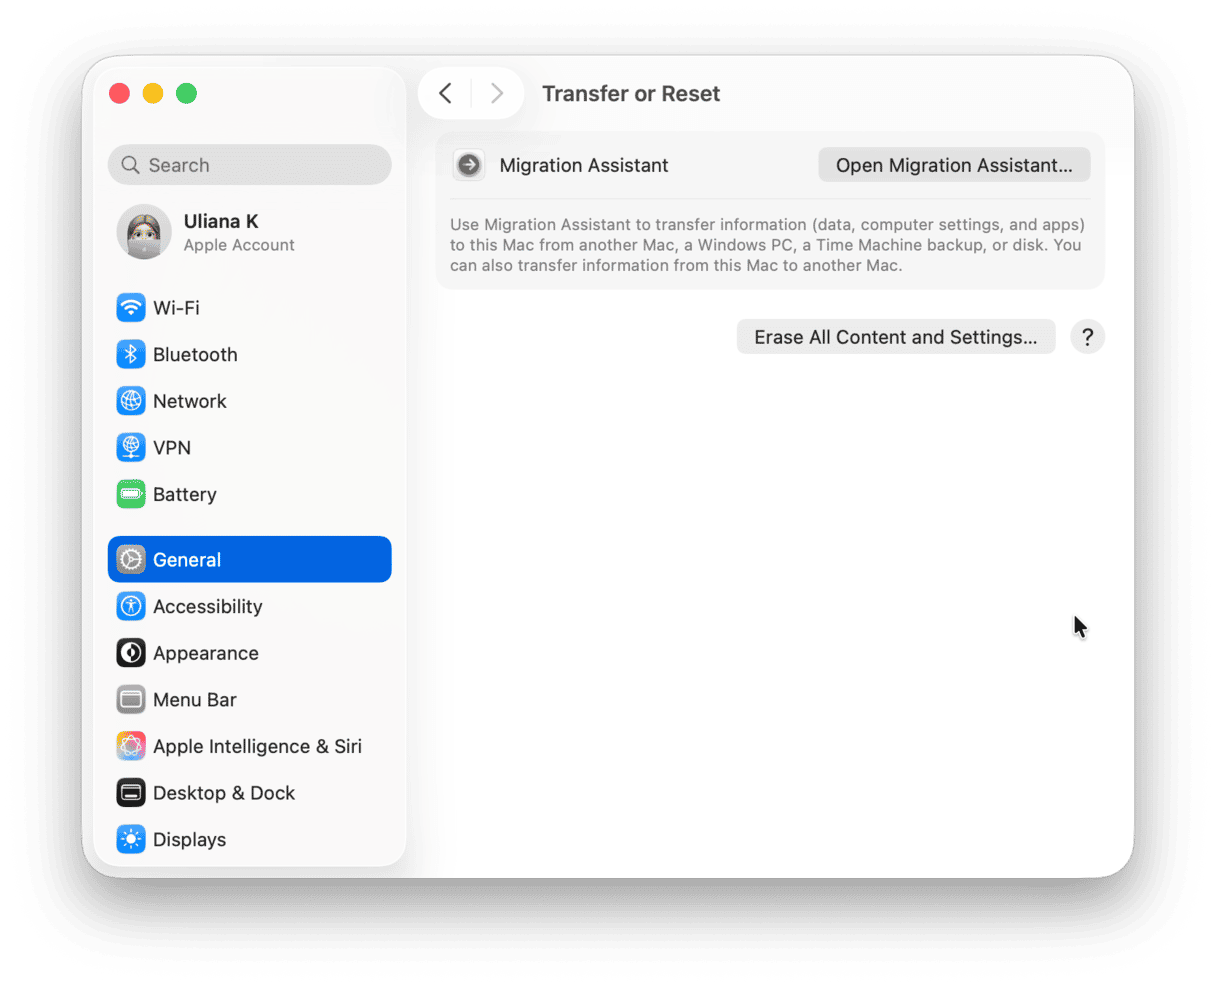
- Go to General in the sidebar and choose Transfer or Reset.
- Click Erase all Content and Settings.
- Type in your admin password and click Unlock.
- Click Continue to confirm you want to proceed.
- If asked, log out of your Apple ID and choose Continue.
- Click Erase All Contents and Settings.
Your Mac will now restart. You can switch it off and it will boot like a new Mac for the next owner.
Alternatively, you can transfer your data using Migration Assistant from your old Mac to a new one, then erase all contents and settings. To do that, choose Open Migration Assistant in Step 4 above.
What to do if you can’t use Erase Assistant
If Erase Assistant doesn't work on your Mac, either because it’s an Intel Mac without the T2 security chip or because it shows an error message, you can manually wipe your Mac. Here’s how to do it.

How to manually erase your Mac
First, back up your Mac. It’s better to make two backups and store them in different places, just in case.
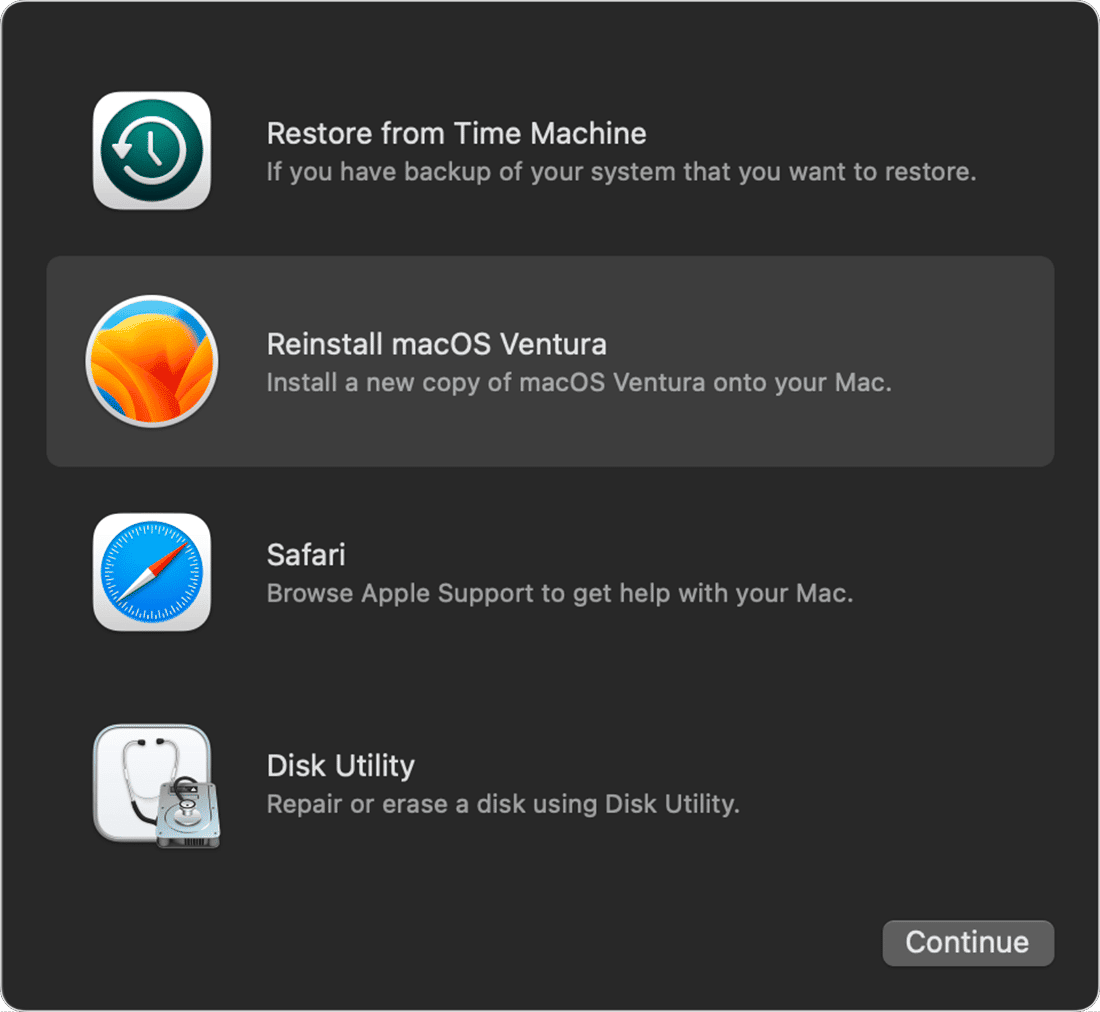
- Start up your Mac in Recovery mode. The method for rebooting in recovery mode is different and depends on your Mac model. You can find the instructions for your Mac with Apple silicon here and here for an Intel-based Mac.
- When the macOS Utilities screen appears, choose Disk Utility.
- Select your boot disk you’d like to wipe, and click Erase in the toolbar.
- Give the disk a name, choose APFS format and click Erase Volume Group.
- When the erase is complete, quit Disk Utility.
- Click Reinstall macOS in the Recovery app and follow the instructions.
That’s it. When macOS is reinstalled, shut down your Mac. The next time it boots, it will start up as a new Mac.
Erase Assistant is a very useful tool. It allows you to wipe all the data and settings from your Mac so that if you give it away or sell it, the new owner can set it up as a new Mac and won’t have access to your files. However, it only works on some Macs, and if it doesn’t work on yours, you will see "Erase Assistant not supported on this Mac." If that happens to you, follow the steps above to deal with the problem and manually erase your data and settings.


