When it comes to locating files or folders on our Macs, we all have our own preferences. Some just scroll through folder after folder until they find what they’re looking for. Others fire up Spotlight and use that, and another group uses the search bar in Finder windows. That’s a pretty useful method because it allows you to specify whether you want to search your whole Mac or only the currently active folder. But what do you do with Mac search not working? We’ll show you.
Why use Finder search?
If you’re not a regular user of the Finder search bar, you might wonder why bother with it? Well, for one thing, if you have a Finder window open in front of you, it’s quicker to use that than to invoke Spotlight. And unlike Spotlight, which includes results from the web, it only returns files on your Mac. Finder search also allows you to specify that you want to search the current folder or your whole Mac. And, lastly, but most impressively, when you conduct a search in Finder, you can use it to build a filter that you can save as a Smart Folder so that all the files that meet the criteria in the filter appear in the Folder — then, they stay in their original location and are mirrored in the folder.

What to do if Finder search is not working
1. Use ‘This Mac’
If you find that when you click the magnifying glass, type a search term, and select the current folder, nothing happens, try choosing This Mac instead. For some reason, Finder sometimes has trouble with search when you select the folder but works fine when you choose This Mac.
2. Try Spotlight
As we explained above, Spotlight isn’t an ideal substitute for Finder search because it returns lots of results from different places, in addition to files on your Mac. However, you can customize it so that if Finder search is not working, it can become a reasonable replacement. To use it, click the magnifying glass icon in the menu bar or press Command-Space and type your search term in the box. If the file you’re looking for doesn’t appear in the results, the next thing to do is to check it hasn’t been filtered out. Here’s how to do that:
- Click the Apple menu and choose System Settings.
- Choose Spotlight.
- Under Results, make sure the correct option is selected. For example, if the file you’re looking for is a document, make sure Documents is enabled (you will have to click an i next to Files to do it).
- Try the search again.

If Spotlight is returning too many results from too many different sources, making it difficult to see the result you’re looking for, you can uncheck boxes next to the options you don’t want. For example, check Websites and Movies to exclude those.
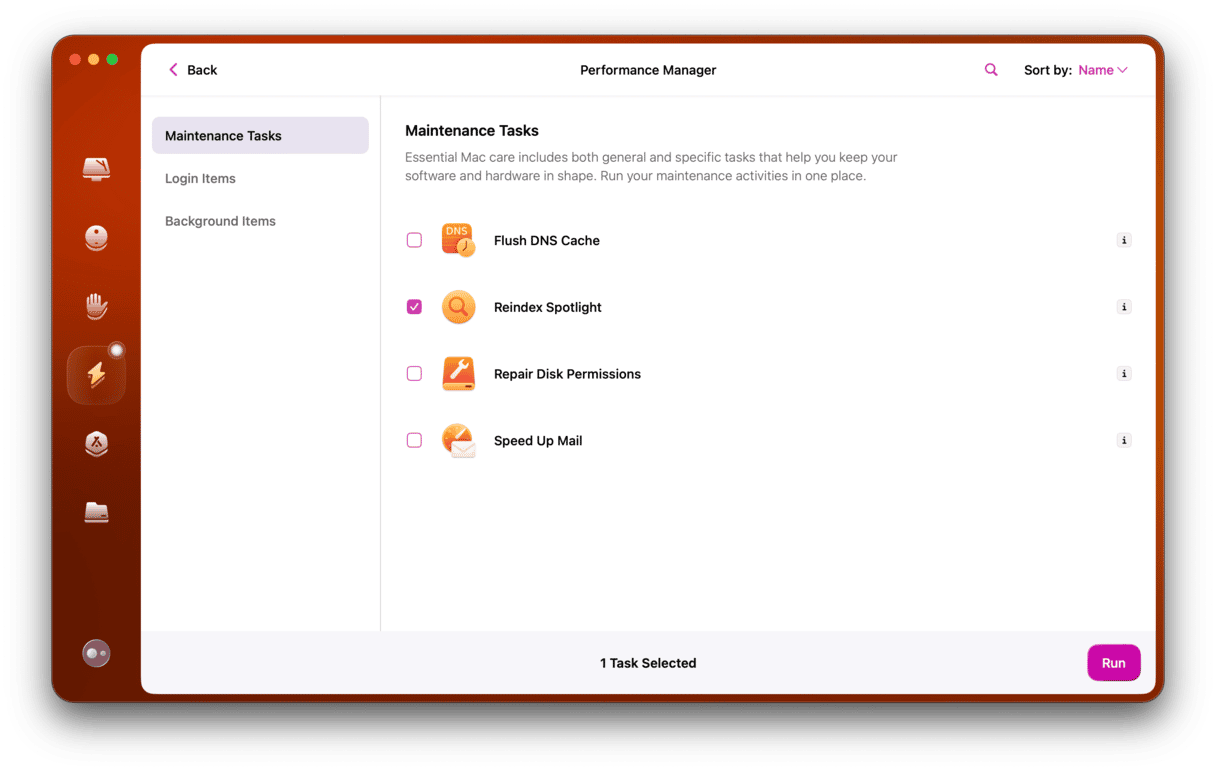
Reindexing Spotlight simply means rebuilding its search database. This will make searches more accurate and fix search-related issues.
- Try CleanMyMac for free — sign up and use it for 7 days.
- Head over to the Performance tab and run a scan.
- Click View All Tasks > Reindex Spotlight.

3. Relaunch Finder (it works wonders)
Not many people know that Finder is just like any other app you can close and relaunch. This will clear its cache and reset preferences.
- Right-click the Finder icon while holding down the Option key.
- Choose Relaunch.

4. Check Search privacy settings
Spotlight’s privacy settings shouldn’t have any effect on Finder search, but it’s worth checking, just in case.
- Go to System Settings > Spotlight and click Search Privacy.
- If there is a folder or folders in the box and you think the file you’re looking for might be in one of them, select the folder and click the ‘-’ button. Try the search again.

5. Check your Mac for malware
It’s possible that the reason why Finder search is not working on your Mac is that it has been infected by malware. Malware comes in various forms and has a number of different effects on your Mac. The only way to rule it out is to check your Mac for malware. And the best way to do that is to use a specialist tool. CleanMyMac’s Protection tool makes it very easy to check your Mac for malware. It will scan your Mac and compare what it finds with a database of known malware. If it finds anything, it will alert you and allow you to remove it. Get your free CleanMyMac trial and follow these steps:
- Open CleanMyMac.
- Click Protection from the sidebar.
- Click Scan > Remove if malware has been detected.

6. Rebuild the Finder search index
Rebuilding the index used by Finder search might fix the problem. You’ll have to use Terminal:
- Go to Applications > Utilities and open Terminal.
- Type:
sudo mdutil -E / - Press Return.
- Type in your password and press Return.
- Quit Terminal and try searching again.
7. Сhange the default for Finder search
You can change the default setting for Finder search so that when you search for something without selecting a location, it searches either your whole Mac or the current folder.
- Click the Finder icon in the Dock.
- Choose Finder in the menu bar and then Settings.
- In the Advanced tab, choose an option from the ‘When performing a Search:’ menu.

How to save a Finder search
Once you’ve got Finder search working the way you want it to, you can create smart folders to save searches:
- Open a new Finder window and type a search term.
- Choose ‘Contains’ or ‘Name Contains’
- Click the ‘+’ at the top right of the window to add more filters.
- Use the menus on the left to set criteria and type a term in the text box that the criteria should match. For example, ‘Kind’ is ‘Image’.
- Click the ‘+’ to add more criteria.
- When you’re done, click Save.
- Give the saved folder a name and choose where to save it.
- Click Save.
All the files that match the criteria you set will be available in that folder. And any new files you create in the future that also match the criteria will be available there, too.
Final bonus method: delete the corrupt Finder PLIST File
PLIST files are property files that contain app settings. You can delete Finder's PLIST file and restart your Mac. Your system will then generate a new PLIST after restart. This is a common troubleshooting method, although we advise that you keep a backup version of your original PLIST file in case things go wrong.
How to erase the corrupt .plist file
- Open the Finder and choose Go in the menu bar.
- Choose Go to Folder...
- Copy and paste this location:
~/Library/Preferences/

Now, find the file com.apple.finder using the search bar. Copy this file to any safe location as a backup. Then, send the file to the Trash and restart your Mac.
If you use Finder search a lot, it can be very frustrating if it doesn’t work. However, there are a number of things you can do to try and fix it. And an excellent alternative in Spotlight if you need it. Follow the steps above if Finder search is not working on your Mac. Once it’s working again, set up a few smart folders to automate searches.


