Zoom became hugely popular when many of us were locked down during the COVID-19 pandemic, had to work from home, and were not able to see family and friends in person. And it has continued to be popular among those who still work remotely or on a hybrid basis. It has features that its competitors don’t, like the ability to create breakout rooms in meetings. Most of the time, Zoom works smoothly. However, there are occasions when problems can occur. And one error you might see is when you try to update Zoom. So, if you ask yourself, “why won’t Zoom update on my Mac?” and see error code 10004, you’ve landed in the right place. In this article, we’ll explain what that error means and how to fix it.
What is Zoom error code 10004?
Error message saying that ‘Unable to install updates. Error code: 10004’ occurs when Zoom tries to download and install an update but is unable to. That could be caused by a problem with internet access on your Mac, but it is more likely to be an issue with Zoom’s update servers. If your Mac is managed by an IT administrator using mobile device management software or profiles, it could also be a permissions issue with those that are causing the error.

How to fix Zoom error code 10004 on your Mac
There are a number of ways to try and fix Zoom error code 10004.
1. Contact your IT helpdesk
If your Mac is managed by an organization you work for, the first step in trying to fix the error is to contact the IT department’s helpdesk. It’s likely they have encountered the problem before and will know how to fix it, perhaps by installing the update manually from an administrator account or by giving your account more privileges. It could also be that the preferred method for updating Zoom in the organization is by using the app provided by the mobile device management software.
2. Check Zoom’s status page
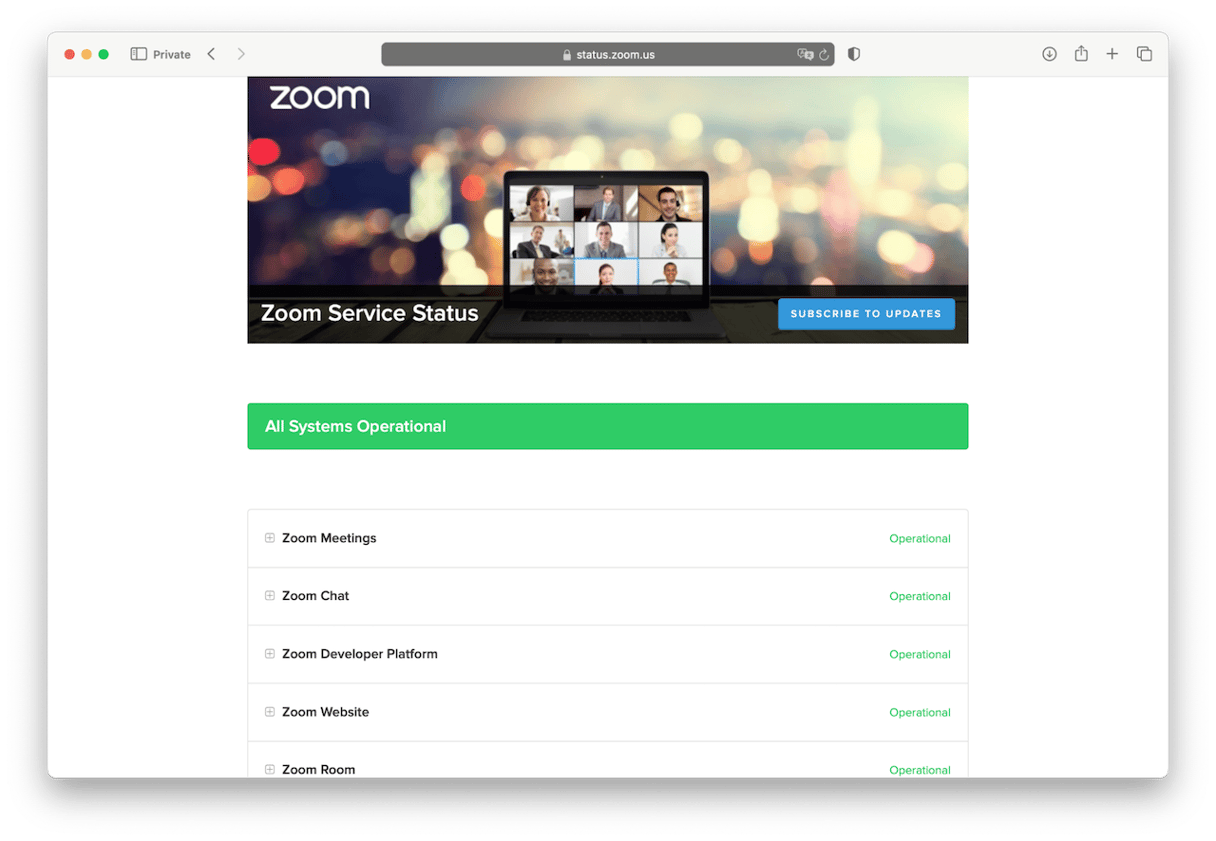
In a web browser, go to status.zoom.us and look for a green bar that says All Systems Operational. If you see a different message, the problem might be Zoom’s servers, and you will just have to wait for it to be fixed.
3. Reinstall Zoom
If your Mac is not managed by an organization, the next step is to reinstall Zoom. When you do that, you will install the most up-to-date version. However, before you can reinstall Zoom, you need to uninstall it. Follow the steps below:
- Open Zoom and click Zoom in the top left corner of the screen.
- Choose Uninstall Zoom Workplace.
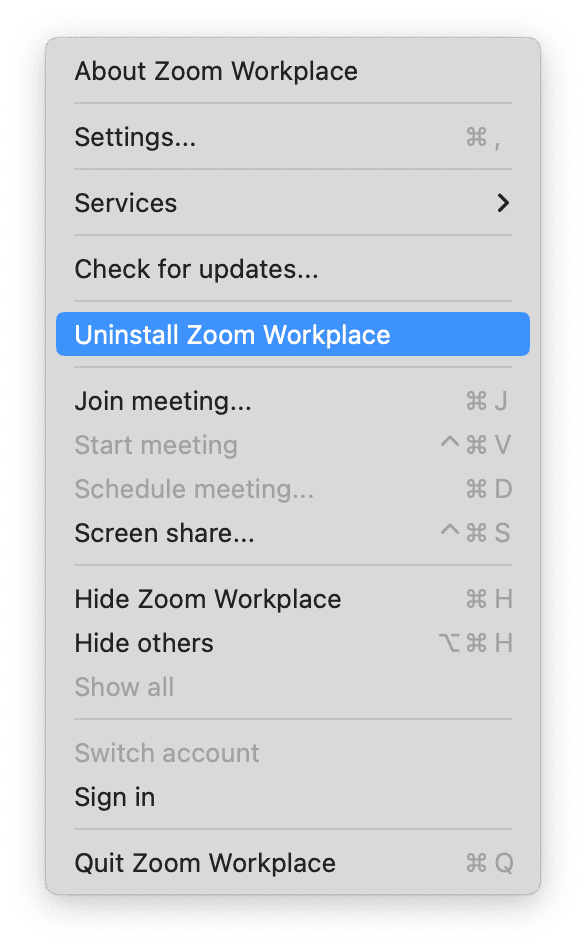
- Click OK to confirm you want to uninstall Zoom. Wait for the uninstall to complete and restart your Mac.
- In a web browser, go to this link to download Zoom. If you have an Intel-based Mac, click the Download button. If you have a Mac with Apple silicon, click the link beneath it.
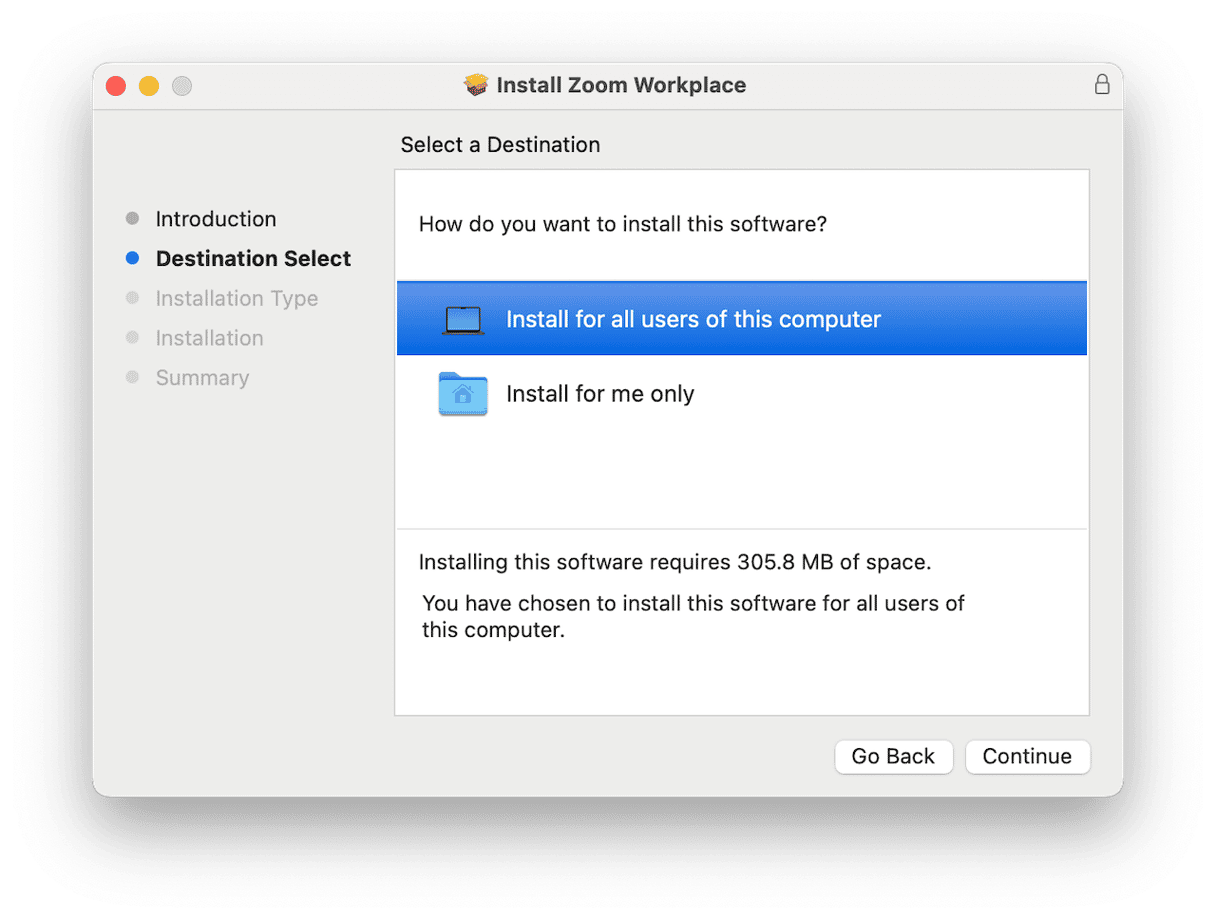
- Double-click the downloaded .pkg file.
- Follow the instructions on the screen to install Zoom and confirm whether you want to install it for your user account or for all users. If you want to install it for all users, you will need to enter an admin password.
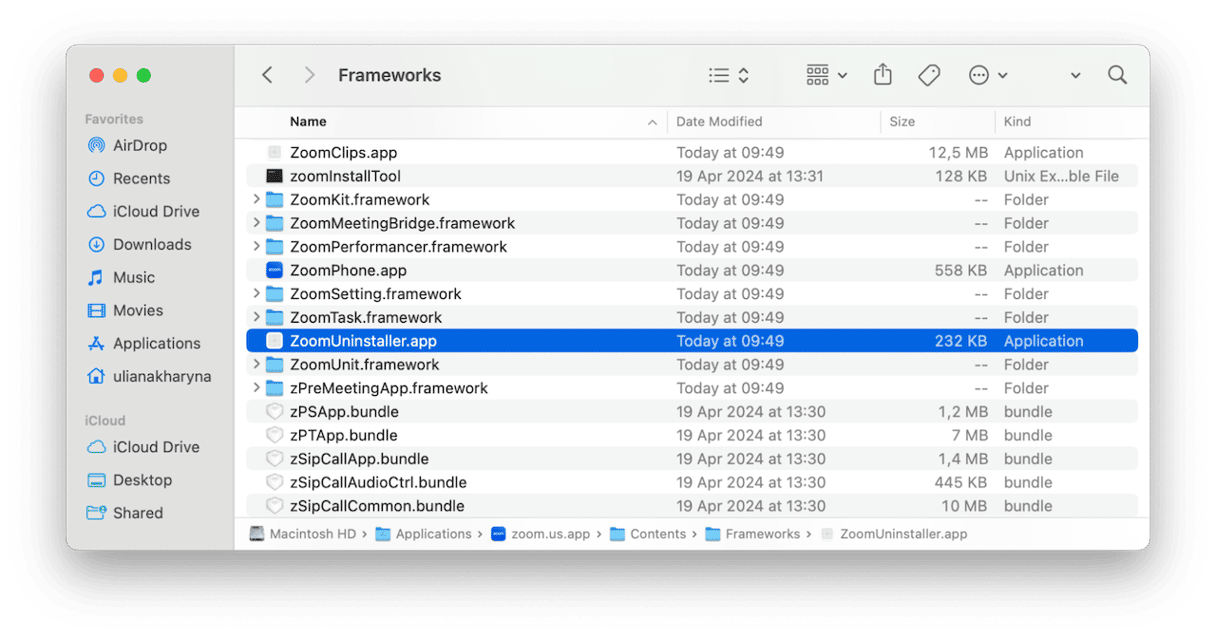
If Zoom doesn’t uninstall at step 2 above, follow the steps below to manually uninstall it:
- Go to your Applications folder and right-click or Control-click on the Zoom application icon.
- Choose Show Package Contents.
- In the Contents folder, open the Frameworks folder.
- Double-click ZoomUninstaller.
- When the uninstall is finished, restart your Mac.
How to uninstall Zoom and other apps easily
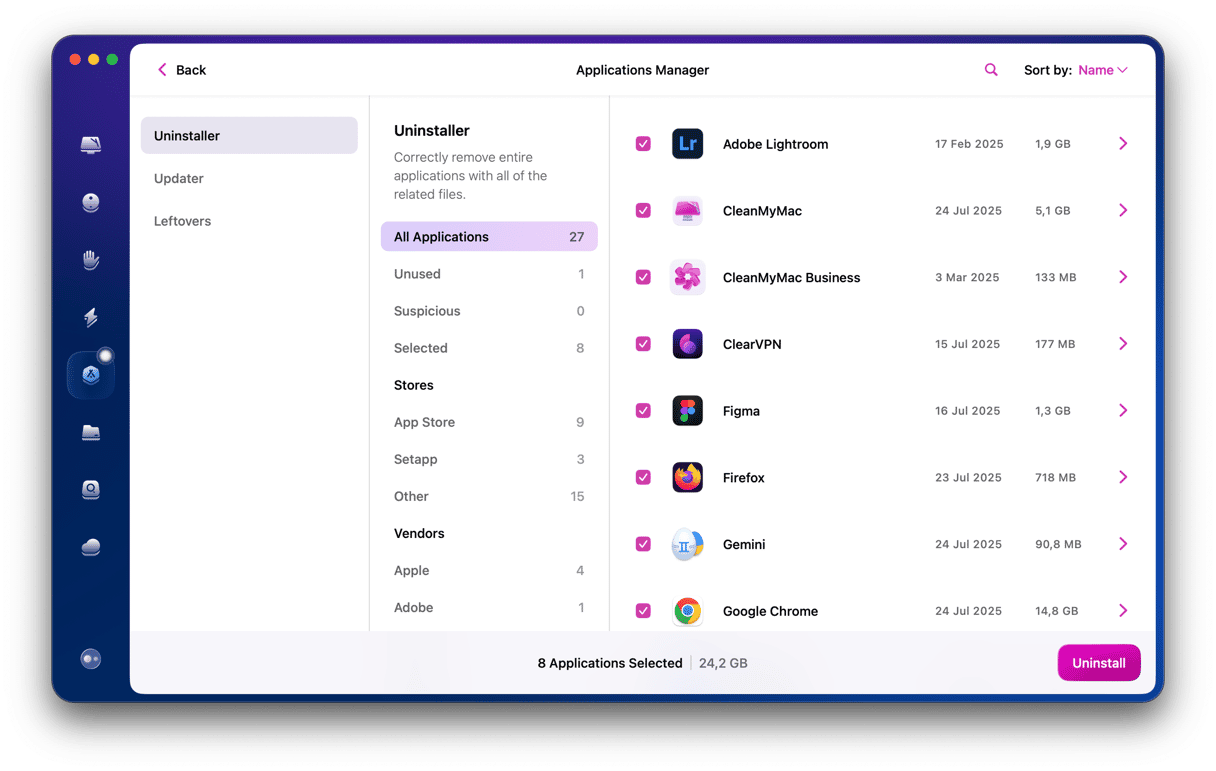
Although Zoom has its own uninstaller, even then, there are a few steps involved in uninstalling it. Most apps, though, don’t come with their own uninstaller, and so getting rid of them completely is very difficult. You can’t just drag the app icon from your Applications folder to the Trash and empty it. That won’t remove all the files it has placed inside your Mac’s Library folders. To get rid of those, you need to track them down and put them in the Trash. Or, you could do it the easy way and use a dedicated uninstaller tool like CleanMyMac. The Uninstaller module in CleanMyMac does all the detective work for you, hunting down all those files. All you have to do is choose which app you want to uninstall and click Uninstall. You can use it to uninstall multiple apps at the same time, get rid of files left behind by apps that weren’t uninstalled properly, and reset apps that are misbehaving.
4. Check your settings
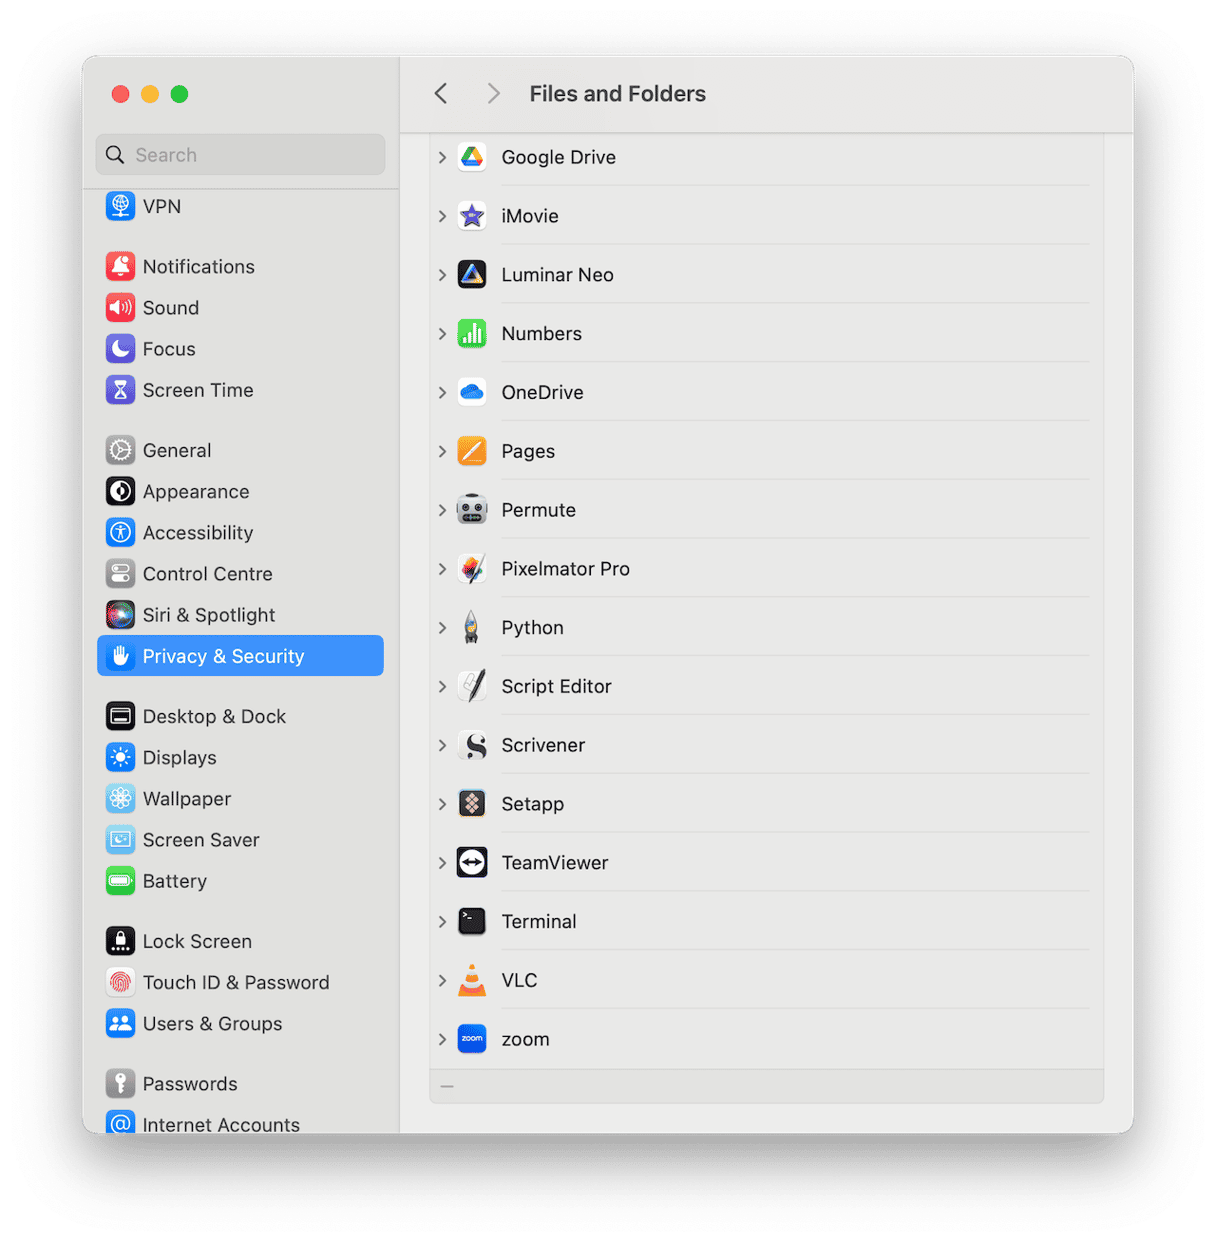
Another important step is to check your settings if Zoom still won’t update or if you can’t reinstall it. Here’s how:
- Click the Apple menu and choose System Settings.
- Select Privacy & Security.
- Choose Full Disk Access and then click the Zoom installer.
- Now, choose Files & Folders and select the installer file.
- Quit System Settings and try to install Zoom again.
5. Update macOS
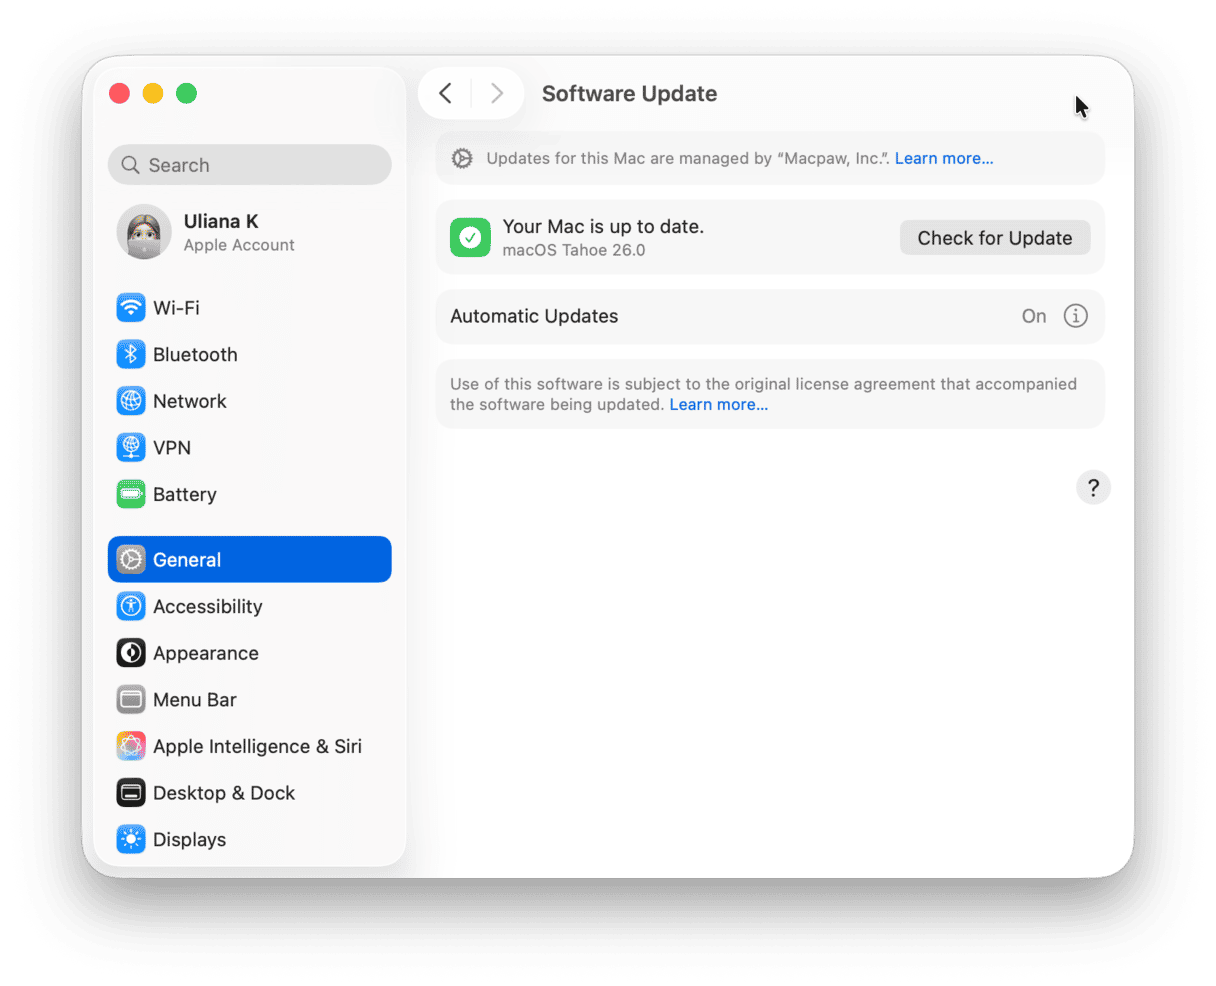
If reinstalling Zoom doesn’t doesn’t fix the problem, it could be a bug or flaw in macOS that has been fixed in a recent update. So, the solution is to check for updates and install any that are available:
- Go to System Settings > General > Software Update and wait for it to check whether there is an update available.
- If there is, follow the instructions on the screen to install it.
6. Restart in safe mode
Safe mode loads only those extensions necessary for your Mac to boot. On Macs with Apple silicon, it also performs checks on your startup disk and fixes problems it finds. If nothing else has worked, try restarting your Mac in safe mode and updating Zoom from this boot. Then, restart your Mac normally. The steps for restarting in safe mode are different for Apple Silicon and Intel-based Macs. Check out this article and see the instructions for your Mac.
Zoom is usually very reliable, and, most of the time, it will work without a problem. However, occasionally you might run into errors, and it’s good to know how to fix them, so you don’t miss that important meeting. If you see the error code 10004 on your Mac, it could have several different causes, either on your Mac or on Zoom’s servers. Follow the steps above to identify the cause and fix it. Hopefully, you can now update Zoom and start using it again.


