Recording your iPhone screen is a useful feature for many reasons — you may want to create tutorials, save conversations, or share your gameplay with friends. But, like other videos, screen recording on iPhone can quickly fill up your device’s hard drive and slow down its performance considerably if you don’t take the steps to properly manage it.
Fortunately, you’re in luck. In this article, I’ll show you not just how to screen record but also answer questions like how long can you record on iPhone and how to manage your recorded videos and free up space on your device.
How to screen record on iPhone
If you’ve never recorded your iPhone screen, don’t worry! It’s incredibly easy and, as you read earlier, it’s really helpful in various situations. Whether you’re trying to capture a funny moment to share or want to create a tutorial for others, knowing how to screen record on your iPhone is an incredibly useful skill to know.
When you’re ready to start recording, just follow these steps:
- Swipe down from the top-right corner of the screen (on iPhone X and later) or up from the bottom of the screen (on older models) to open Control Center.
- Tap the Screen Recording icon — it’s the circle with the dot in the middle.
- Wait for the three-second countdown to start recording.
- When you’re finished recording, tap the red status bar at the top of the screen.
- Then, tap Stop to confirm.
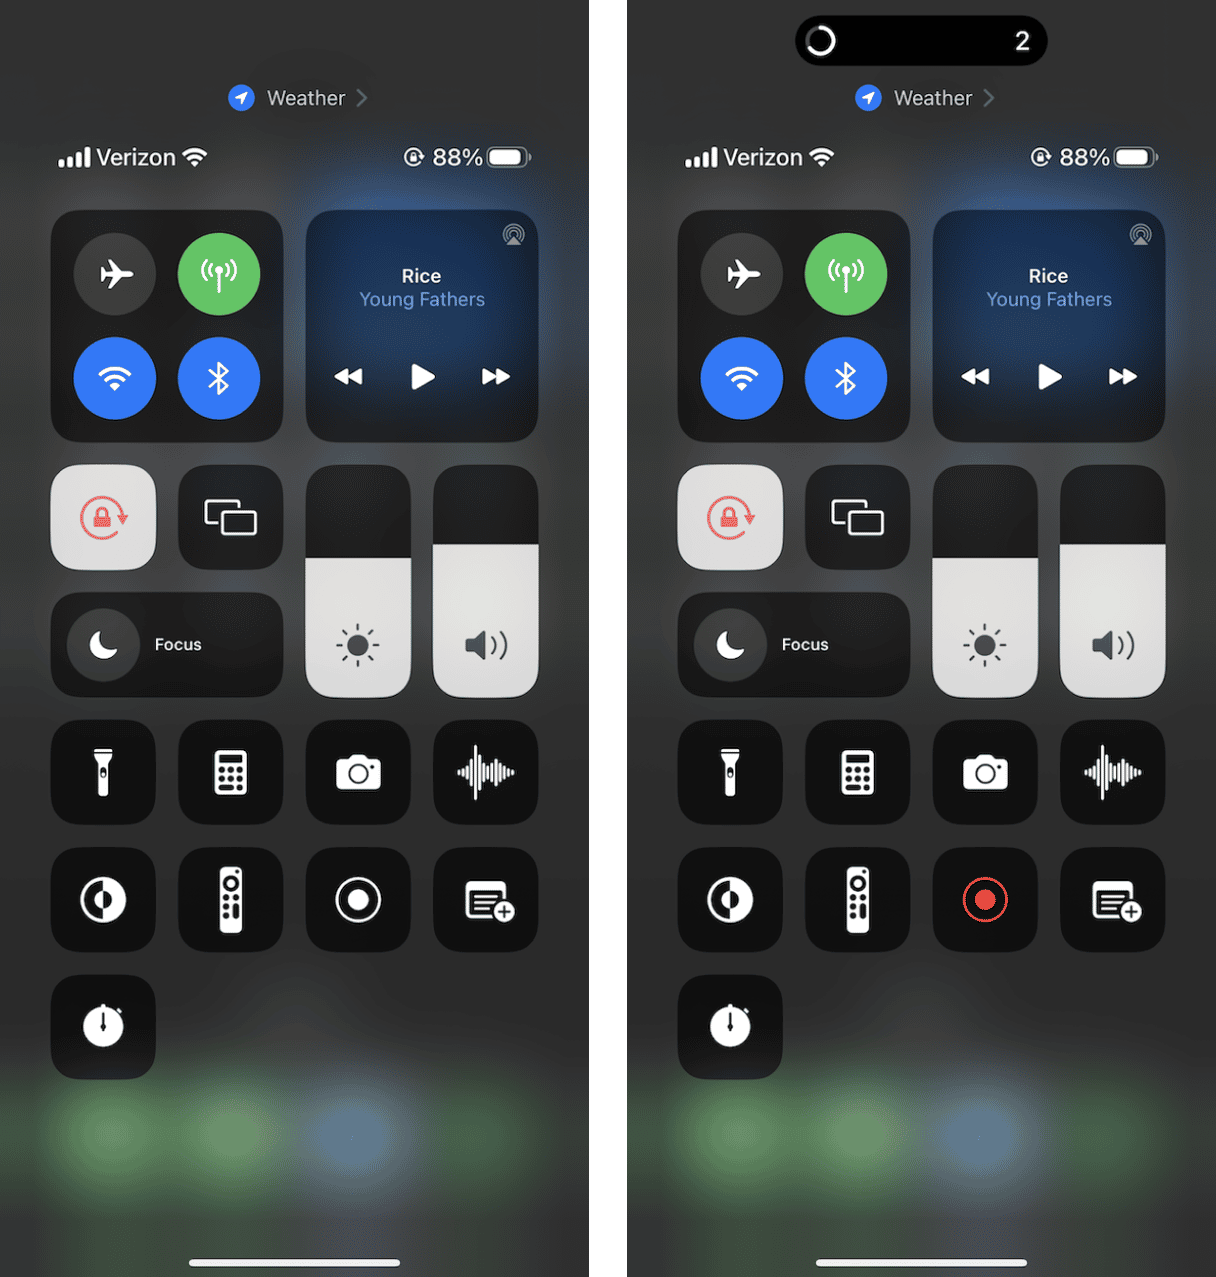
Your iPhone will save the screen recording video to the Photos app, where you can access it and edit or share it with others.
How to edit your screen recordings on iPhone
Once you’ve captured a screen recording on your iPhone, there’s a good chance you’ll want to edit it. Or maybe just trim the beginning and end of the video. Thankfully, you can use the Photos app to make simple edits of your screen recordings. Here’s how to do it:
- Open the Photos app.
- Select your video to preview it.
- Tap Edit.
- Drag the yellow handles at either end of the timeline to select the portion you want to keep.
- Then, tap the Trim button to save your changes.
- Go ahead and make any other edits and then tap Save.
That’s it! In just a few simple taps, you have yourself trimmed and annotated screen recording made entirely on your iPhone. The video editing functions in the Photos app are relatively basic, but it’s perfect for when you just need to make quick edits to your videos.
Now, if you’re looking for more advanced editing features, you can always use a third-party video editing app. Just browse the App Store for the top iOS video editing apps.
How long can you screen record on iPad or iPhone
On your iPad or iPhone, you can screen record for up to three hours continuously, depending on your device’s storage capacity and battery life. However, keep in mind that longer recordings will take up more space on your device, and the battery may drain faster. If you plan on recording for an extended period, make sure your device is fully charged or plugged in to avoid running out of battery.
How to manage your screen recording videos
Once you see just how easy it is to screen record on your iPhone, it’s highly likely you’ll start using them for everything. The only downside to that is how much space they’ll accumulate on your device. Here are some tips for managing your screen recording videos:
1. Use the Photos app to edit or trim your videos
You just read above about how to edit and trim your videos, but really trimming them back with the Photos app is a great way to keep just the essential parts of your video. It will save storage space on your phone — every little bit adds up.
2. Use the Files app to move or delete your videos
Another great way to make sure you’re not wasting your iPhone’s precious storage is to not save your screen recordings on the device itself. You can move your videos out of the Photos app onto a cloud storage app like Google Drive or Dropbox. Actually moving the videos can be done through those respective apps or the Files app.
How to free up space on iPhone
As with anything else on your iPhone, like pictures or documents, you’ll eventually find that all of your screen recordings will start adding up and using all of your storage. Although, the reality is you will probably not notice until your device runs out of space or starts having performance issues. That’s why it’s always a good idea to get in the habit of regularly checking to see what you can clean up.
In addition to decluttering your screen recordings, here are some tips to help you free up space:
1. Offload unused apps
Offloading an app gets rid of the app itself but saves any associated files on your device. These ancillary files are typically very small, so it’s not an issue to save them in case you decide you want to use the app again in the future. To offload an app you’re no longer using, all you have to do is:
- Open Settings.
- Tap General > iPhone Storage.
- Select the app.
- Then, tap Offload App.
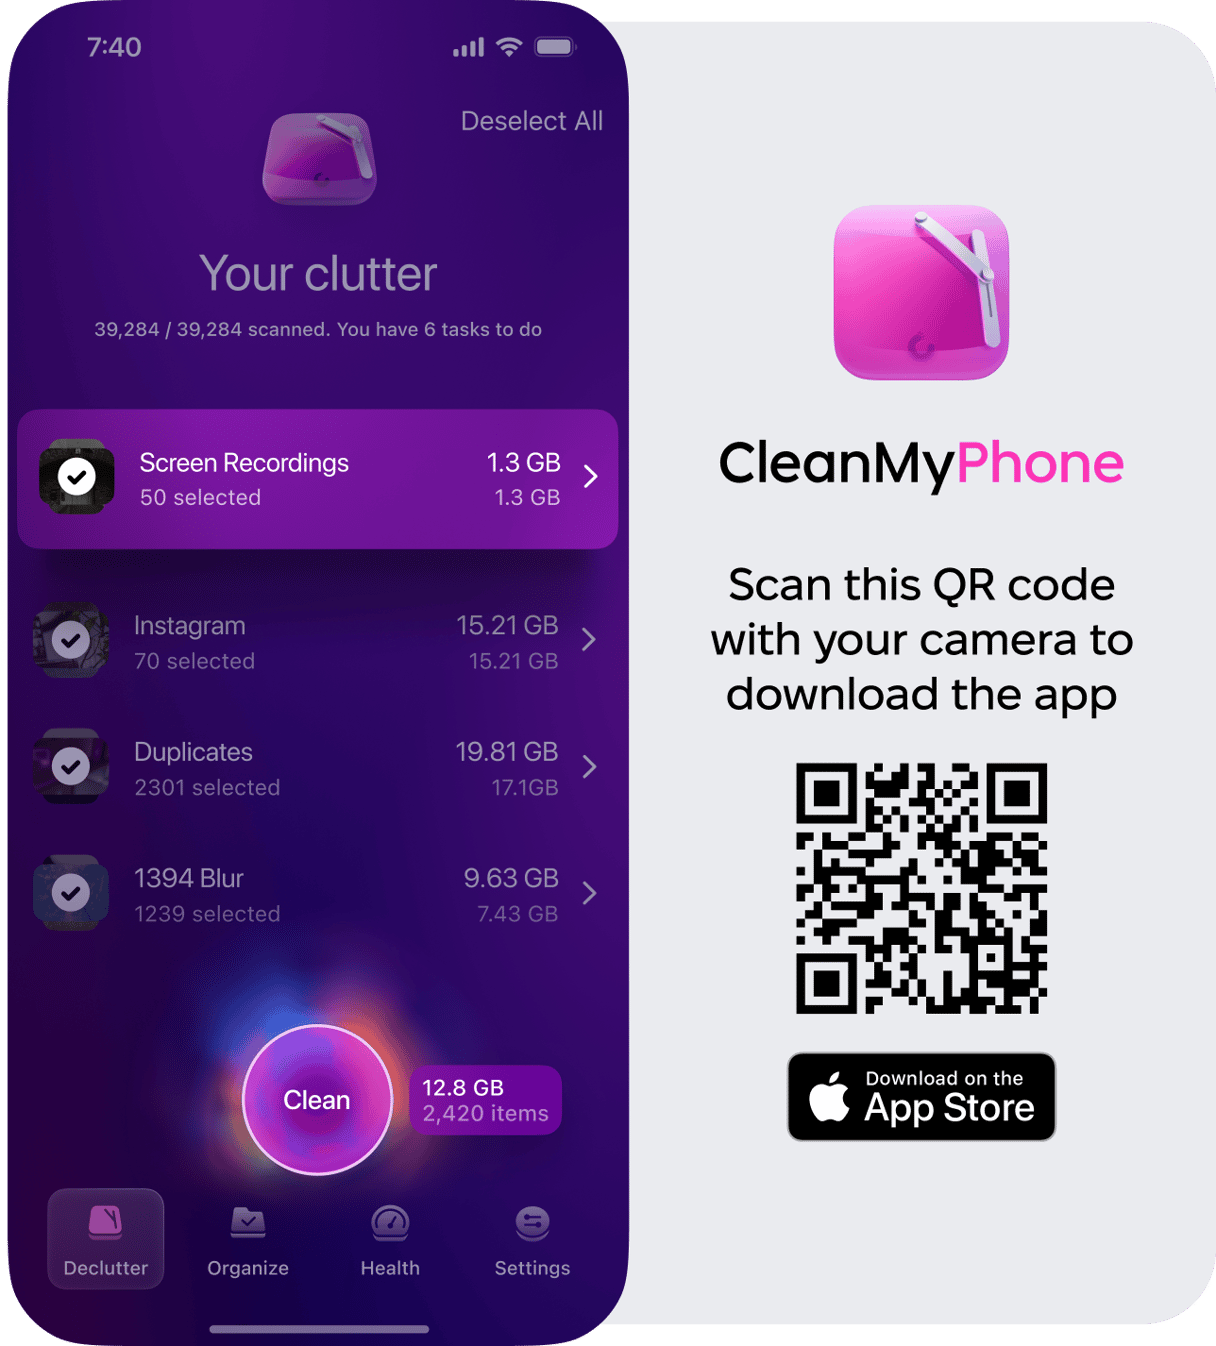
2. Use CleanMy®Phone to declutter your iPhone storage
Sometimes, it might take a couple of tries to get your screen recording just right. That can lead to having a ton of similar videos and photos on your phone. The good news is CleanMy®Phone can help you quickly scan and remove duplicates and other clutter on your phone.
2. Delete old messages
Messages are often an overlooked source of wasted storage on your iPhone. Thankfully, iOS makes it easy to delete messages and attachments in bulk. Just go to Settings > General > iPhone Storage > Messages and review the messages and attachments you want to delete.
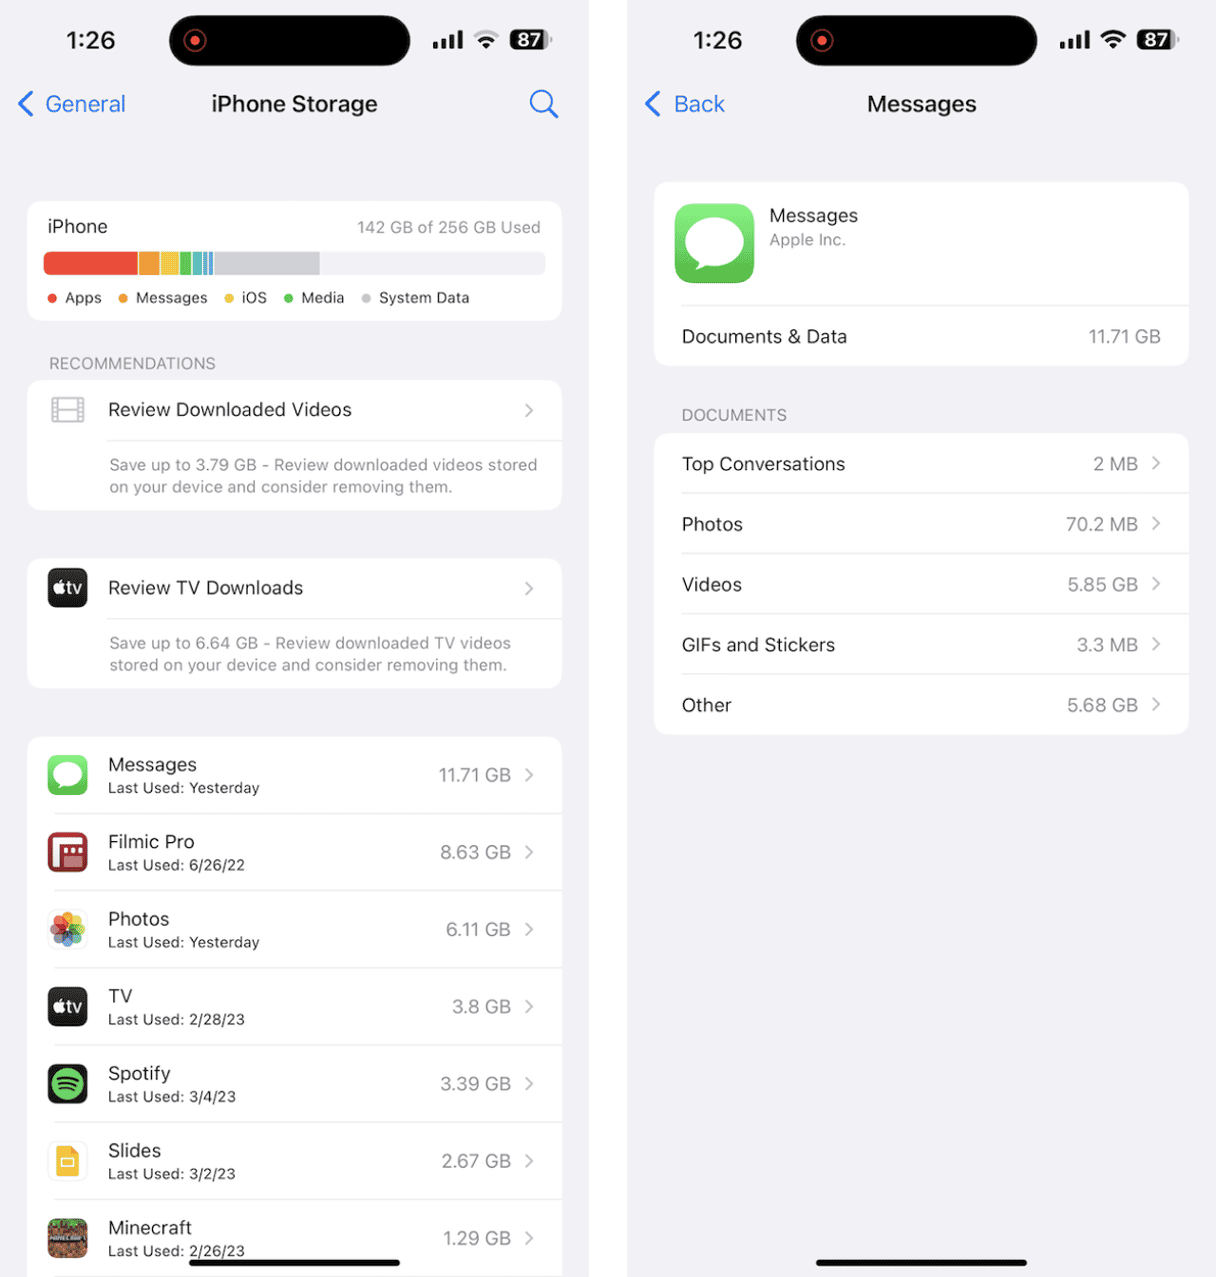
You can also set your messages to autodelete after a certain period of time, such as 30 days.
3. Manage media storage
Media of all types, like pictures, music, and videos, tend to take up quite a bit of space. But iOS offers a few space-saving features like optimizing your iCloud Photo Library or reviewing your download videos. To see what features you can take advantage of, just go to Settings > General > iPhone Storage.
Screen recording with your iPhone is an easy and a really useful way to share what you’re doing on your device with people. It’s like they say, it’s better to show and not tell. With that in mind, it’s incredibly important to manage the videos you’re creating. You should regularly check your device’s storage and free up space as needed. Hopefully, you’re feeling confident after reading this article to follow the steps and keep your iPhone organized and optimized.


