macOS Sequoia looks set to be the best version of macOS yet. But for those of us who are excited to install it, the wait until the final version ships is just far too long. Thankfully, you don’t have to wait until then. There is an alternative — install the beta. Once you’ve installed the beta version of Sequoia, you’ll be able to use it as your main OS and check out most of the new features. In this article, we’ll show you how to install the macOS Sequoia beta.
Which macOS Sequoia beta should I install?
Good question. There are two options. There’s a developer beta that was released shortly after WWDC earlier in the summer and a public beta launched several weeks later. It used to be that you had to be a registered Apple developer and pay the $99/year fee to download and install developer betas. However, that’s no longer the case. All you need to do to install both the developer beta and the public beta is to register for Apple’s Beta Software Program, which is free. You can sign up here. Once you’ve signed up with your Apple ID, you can follow the steps below to install the macOS Sequoia beta.
Before you install macOS Sequoia
There are a couple of things to note before you go ahead and install the beta. The first is that it’s beta software, so it may be buggy. The whole reason for a beta program is that Apple can test and refine Sequoia ahead of its full release. The second thing is that some features, such as Apple Intelligence, won’t be available at launch, and so won’t be in the beta.
Finally, before you do anything else, make a complete backup of your Mac. It’s best to use Time Machine for that because it makes it much easier to restore from a backup if you need to.
How to install macOS Sequoia developer beta
- Once you’ve signed up for the Beta Software Program, enroll your Mac for beta updates here.
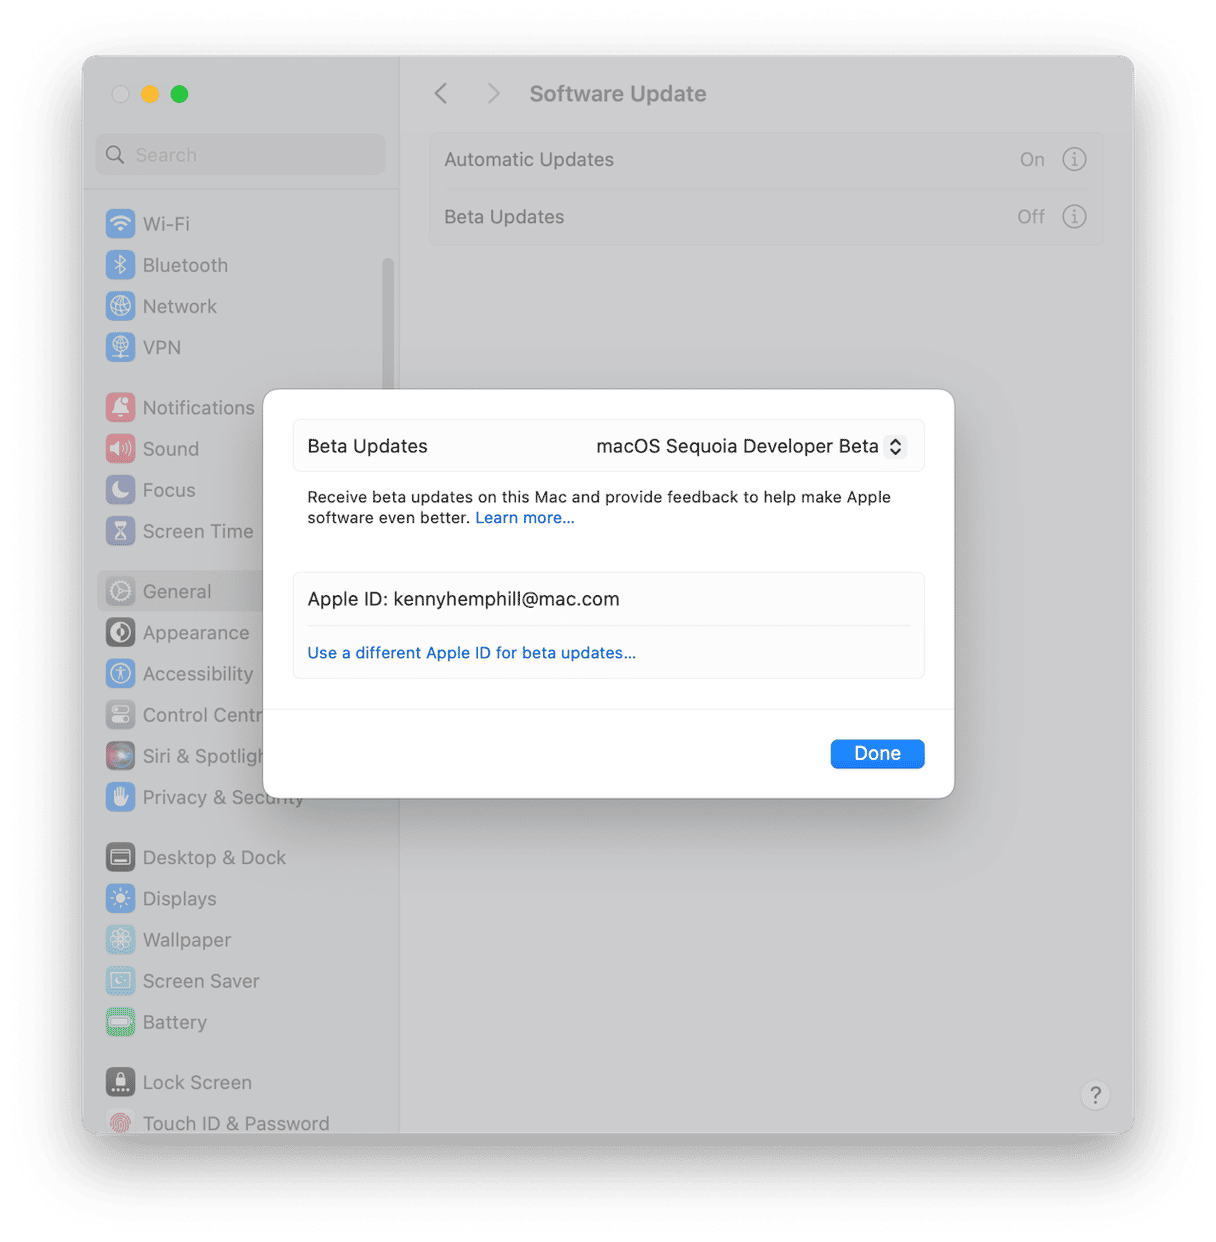
- If your Mac is currently running macOS Ventura 13.4 or later, go to System Settings and choose General > Software Update. If your Mac is running a version of macOS older than Ventura 13.4, you will need to download the macOS Beta Access Utility and open that.
- In Software Update, click the ‘i’ next to Beta updates and choose macOS Sequoia developer beta.
- Click Update Now.

How to install macOS Sequoia public beta
The process for installing the macOS Sequoia public beta is the same as that for installing the developer, except that when you click the ‘i’ next to Beta, you should choose macOS Sequoia public beta. If that option is not available, it means that the macos sequoia beta Download is not available yet.
How to roll back to macOS Sonoma
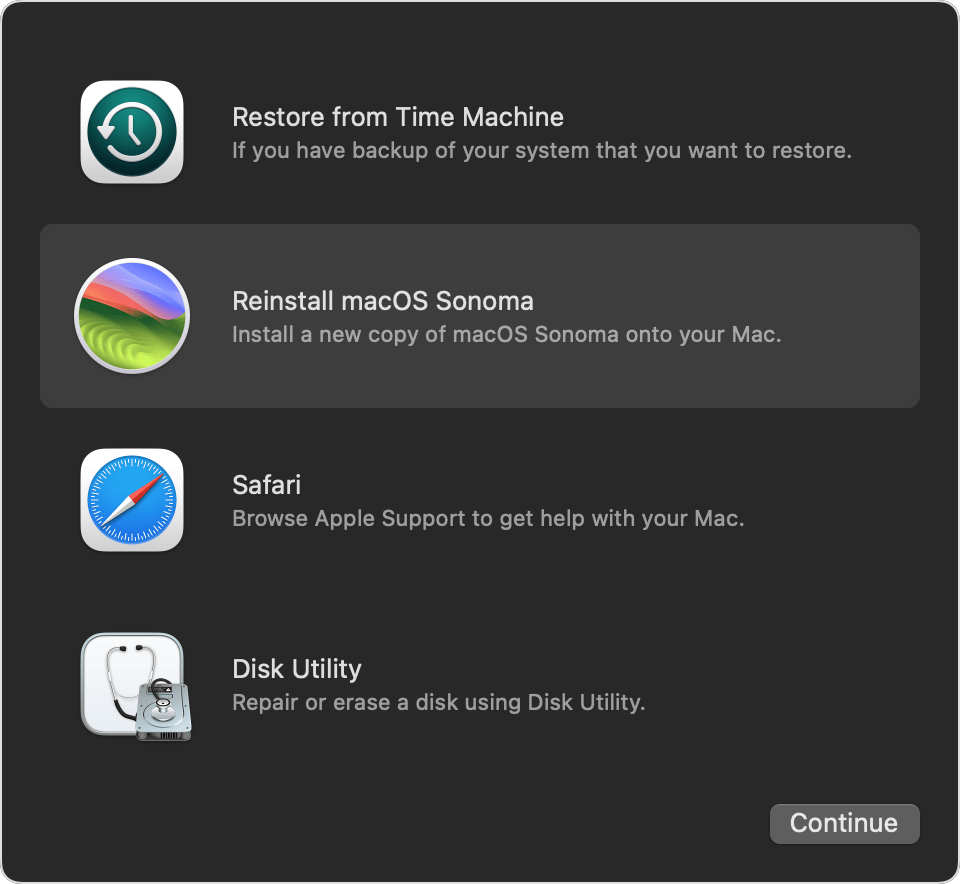
There are a couple of different ways to roll back to macOS Sonoma. By far, the simplest is to restore a Time Machine backup. So, again, if you haven’t upgraded yet but are about to, make a backup using Time Machine.
Mac with Apple silicon
- Connect the Time Machine backup disk to your Mac.
- Shut down your Mac.
- Press and hold the power button until you see the startup options screen.
- Click Options > Continue and type in your username and password when asked.
- Choose Restore from Time Machine Backup in macOS Utilities.
- Select your Time Machine backup disk as the restore source.
- Select the most recent backup before you installed Sequoia.
- Click Restore.
Intel-based Mac
You can reinstall the version of macOS that shipped with your Mac or the latest version that’s compatible with your Mac. The second option will install the latest version of Sonoma.
- Shut down your Mac.
- Use one of the keyboard combinations to restart your Mac in recovery mode:
- To install the version of macOS that shipped with your Mac: Command-Option-Shift-R
- To install the latest version of macOS compatible with your Mac: Command-Option-R
- Release the keys when you see the Apple logo.
- Choose Reinstall macOS.
- Wait for it to reinstall.

If you can’t wait until the full release to try out the latest version of macOS, you can install the macOS Sequoia beta. There are two options. The developer beta was released first, with the public beta following a few weeks later. The developer beta is usually slightly ahead of the public version when it comes to updates. Both can be installed from the Software Update section in System Settings once you’ve signed up for Apple’s Beta Software Program. Follow the steps above to do that, but remember to back up your Mac first.


