Even these days, when it seems almost everything is synced with the cloud, sharing files directly between computers on a network can be very useful. The good news is that you can find the options for sharing files in System Settings. The bad news is that, sometimes, file sharing goes wrong and doesn’t work. Here’s what to do when that happens.
What is file sharing on Mac?
File sharing allows you to share files and folders on your Mac with other Macs or Windows PCs on your network. On older Macs, you can choose whether to enable sharing using Apple’s proprietary file sharing protocol, AFP, or the standard protocol SMB (exclusive for newer Macs). You can also choose whether or not to allow Windows PCs to connect to your Mac.
By default, when you turn on file sharing, the Public user folders for all accounts on your Mac are available for sharing. You can then add more files and folders to make them available for other computers on the network. You can also set permissions for specific users, groups, or everyone and dictate whether they are allowed to read, read and write, or are blocked from accessing files.
If you plan to share all the files on your Mac across a network, you may want to prune the files stored on it first by getting rid of junk files you don’t need. That way, you’re not sharing those junk files over the network. The easiest way to do that is to use CleanMyMac’s Cleanup tool.

It scans your Mac looking for junk and, after the scan, allows you to get rid of it with the click of a button. Cleanup identifies user cache, system cache files, language files, logs, and other files you probably don’t need and don’t want to share. Get started with a free CleanMyMac trial — test the app for 7 days and see how much junk it can find. Just open CleanMyMac and click Cleanup > Scan > Clean. Easy!✅
What to do when Mac file sharing is not working
There are a number of reasons why file sharing might not work. We’ve set out several scenarios below, along with possible fixes.
1. File sharing disabled
Sometimes, it may be that file sharing is simply disabled. Here are two things you can do to fix it.
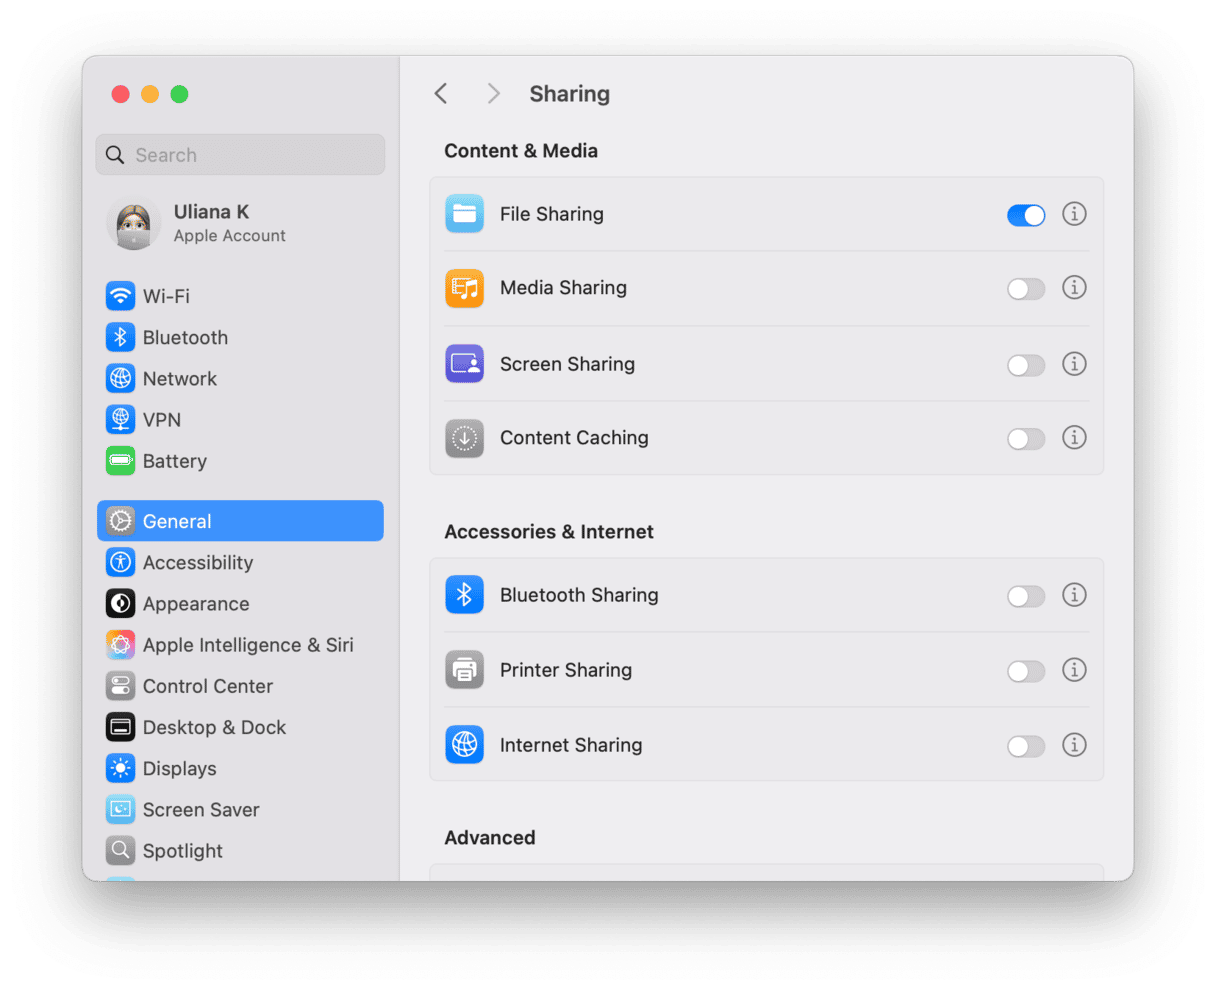
- Turn file sharing off and then on again. It is the first thing you should try. Just go to System Settings > General > Sharing and locate File Sharing on the list. Use the toggle to turn it off and then on again.
- Enable file sharing on Mac with Terminal. Instead of going to System Settings, you can use Terminal to enable file sharing. Open Terminal from Applications > Utilities and run these two commands:
sudo launchctl load -w /System/Library/LaunchDaemons/com.apple.smbd.plistsudo defaults write /Library/Preferences/SystemConfiguration/com.apple.smb.server.plist EnabledServices -array disk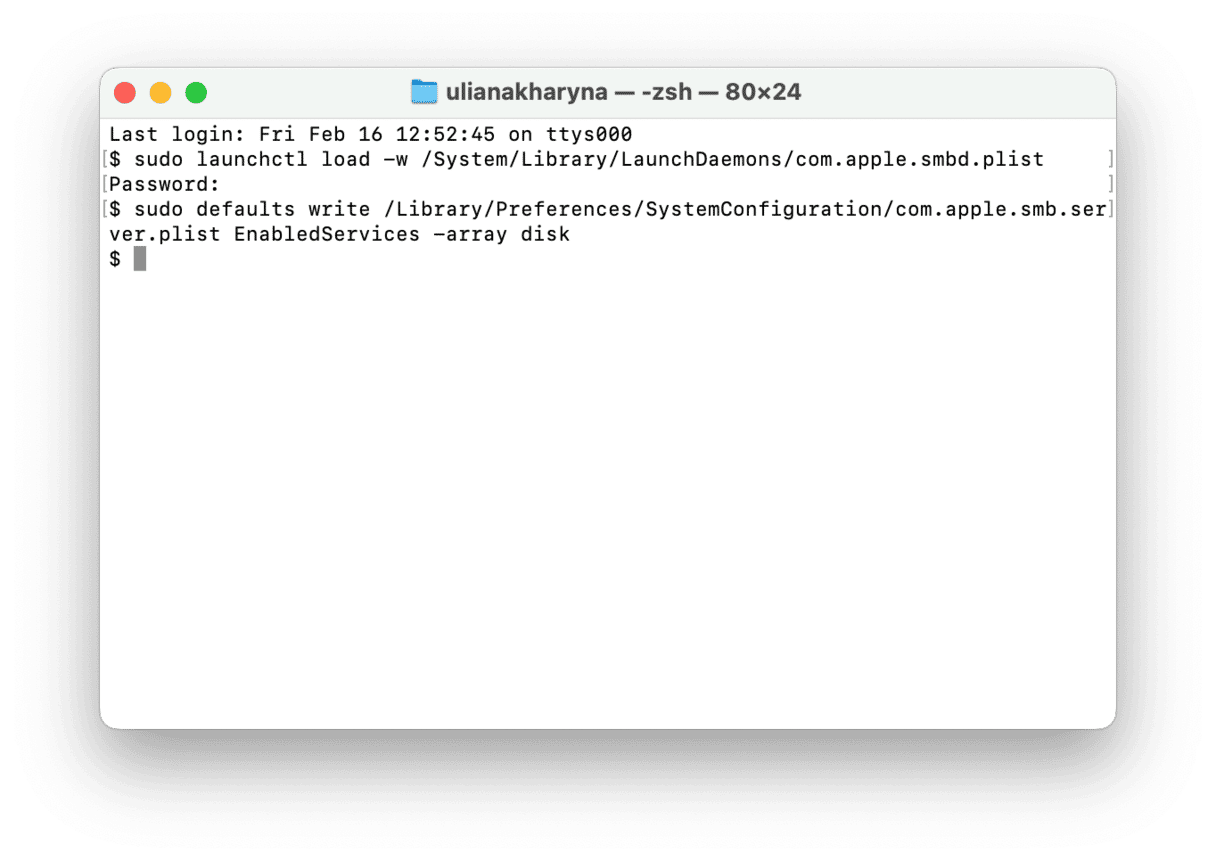


If you now go to System Settings > General > Sharing, you should see that File Sharing is enabled.
Note that you will have to disable it via Terminal when you no longer need it enabled. Here is the command you will need to run to turn off file sharing:
sudo launchctl unload -w /System/Library/LaunchDaemons/com.apple.smbd.plist
2. Shared folder or server doesn’t appear in the Finder
If you expect a server or Mac you’re connected to to appear in the sidebar of a Finder window, and it doesn’t, do the following:
- Open the Finder.
- Choose the Finder menu, then Settings.
- Select sidebar.
- Make sure Bonjour computers and Connected servers are checked.
- If you want to see a server you’re connected to appear on the desktop, click General and choose Connected servers.

3. You can’t log in to a shared computer
You will need to speak to the administrator and ask them to check that you can be given access to the computer and the files and folders you want to access. If you are the administrator, do the following.
- Open System Settings and select General > Sharing.
- Make sure File Sharing is turned on.
- Now, click the i icon.
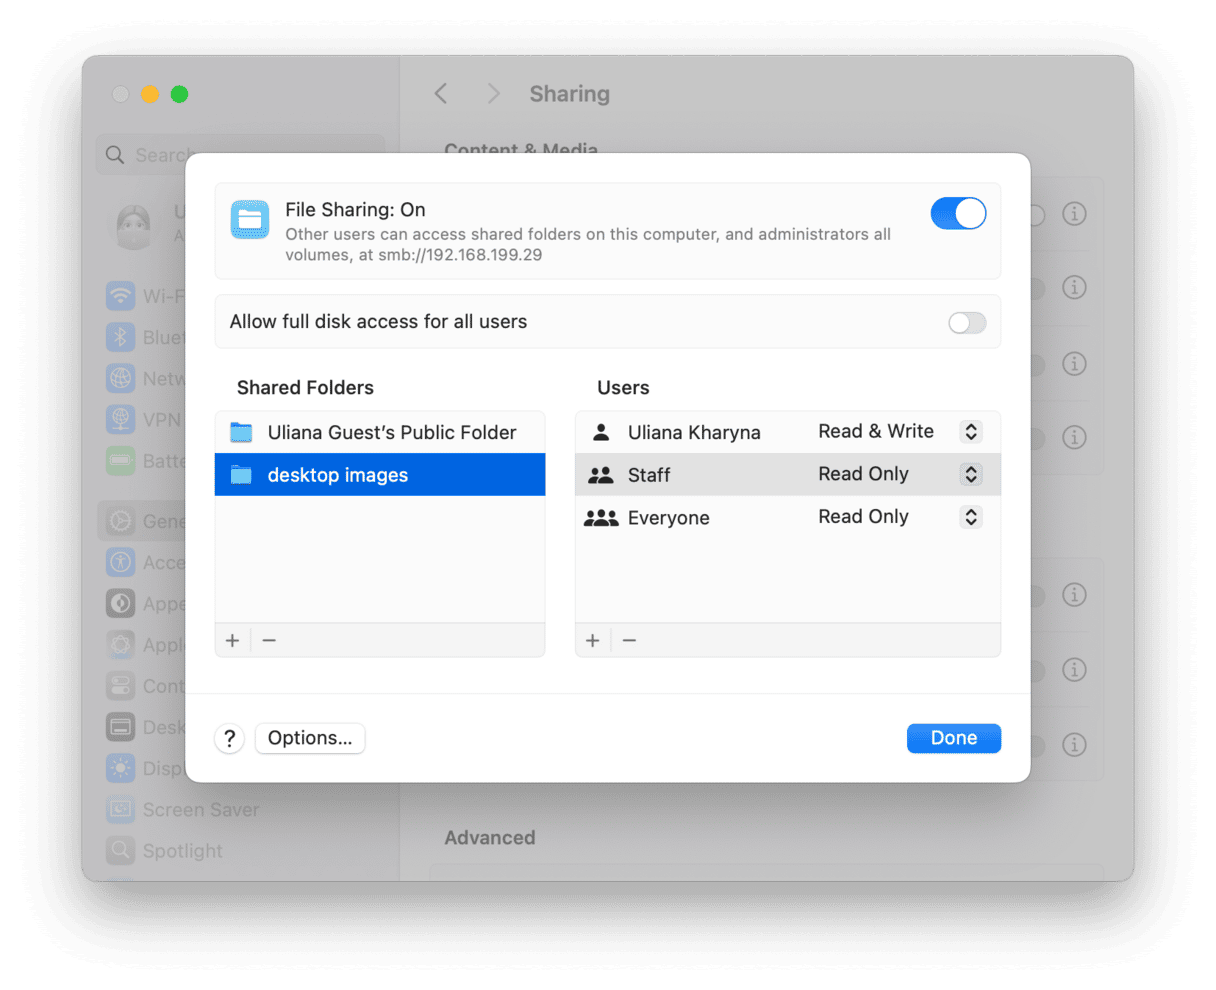
- Ensure the folder you want to access is in the list of shared folders. If not, click the ‘+’ and add it.
- Is your username listed under Users? If not, click ‘+’ and add it, then type in a password.

4. You’re denied permission to access a folder
As we explained above, file sharing on the Mac is built on Unix, which uses a system of permissions. If you can’t access the file or folder you need, it’s likely a permissions issue. Files in a shared folder don’t automatically inherit the same permissions as the folder. To apply permissions granted to a folder to all the files in it, right-click on the folder in System Settings > General > Sharing > File Sharing and choose ‘Apply Permissions to Enclosed Items.’ Confirm the action.

To set permissions for a shared folder, select it in the ‘Shared Folders’ panel in the File Sharing pane of System Settings, then click your username in the right panel and click the arrows to choose permissions.
If you’re trying to connect from a Windows PC, click Options in the main Sharing window, select the account’s name that houses the file or folder you want to share, and click Done.
File sharing on Mac is a handy tool if you have multiple Macs or Macs and PCs on a network. Most of the time, once it’s set up, it just works. Occasionally, however, it goes wrong, and you either can’t connect to a Mac on the network or can’t access the folder you need. If that happens to you, follow the steps above, and file sharing will be working properly again in no time.