It can be very frustrating if you watch the announcement of a new version of macOS and get excited about all the new features and then discover that it’s not supported to run on your Mac. Apple has been pretty good over the years of making sure that Macs that are several years old can still run the latest version of macOS. But in recent years, several Macs from the mid-2010s have dropped off the list of those that are supported to run Ventura and Sonoma. It’s worth noting that being ‘unsupported’ doesn’t necessarily mean your Mac is not capable of running Sonoma. It just means that you can’t install and update it in the usual way and that it is likely to have problems if you do. In this article, we’ll show you how to install Sonoma on an unsupported Mac.

Should you install Sonoma on an unsupported Mac?
That’s a question you will have to answer for yourself. Apple clearly doesn’t recommend it, having tested Sonoma on a wide range of Macs. It’s possible that it will cause your Mac to run very slowly, crash, or even fail to boot. It could even shorten battery life on a MacBook Pro or Air and possibly cause it to overheat. All we can do is show you how it’s possible and let you make up your own mind about whether you go ahead. This article shouldn’t be taken as a recommendation to proceed. If you are going to go ahead, don’t do it on a Mac you need for work or rely on for anything else. Treat it as an experiment and a bit of fun.
Prevent Mac issues before you upgrade
Any Mac, not just an unsupported one, can run into problems when running macOS Sonoma or any other version of macOS. The best way to minimize problems is to regularly maintain your Mac. This includes reindexing Spotlight, repairing disk permissions, and flushing DNS cache, to name just a few tasks. Doing all that manually yourself would be time-consuming and, well, not much fun. Let’s face it, even with the best intentions, you’d give up after a while.
Fortunately, you don’t have to do it manually — CleanMyMac’s Performance tool can do it for you. And as well as running the tasks above, it can also help you manage login items and background processes. Get your free CleanMyMac trial — once installed, follow these steps to maintain your Mac:
- Open CleanMyMac.
- From the sidebar, click Performance > Scan > Run Tasks.
- If you want to select tasks to perform, click View All Tasks. Also, do not forget to review login items and background items to disable any unnecessary resource hoggers.

How to install Sonoma on an unsupported Mac
Installing macOS Sonoma on an unsupported Mac means you will have to download and install a boot loader called OpenCore Legacy in order to patch your Mac so that Sonoma will install. OpenCore Legacy modifies the Sonoma installer to bypass checks on compatible computers and install drivers. It also includes patches to address some issues that might occur with older machines, and drivers to enable booting on older Macs. You will also need a Mac that’s supported to install Sonoma to download the installer from the App Store.
Now that you’re ready for an experiment, follow these steps:
- Open App Store app on a Mac that is compatible with Sonoma and search for Sonoma. Click Get or click this link to go there directly.
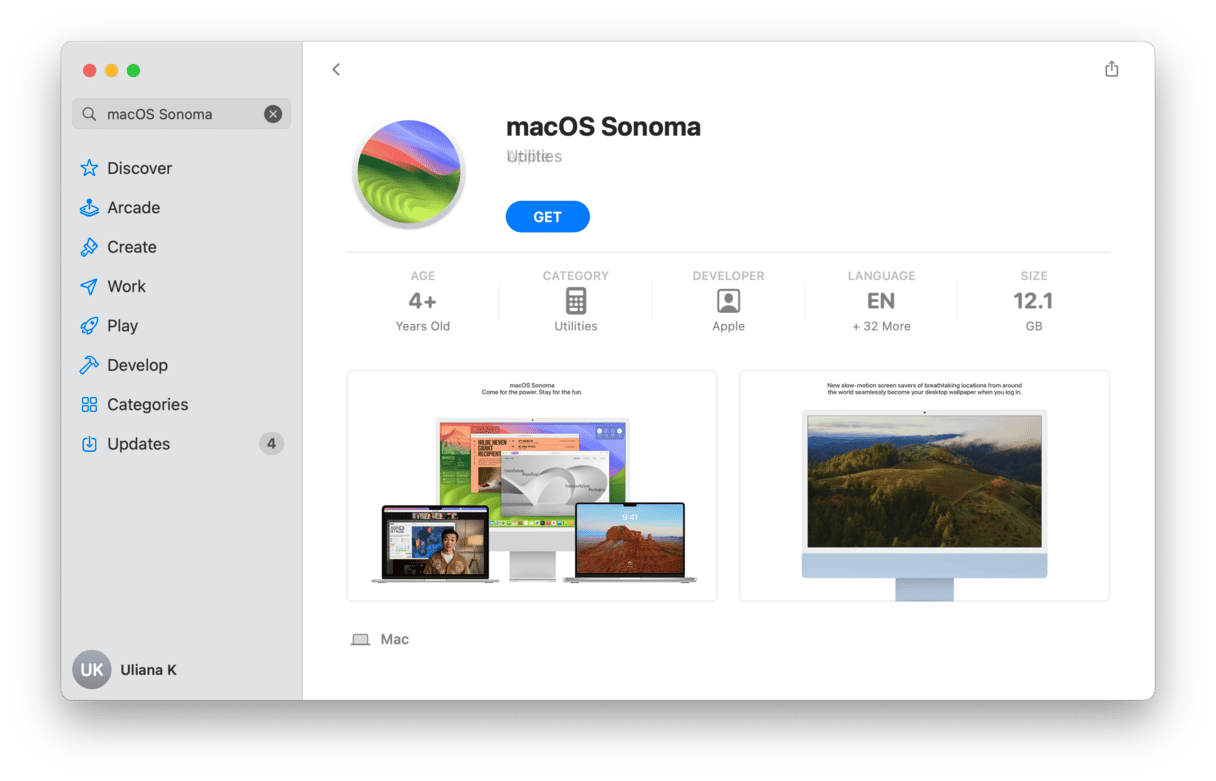
- When Sonoma has downloaded, the installer will launch automatically. Quit it as soon as it does.
- Go to your Applications folder and check that the Sonoma installer is there.
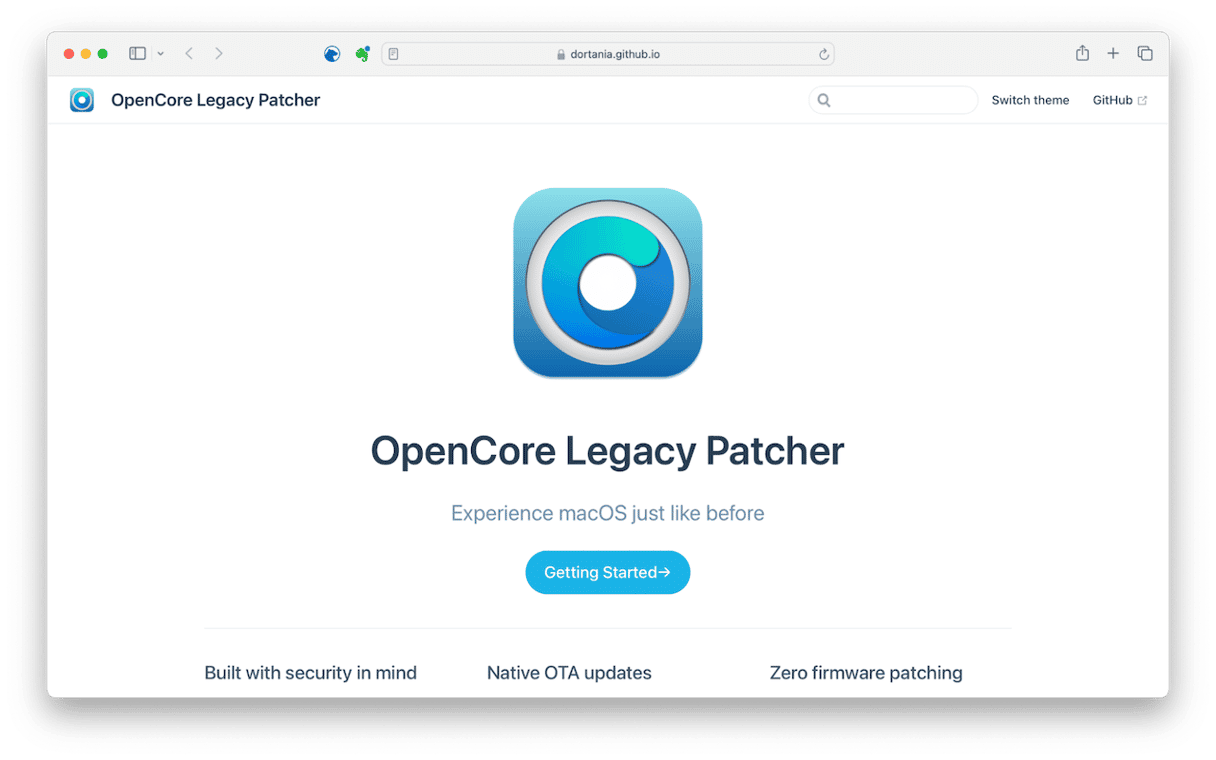
- Go to the OpenCore Legacy page on GitHub and click Getting Started to download the latest version.
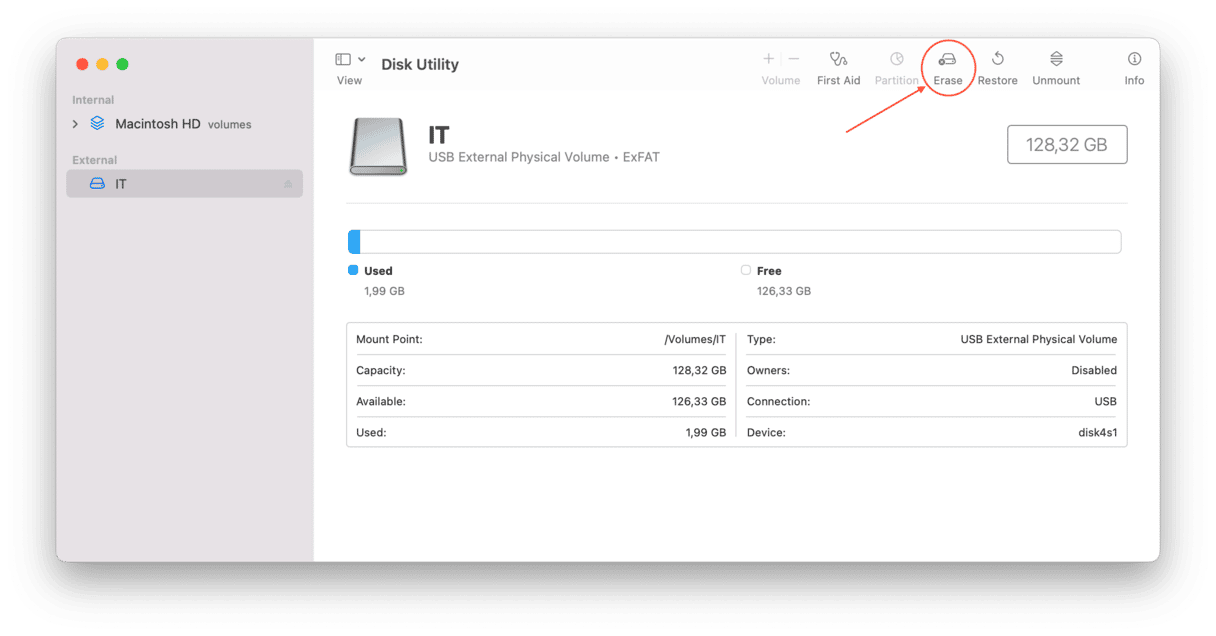
- Grab a USB stick that has a capacity of at least 16GB. Connect it to your Mac, open Disk Utility and erase it.
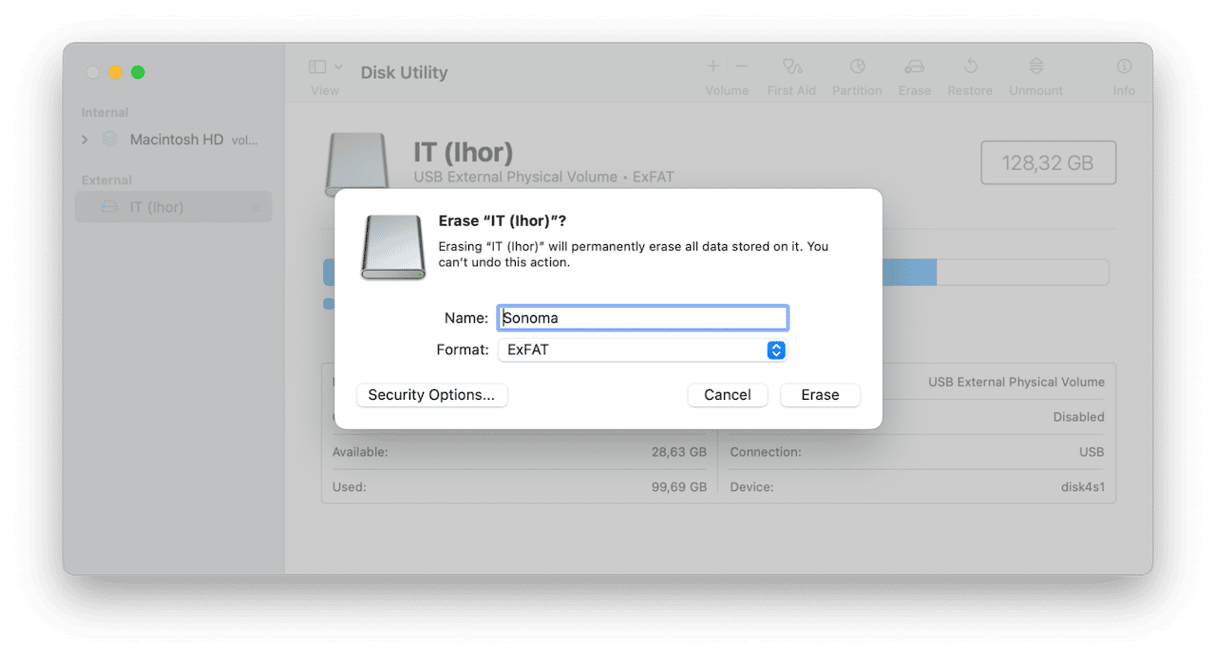
- Format it as MacOS Extended (Journaled) and name it Sonoma.
- Open OpenCore Legacy and choose Build OpenCore. Follow the instructions on the screen to build the OpenCore package for your Mac. If you’re not sure of your specific Mac model, click the Apple menu, and choose About This Mac.
- Once OpenCore Legacy has finished building the OpenCore package for your Mac, go to the Install OpenCore section.
- Follow the instructions on screen to install the package on the USB stick you formatted at step 5. This will use the Sonoma installer you downloaded to create a bootable USB installer.
- When OpenCore Legacy has finished creating the installer, eject the USB stick from the Mac and plug it into the Mac on which you want to install Sonoma.
- Restart the Mac you plugged the USB stick into and hold down the Option key.
- When you see the option to select a startup disk, choose the USB stick with the installer.
- From macOS Utilities, choose Install macOS. Select your Mac’s internal disk and follow the instructions on screen to complete the install.
When your Mac restarts, it will be ready to set up and run Sonoma. Follow the instructions on the screen to create a user account, connect to Wi-Fi, and go through the rest of the process of setting up Sonoma.
Installing Sonoma on an unsupported Mac is not for the faint-hearted. It’s a long and tricky process, involving tools that are not approved by Apple. And even if you manage to install it, there is no guarantee it will run well, or boot at all. However, if you have a Mac that you don’t use for anything else and are game for experimenting, it could be a bit of fun to try and install Sonoma on it using the steps above.


