If your Mac starts running very slowly or grinds to a halt, the problem is usually caused by a rogue application hogging CPU cycles or RAM. However, often it’s not the whole application that’s a problem, just a handful of tasks that are running within it. Those tasks are known as processes, and at any one time, there are dozens running, most of which you’ll be completely unaware of.
Sometimes, fixing a problem with a slow Mac can be as simple as killing the rogue process after you’ve worked out which one is causing the problem. In this article, we’ll show you how to track down and kill those processes.
What is a process?
It’s a task or set of tasks running at OS level or within an application that allows you to do whatever it is you’re trying to do on your Mac. Tasks may be initiated by the macOS, an application running in the background, or you, the user, when you issue a command by making a selection in a menu or dialog box.
Modern Macs with multiple CPU cores can run dozens of processes simultaneously, and it’s rare for any single process to cause your Mac to come to a halt and cause the dreaded spinning beachball to appear, but it’s not unheard of.
How to see processes on your Mac
If you notice your Mac is running slowly, you keep seeing the beachball, or applications keep crashing, the first step is to check Activity Monitor.
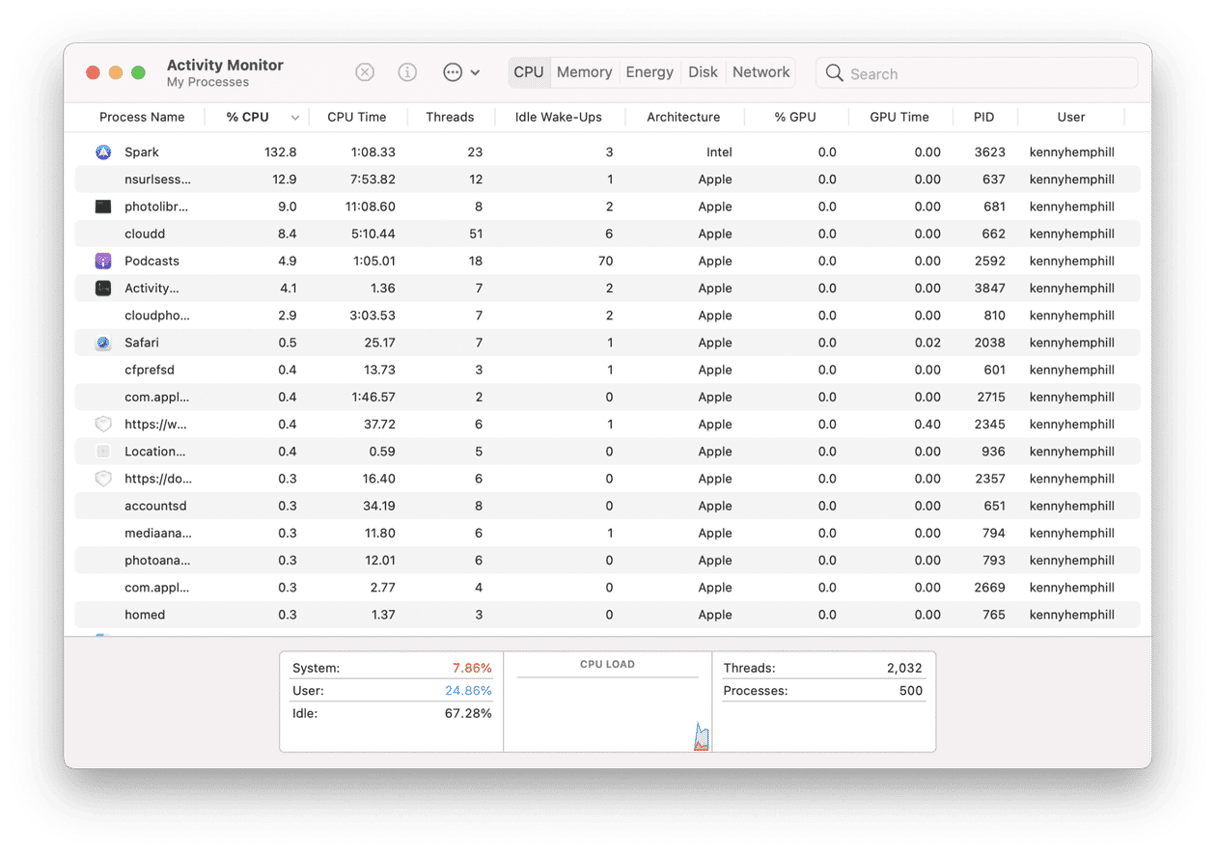
This handy utility displays all the processes currently running on your Mac, along with the CPU cycles, RAM, and other resources they are using, and allows you to quit them. It’s tucked away in the Utilities folder in Applications.
- Go to Applications > Utilities and open Activity Monitor. Processes that cause your Mac to slow down are likely occupying lots of CPU cycles, so click the CPU column header to order processes according to the CPU cycles they are using. If any processes are occupying close to 100%, they are the culprit.
- Select a process that’s using more than its fair share of CPU cycles and click the Quit Process (X) button in the toolbar.
How to kill processes on your Mac using Terminal
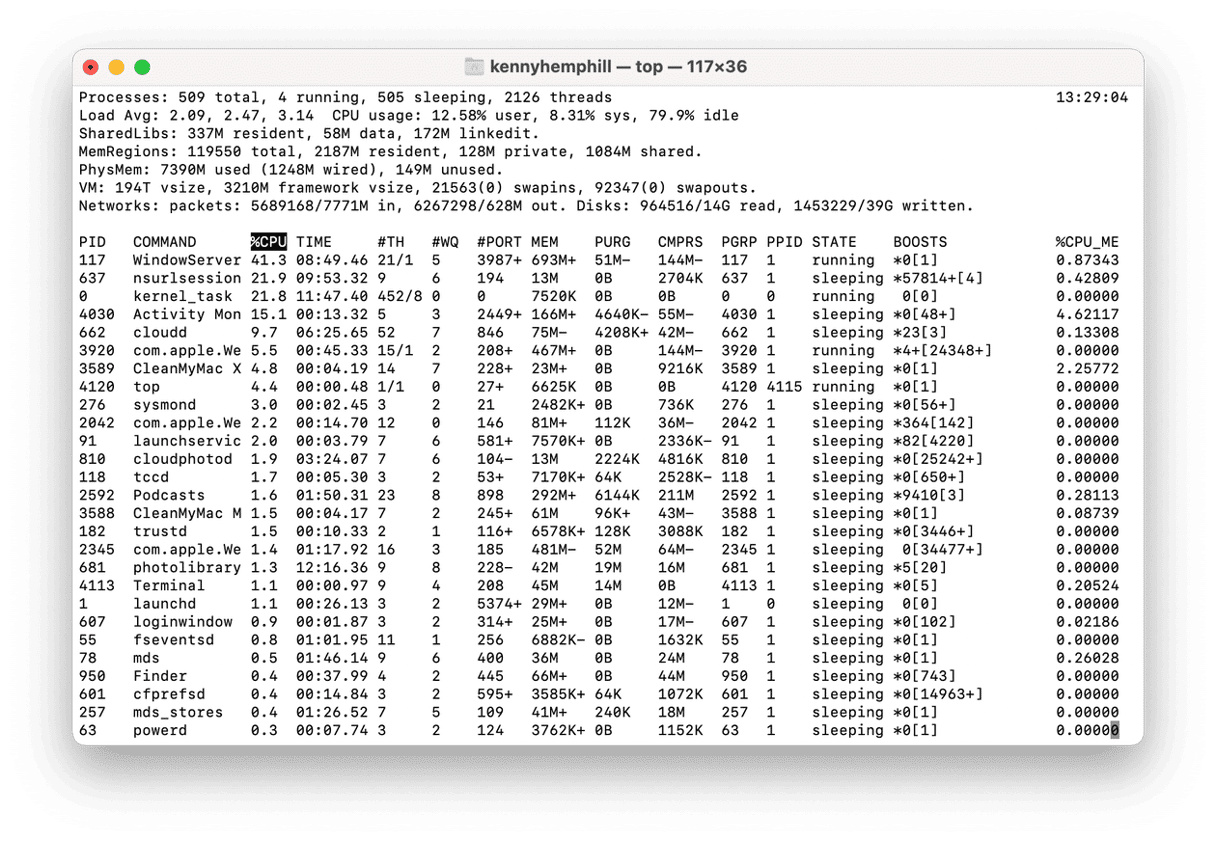
If you don’t want to trawl through Activity Monitor to find processes and quit them one by one, you can quickly use Terminal to end tasks on your Mac. Terminal can be a little daunting if you don’t use it often, but it needn’t be. Just follow the steps below carefully.
- Go to Applications > Utilities and open Terminal.
- Type
topand press Return. - You will see information in the Terminal window that tells you how many processes are currently running and what percentage of available CPU cycles they are using. Below is a list of the processes.
- If you see a process that is clearly using too many CPU cycles, or if you know the name of the process you want to kill, note down its PID.
- Type
kill -9followed by the PID of the process you want to kill and then press Return.
How to force quit an application that’s not responding
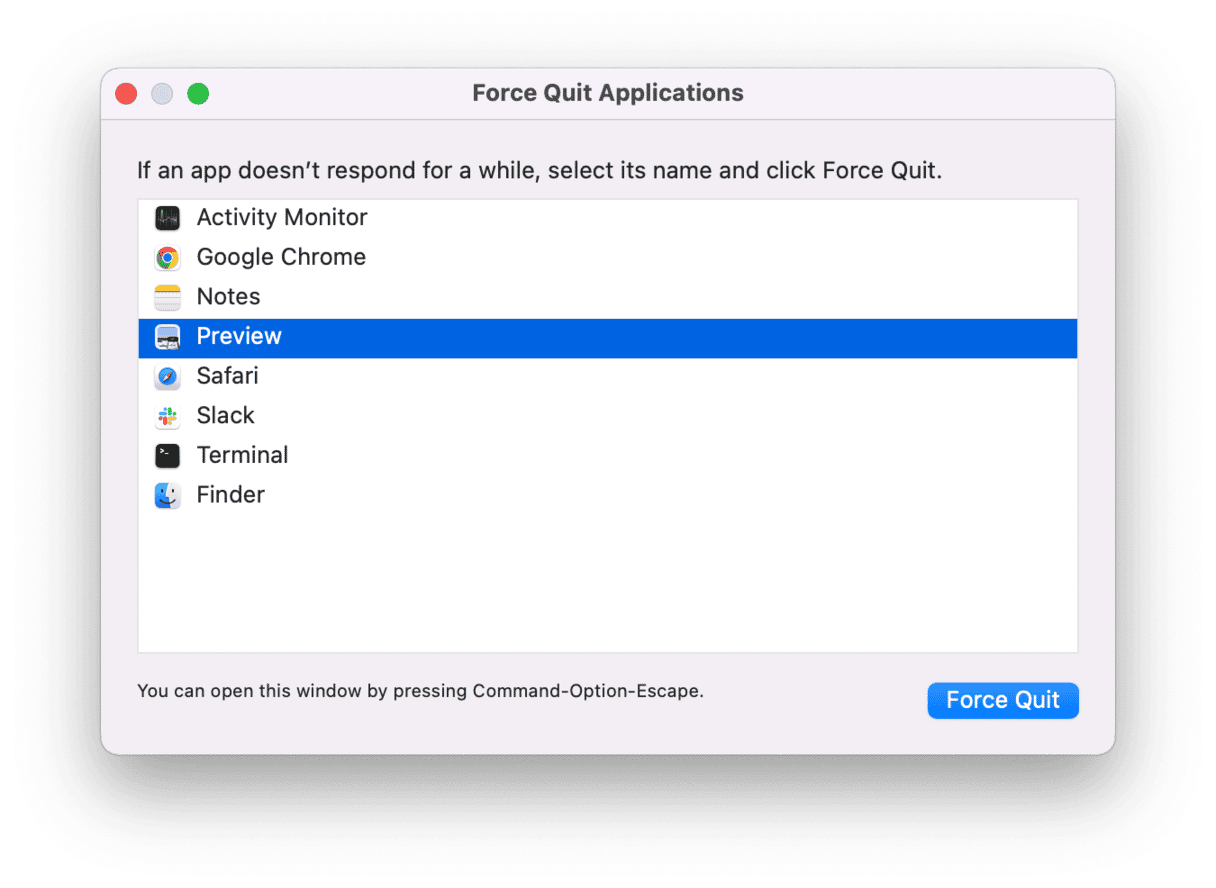
Force quitting an application kills all the processes associated with that application. It works when you can’t quit an app or when the program is completely unresponsive. There are several ways to force quit applications:
- Right-click on the app’s icon in the Dock and choose “Force Quit” — this option only appears when the application is unresponsive and won’t quit in the usual way.
- Press Command-Option-Esc to display the Force Quit menu, choose the application, and click Force Quit.
- If the Finder is not working, click the Apple menu, choose Force Quit, select the application, and click Force Quit.
- Open Terminal and follow the steps for killing a process above. In this case, note down the PID of the application you want to force quit.
How to stop processes on your Mac launching at startup
Lots of applications work best when they launch at startup or need to launch processes at startup to run in the background. However, these startup items and launch agents can slow down booting your Mac and, if they run into trouble, it can slow your Mac down while you’re using it.
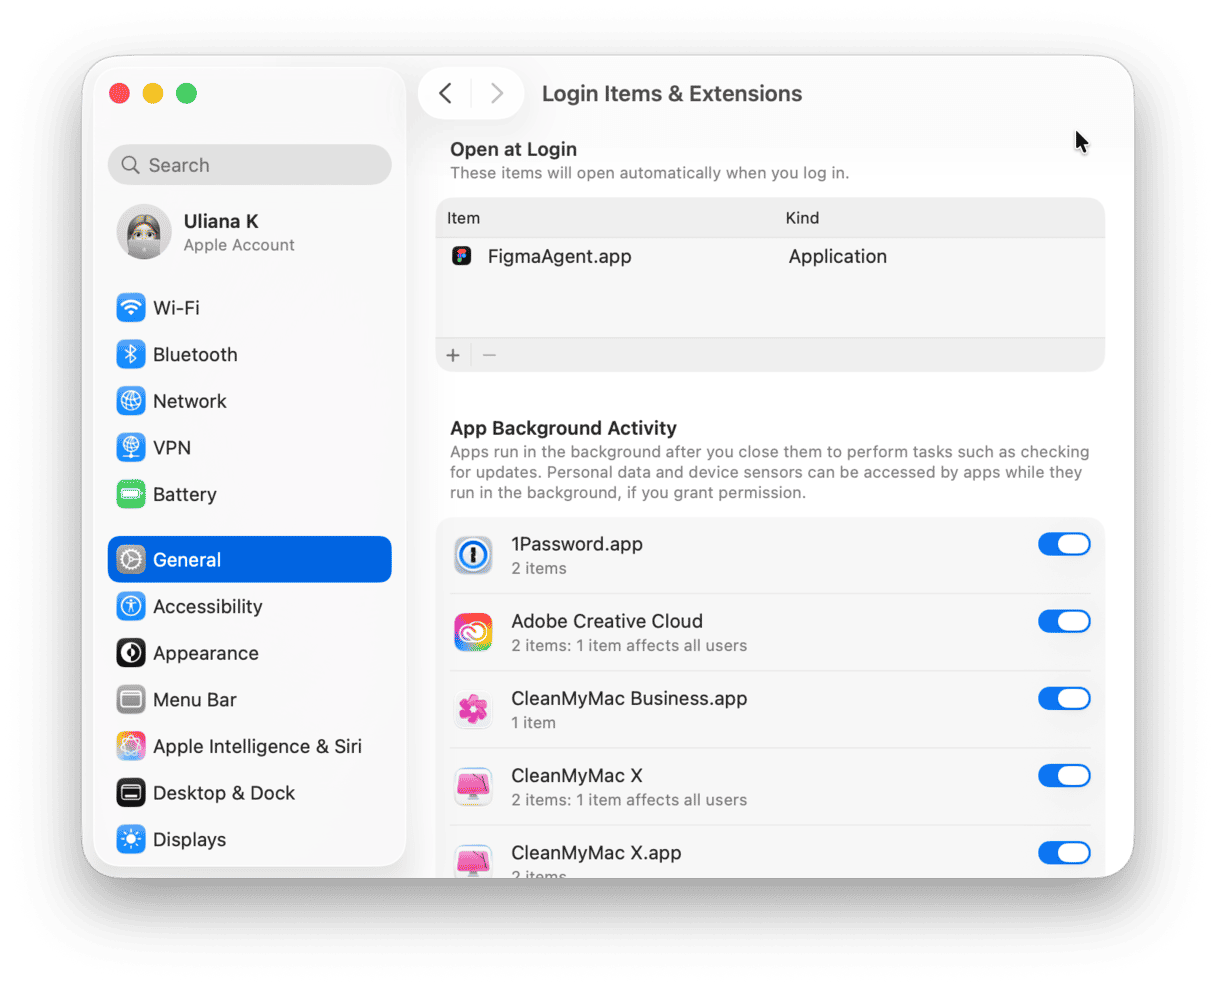
You can remove or disable startup items in System Settings.
- Click on the Apple menu and choose System Settings.
- Select General > Login Items & Extensions.
- Select the item you want to remove and click the “-” button.
Dig deeper using Spindump
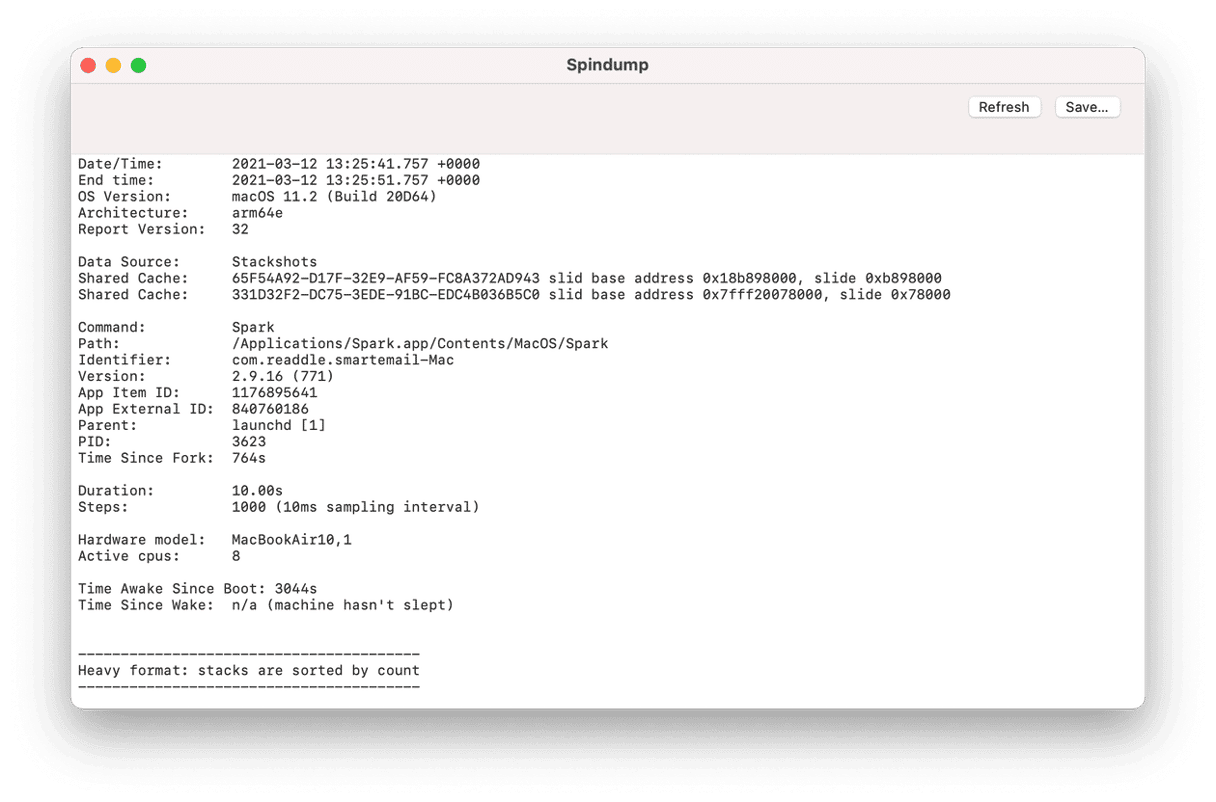
Spindump is a diagnostics and reporting tool that can shed light on why an application crashes or becomes unresponsive. While it’s unlikely you will find anything in it yourself that will prove helpful, it’s very helpful when you are in discussion with a developer about problems you’re having with their app. Here’s how to use it.
- Open Activity Monitor from Applications > Utilities.
- Select the application you want to generate the Spindump for.
- Click the More button (circle with three dots) in the toolbar and choose Spindump.
- Type in your admin password when requested.
- When the Spindump has been generated, click Save to save a copy.
How to prevent problematic processes on your Mac
1. Keep macOS up to date
This is very important for making sure that your Mac runs optimally and ensuring that you keep it safe from malware and other security threats. Apple issues updates not just for the most recent macOS version but also for the previous two versions.
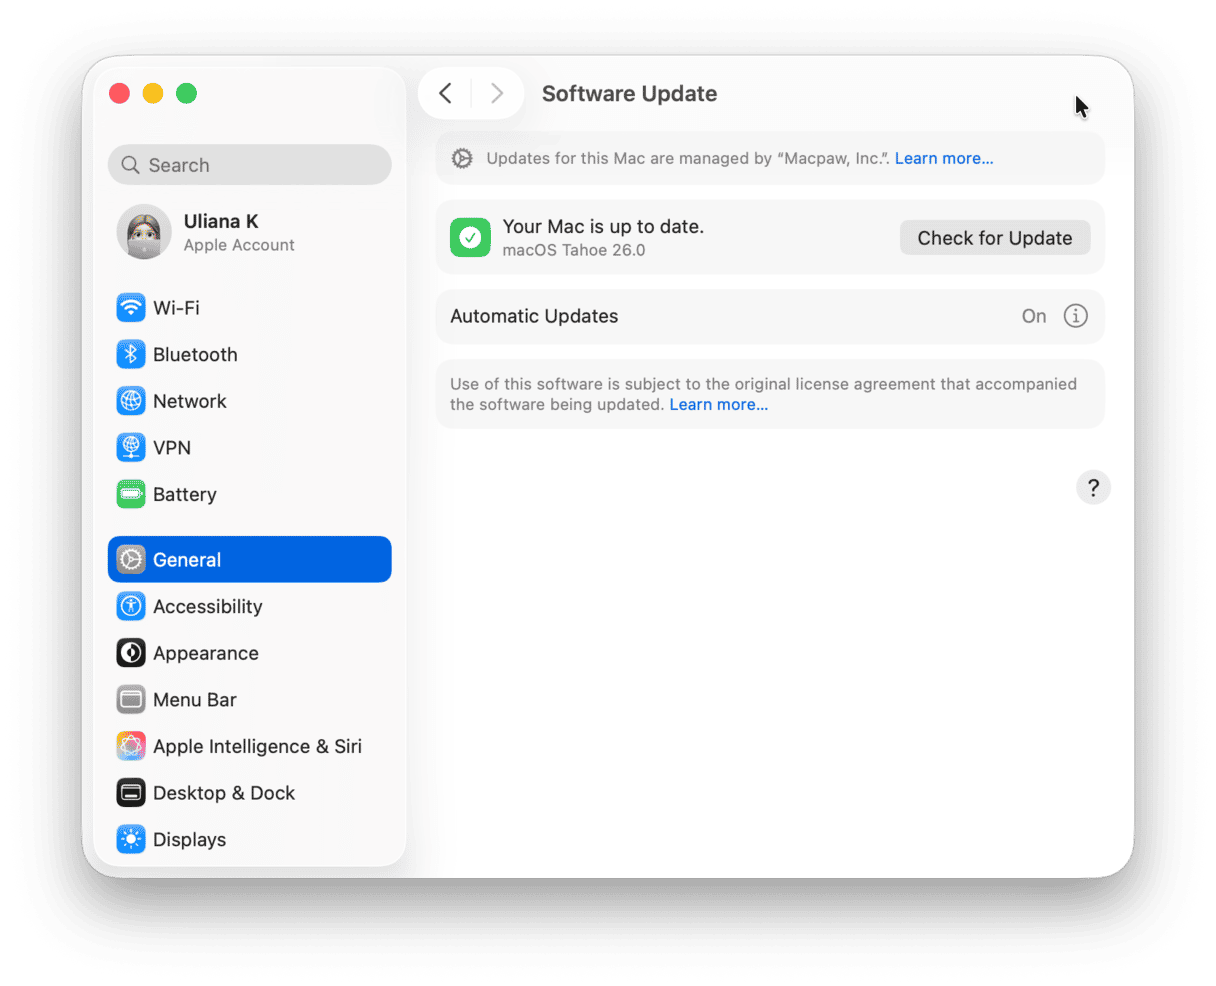
Use Software Update in System Settings > General to keep your macOS up to date. If you’re running an older version of macOS, consider upgrading if you can.
2. Keep applications up to date
Running old versions of applications is more likely to cause processes run into problems. You can update apps downloaded from the App Store in the App Store.
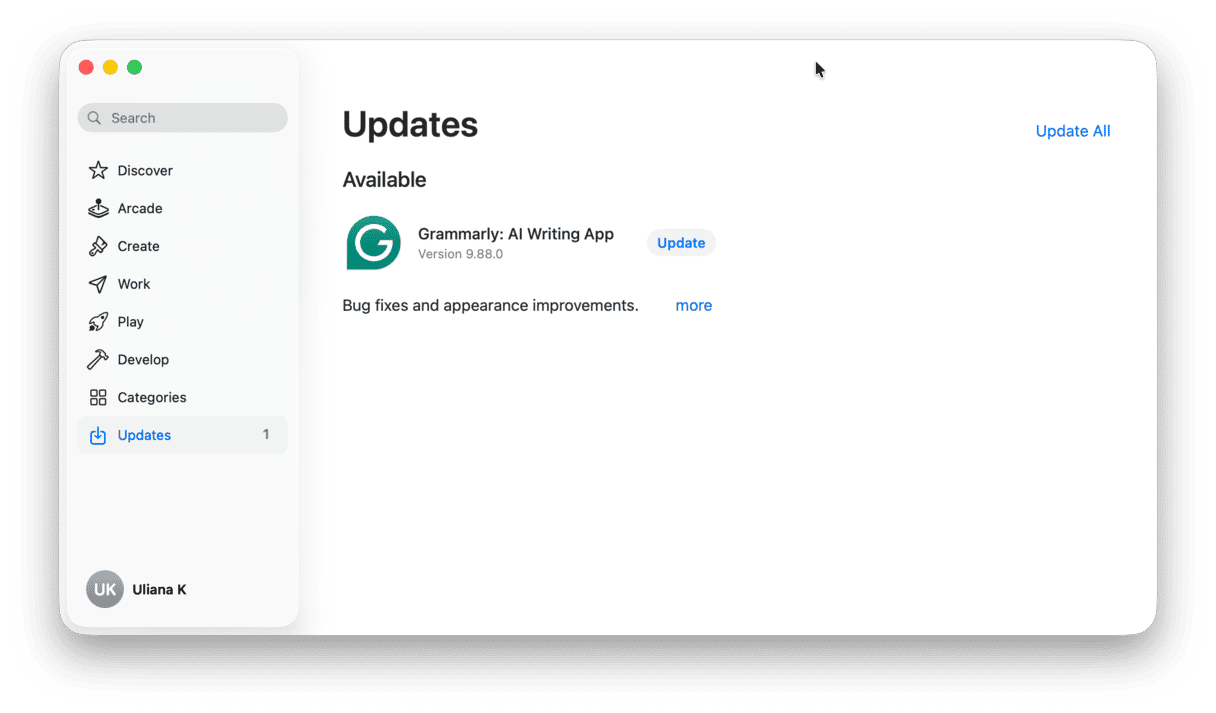
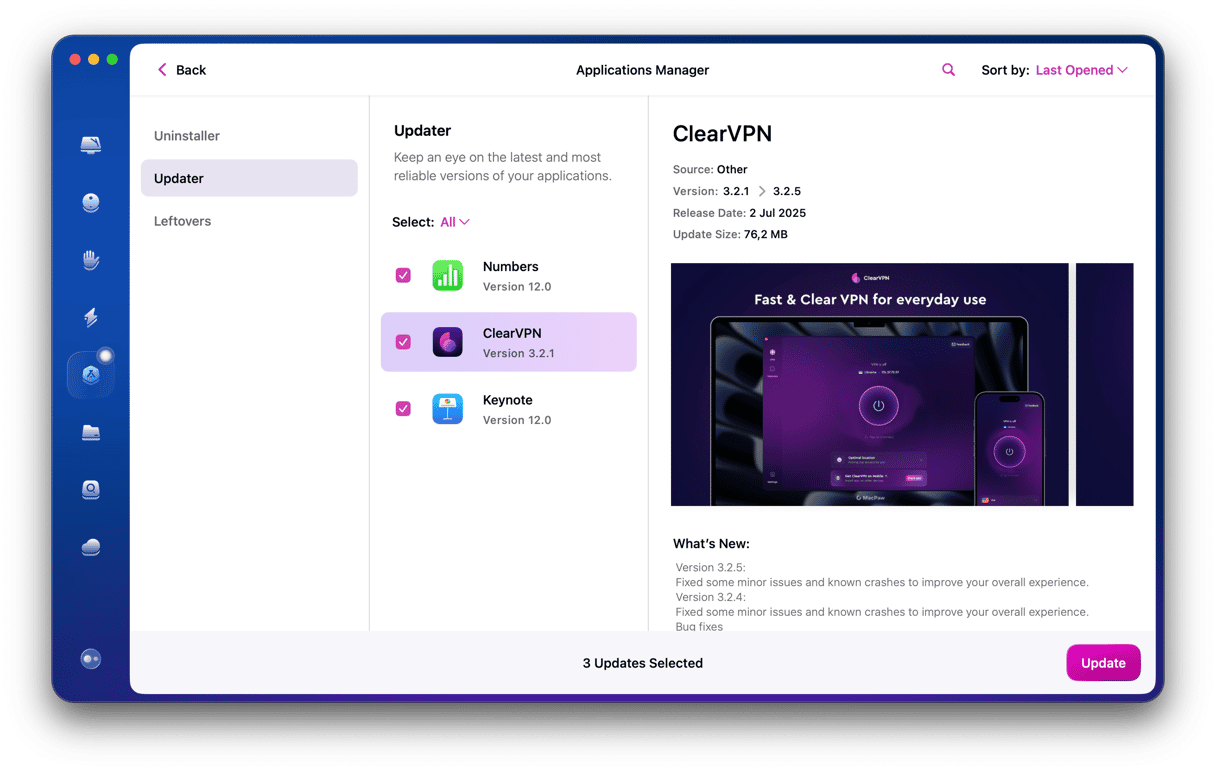
For other applications, clicking on their application name in the menu bar will give you an option to check for updates. However, the easiest way to update applications is to use CleanMyMac’s Updater tool that comes with the Applications feature — it can update multiple applications simultaneously.
3. Monitor running processes
If you find yourself frequently having problems with a problematic process, have Activity Monitor open and keep an eye on its CPU activity monitor while you work. For example, the CPU load graph at the bottom of the window will give you an idea of when the CPU is under pressure, and if you note what your Mac is doing when that graph peaks, you’ll build a picture of where the problem lies. Keeping an eye on the “% CPU” column will also help identify which processes persistently use more than their fair share of CPU cycles.
Processes form the backbone of the work done on your Mac. Some are run by applications, others by the macOS itself. Most run in the background, and you never even notice them. However, when a process gets into trouble, it can hog CPU cycles or RAM and slow down your Mac or crash applications.
By following the steps above, you will be able to identify the processes causing the problem and kill them, so your Mac runs properly again. Activity Monitor is a particularly useful tool, and if you’re comfortable using Terminal, it’s a very quick way of quitting specific processes. CleanMyMac can also help, and it can prevent problems in the future if you use its Performance feature.


