Since macOS Catalina, when you connect your iPhone to your Mac with a USB cable, it should appear in the sidebar of the Finder window and allow you to perform actions like backing up the iPhone and transferring files. Prior to Catalina, iPhone appeared in iTunes. However, sometimes, when you plug it in, your Mac won’t recognize your iPhone. In this article, we’ll show you what to do when that happens.
Why won’t my Mac recognize my iPhone
There are a number of possible reasons why your Mac doesn’t recognize iPhone. It could be that the cable you’re using is faulty or that there is a software glitch preventing the iPhone from showing up.
What to do if your Mac won’t recognize iPhone
As always, when trying to fix a problem with a Mac, we’ll start with the most likely causes and those that are easiest to fix. So, you should work through the steps below in order.
1. Double-check it’s not recognized
If you’re running macOS Catalina or later, look carefully in the sidebar of a Finder window. If you’re running a version of macOS earlier than Catalina, check iTunes.
2. Update macOS and iOS
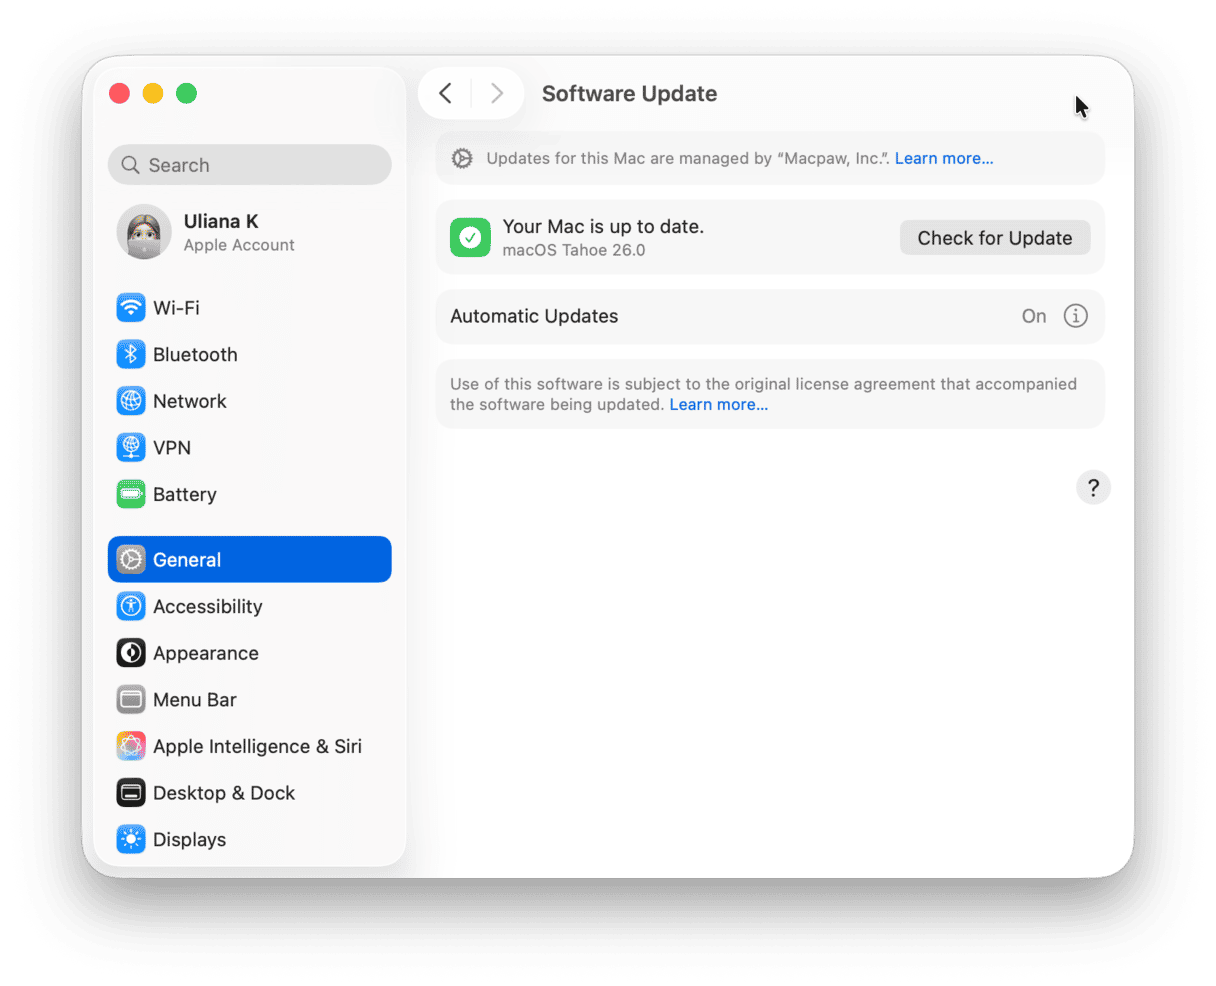
It could be a software bug, and it may be fixed in a new macOS version. Here’s how to check for updates:
- Click the Apple menu, choose System Settings, then General > Software Update.
- Wait for it to check for an update and install it if there is one available.

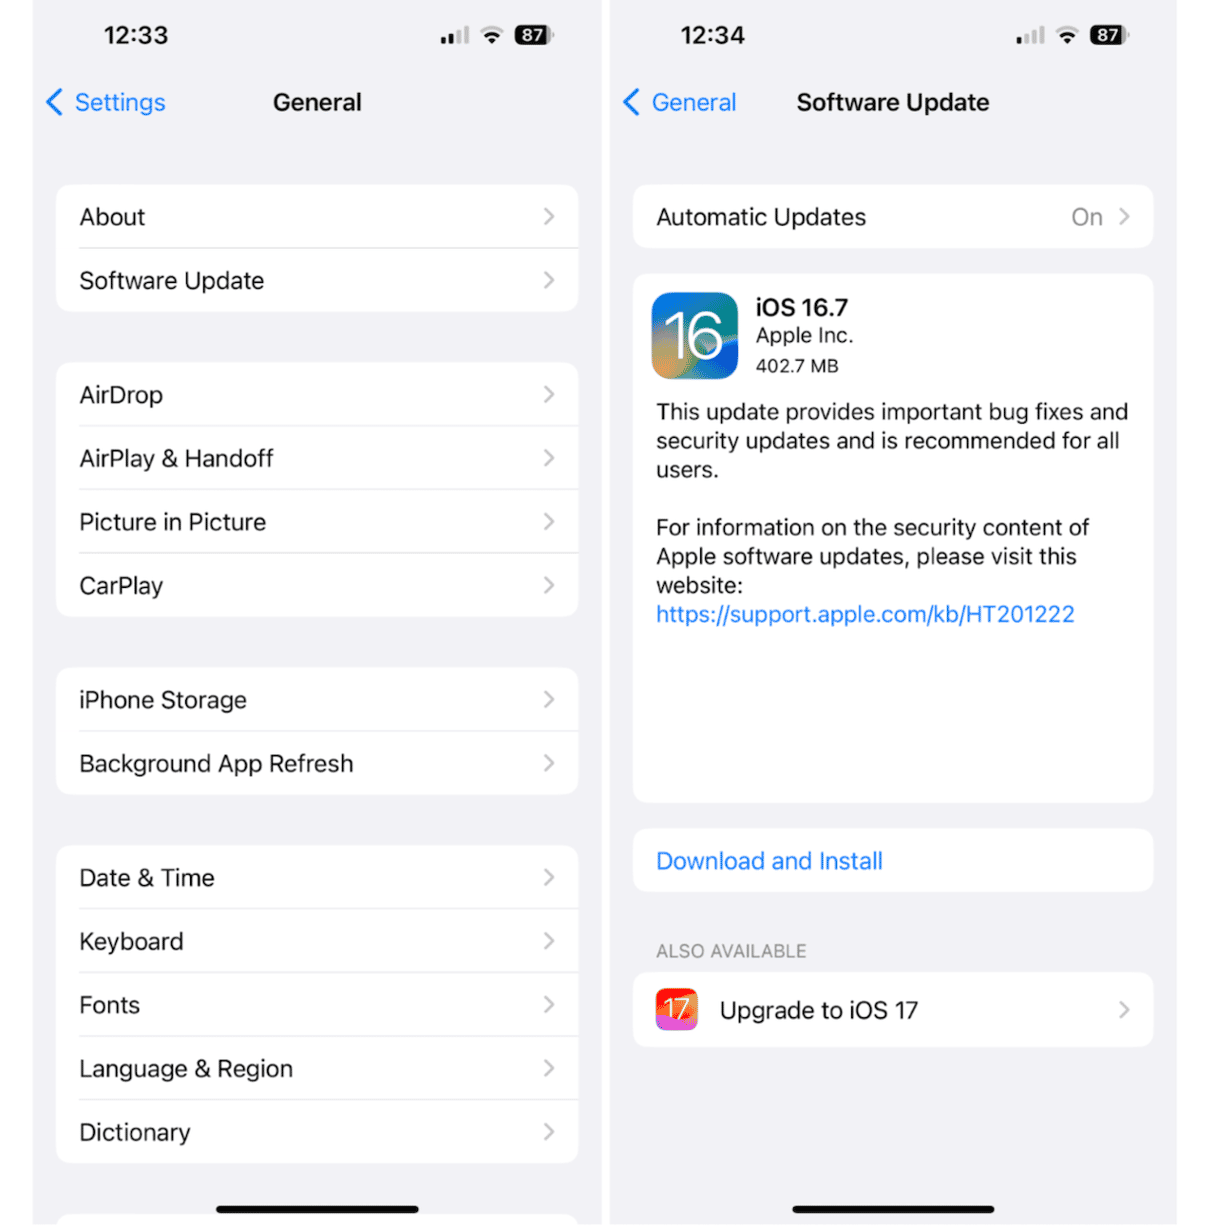
The same goes for your iOS, so check if there is an iOS update:
- On your iPhone, tap Settings, then choose General > Software Update.
- If there is an update available, tap Download and Install.

3. Run maintenance scripts and repair disk permissions
macOS maintenance scripts are set to run automatically on your Mac and perform clean-up and maintenance tasks. However, they are set to run in the early hours of the morning, and if your Mac is shut down, then they won’t run. So, it’s a good idea to run them manually now and again, especially when you have problems like this one. Similarly, repairing disk permissions can fix a multitude of problems, so it’s a good idea to do that, too.
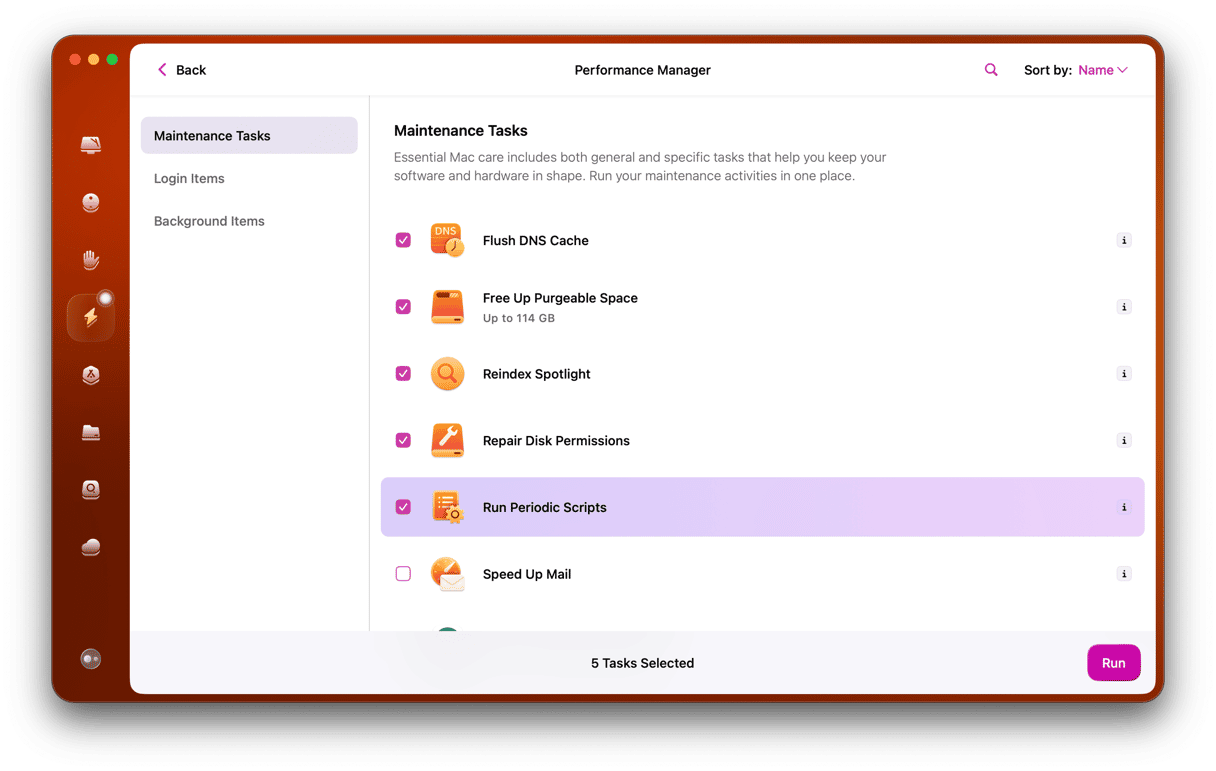
Normally, running macOS maintenance scripts means using Terminal. However, CleanMyMac’s Maintenance module can do it for you. It can also repair disk permissions and run other maintenance tasks like freeing up RAM, reindexing Spotlight, and thinning out Time Machine snapshots. You can download it for free here. Once you’ve downloaded and installed it, follow the steps below.
- Open CleanMyMac.
- Choose Maintenance in the sidebar.
- Select Maintenance Scripts and Repair Disk Permissions.
- Click Run.

4. If you’re using a hub, connect your iPhone directly to your Mac
We’re now at the stage where we need to rule out possible causes of the failure to connect properly. If you’re using a USB hub or dock, that could be the issue. Unplug the iPhone from the hub and plug it directly into your Mac. Make sure the iPhone is unlocked and the Home screen is displayed. If your Mac asks you to ‘Trust this device,’ confirm that you trust it. If it asks you if you want to allow the accessory to connect, confirm that you do.
5. Try a different USB cable
If you have another Lightning to USB cable you can use, try using that to connect your iPhone to your Mac. If that doesn’t work, you can rule out the cable as the cause.
6. Try a different USB-C adapter
If you’re using a USB-A to USB-C adapter to connect your iPhone’s USB cable to your Mac, try a different adapter.
7. Restart your Mac
If nothing so far has worked, try restarting your Mac and then reconnecting your iPhone using the USB cable.

8. Restart your iPhone
If restarting your Mac doesn’t fix the problem, restart your iPhone. The method for restarting an iPhone depends on which model you have. You can find instructions for restarting your specific model of iPhone on Apple’s website here.
9. Restart your Mac in safe mode
Booting your Mac into safe mode loads only the extensions that are necessary for it to boot. It also performs checks on your startup disk and fixes problems it finds. It’s a good way of checking whether extensions are causing the problem. The method for booting into safe mode differs for Apple silicon and Intel-based Macs. You can find the instructions for booting your Mac in safe mode on Apple’s website here.
There are several possible reasons why your Mac won’t recognize your iPhone when you connect it. The key to fixing it is to rule out the possibilities one by one. To do that, follow the steps above in order. By the time you get to the end, you should have fixed the problem and be able to see your iPhone on your Mac.


