macOS is well-known for its ease of use, so you should get used to a new platform very quickly. To help you out a little bit, we’ve gathered all tips and tricks into a detailed Mac tutorial — some kind of a knowledge portal about the Apple ecosystem. This information will be useful for new users, as well as those who are already using macOS.
What is macOS?
macOS (earlier called OS X) is the operating system that powers Mac computers, just like Windows on PCs. Each year it receives regular security updates and one major upgrade. The current macOS version, macOS 13 Ventura, was released on October 24, 2022.
macOS is considered to be more stable than Windows. The main reason for this is that Apple produces both the hardware (Mac computers) and software (Mac operating system), so they have better control over the integration of the entire system. Also, Macs have a reputation for being more secure than PCs. And beginning from 2020, Apple announced its own processor line — a.k.a. Apple silicon — a feature that was previously outsourced to Intel and IBM.

Mac’s ease of use is also legendary. If you’re switching from Windows, you’ll learn how to use all the macOS features in no time.
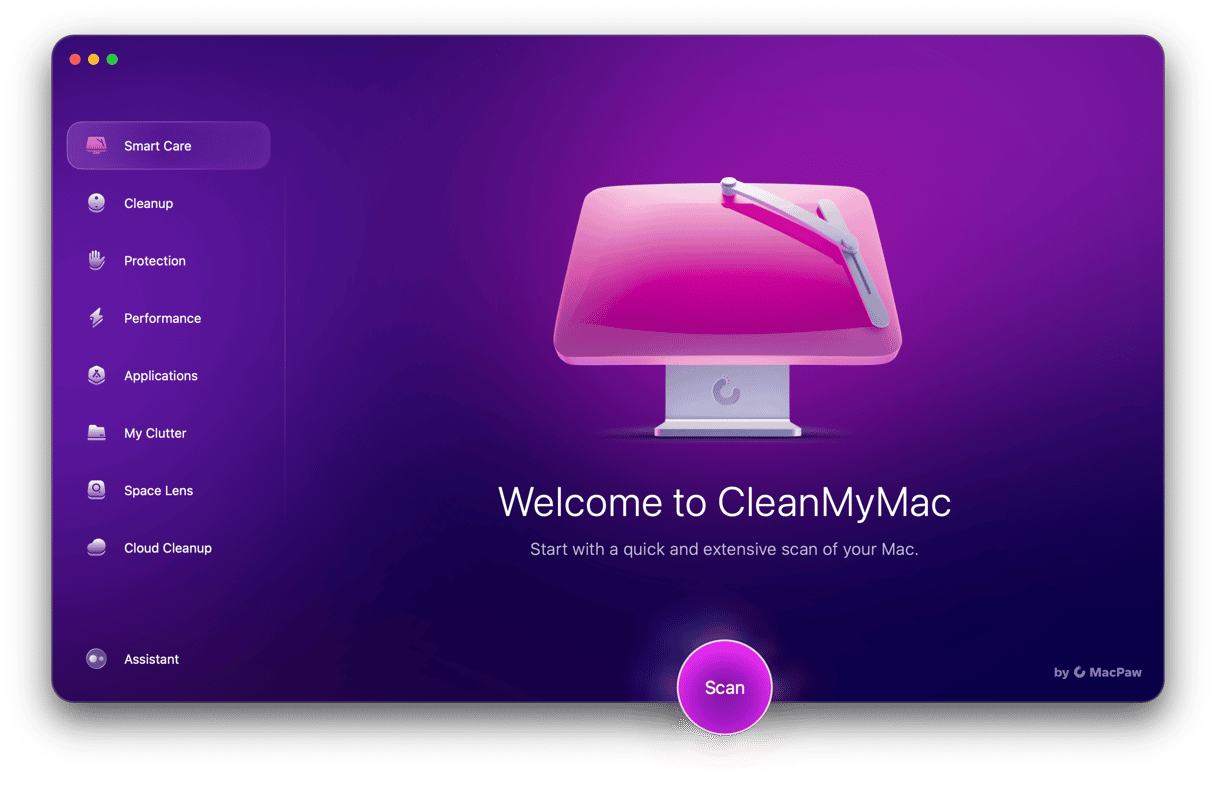
Before we begin, let us advise you on an easy-to-use app that will make using your Mac much simpler — CleanMyMac. This powerful tool will keep your computer clean, fast, and safe with just a click. Once you set up your new Mac, install it and give it a try.
How to set up a new Mac
Right out of the box, your new Mac has to be set up. It’s super easy to do, so don’t worry. The whole process shouldn’t take more than 20 minutes. Let’s start!
1. Check for an internet connection
It’s better to set up your Mac somewhere that has a Wi-Fi network. Your Mac will need a stable connection to complete the setup steps. If the network requires a password, think about it in advance.
2. Plug in only the essential devices
You may connect a mouse or external keyboard, but don’t use other peripherals yet. And don’t forget to plug in your Mac.
3. Turn on your Mac
Please note that some MacBooks automatically start up when you open the lid or connect the computer to power. On other Mac computers, press the power button to start up.
4. Use the setup assistant
A series of windows will ask you for setup details, such as your Apple ID. If you have an iPhone or iPad or you’ve used Apple services, such as Music or TV, you already have an Apple ID. Use the same one on your Mac.
We recommend that you let the setup assistant turn on Find My Mac, FileVault, and iCloud Keychain.
You’ll also be asked to create the name and password of your computer account. This information is needed when you install software, change some settings, and log in to your Mac.
Once the setup assistant finishes setting up your Mac, you can begin using your computer.
Getting started with your new Mac
The menu bar
The menu bar sits at the very top of your Mac’s screen. It houses the following things:
- Apple menu () — Here, you can find the most important system tools and features like information about your Mac, System Preferences/System Settings, recent items, and options to restart your Mac, put it to sleep, shut it down, and log out of your account.
- App menu — It is specific to the app you’re currently using. You’ll see different categories: File, Edit, View, and more.

- System status menu — It includes third-party widgets that you download from the App Store, Wi-Fi status, the battery, and the date and time.
- Spotlight — It’s quick access to the Spotlight search (read more about Spotlight below).
- Siri — Here, you can get quick access to your personal assistant (more information about Siri is below).
- Notification center — Here, you can get quick access to things that matter to you (weather, calendar, etc.) and special content from third-party apps.

The Touch Bar
The Touch Bar is a big feature that Apple added to some MacBook Pro models, although it was removed from the latest MacBook Pro models with Apple silicon. It’s a panel that sits at the top of the keyboard and replaces the row of function keys. With its help, you can control a wide variety of settings and tools within macOS, as well as built-in and third-party apps.
How to customize your Touch Bar:
- Click File. You need to open a window in an app to edit the Touch Bar options for that view.
- Choose New Window.
- Click View.
- Choose Customize Touch Bar…
- Click and drag buttons down from the display to the bottom of the screen, bringing them to the Touch Bar. You’ll see the options for your current view.
- To move a Touch Bar button, hold and drag it to a different spot.
- To remove a button from the Touch Bar, hold and drag it to the far end left.
- Release your finger when “Remove From Touch Bar” appears.
Note that all Mac’s built-in apps offer Touch Bar customization. Developers of third-party apps have the option to include it with their apps.
The Dock
So, what is the Dock? The Dock is the closest equivalent macOS has to a Windows Start menu. It lets you quickly access your favorite apps, files, folders, and any actively-running apps.
How to add an app to the Dock
- Launch a Finder window from your Dock.
- Click on Applications in the sidebar.
- Choose the app and drag it to the Dock.
- Let go of the app while it hovers over the Dock.
How to Remove an app from the Dock
That’s even easier than adding the app to the Dock. Choose the app you want to remove and drag it to Trash.
Finder
Finder in the default macOS file management app. It’s a gateway to all your files, applications, and downloads. You have a lot of control over what the Finder will show you and how the different parts of it will work.
How to open a Finder window
There are a few ways to do that:
- Click on your desktop, then click on File in the menu bar and select New Finder Window.
- Click on the Finder icon in the Dock.
- On your keyboard, hit Command+N while you have your desktop selected.
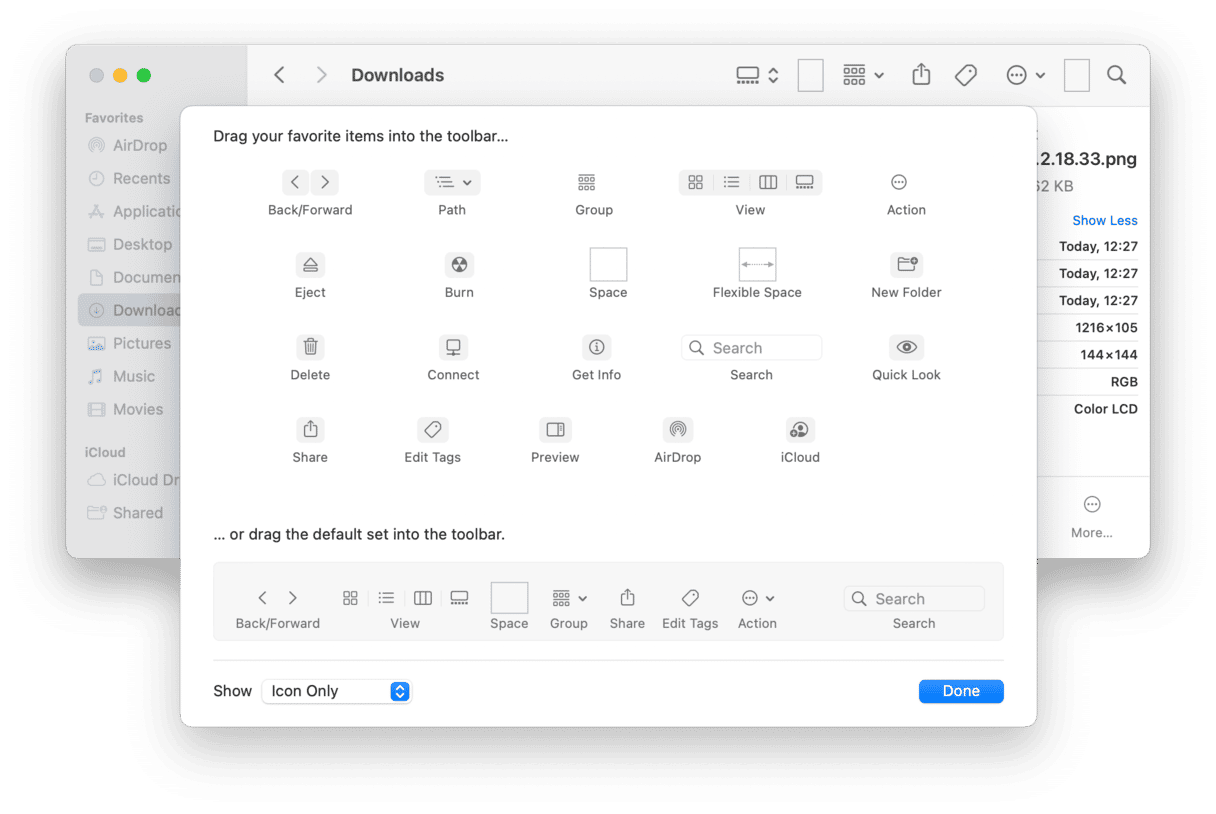
How to customize the Finder toolbar
By default, the Finder toolbar offers a number of various buttons you can use, but you can customize the bar to your liking.
- Open a new Finder window.
- Right-click on the toolbar.
- Click Customize Toolbar…
- Click and drag different tools onto the bar.
- Click Done once you’ve added the tools you want.
AirPlay and AirDrop
AirPlay is Apple’s wireless streaming technology. You can send video or audio to an AirPlay receiver (like an Apple TV) by clicking the AirPlay icon in the menu bar — Screen mirroring under the switchers icon. It’s also ideal for sharing presentations or photos.

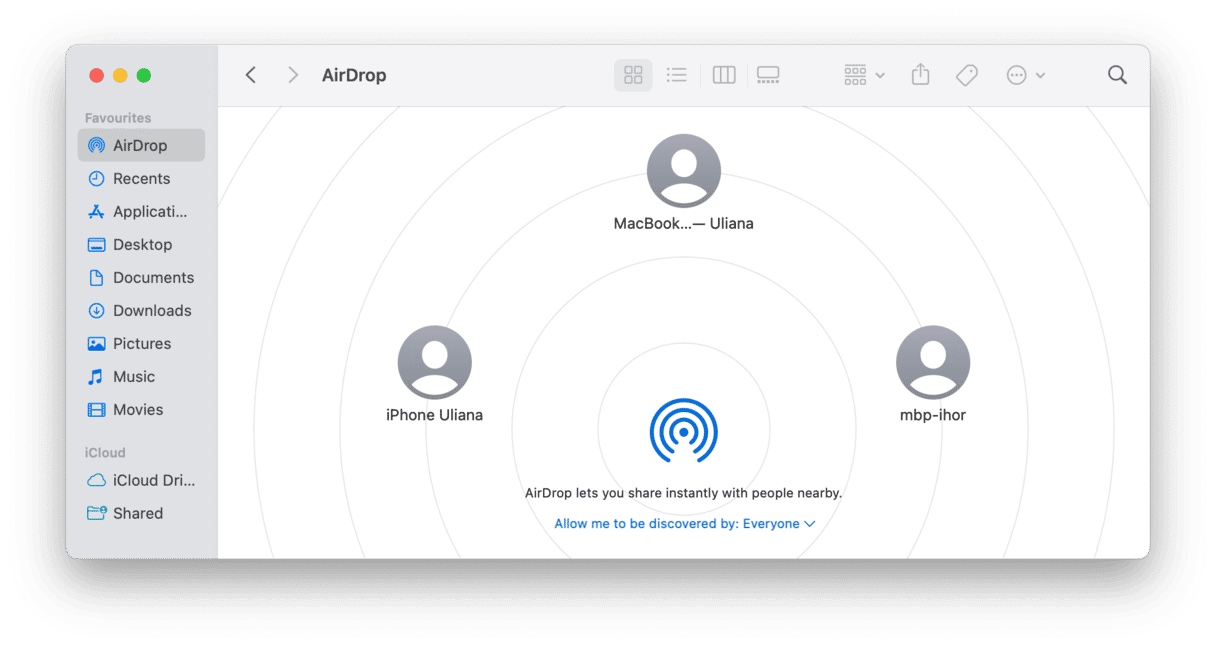
AirDrop is a wireless file-sharing technology. You can use it to send files between Mac computers and iOS devices like the iPhone and iPad.
Here’s how to use AirDrop:
- Launch Finder.
- Click on AirDrop in the sidebar to scan for a list of available recipients.
- If you’re trying to receive a file on your Mac, make sure to have this screen open.
Spotlight
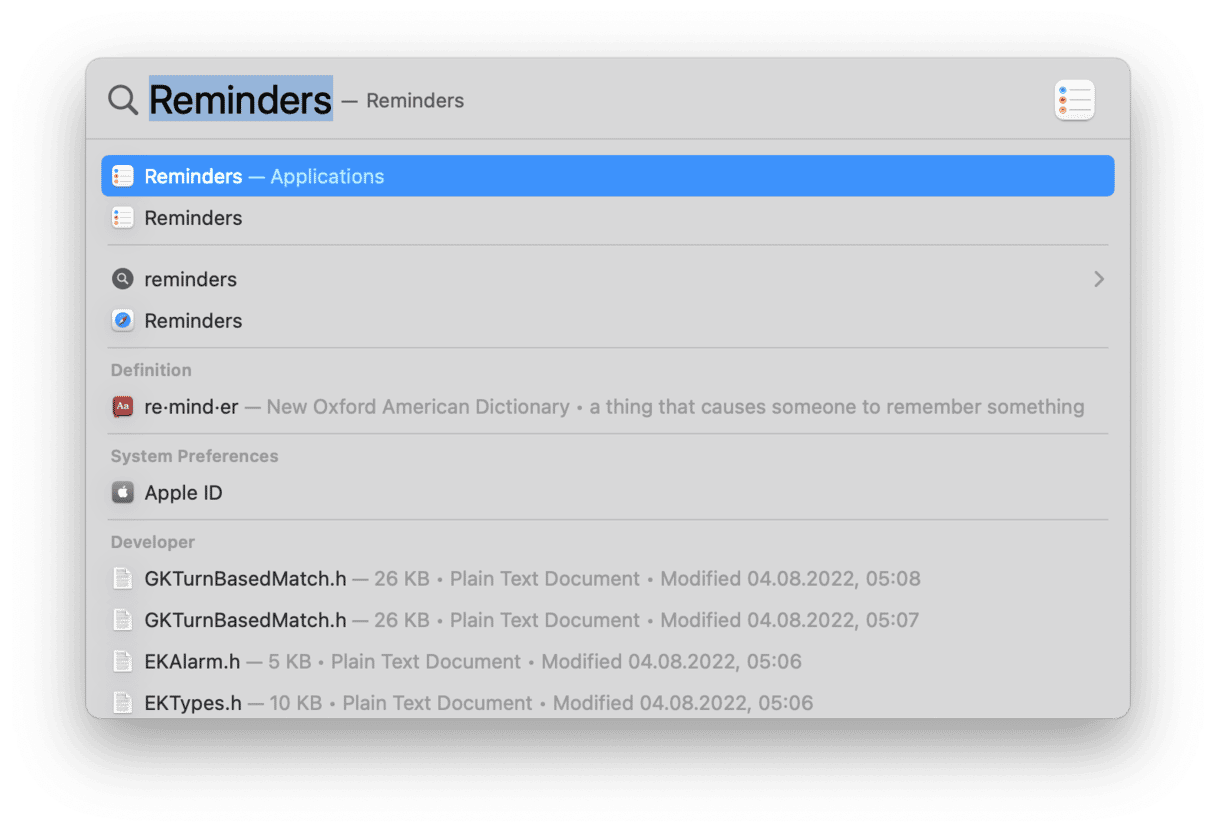
Spotlight is the name of your Mac’s search engine. It digs through your personal files, folders, photos, and documents to produce the results you’re looking for. If you need to find something, chances are Spotlight will find that for you.
How to access and use Spotlight:
There are two ways to open Spotlight: either click on the Spotlight button in the menu bar or use the keyboard shortcut Command+Space. You’ll see the Spotlight search field in the middle of the screen.

Type in what you’re looking for, and Spotlight will return results.
Siri
With your new Mac, you’ve also gained a virtual personal assistant. Isn’t it cool? Siri can do so many things for you: schedule events, tell you the weather, search the web for information, tweet to your followers, and even more.
How to enable Siri on Mac
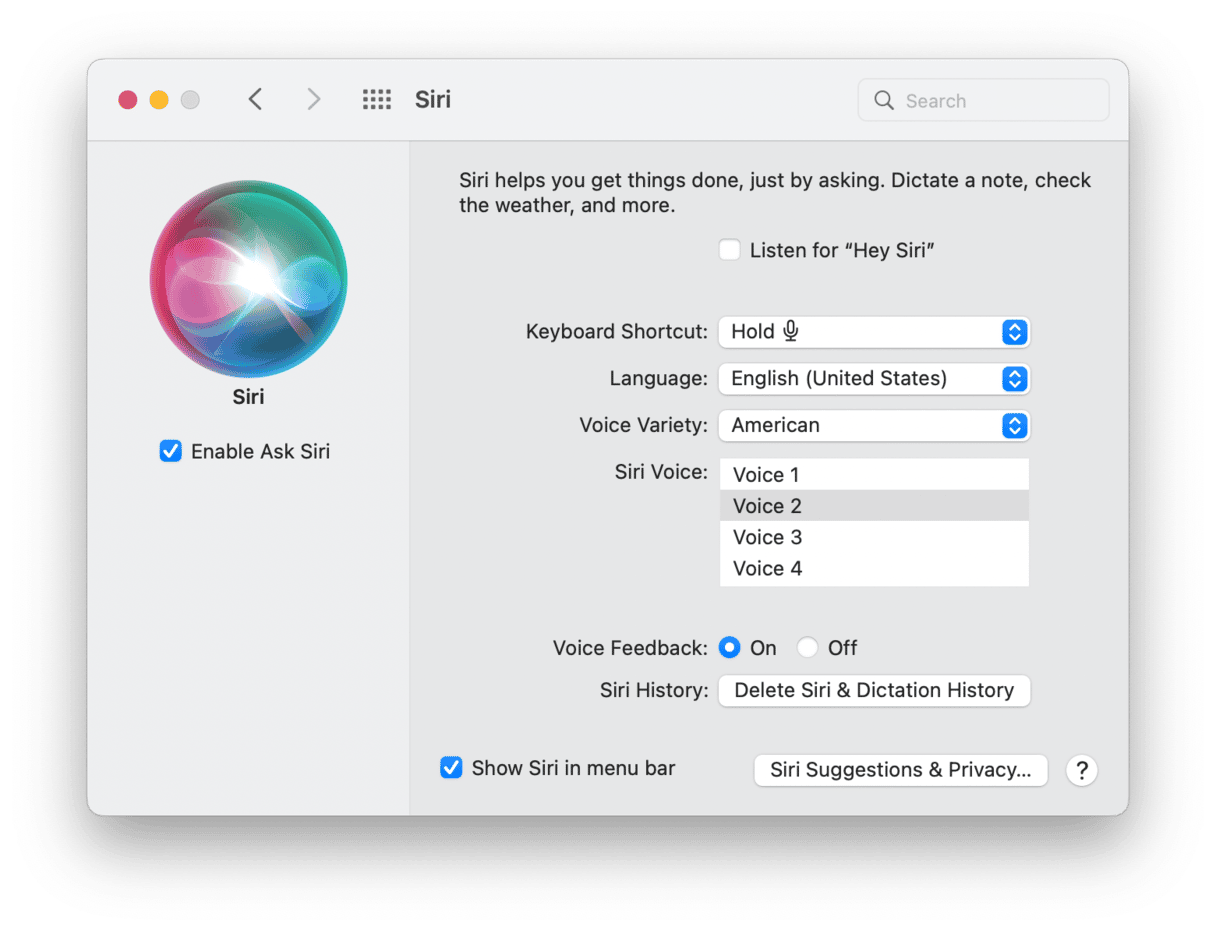
When you first set up your Mac, you’ll be asked if you want to use Siri. If you haven’t enabled it at that time, you can do that manually:
- Click on the Apple icon in the upper left corner of your screen.
- Choose System Preferences (System Settings in macOS Ventura).
- Select Siri.
- Tick the box Enable Ask Siri.
- Choose a language and Siri voice.
- Select the Keyboard shortcut to quickly access Siri.
Safari
Safari is the default web browser for macOS, iPhone, and iPad. In most ways, it’s like any other popular browser: you can browse the web, bookmark favorites, and open multiple websites in tabs. But it’s more efficient than any browsers on macOS as Safari is optimized specifically for Mac.
What is AdBlock for Safari?
AdBlock for Safari is an application that speeds up browsing by blocking ads that clog web pages.
Here’s how to install it on your Mac:
- Find AdBlock in the Mac App Store and click Get.
- Click Install.
- After the app is installed, it will send a notification to Safari or open the app and press Set Up AdBlock in Safari.
- You’ll see the Safari Extensions Preferences window.
- Select the checkboxes next to AdBlock Engine and AdBlock Icon.
- Close the AdBlock app window.

AdBlock is now set up to block ads on every web page you visit.
Note: If you are tired of annoying pop-ups, consider installing CleanMyMac. Its Malware Removal tool can scan your Mac for adware and neutralize all threats at once. Check it out here — it has a free trial version.
The Mail app
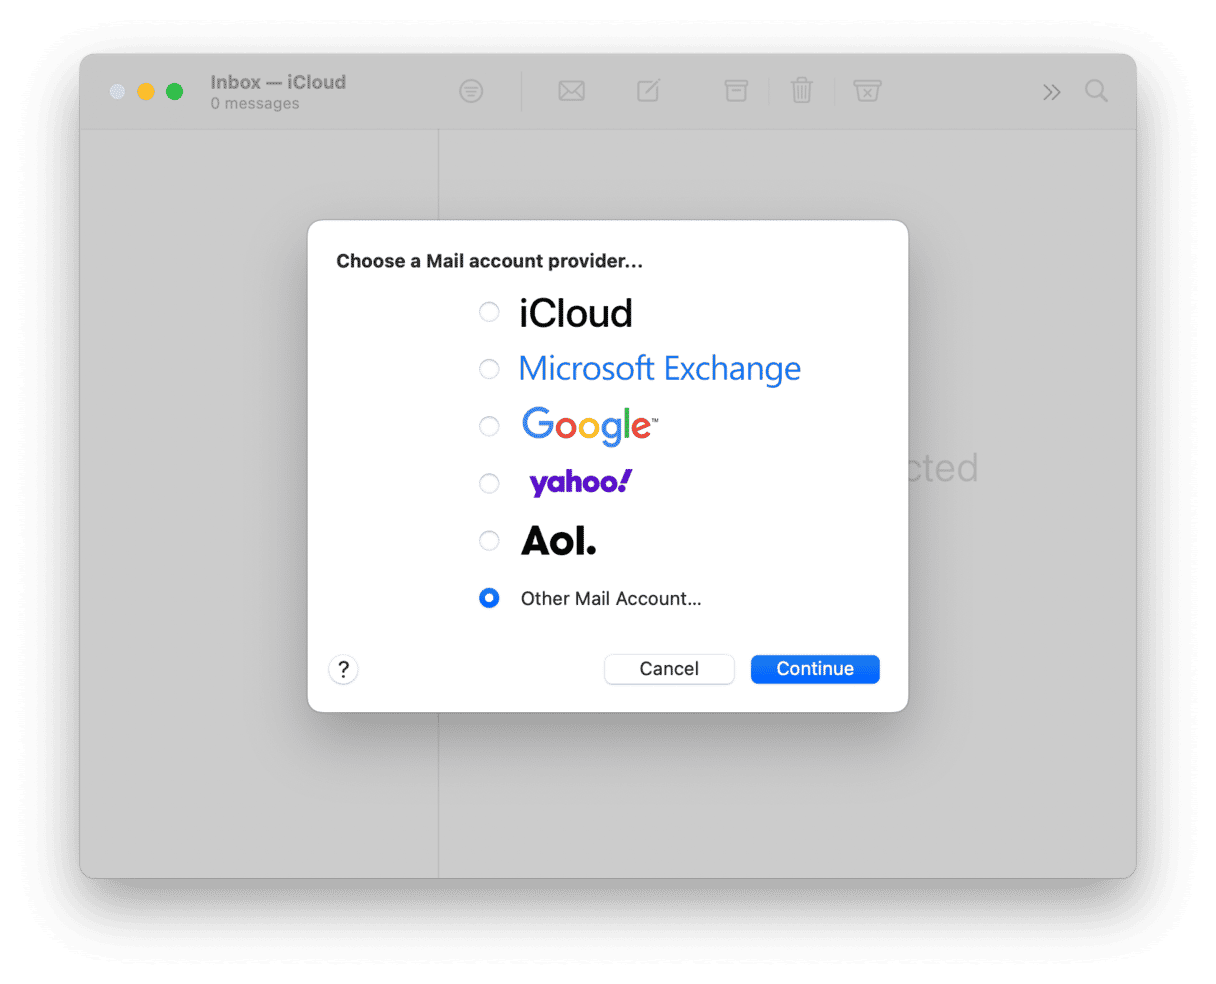
Use the Mail app to compose, reply to, and sort emails on your Mac. It lets you use any email account you have without having to constantly go to that service’s website. You can sync your Gmail accounts, Outlook accounts, work accounts, etc. All you have to do is to set things up. Here’s how.
How to set up an email account
- Launch the Mail app from the Dock or Finder.
- Click an email provider based on what type of email account you have.
- Click Continue.
- Enter your email address and password.
- Click the checkbox next to each app you’d like to use with this account.
- Click Done.
iCloud
What is iCloud?
iCloud securely stores your photos, videos, documents, and apps and keeps them updated across all your devices. With its help, you can easily share photos, calendars, and locations with your friends and family. You can even use iCloud to find your device if you lose it.
When you create an Apple ID, you automatically get 5 GB of iCloud storage for free. If it’s not enough, you can then buy more storage at an additional cost.
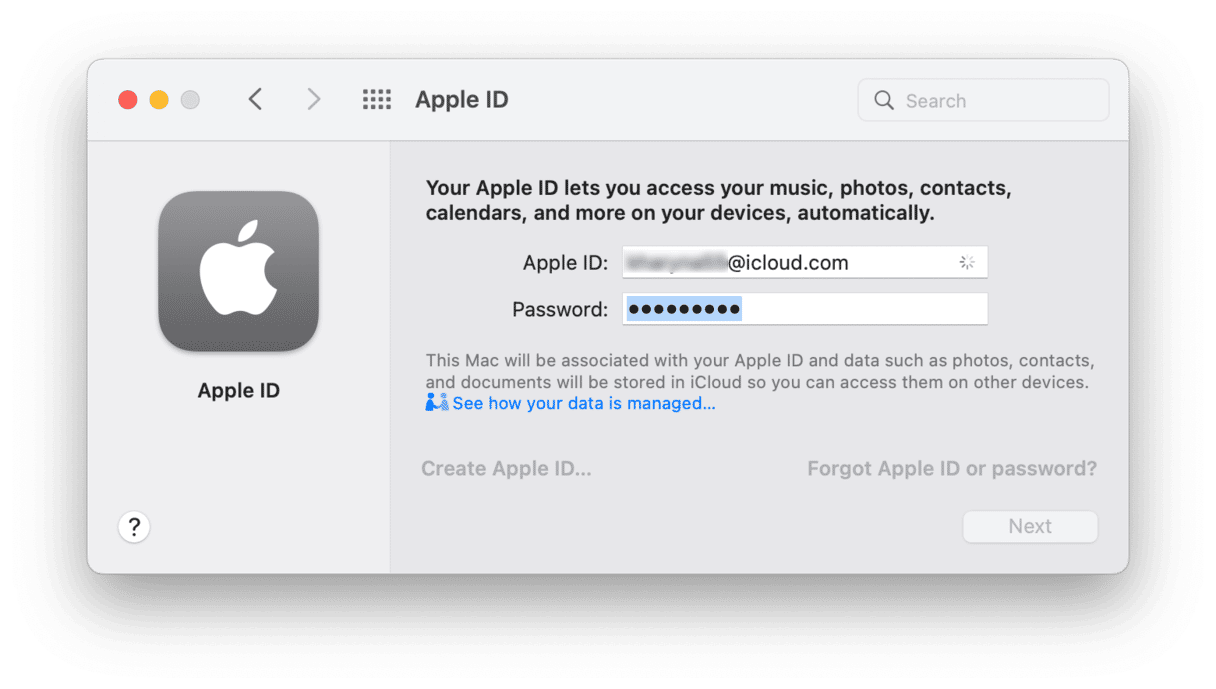
How to set up iCloud on Mac
When you start using your Mac for the first time, you’ll be asked if you want to use iCloud Drive to store your data. If you’ve clicked “Yes,” you’re all set. If you’ve clicked “No” but then decided to use it, here’s how to enable it manually.
- Click on the Apple icon in the upper left corner of your screen.
- Click on System Preferences (System Settings in macOS Ventura).
- Press Sign in to your Apple ID.
- Enter your Apple ID and password.
- Enter your admin password and proceed with the settings.
- Choose Allow to allow Find My Mac in the pop-up.
- Confirm the checkboxes next to all the apps that use iCloud.
Notifications
The Notifications Center collects notifications from various applications and stores them in a single location. Notifications appear briefly in the top-right corner of your screen or stay there until you dismiss them.
In a notification on your Mac, do any of the following:
- Get details — click the notification or click Show.
- Respond to text messages or emails — click Reply.
- Respond to calls — click Accept or Decline.
- Repeat a notification — click Snooze, and the notification will reappear 15 minutes later.
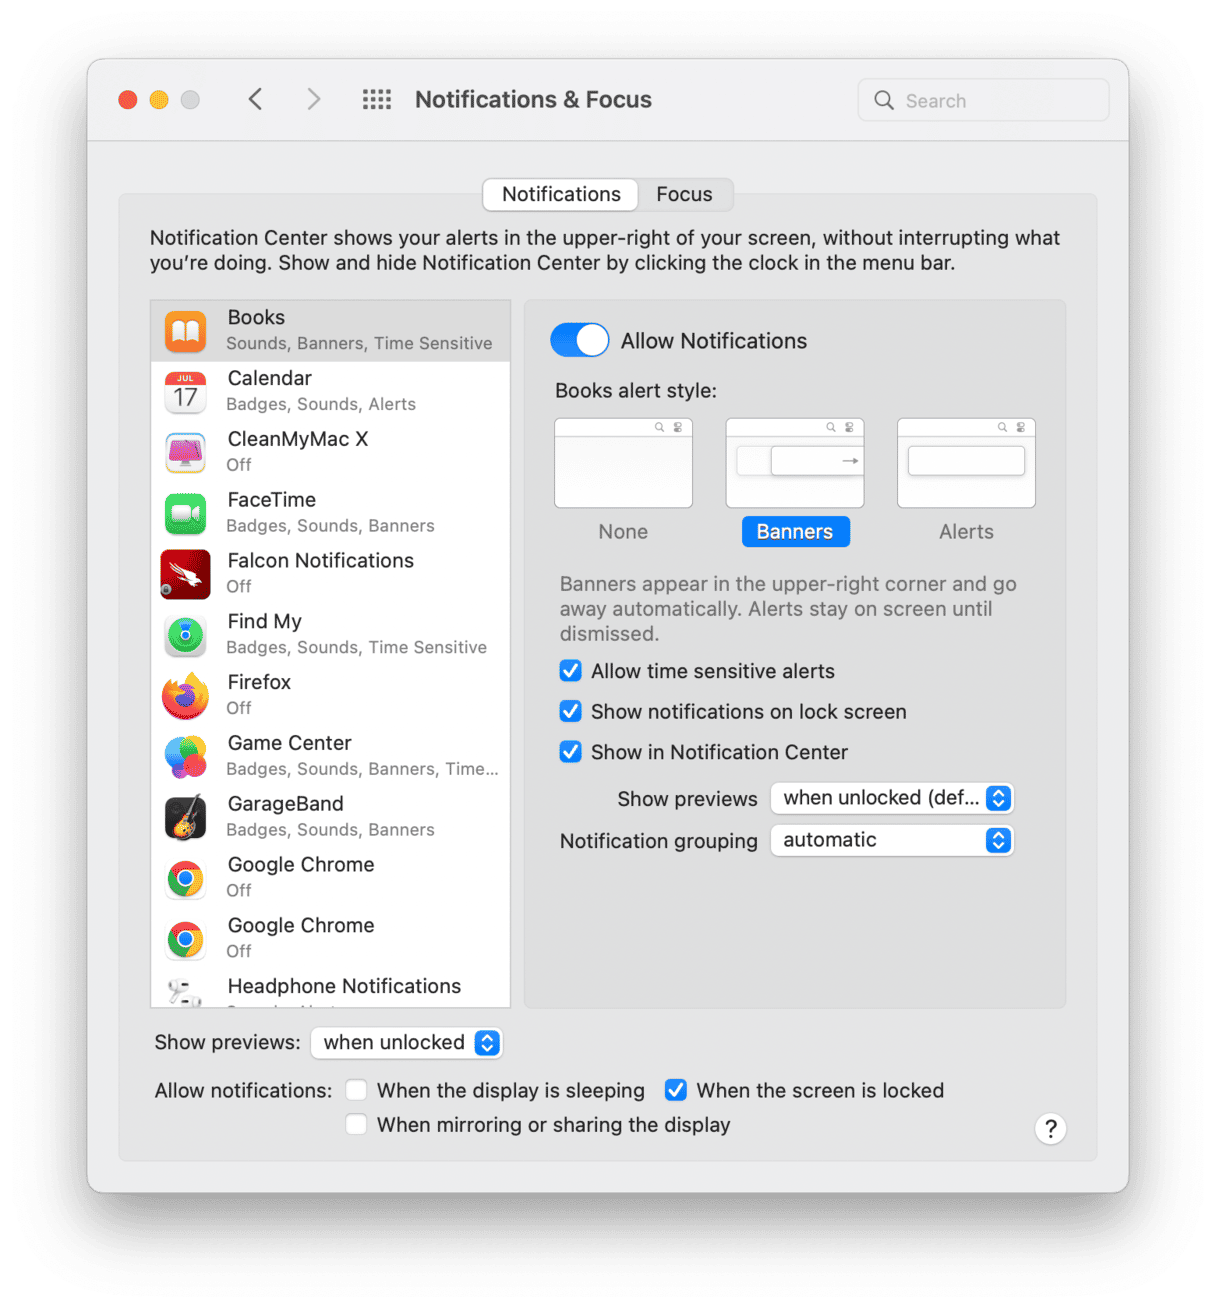
If you don’t want to receive notifications from certain apps, you can stop them. Here’s how to turn off notifications on Mac:
- Go to the Apple menu.
- Choose System Preferences (System Settings in macOS Ventura).
- Click Notifications & Focus (Notifications in macOS Ventura).
- Make your way through the apps on the left and either select or deselect the Allow Notifications option for the app.
System Preferences/System Settings
System Preferences — System Settings in macOS Ventura — allow customizing your Mac to your personal preferences. If you are a new Mac user, you will not find a Control Panel on macOS as with the Windows platform. All vital settings are found within the System Preferences/System Settings.
There are three ways to open System Preferences/System Settings:
- Go to the Apple menu and choose System Preferences/System Settings.
- Find from the Launchpad.
- Open from the Dock panel.
Choose System Preferences/System Settings, and you will see the main window for your computer settings. Click on any to preview and modify your Mac settings.
The basics of using macOS
Here are the key things you need to know when using your Mac.
How to lock and unlock a MacBook
Locking your Mac or putting it to sleep is a convenient option when you need to step away for a moment. Here are a few ways to lock your Mac:
1. Close the lid
As simple as that. To log back in, you’ll have to open the lid and enter your password.
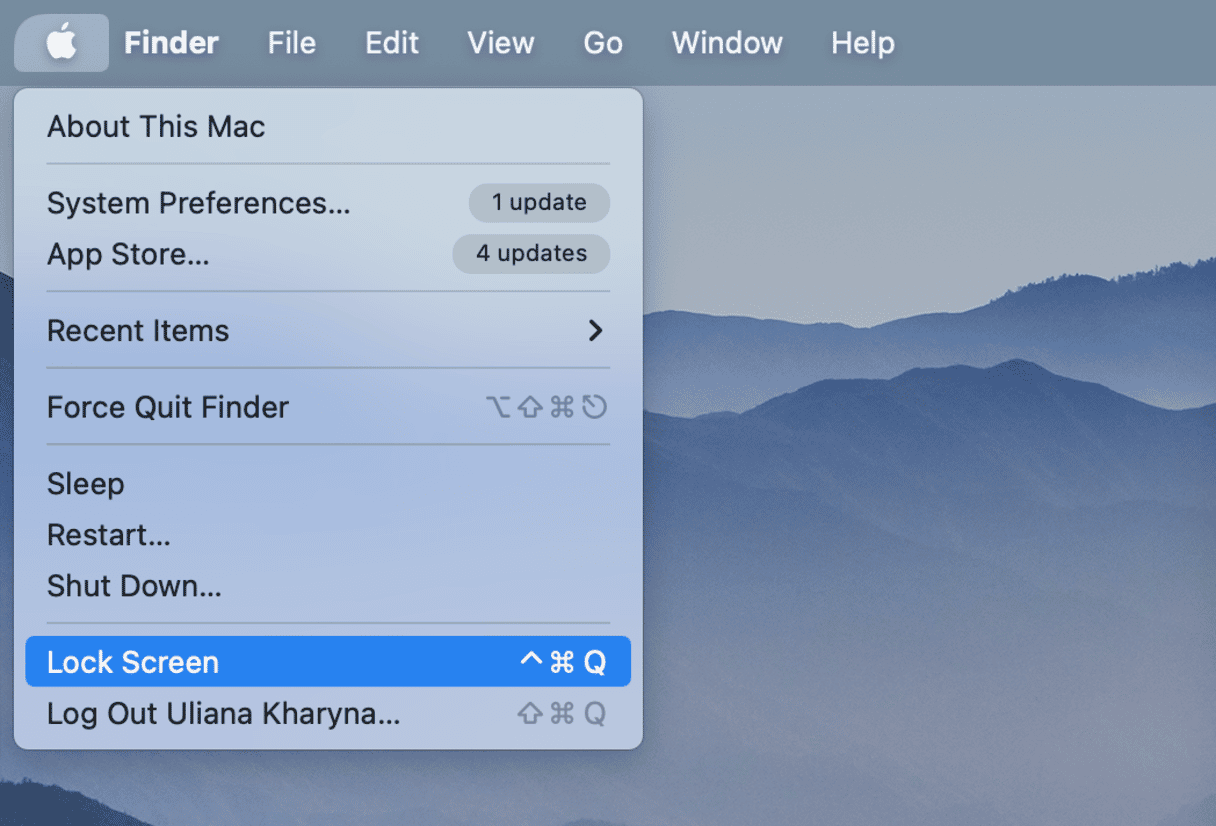
2. Use the Apple menu
Click the Apple icon in the upper-left corner of the screen and choose Lock Screen or Sleep.
What’s the difference between Lock and Sleep?
Both options will turn off the display, but sleep conserves more energy by putting the CPU into low-power mode, spinning down the hard drive, and stopping background tasks.
3. Use shortcuts
If you’re using a Mac that’s running one of the latest macOS versions, press Command+Control+Q. For older versions of the operating system, press Control+Shift+Power.
If you want to put your Mac to sleep, press Command+Option+Power.
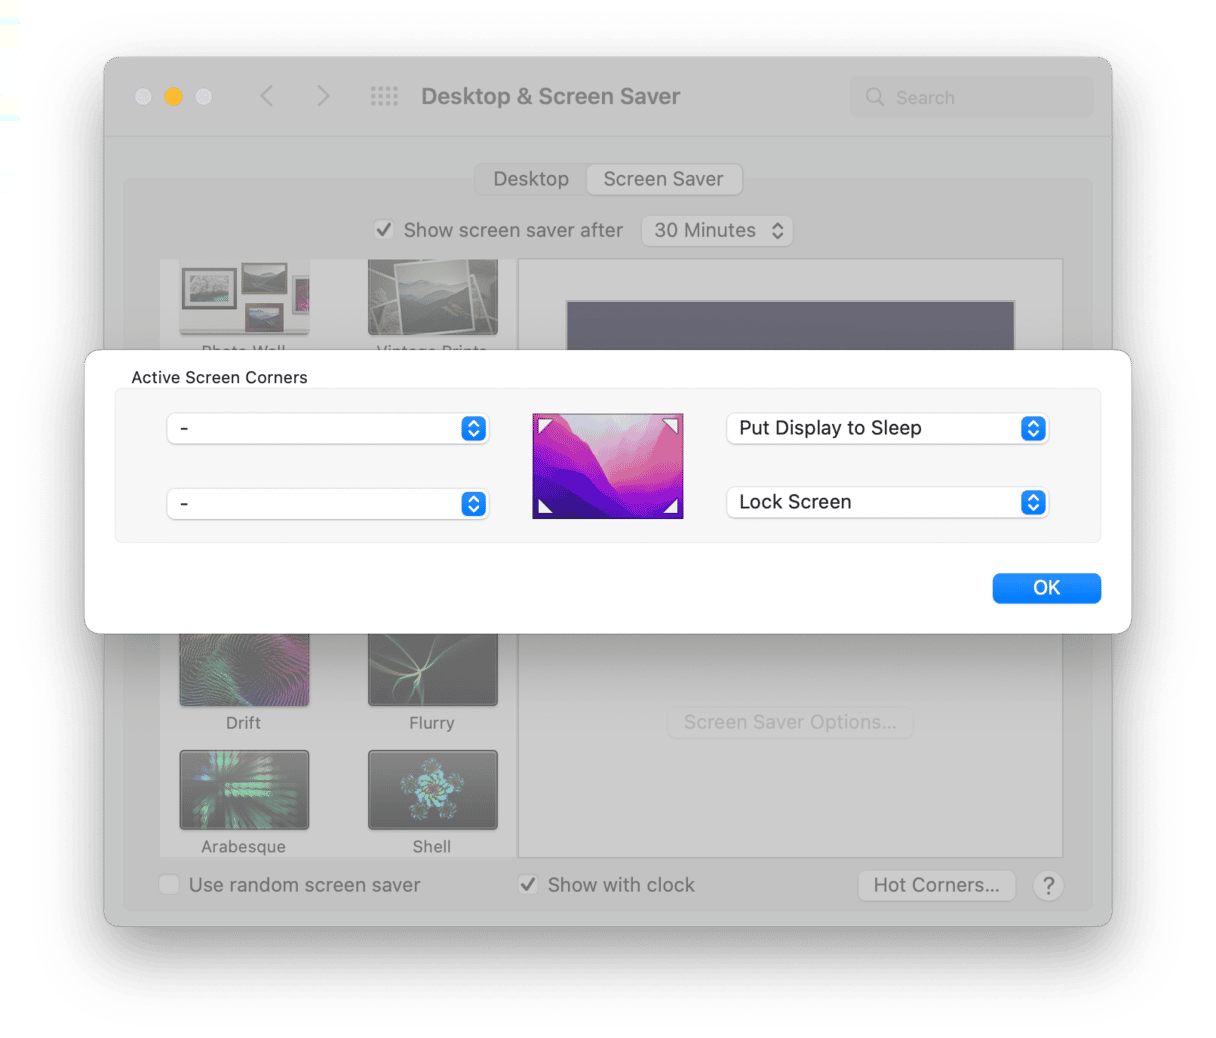
4. Set up a hot corner
When you move your cursor to one of the four corners of your screen, you’ll lock the screen.
- Go to System Preferences/System Settings.
- Choose Desktop & Screen Saver.
- Click Screen Saver > Hot Corners.
- Select a corner and choose the option.
- Click OK to confirm.
How to right-click on Mac
If you recently switched from a Windows PC to Mac, you may wonder how to right-click if there is only one button. Apple mice and trackpads have never had a secondary button, but there are several ways you can right-click.
Right-click on a Trackpad
- Click the Apple icon and choose System Preferences/System Settings.
- Click the Trackpad icon.
- Choose the Point & Click tab.
- Click the checkbox next to Secondary link.
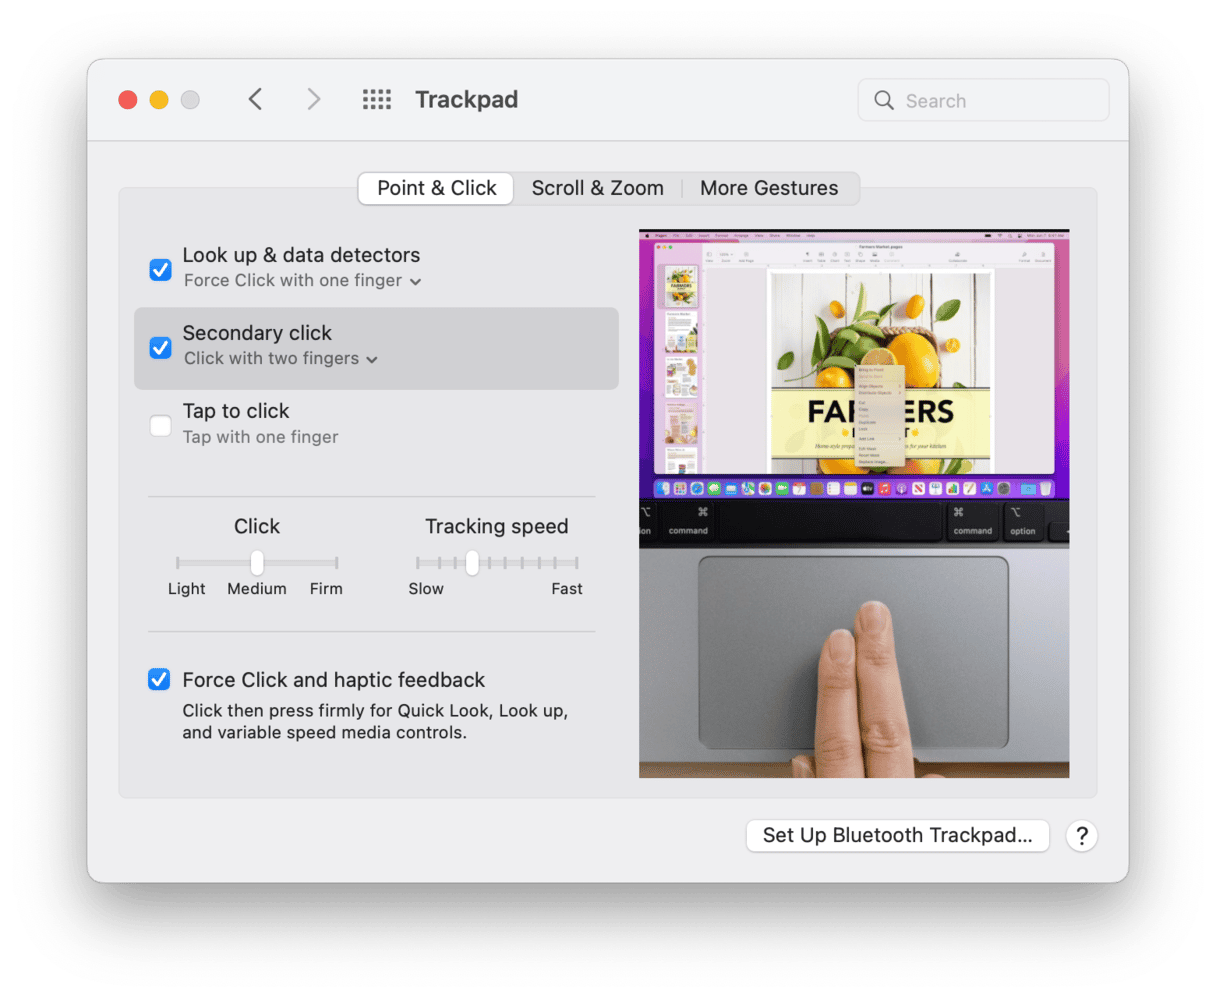
With Secondary click enabled, tapping the trackpad with two fingers at the same time performs a right-click option.
Right-click on a Magic Mouse
Here’s how to enable secondary click:
- Click the Apple menu and choose System Preferences/System Settings.
- Click the Mouse icon.
- Click the Point & Click tab.
- Click the checkbox next to Secondary click. The default option is Click on right side, but you can change it to Click on left side if you want.
Control-clicking
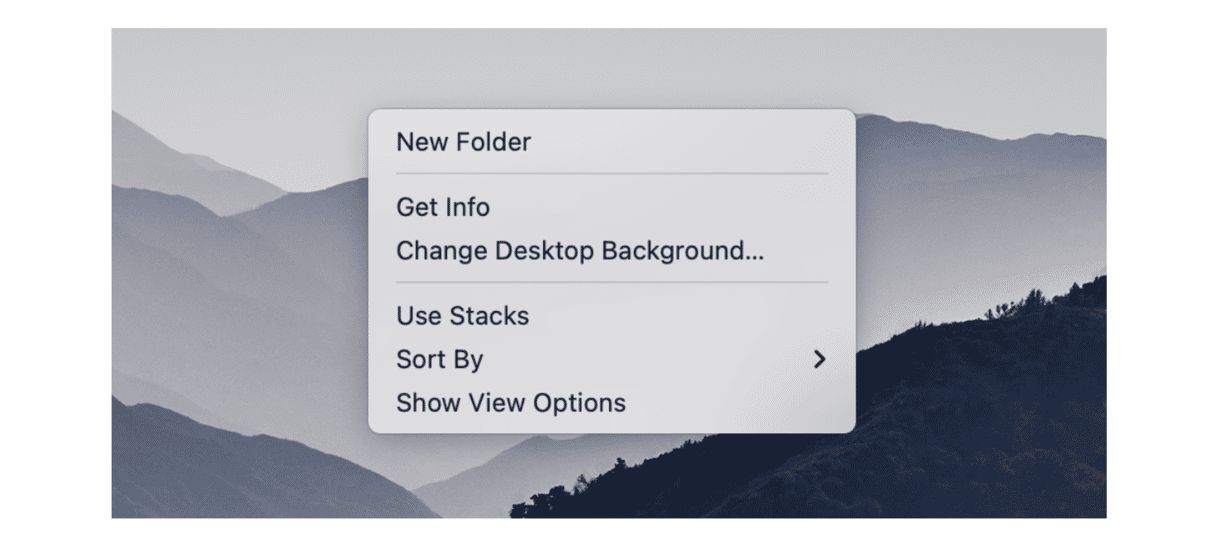
This method works both with a trackpad and a mouth. Holding down the Control (Ctrl) key on your keyboard when you click a mouse button is the equivalent of a right-click on a two-button mouse.
For example, when you control-click Mac’s desktop, you’ll see the contextual menu:
How to use full screen mode on Mac
Using full screen mode helps to stay productive and avoid distractions. Using it is very simple — you just have to click the full screen button (it’s green) in the top left corner of the app window. Alternatively, you can use the shortcut — Control+Command+F.
How to exit full screen mode
There are three ways to exit full screen mode on Mac:
- Press the Escape key — it works for most applications.
- Hover your cursor over the top left corner of the screen and click the green button.
- Use the keyboard shortcut Control+Command+F.
How to install applications on Mac
Macs come with free pre-installed apps that help you surf the web, edit photos and videos, listen to music, and more. But there are thousands of additional applications you can download to your Mac and get even more opportunities.
You can find new apps in the Mac App Store or download them from the developer websites.
Here’s how to download applications from the Mac App Store:
- Open the App Store app from the Dock or using Spotlight Search.
- Find the app you want to download. You can look at different app categories by clicking on the tabs at the left.
- Click on Get or price button to install the app (the Get button is for free apps, and the price is for paid apps).
- Enter your Apple ID (if you are not already signed in) and password.

The app will start to download. Once it’s downloaded, you can find it in your Applications folder in the Finder.
How to download applications from third-party websites:
- Visit the developer’s website. Make sure the software you’re going to download is reliable and safe.
- Click on the download file link.
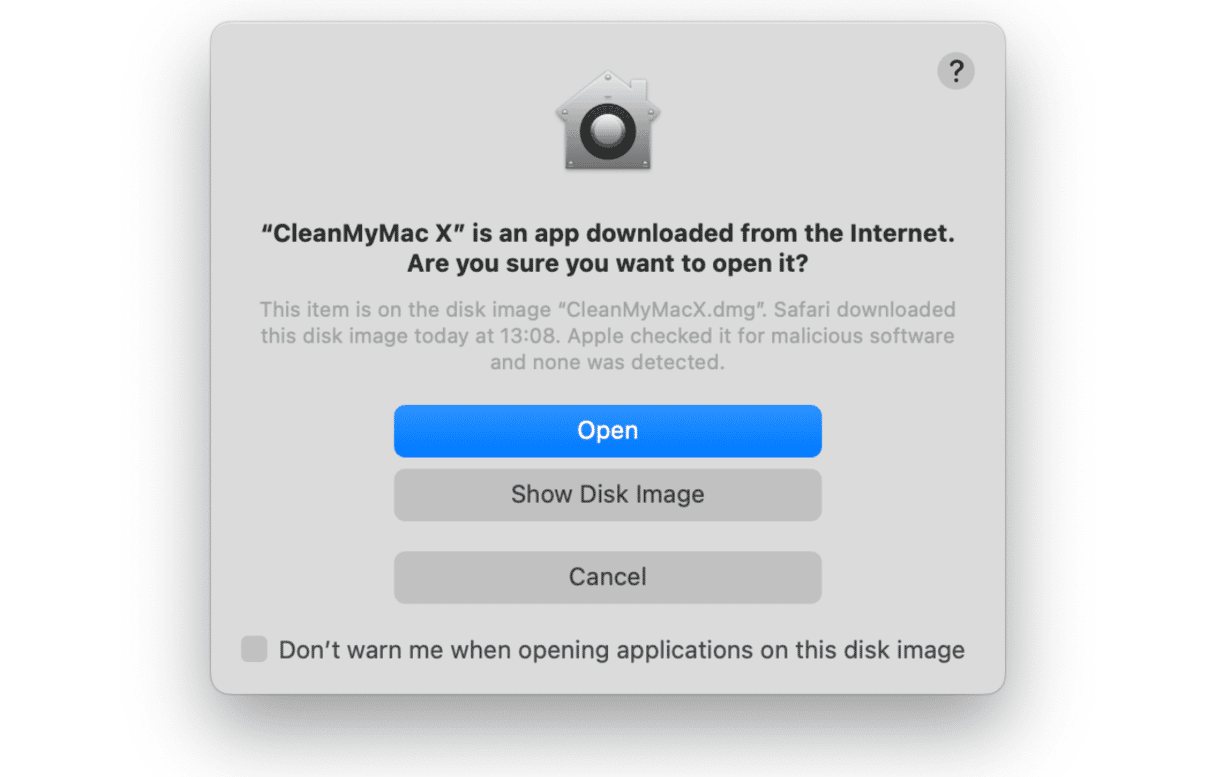
- Once the file is downloaded, double-click on it. Your Mac may tell you that the application is downloaded from the internet and ask you if you are sure to open it. Click the open button.
- Follow the directions given by the installer to complete the installation.
How to delete applications on Mac
To get your Mac more orderly and faster, you might want to remove unused apps. Most of the time, uninstalling is very simple. You just need to follow these steps:
- Exit the program you want to delete.
- Open your Applications folder.
- Drag the icon of the app to Trash.
- Empty the Trash.
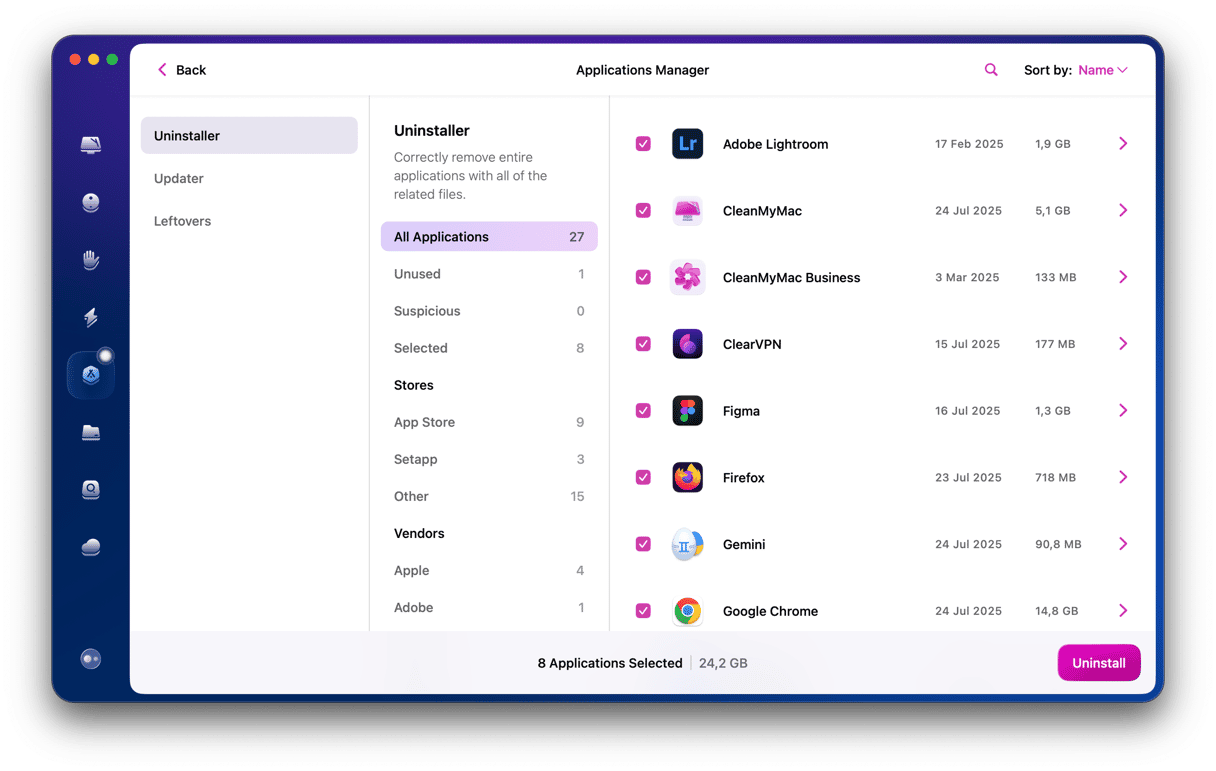
However, you need to know that sending an app to Trash doesn’t remove it completely. This defies logic, but that’s how macOS works, unfortunately. Tons of app leftovers still remain on your hard drive. To completely uninstall the app from your Mac, you should use a dedicated uninstaller, like the one in CleanMyMac. With a click, you can uninstall the app along with all associated files, such as caches, preferences, saved states, and more.
Here’s how it works:
- Download CleanMyMac and install it.
- Open the app.
- Choose the Uninstaller tool.
- Pick the app you want to remove.
- Click Remove
How to maintain macOS
Macs are reliable computers that can run well for years if maintained right. Here are a few things you should do to keep your Mac fast and healthy.
Regularly back up your Mac
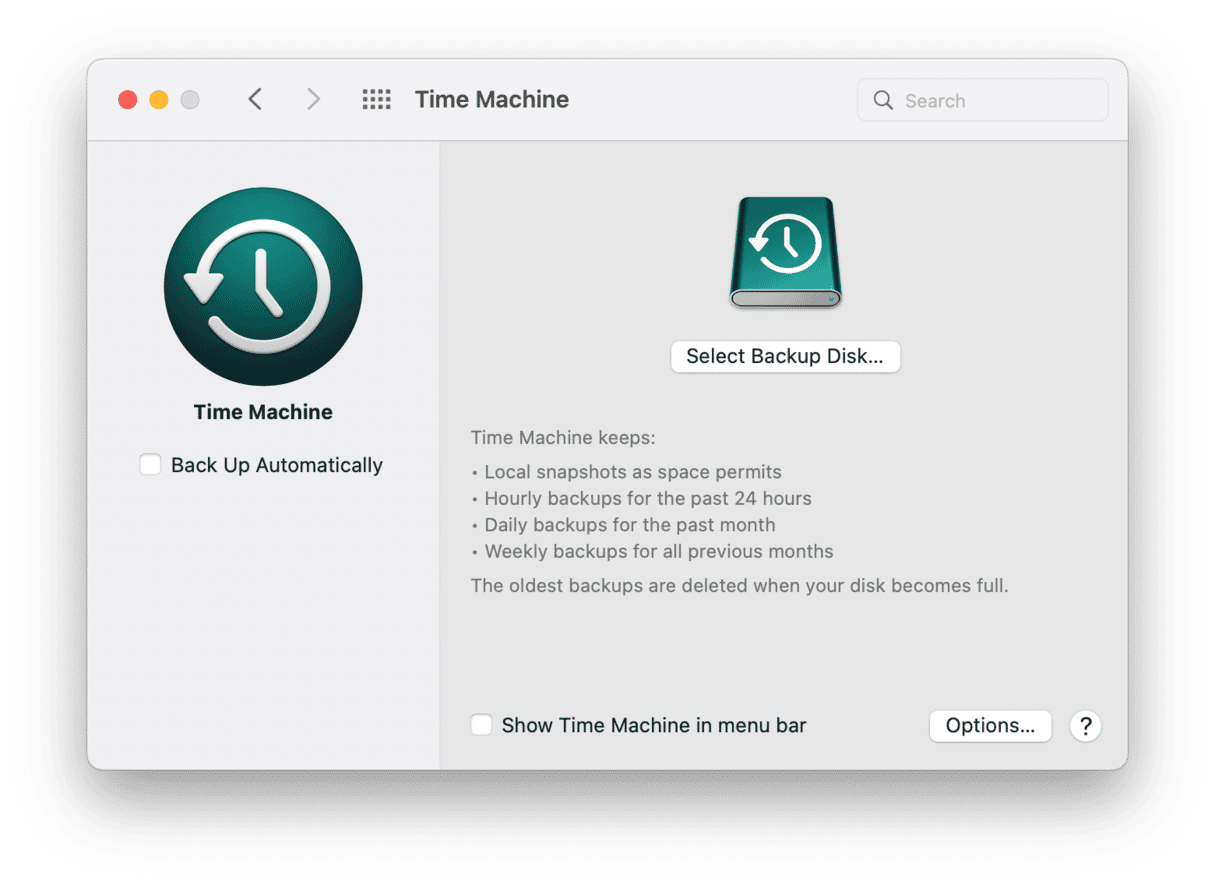
Even Macs can crash and run into hard drive problems. To protect your data, make a habit of backing up your Mac. Thankfully, that’s not difficult, as all Macs have a built-in Time Machine that allows creating a backup of all your files.
To create backups with Time Machine, all you need is an external storage device. After you connect the device and select it as your backup disk, Time Machine automatically makes hourly backups for the past 24 hours, daily backups for the past month, and weekly backups for all previous months. The oldest backups are deleted when the backup disk is full.
Note that the first backup may take a long time, depending on how many files you have, but future backups will be faster.
To learn more about backing up data, check this detailed guide on how to use Time Machine.
Keep your software updated
It’s important to keep your software updated — both the operating system and all installed applications. It will help you avoid compatibility issues caused by outdated versions of applications and various security breaches. Follow the updates and make sure that you have the latest available versions.
To make the updating process easier, you can use the dedicated Updater tool in CleanMyMac. It will do the job of checking and updating your software for you. Here’s how it works:
- Download and install CleanMyMac.
- Launch the app and choose Updater.
- View available updates.
- Click Select All to update all apps in bulk.
- Click Update.
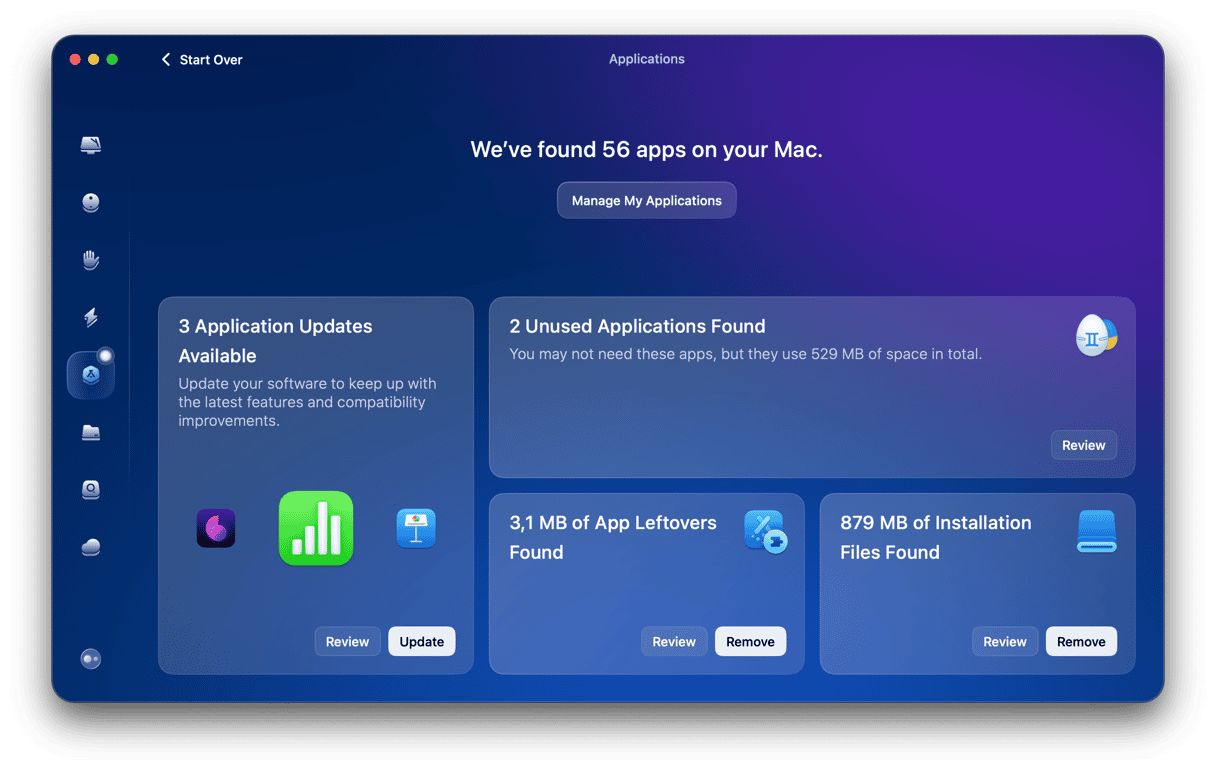
That’s it. With just a few clicks, you can always be sure that you are up-to-date.
Protect your Mac from threats
Macs can get malware. This problem has become even more widespread than on Windows PCs as Mac computers have become more popular. They can become infected with viruses, pop-ups, spyware, worms, and more. The most efficient way to keep your computer safe is to install a dedicated application that can eliminate any possible threat.
We recommend you to use the app we’ve already mentioned above — CleanMyMac. It has a Malware Removal tool that can scan your Mac for malware threats and neutralize them at once. All it takes is a click.
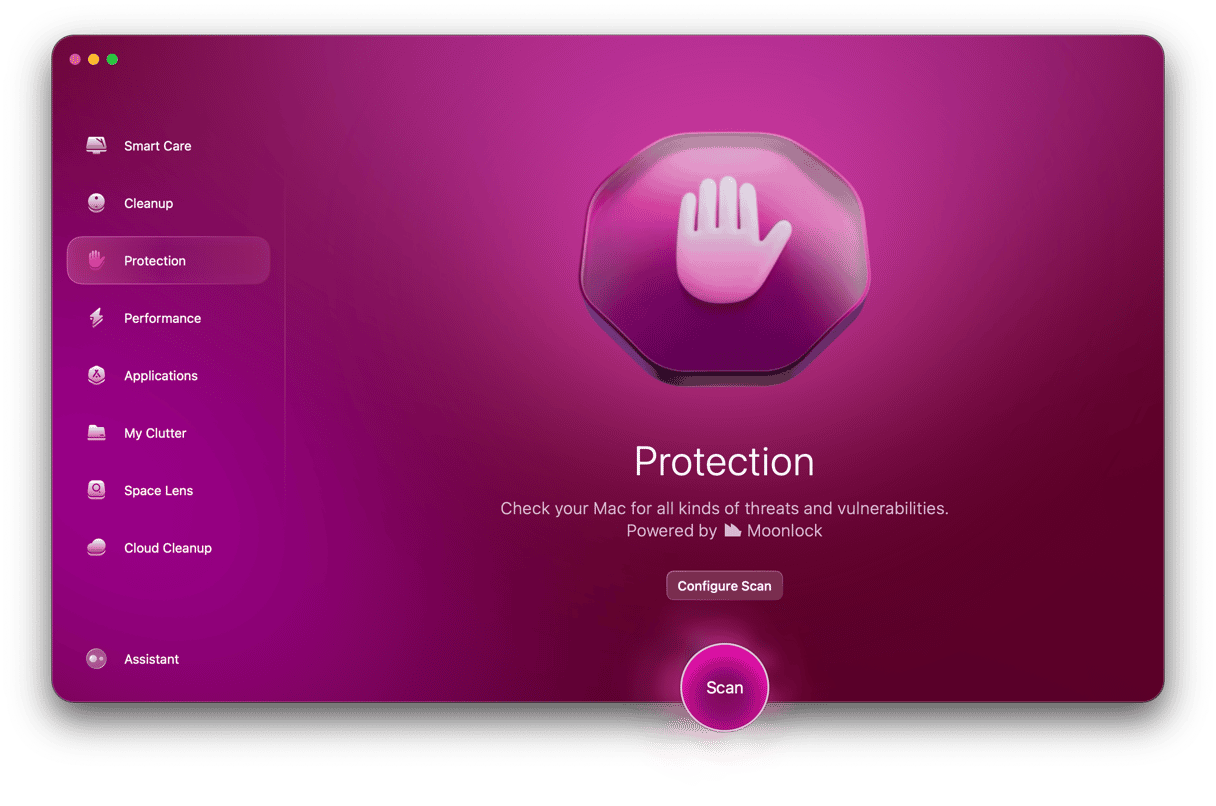
CleanMyMac also has a cool feature of real-time malware monitoring. This means that you’ll get an instant notification about a potential threat and can remove it before any harm is done to your system.
As you can see, using your Mac is a piece of cake. The interface is very intuitive, and you can easily find the needed things. Just take care of your system using the tips mentioned above, and it will run smoothly for years.
Thank you for reading, and stay tuned!


